Welcome to Jetson Orin NANO Developer Kit repository
01.Traffic scene object detection
TAO TrafficCamNet Traffic Scene Object Detection
TAO TrafficCamNet Traffic Scene Object DetectionReferences1. Case Goal and Processing Flow2. Pre-Run Checks3. Starting Detection4. USB Camera Real-Time Detection4.1 Direct Run4.2 Common Parameters5. CSI Camera Real-Time Detection5.1 Direct Run5.2 Common Parameters6. Common Issues
Applicable environment: Jetson Orin Nano, JetPack 7.2.1, DeepStream 9.1.
After setting the power mode to MAXN, running the case may pop up an over-current warning; just ignore it.
References
The following materials apply to all TAO application cases in this chapter and are provided here in one place:
NVIDIA DeepStream TAO application examples: https://github.com/NVIDIA/DeepStream/tree/main/src/apps/tao_apps
DeepStream TAO integration documentation: https://docs.nvidia.com/metropolis/deepstream/dev-guide/text/DS_TAO_integration.html
1. Case Goal and Processing Flow
TrafficCamNet targets road traffic scenes, detecting traffic objects such as vehicles and pedestrians frame by frame and outputting classes, confidence, and bounding boxes. It is not an object tracker: the bounding boxes do not come with stable cross-frame tracking IDs. This case also does not recognize license plate characters; for license plate recognition, see the LPR case in this chapter.
H.265 MP4 → hardware decoding → TrafficCamNet TensorRT inference → overlay detection results ├→ desktop/VNC preview └→ H.264 MP4 fileThe course example is wrapped by the DeepStream tao_apps application and a launch script. The model handles detection; decoding, box drawing, preview, and recording are done by the DeepStream pipeline.
2. Pre-Run Checks
Please operate in the Jetson graphical desktop or a VNC terminal connected to the desktop. A pure SSH session usually has no usable graphical display environment.
xxxxxxxxxxcd ~/DeepStream/tao-toolkit-shell-demols -lh video_in/sample_1080p_h265.mp4ls -ld video_outConfirm that the input video exists and the output directory is accessible. The default course video is H.265 encoded, about 1920×1080, 30 FPS, 48.1 seconds; do not assume the input is H.264 merely because the file extension is .mp4.
3. Starting Detection
For local video detection, run in the terminal:
xxxxxxxxxx./run_video.sh trafficcamnetThe script sets up the programs and graphical environment required by the case, loads the TrafficCamNet configuration and TensorRT engine, then starts the DeepStream pipeline. During normal operation, the terminal continuously outputs pipeline status/performance information, and a preview with detection boxes appears in the Jetson desktop or VNC.
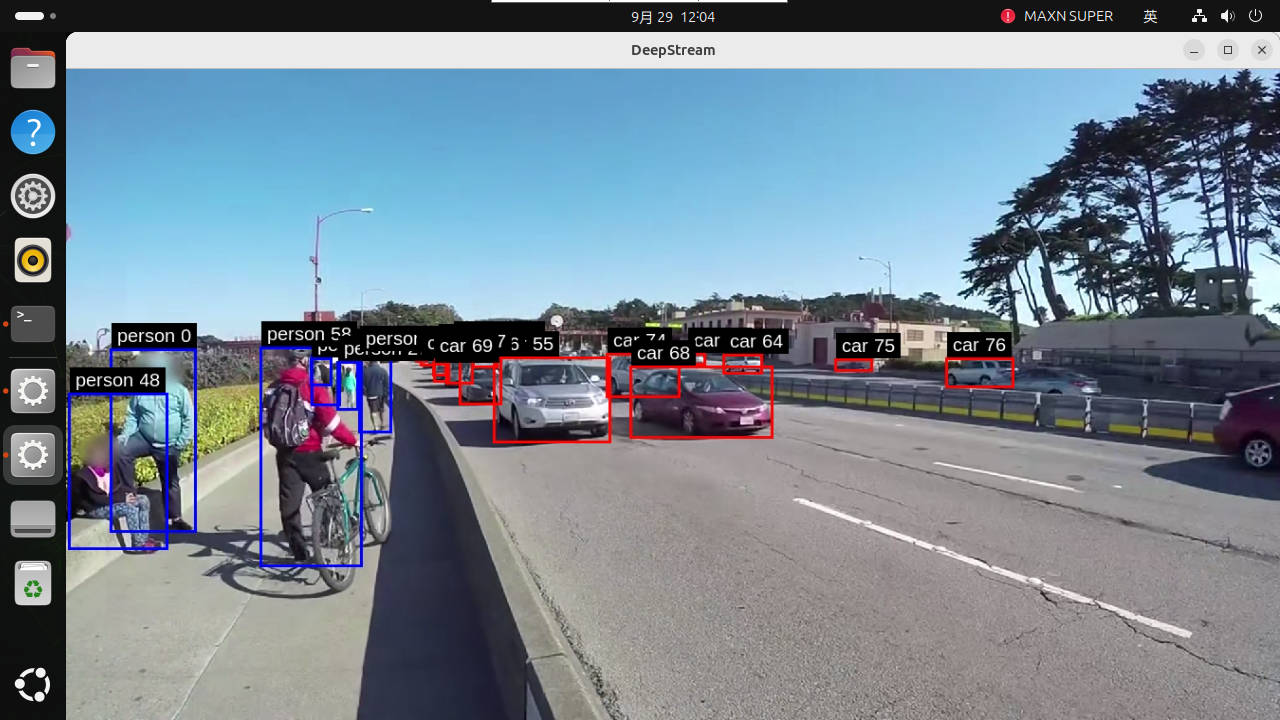
The rectangles in the frame indicate the target positions judged by the model, the class text indicates the predicted class, and the confidence indicates the model's score for that prediction. Occlusion, lighting, target size, and shooting angle all affect detection results; occasional missed or false detections do not mean the launch failed.
The default input file is referenced by the case configuration:
xxxxxxxxxxvideo_in/sample_1080p_h265.mp4The simplest way to replace the test video is to back up the original material first, then place the new video in Jetson's video_in/ and name it sample_1080p_h265.mp4. This requires no configuration changes; confirm that the new video can be decoded by GStreamer on the Jetson before starting the case. If you keep the original file, rename the copy you need to keep first to avoid being unable to recover after overwriting.
This case configuration also specifies the input source via configs/source_trafficcamnet.csv. When you need to keep multiple materials or use other file names, you can check and edit the CSV on the Jetson, changing the source to a file:// URI corresponding to the actual local path on the Jetson. Before modifying, check the CSV's current format, and keep the fields and URI format consistent with the existing configuration. Change only one input path at a time, run to confirm, then make other adjustments.
Output is always written to video_out/out_trafficcamnet.mp4. If a re-run overwrites a result with the same name, rename the old output you need to keep first.
4. USB Camera Real-Time Detection
4.1 Direct Run
USB mode streams from the camera in real time and displays detection results, suitable for verifying live footage; the current camera entry only previews and does not record MP4. After connecting the USB camera, first confirm the system recognizes the device:
xxxxxxxxxxls -l /dev/video*Other cameras may have different nodes, pixel formats, and resolutions. Make sure no other program is occupying the camera.
Start in a Jetson desktop/VNC terminal:
xxxxxxxxxxcd ~/DeepStream/tao-toolkit-shell-demo./run_usb.sh trafficcamnetUnder normal conditions, a live preview opens with detection boxes overlaid on the frame. A USB camera is a live source and will not naturally play to EOS like an offline MP4; the current entry is for real-time preview and does not generate video_out/out_trafficcamnet.mp4.
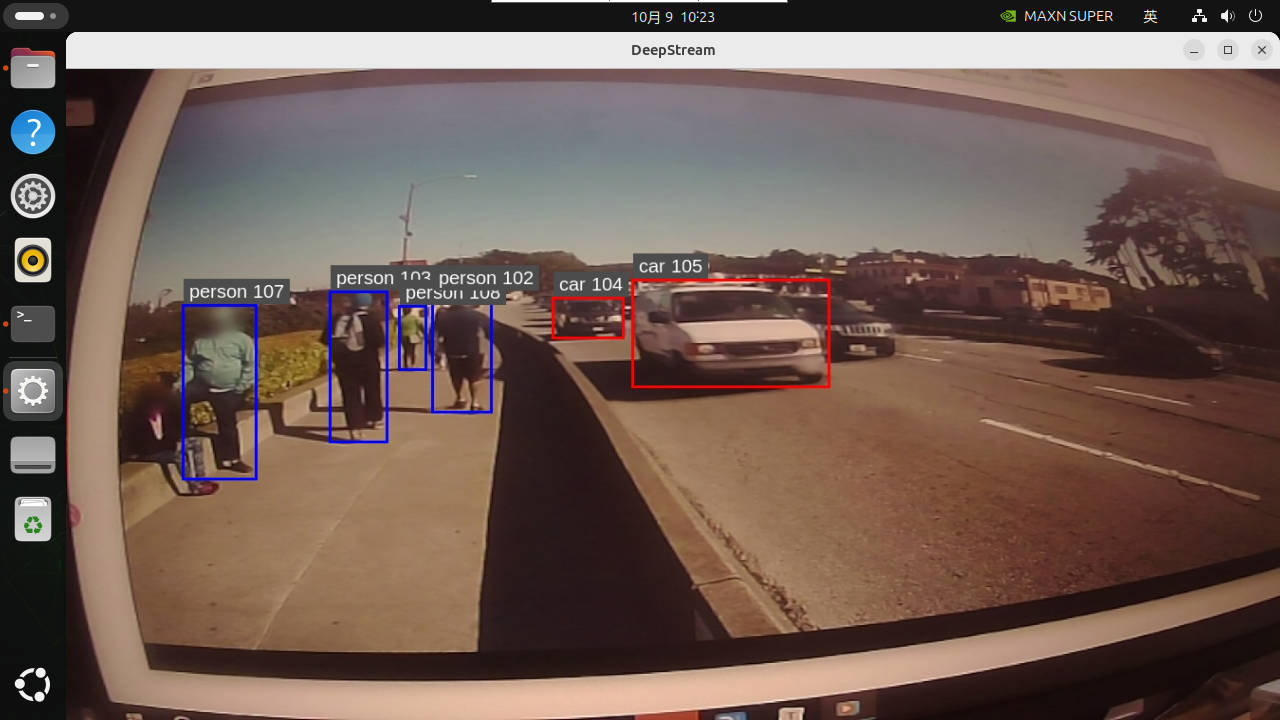
To stop, press Ctrl+C once in the launching terminal, wait for the source EOS and App run successful, and confirm the preview is closed and the camera device is released before starting other camera programs. The course USB entry was tested at about 30 FPS on /dev/video0, YUYV 640x480@30; that figure only represents that device and configuration, not a performance guarantee for all USB cameras.
4.2 Common Parameters
Before running, you can check the formats, resolutions, and frame rates supported by the camera:
xxxxxxxxxxv4l2-ctl -d /dev/video0 --list-formats-ext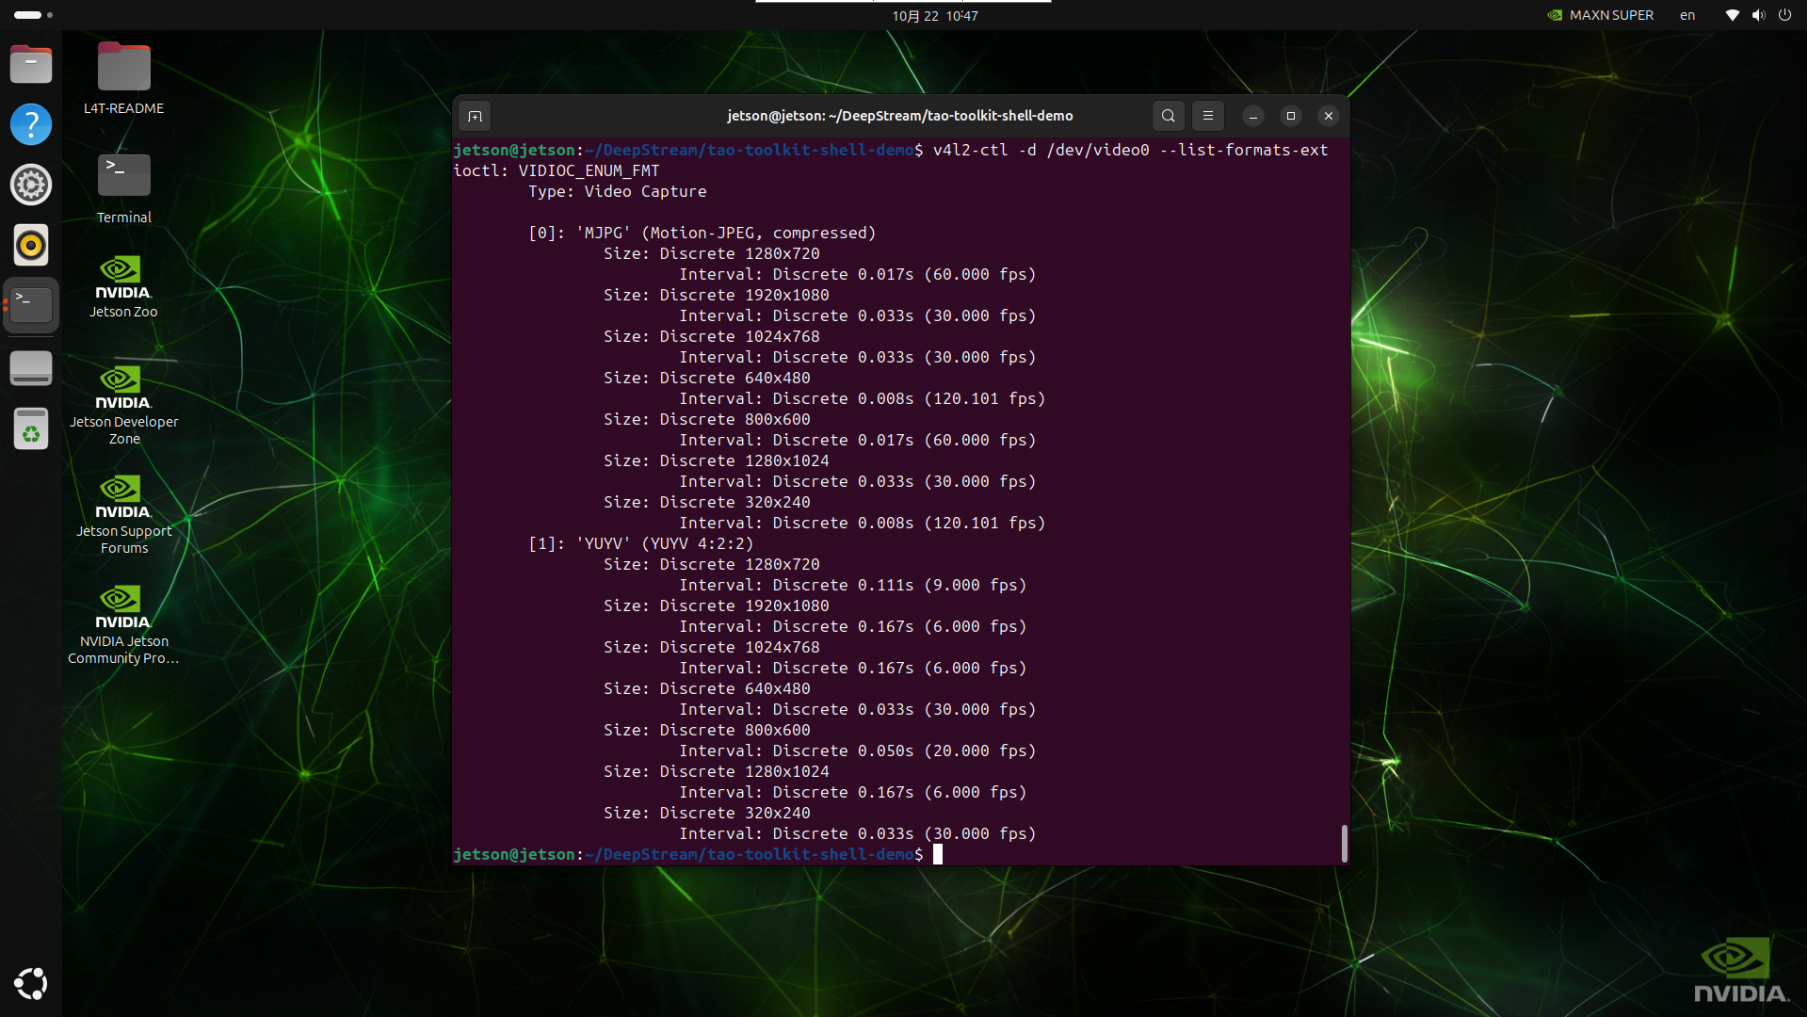
Note: the USB pipeline of Object Embedding Vector Generation is fixed to YUY2, so among the parameters below, choose the YUY2 parameters
x# View all parameters./run_usb.sh trafficcamnet --help
# Use another video device./run_usb.sh trafficcamnet --device /dev/video1
# Choose from the configurations found above that the camera supports; here we use 1280×720, 9FPS./run_usb.sh trafficcamnet --width 1280 --height 720 --fps 95. CSI Camera Real-Time Detection
5.1 Direct Run
CSI uses the Jetson Argus camera link, not the USB/V4L2 path of /dev/video0. Before starting, connect a supported CSI camera, confirm the sensor driver and Argus service are working, and operate in a Jetson desktop/VNC graphical session.
xxxxxxxxxxcd ~/DeepStream/tao-toolkit-shell-demo./run_csi.sh trafficcamnetWhether the sensor is available depends on the specific carrier board, cable, camera module, and device tree/driver configuration. If startup fails, first check the camera connection, sensor driver, and Argus logs, then look at the first DeepStream error; do not treat the USB /dev/video0 format check result as evidence that CSI is working. The CSI real-time entry is currently also for preview only, so do not assume it will generate an MP4.
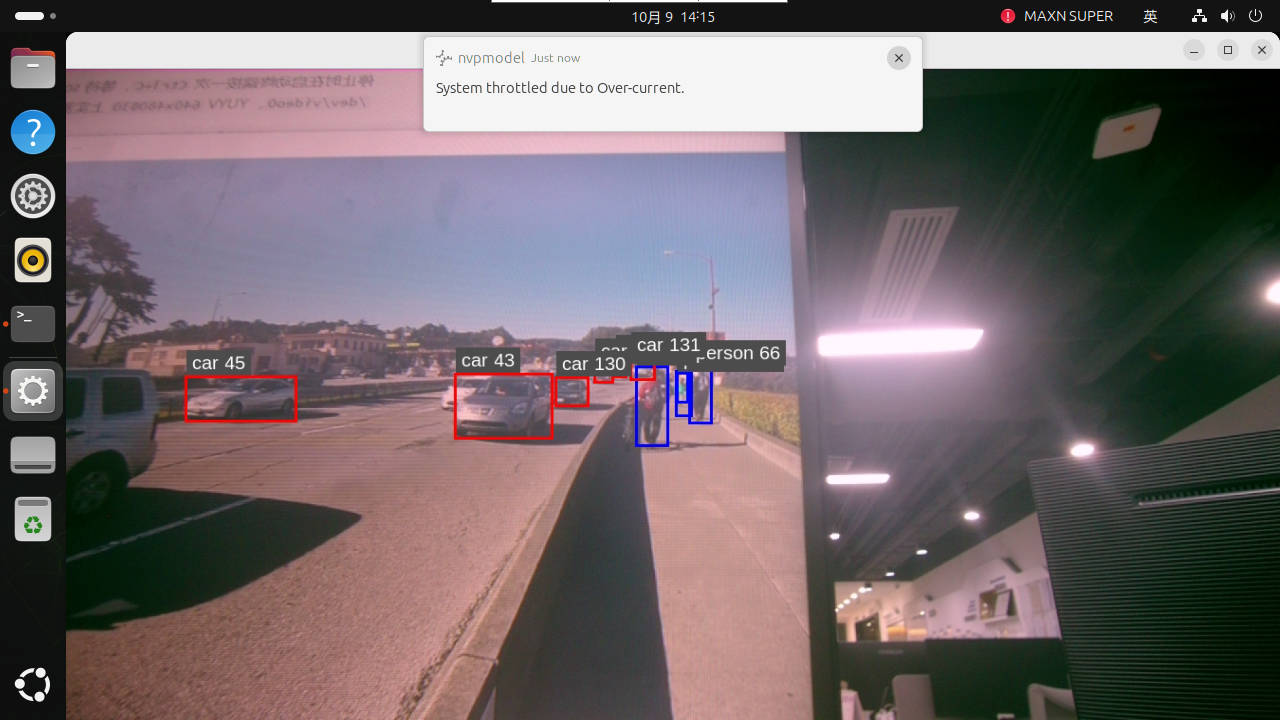
To exit, press Ctrl+C once in the launching terminal, wait for the application and camera streaming to exit before starting other programs. CSI live preview is connected; frame rate depends on model load and camera configuration.
5.2 Common Parameters
Before running, you can check the formats, resolutions, and frame rates supported by the camera; this must be run in a graphical interface:
xxxxxxxxxxgst-launch-1.0 nvarguscamerasrc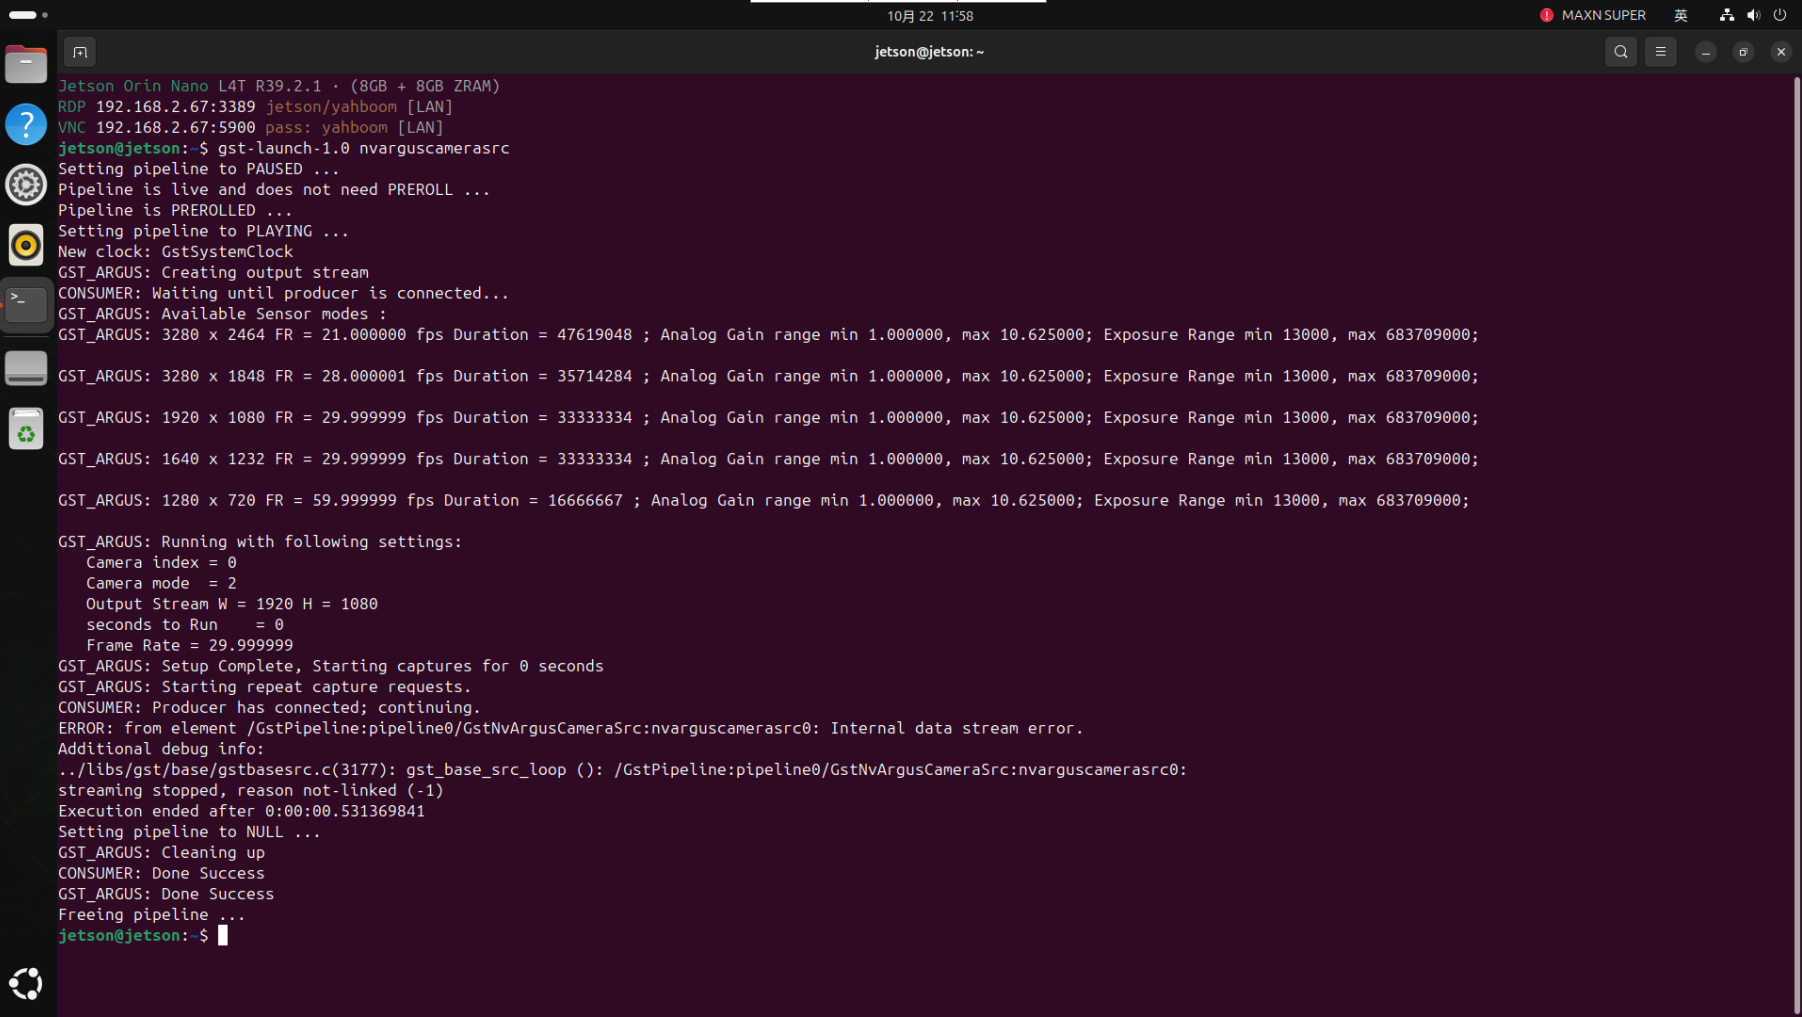
xxxxxxxxxx# View all parameters./run_csi.sh trafficcamnet --help
# Use the second CSI camera./run_csi.sh trafficcamnet --sensor-id 1
# Adjust input size and frame rate./run_csi.sh trafficcamnet --width 1920 --height 1080 --fps 30
6. Common Issues
| Symptom | Check and Handling |
|---|---|
Failed to load config file | Confirm launching from ~/DeepStream/tao-toolkit-shell-demo; check whether the configuration path referenced by the launcher still points to the official TAO demo directory. |
| Input file not found or cannot be decoded | Confirm video_in/sample_1080p_h265.mp4 exists; use gst-discoverer-1.0 to check the encoding, and confirm the input URI points to a local file on the Jetson. |
| No preview window | Confirm the command is started in a Jetson desktop/VNC graphical session; check whether DISPLAY and X authorization are set correctly by the launcher. |
Could not open ...mp4 for writing | Confirm video_out/ exists, disk space is sufficient, and the current user has write permission; check whether another process is occupying the output file. |
| Message that the engine does not match the device/version | The engine relates to the GPU, TensorRT, CUDA, precision, and batch configuration. First verify the course environment; only after confirming the engine really does not match, rebuild it on the target Jetson following the project process and re-verify. |
| Tracker user-meta warnings appear | This case has shown non-blocking warnings such as Unable to acquire a user meta buffer. If the pipeline still runs, EOS is received normally, and the output is parseable, accept based on the full-chain results; if the pipeline exits or there is no output, locate the issue with the surrounding logs. |
| Output exists but the player cannot open it or cannot seek | Wait for the application to fully exit before checking; use gst-discoverer-1.0 to confirm the container and seekable state. If it is still abnormal, regenerate the output with one natural run and check whether it was previously force-terminated. |
| USB camera cannot be opened | Confirm device nodes such as /dev/video0 exist, the format is supported, the user has access permission, and the device is not occupied by another process. |
| USB streams but no preview | Confirm launching in a graphical desktop/VNC session; check for camera format negotiation or display sink errors. |
| CSI reports source not found or no image at startup | Confirm a compatible CSI sensor is connected, check the cable, sensor driver, Argus service, and camera occupancy, then look at the first DeepStream error. |
| Want to check the recording after running USB/CSI | The camera entries currently only preview and do not produce the MP4 output of this case; recording capability needs to be configured and verified separately, and the output path of the offline video mode cannot be used for acceptance. |
When troubleshooting, first keep the complete launch command and the logs near the first error; do not directly delete engines, modify multiple configurations, or reinstall DeepStream.