Welcome to Jetson Orin NANO Developer Kit repository
04.OpenClaw WebChat Interaction
OpenClaw WebChat Interaction
OpenClaw WebChat InteractionDirect Access in VNCAccessing from Other Hosts on the LAN1. Modify the OpenClaw Configuration File to Allow Other Devices on the LAN to Access OpenClaw2. Start the Gateway3. Obtain the Access Token4. Establish an SSH Tunnel on the PC and Access
Direct Access in VNC
Note that on the Jetson Nano mainboard, because OpenClaw runs inside Docker, interacting with WebChat requires special handling. For details, see Accessing from Other Hosts on the LAN in the second part
We first connect to the host terminal and enter (the gateway of the non-Docker version may already start automatically at boot, so manual startup is not required; the Docker version must be started manually)
openclaw gateway
Next we need to obtain the openclaw access token. In another terminal, enter
xxxxxxxxxxopenclaw dashboard
This command displays the token once. Alternatively, you can find the ~/.openclaw/openclaw.json file; your token is configured in this file
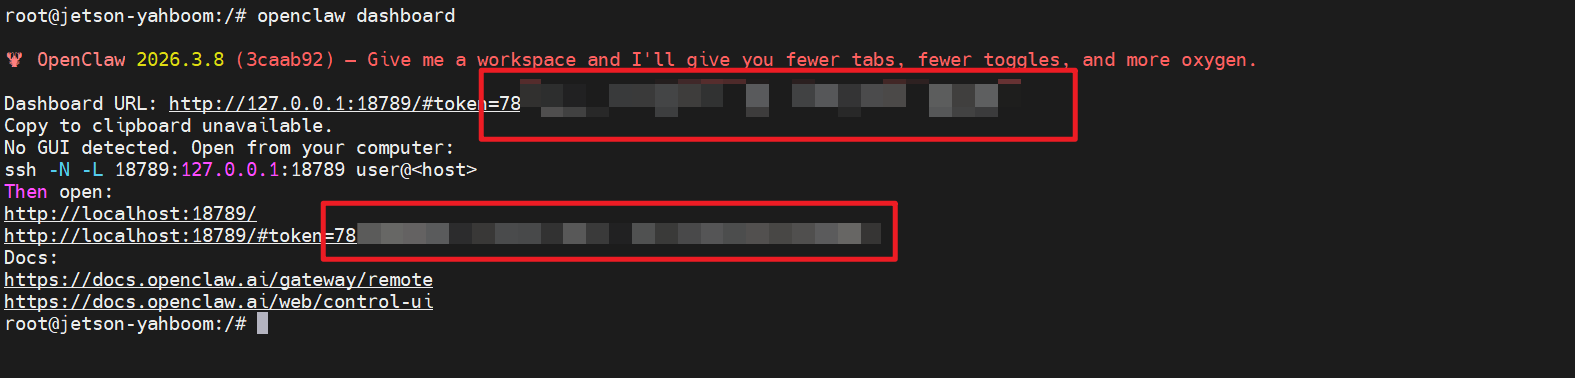
We connect to the system where the mainboard resides via VNC, then open a browser and enter the link given in dashboard
Accessing from Other Hosts on the LAN
After OpenClaw 3.8 is deployed in the Docker container on Jetson Nano, accessing the OpenClaw Control UI (that is, the web console) through a browser locally on the Jetson reports access error 4008, so the browser must be opened on another computer to access it.
If no other computer is available, we can use the OpenClaw TUI tool to work in the terminal in a command-line manner. For details, see the TUI usage section later in this document
Common issue: Please use a recent version of the Edge or Chrome browser; other browsers may report error 4008.
1. Modify the OpenClaw Configuration File to Allow Other Devices on the LAN to Access OpenClaw
xxxxxxxxxxopenclaw configHere we make the selections as shown in the figure below (use the up and down keys to select, and Enter to confirm)
Except for the Token, which may differ from the one in our figure, everything else must be the same. The key point is the Gateway bind mode item, which we need to set to LAN so that other devices on our LAN can access our OpenClaw
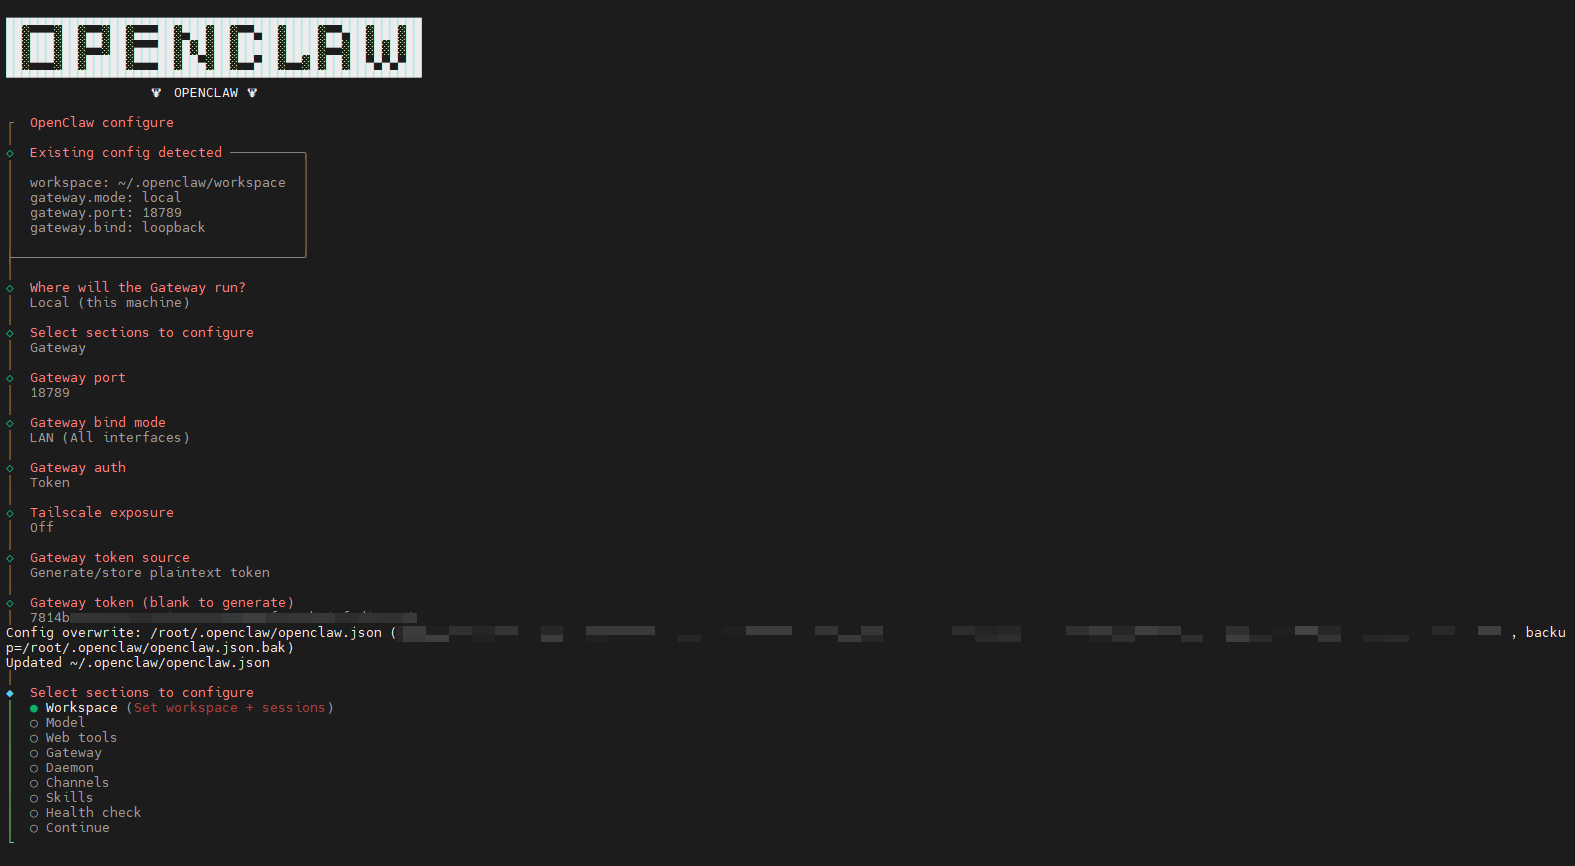
Finally, we select Continue to confirm, press Enter, and the configuration is complete!

2. Start the Gateway
After the configuration is complete, we first get the OpenClaw Gateway running. We open another terminal and enter the following in the terminal
xxxxxxxxxxopenclaw gateway
3. Obtain the Access Token
The Token here is the Token generated in the configuration we just completed. If you did not note it down, you can use
xxxxxxxxxxopenclaw dashboard
This command displays the token once. Alternatively, you can find the ~/.openclaw/openclaw.json file; your token is configured in this file
4. Establish an SSH Tunnel on the PC and Access
On a PC on the same LAN, configure the environment for connecting to the Jetson.
We open the Cmd terminal on the computer (taking a Windows computer as an example, press Win+R to bring up the quick RUN tool, enter cmd, and then press Enter)

Enter the following in the console
xxxxxxxxxxssh -L 18789:127.0.0.1:18789 jetson@<jetson-ip-address>Note that
After pressing Enter here, you need to enter a password (the default is yahboom)
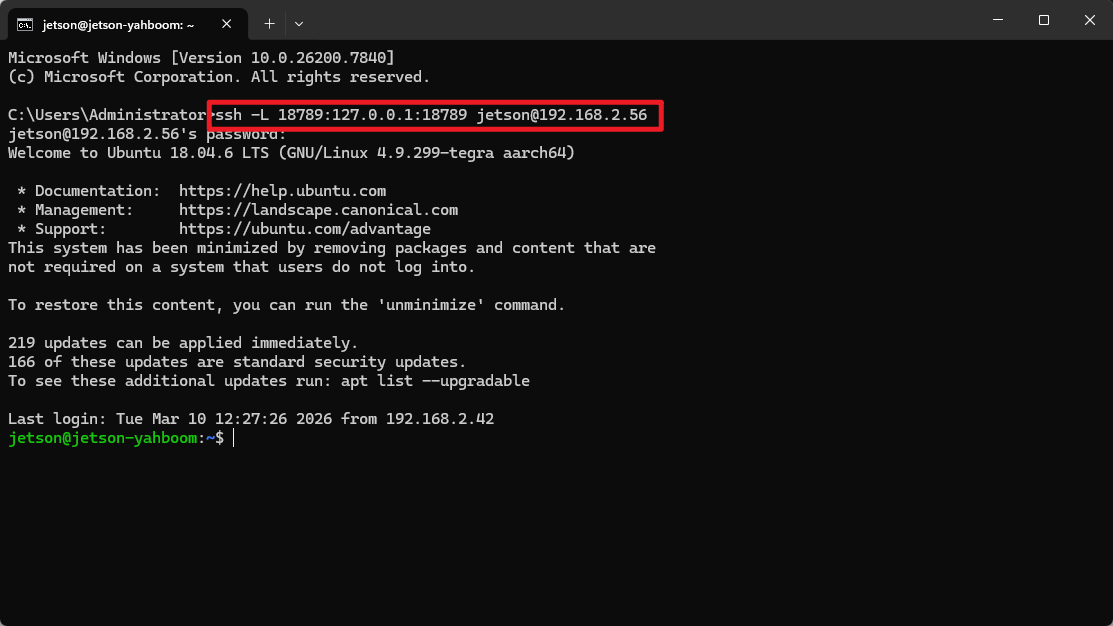
When this screen appears, it means you have successfully connected to the Jetson
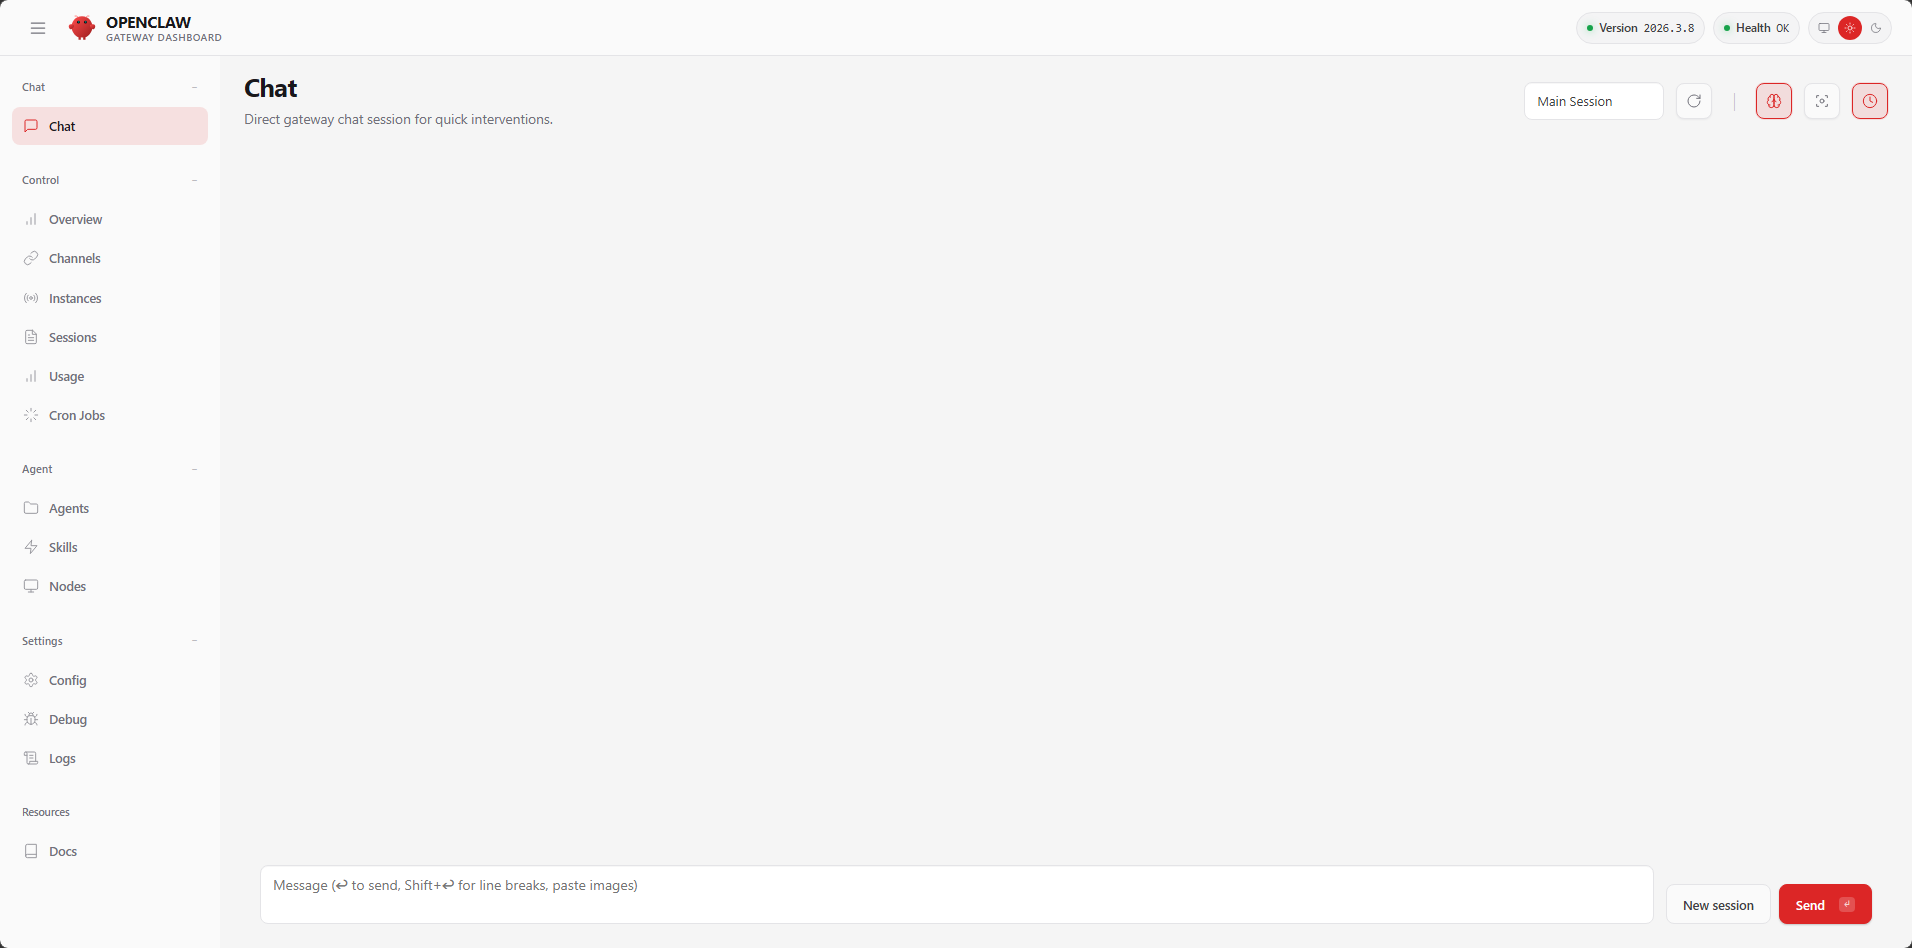
We open the browser on the PC and enter the address string of IP plus token in the address bar (that is, the address output by openclaw onboard just now, <http://127.0.0.1:18789/#token=xxxxxxxxxxxxx) When this interface appears, the deployment is successful!>