Welcome to Jetson Orin NANO Developer Kit repository
02.OpenClaw Deployment
1. OpenClaw Deployment
=============================【Note】================================
This section is the complete installation and deployment tutorial for OpenClaw. It involves many steps. If you want to use OpenClaw quickly, please
follow the tutorial in the first section of this chapter 【1. Directly Using the Pre-Configured Environment (Recommended)】
====================================================================
1. OpenClaw Deployment1.1 OpenClaw Installation1.1.1 Installing OpenClaw1.1.2 Installing with QuickStart1.1.3 Opening the OpenClaw Control UI on a PC (Windows)1.2 Model Configuration (Must Read)1.2.1 Why Models Must Be Configured1.2.2 How to Configure Models1. OpenRouter (Built-in Provider of OpenClaw)2. Bailian (Third-Party Provider API Example)
This chapter covers two parts:
OpenClaw installation (Jetson Nano Docker scenario)
Model configuration (OpenRouter / Bailian / Ollama)
1.1 OpenClaw Installation
OpenClaw official website: https://openclaw.ai/
Open source project address: https://github.com/openclaw/openclaw
1.1.1 Installing OpenClaw
On the Jetson Orin Nano, OpenClaw must run inside the Docker environment. OpenClaw is already configured in the official Yahboom image. This section is for reference only if you want to install it yourself.
The Node.js shipped with the system is older than version 22, so OpenClaw must be installed through Docker.
1.1.2 Installing with QuickStart
We use the installation script provided officially by OpenClaw
curl -fsSL https://openclaw.ai/install.sh | bash
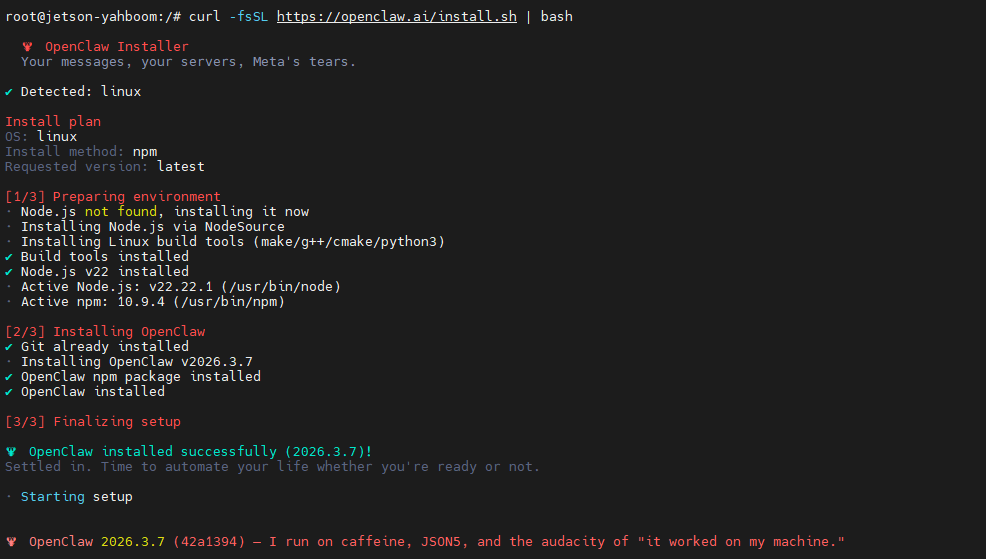
During this process, the installation script automatically detects missing environments and helps us install them with one click
During installation, use the arrow keys on the keyboard to select options, the spacebar to select/deselect, and the Enter key to confirm and apply the configuration
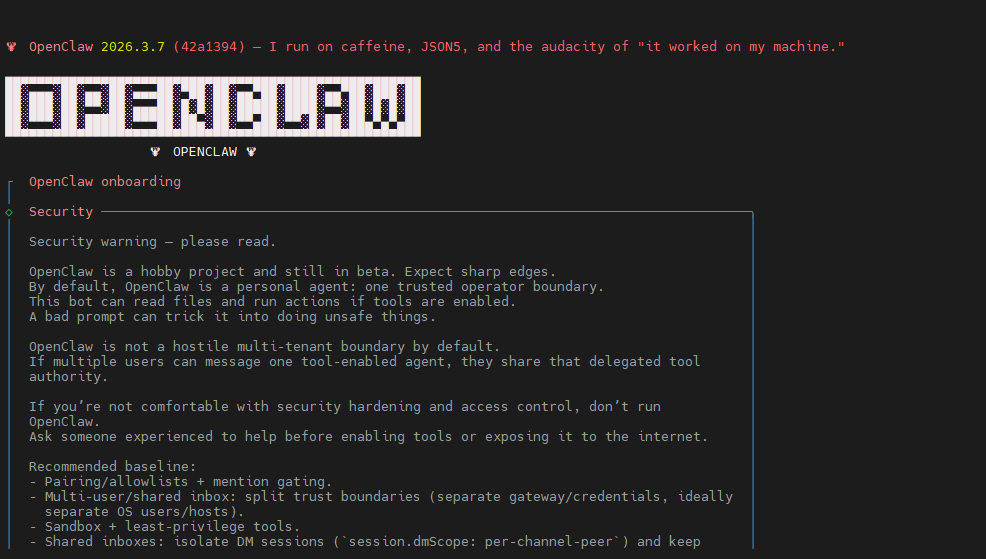
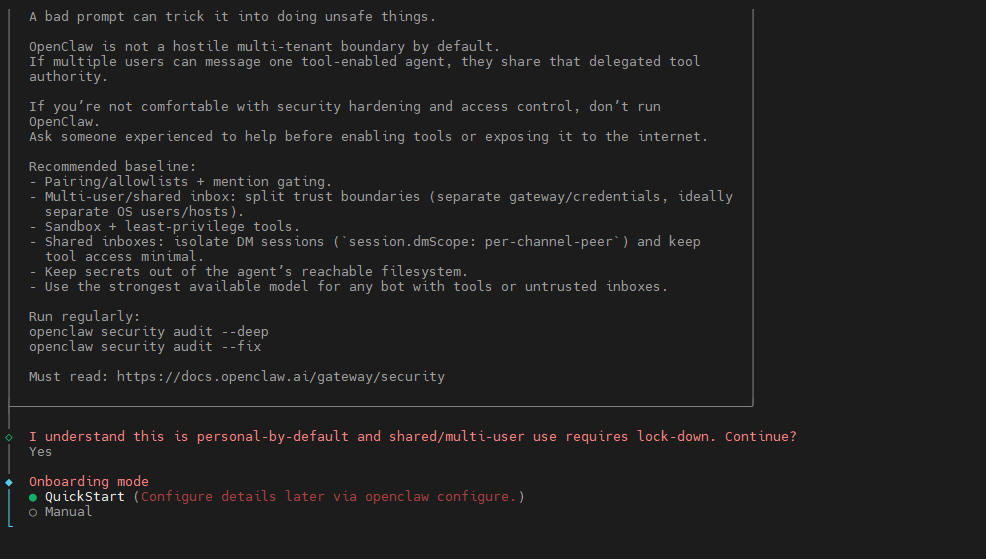
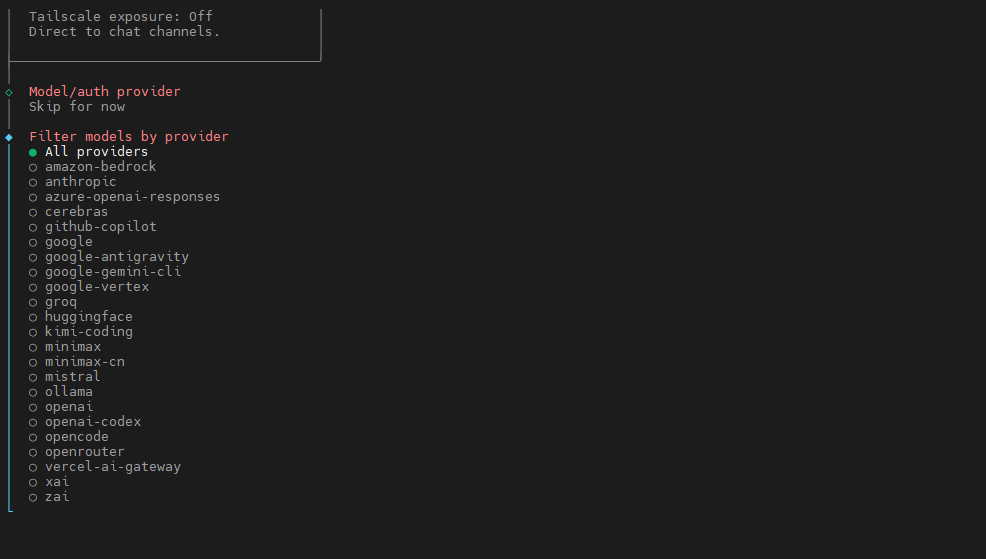
Here we use the QuickStart option to complete the OpenClaw installation quickly; detailed configuration can be left for later
If you have not applied for any API Key, simply select Skip here and configure it later
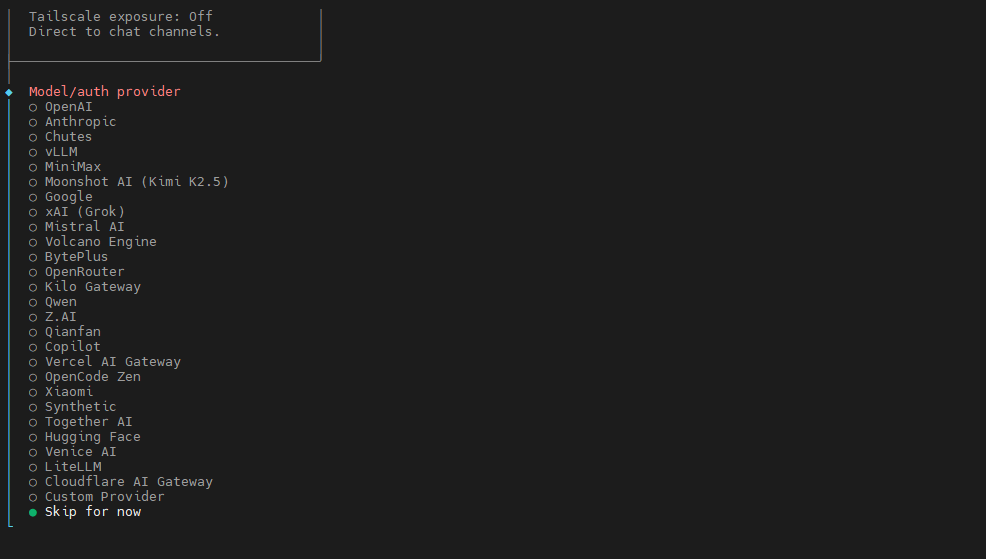
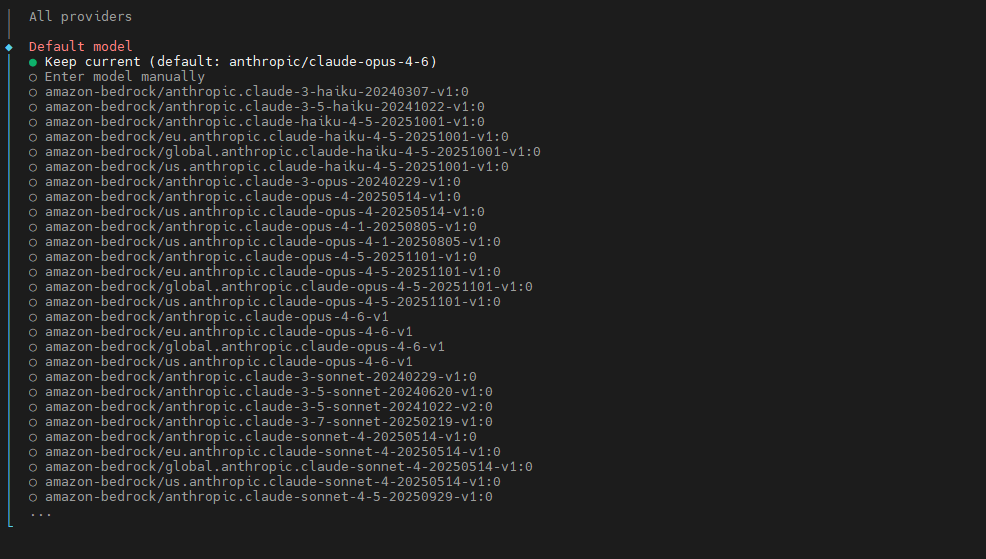
For the model, we choose to keep the default here (configure it later)
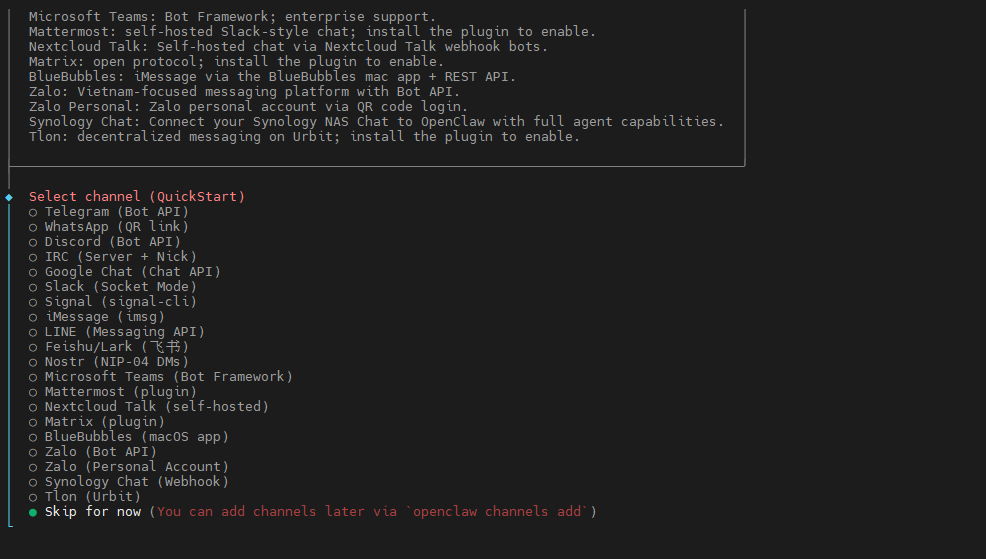
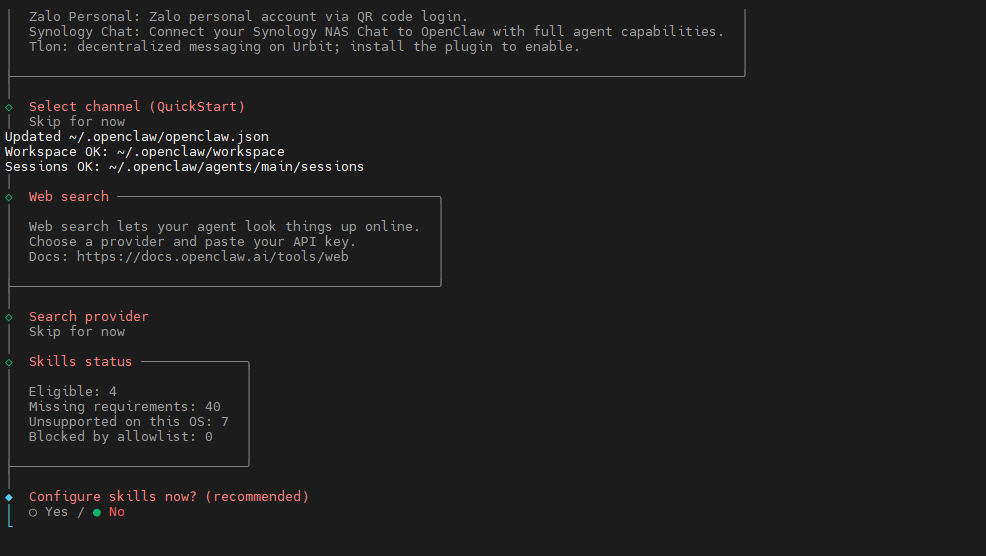
Channel is mainly used for communication with third-party apps, so we still skip it for now
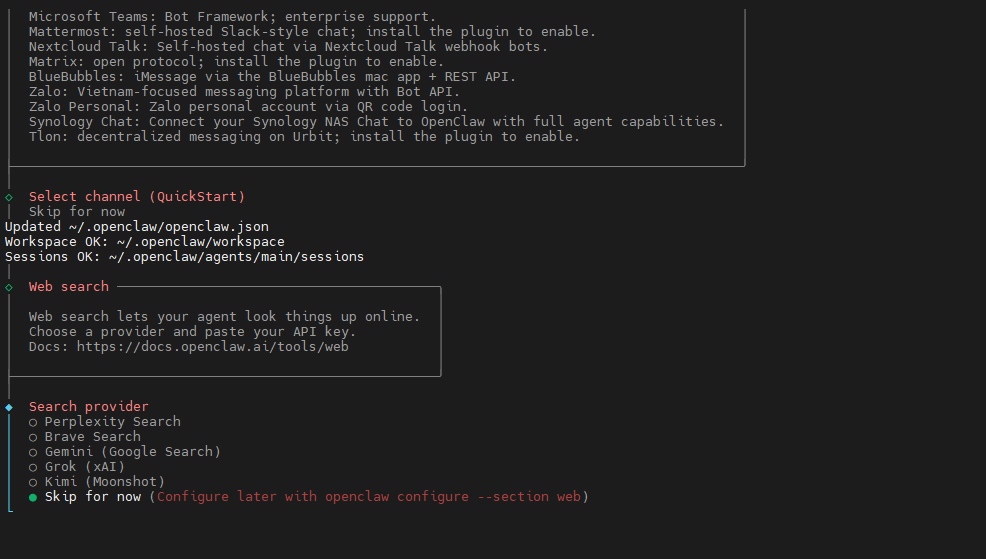
Search provider is the API provider of the search service; we select skip
For configuring "Skills", we choose not to configure them for now (select no)
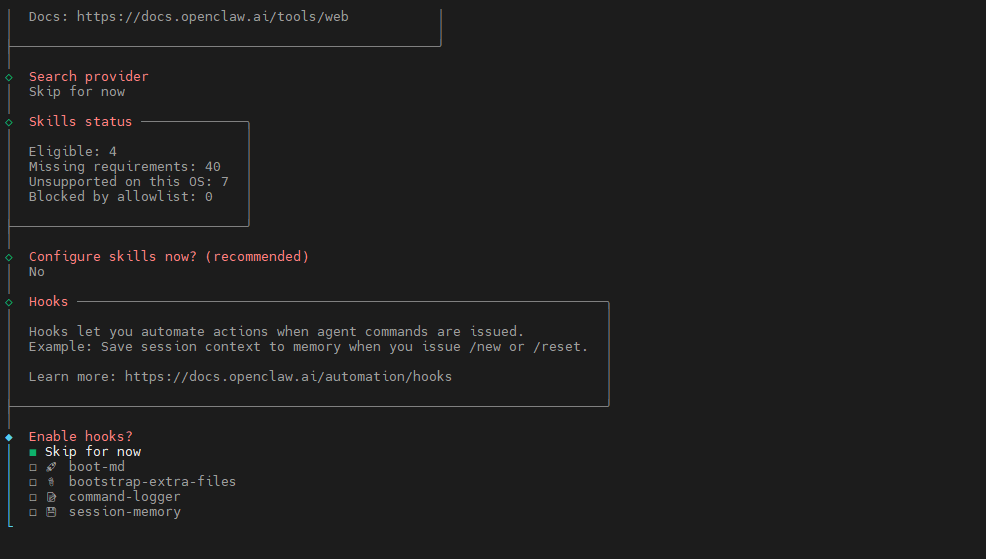
For configuring Hooks, we press the spacebar on Skip for now to select it, then press the Enter key to confirm
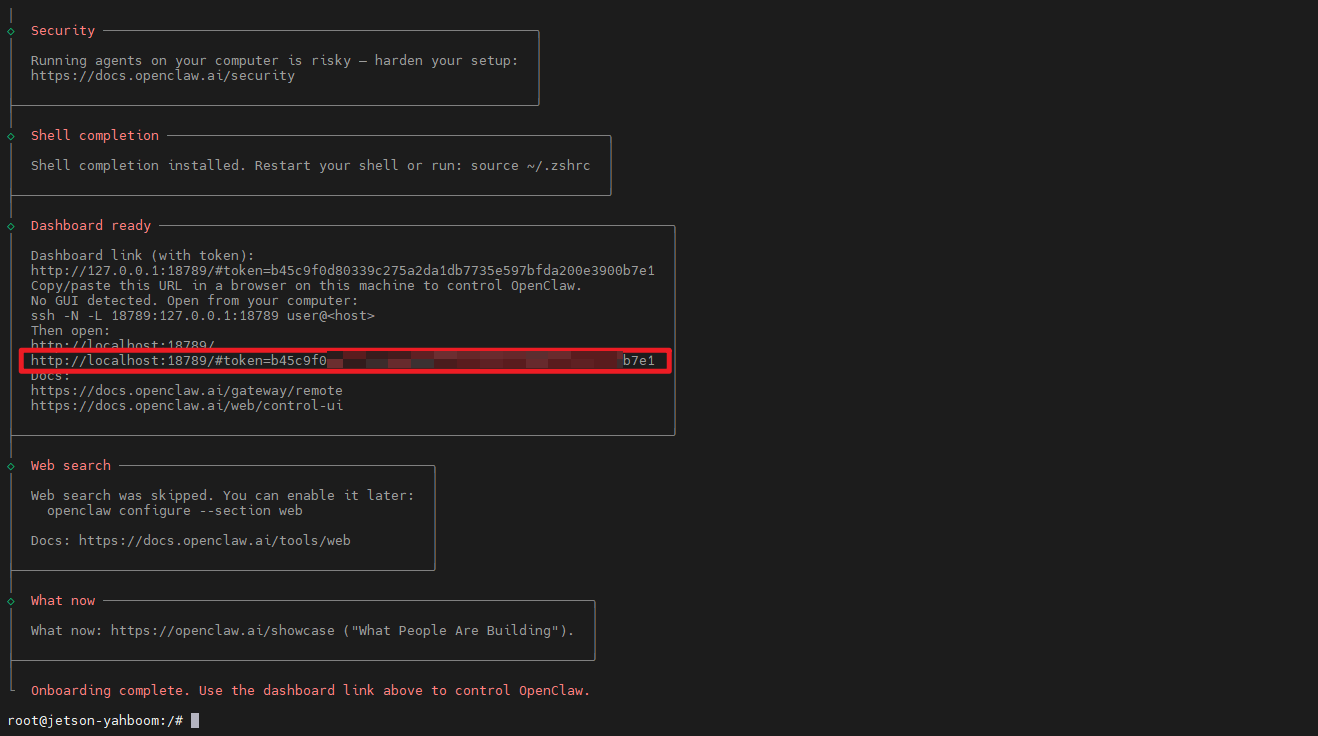
Wait for the installation to complete.
After the installation is complete, copy this address for later use (the token changes in later tutorials because we configure the Gateway manually afterwards, so this address does not actually need to be recorded; it will change again later)
1.1.3 Opening the OpenClaw Control UI on a PC (Windows)
Common issue: Please use a recent version of the Edge or Chrome browser; other browsers may report error 4008.
After OpenClaw 3.8 is deployed in the Docker container on Jetson Nano, accessing the OpenClaw Control UI (that is, the web console) through a browser locally on the Jetson reports access error 4008, so we need to open the browser on another computer to access it.
If no other computer is available, we can use the OpenClaw TUI tool to work in the terminal in a command-line manner. For details, see the TUI usage section later in this document
Modify the OpenClaw configuration file to allow other devices on the LAN to access OpenClaw
xxxxxxxxxxopenclaw configHere we make the selections as shown in the figure below (use the up and down keys to select, and Enter to confirm)
Except for the Token, which may differ from the one in our figure, everything else must be the same. The key point is the Gateway bind mode item, which we need to set to LAN so that other devices on our LAN can access our OpenClaw
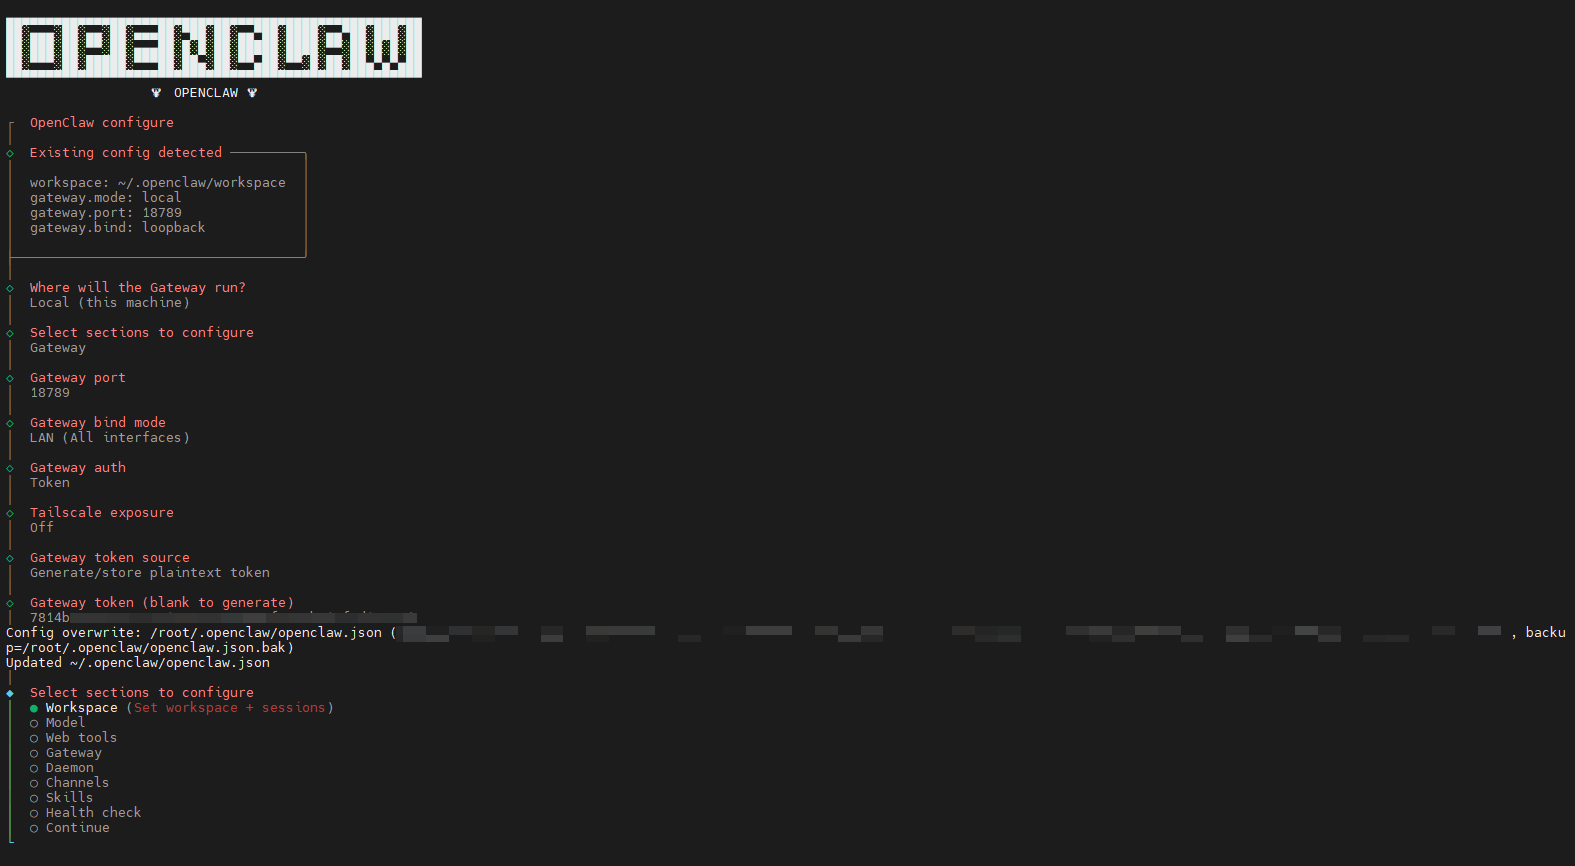
Finally, we select Continue to confirm, press Enter, and the configuration is complete!

After the configuration is complete, we first get the OpenClaw Gateway running. We open another terminal and enter the following in the terminal
xxxxxxxxxxopenclaw gateway
Obtain the access Token
The Token here is the Token generated in the configuration we just completed. If you did not note it down, you can use
xxxxxxxxxxopenclaw dashboard
This command displays the token once. Alternatively, you can find the ~/.openclaw/openclaw.json file; your token is configured in this file
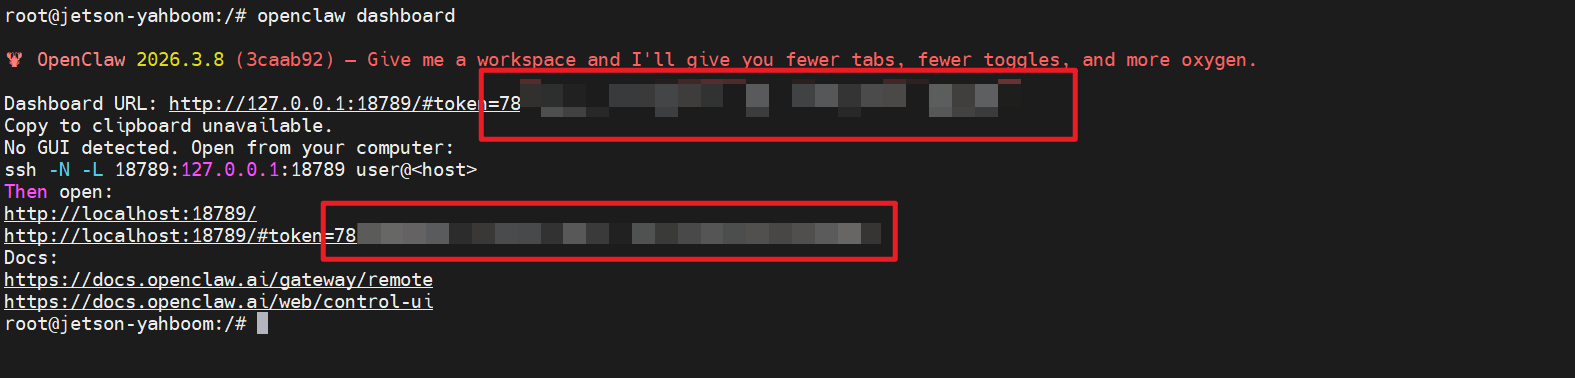
On a PC on the same LAN, configure the environment for connecting to the Jetson
We open the Cmd terminal on the computer (taking a Windows computer as an example, press Win+R to bring up the quick RUN tool, enter cmd, and then press Enter)

Enter the following in the console
xxxxxxxxxxssh -L 18789:127.0.0.1:18789 jetson@<jetson-ip-address>Note that
After pressing Enter here, you need to enter a password (the default is yahboom)
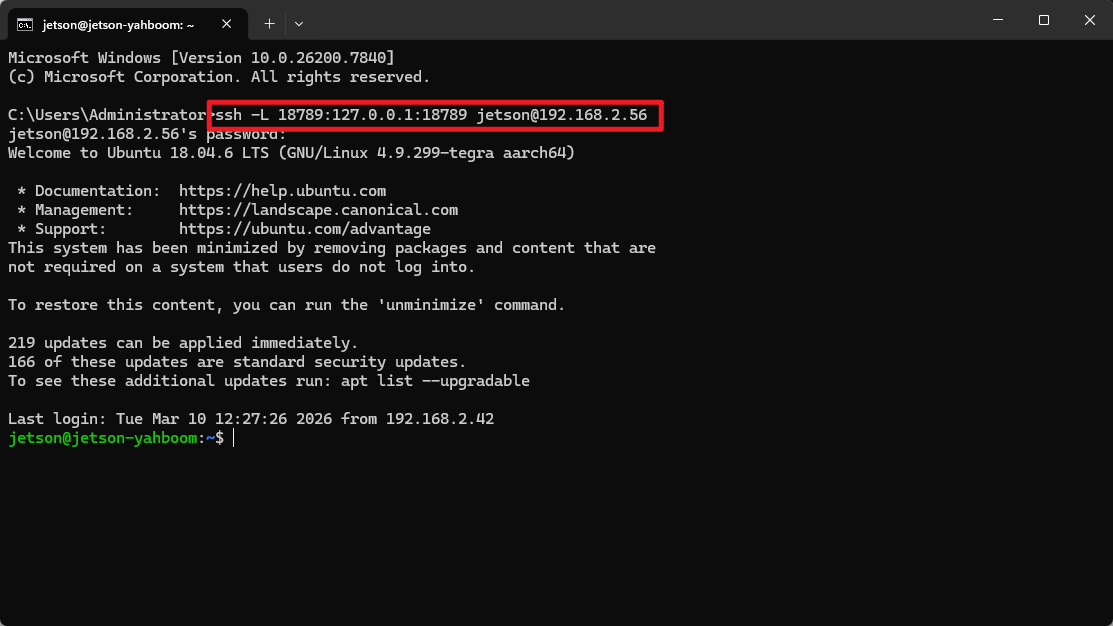
When this screen appears, it means you have successfully connected to the Jetson
Access it in the browser
We open the browser on the PC and enter the address string of IP plus token in the address bar (that is, the address output by openclaw dashboard just now, https://127.0.0.1:18789/#token=xxxxxxxxxxxxx). When this interface appears, the deployment is successful!
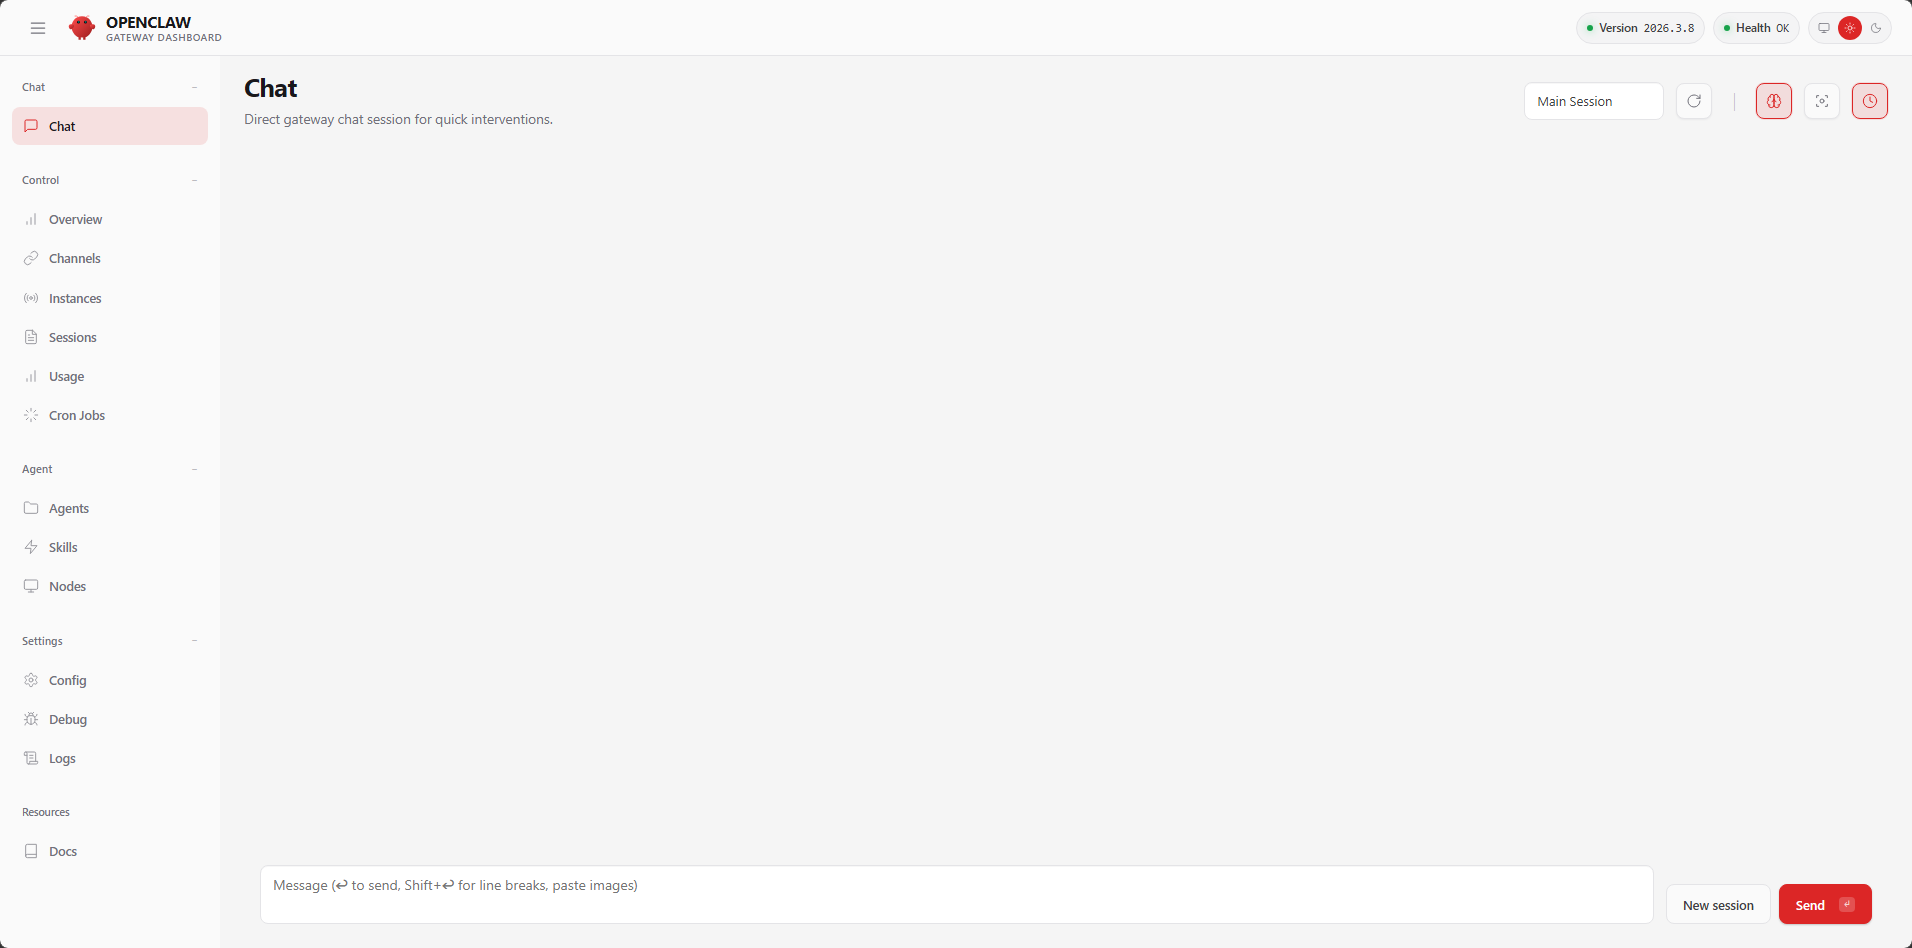
1.2 Model Configuration (Must Read)
1.2.1 Why Models Must Be Configured
OpenClaw is an AI Agent gateway and does not have the "intelligence" capability of a large model itself. We need to configure a large model to give OpenClaw the ability to think and understand
1.2.2 How to Configure Models
Here we take three representative models as examples:
OpenRouter (a built-in provider of OpenClaw, accessible both domestically and internationally)
Alibaba Bailian large model platform (not an OpenClaw provider; manual configuration required)
Ollama (local large model)
Before starting the configuration, we need to start the OpenClaw Gateway first.
If you did not exit the Gateway terminal after completing the deployment in the previous chapter, you can skip this step
We enter the following in the terminal
xxxxxxxxxxopenclaw gateway

1. OpenRouter (Built-in Provider of OpenClaw)
Here you need to have completed the application for an OpenRouter API Key according to the previous tutorial (please refer to the previous tutorial 【Online Large Model / 4. OpenRouter Large Model API Aggregation Platform】)
The OpenRouter API Key format looks like sk-or-v1-b3exxxxxx4xxxxxxxxxxxxxxxxxxxxxxxxxxxxxxxxcddf81d9
We still use the onboard beginner guide from the beginning to configure
xxxxxxxxxxopenclaw onboard
Please make the selections shown in the figures
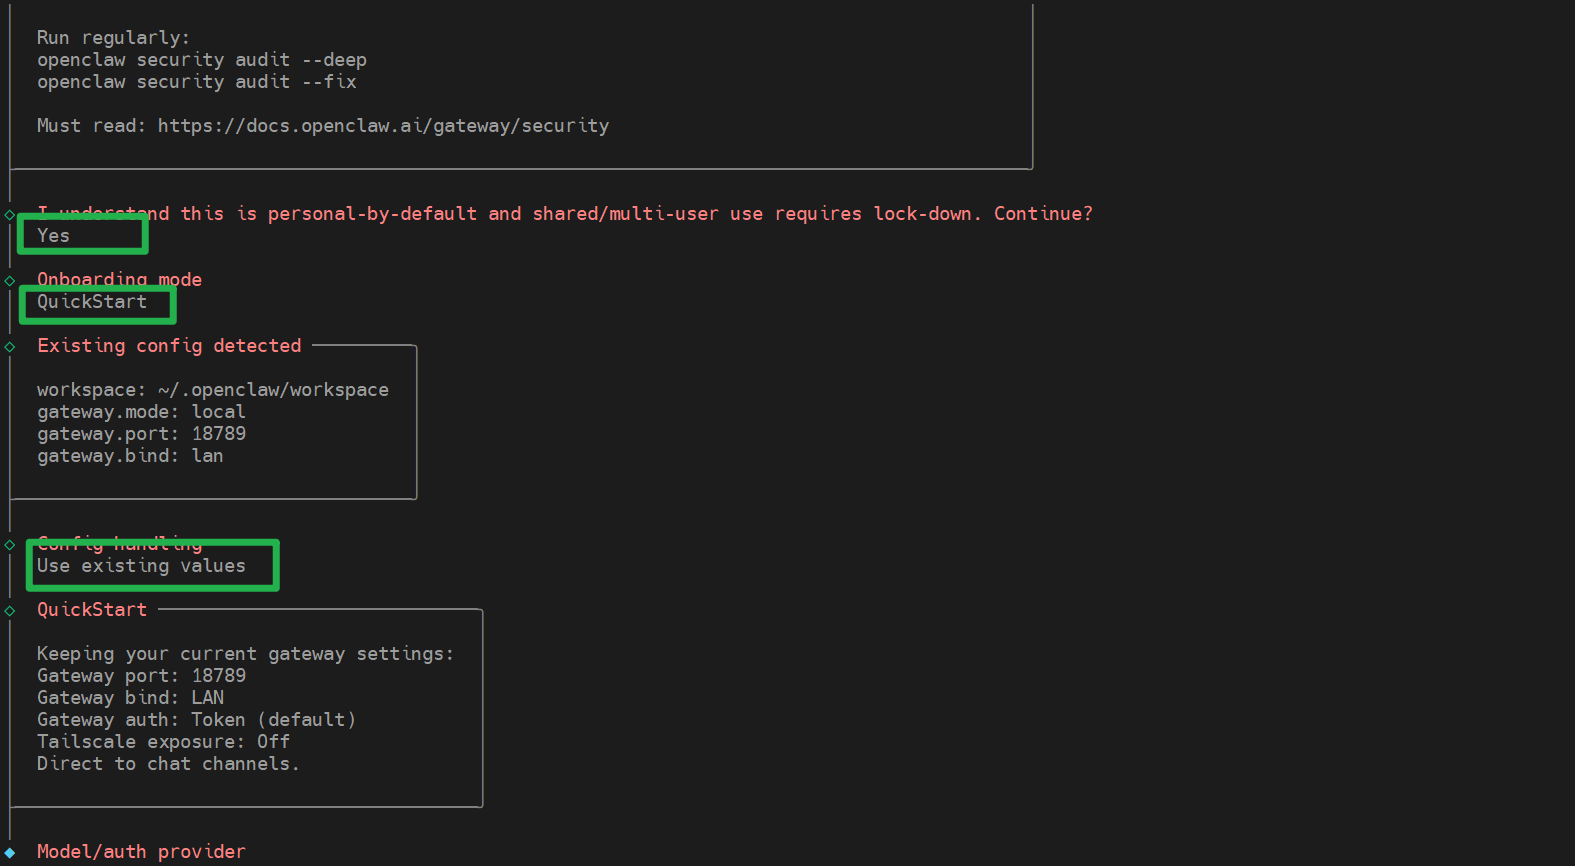
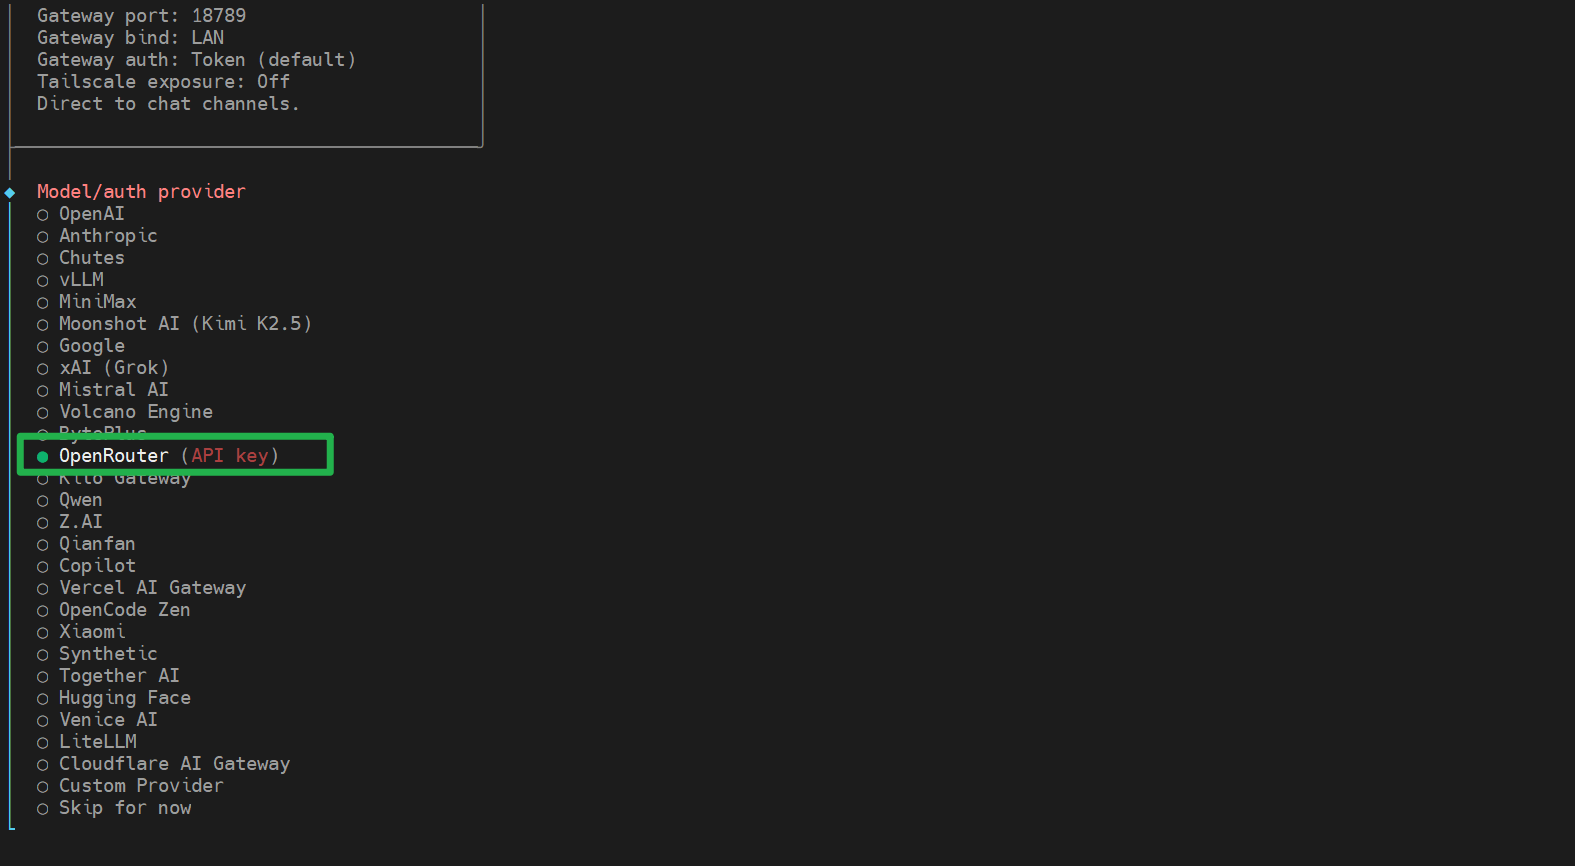
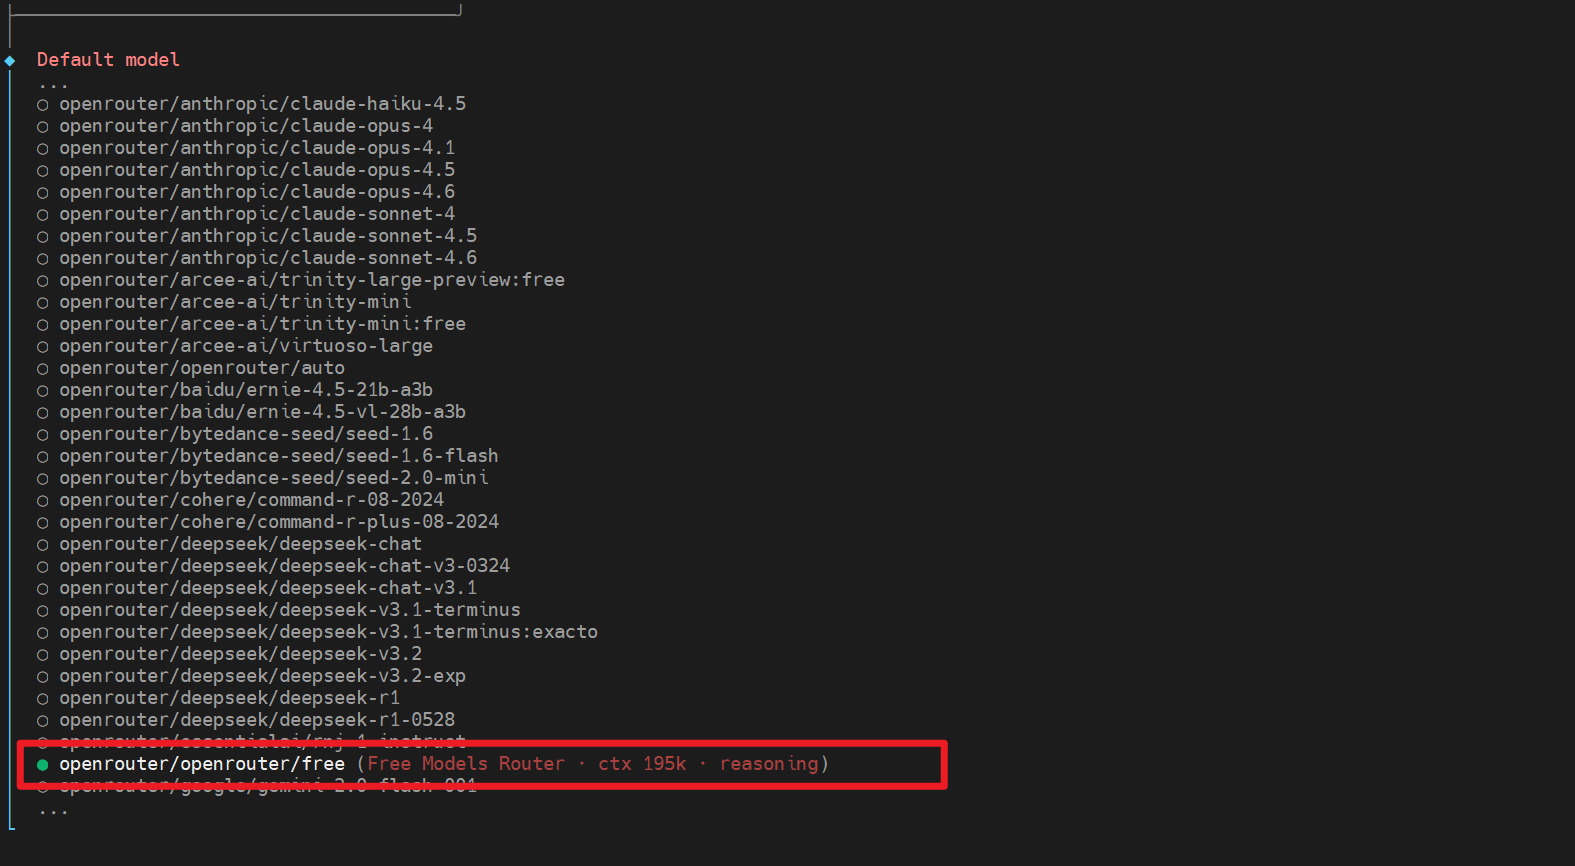
In the next step, we need to select a model. Limited by OpenRouter's traffic control policy, we recommend keeping a balance of more than $11 in your OpenRouter account; if the balance is insufficient, OpenRouter may rate-limit you (this policy may change later, so please refer to the latest actual situation). Here we can select a free model (the model name ends with free), or select a dedicated free model on OpenRouter, openrouter/free (this is a router that randomly selects free models from the models available on OpenRouter. The router intelligently selects the models that support the capabilities required by your request)
At this point, an option requiring the API Key may appear. Paste the API Key there and press Enter to proceed to the next step
Then come the other configuration items, which we skip for now and select Skip for all of them
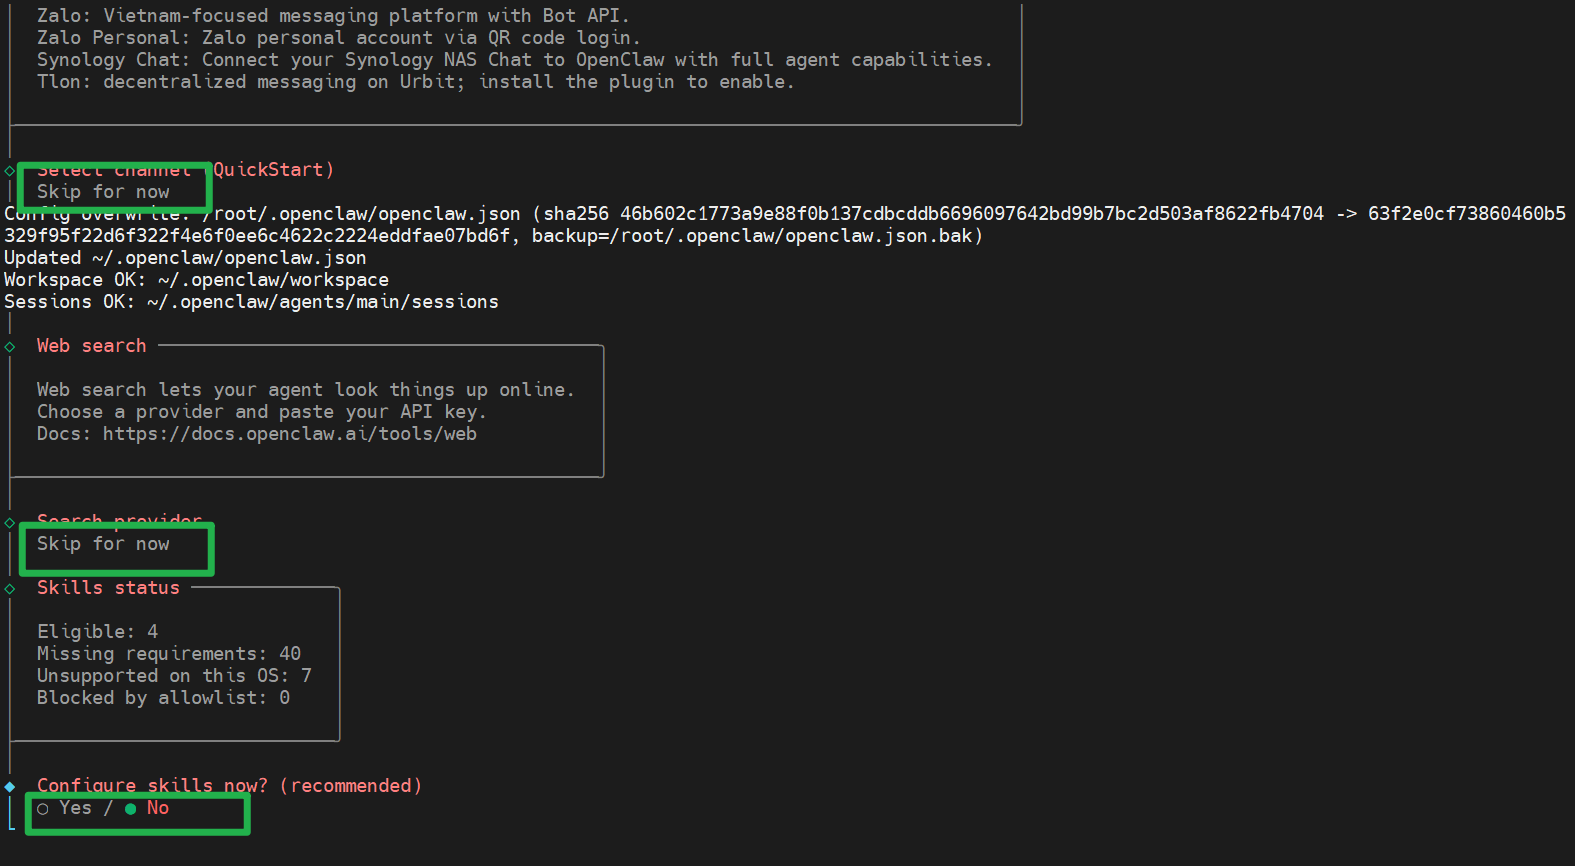
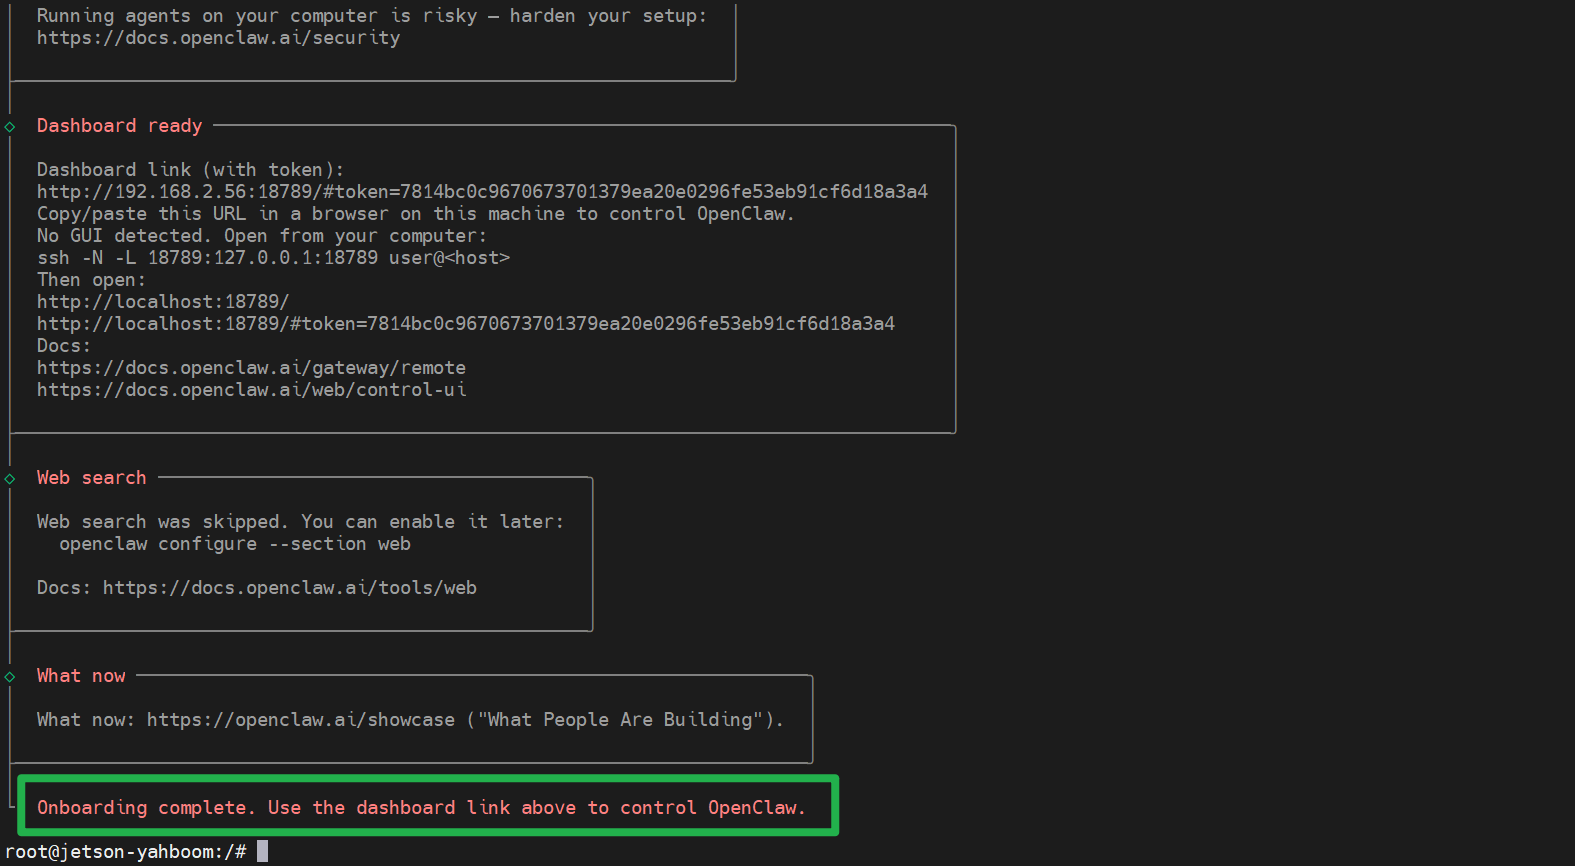
At this point, the configuration is complete
We can use the TUI feature to test it quickly
Enter the command
xxxxxxxxxxopenclaw tui
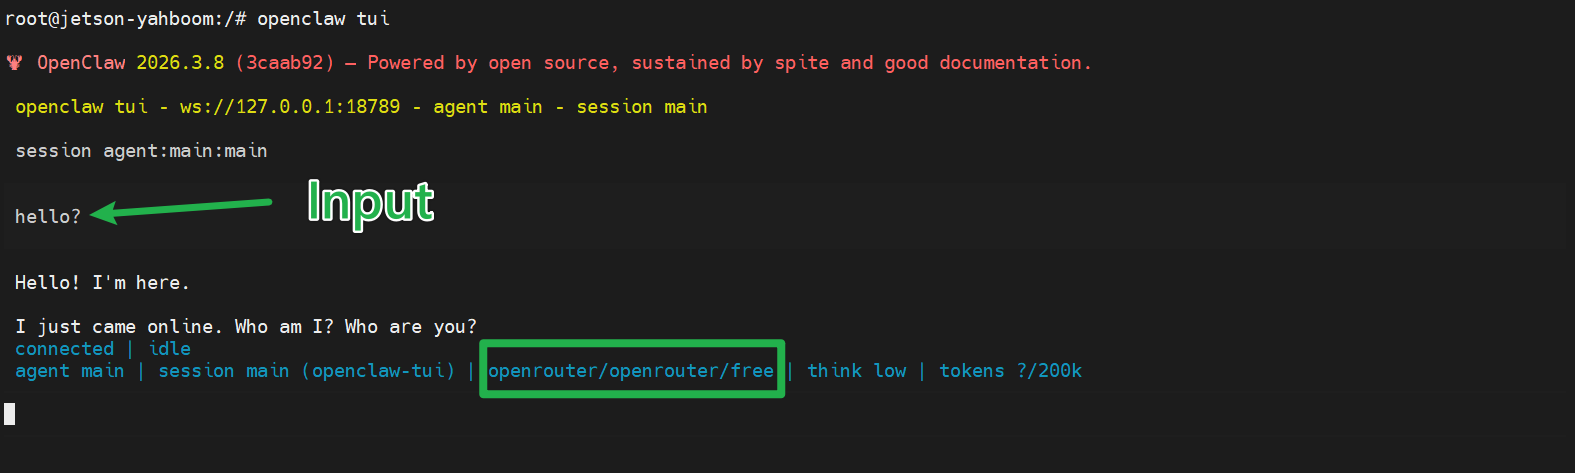
After entering it, simply type a sentence to greet openclaw (the Input part in the figure is what we entered, and the green box is the model we selected)
2. Bailian (Third-Party Provider API Example)
Configuring a third-party API requires editing the OpenClaw configuration file (located at ~/.openclaw/openclaw.json). Here we prefer to edit it in the web page (OpenClaw Control UI)
We open the OpenClaw configuration page in the browser and click these three buttons in sequence
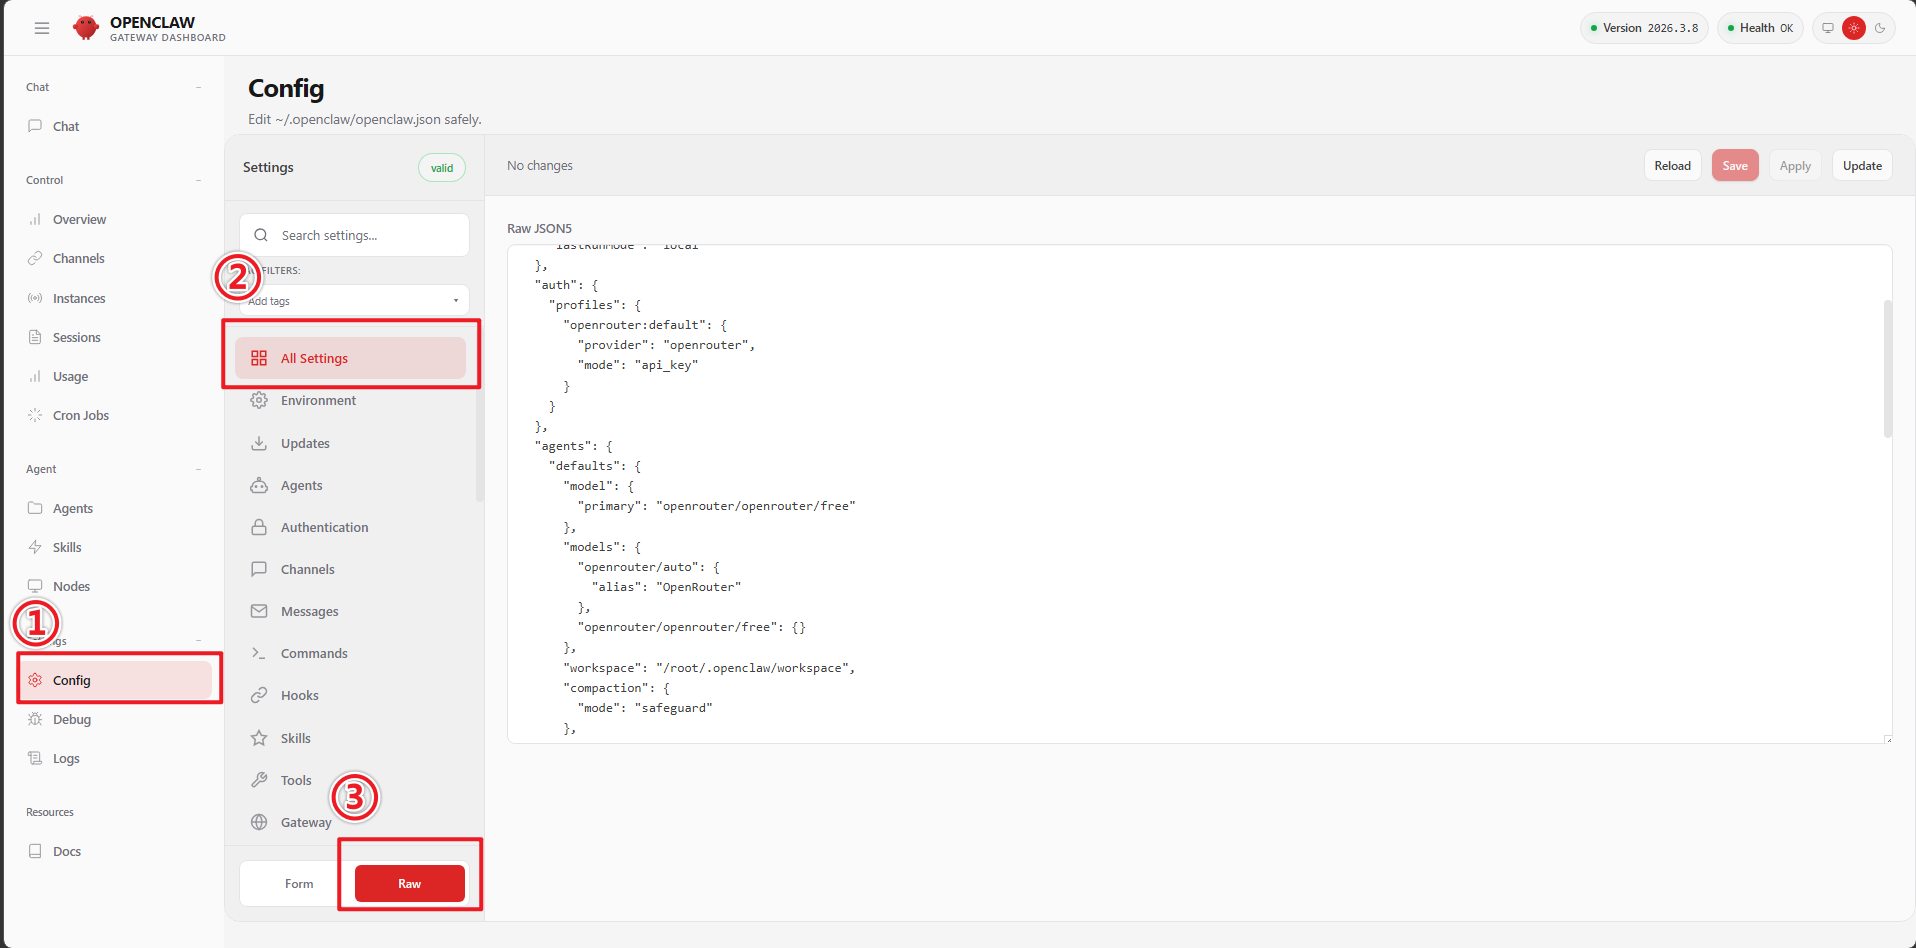
The existing content is as follows. What we need to focus on is the agents part
xxxxxxxxxx{ "meta": { "lastTouchedVersion": "2026.3.8", "lastTouchedAt": "2026-03-10T07:56:18.292Z" }, "wizard": { "lastRunAt": "2026-03-10T07:56:18.270Z", "lastRunVersion": "2026.3.8", "lastRunCommand": "onboard", "lastRunMode": "local" }, "auth": { "profiles": { "openrouter:default": { "provider": "openrouter", "mode": "api_key" } } }, "agents": { "defaults": { "model": { "primary": "openrouter/openrouter/free" }, "models": { "openrouter/auto": { "alias": "OpenRouter" }, "openrouter/openrouter/free": {} }, "workspace": "/root/.openclaw/workspace", "compaction": { "mode": "safeguard" }, "maxConcurrent": 4, "subagents": { "maxConcurrent": 8 } } }, "tools": { "profile": "coding" }, "messages": { "ackReactionScope": "group-mentions" }, "commands": { "native": "auto", "nativeSkills": "auto", "restart": true, "ownerDisplay": "raw" }, "session": { "dmScope": "per-channel-peer" }, "gateway": { "port": 18789, "mode": "local", "bind": "lan", "controlUi": { "allowedOrigins": [ "http://localhost:18789", "http://127.0.0.1:18789" ] }, "auth": { "mode": "token", "token": "__OPENCLAW_REDACTED__" }, "tailscale": { "mode": "off", "resetOnExit": false }, "nodes": { "denyCommands": [ "camera.snap", "camera.clip", "screen.record", "contacts.add", "calendar.add", "reminders.add", "sms.send" ] } }}We need to add a Models section (inside the first level of the JSON, that is, this newly added "models" is at the same level as "agents")
Note that here we need to change DASHSCOPE_API_KEY to your real Bailian API Key, and change baseUrl to the OpenAI-compatible address matching your own account (see the previous chapters for the application method). Mainland-China accounts use https://dashscope.aliyuncs.com/compatible-mode/v1; international accounts use https://dashscope-intl.aliyuncs.com/compatible-mode/v1
Here we take the two models qwen3.5-plus and qwen3-coder-next as examples for models. If you want to support other models, please refer to this model list https://help.aliyun.com/zh/model-studio/models
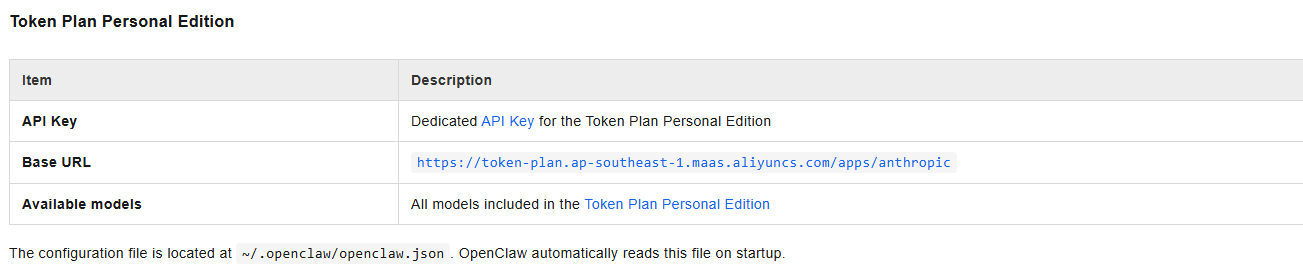
xxxxxxxxxx "models": { "mode": "merge", "providers": { "bailian": { "baseUrl": "https://dashscope.aliyuncs.com/compatible-mode/v1", "apiKey": "DASHSCOPE_API_KEY", "api": "openai-completions", "models": [ { "id": "qwen3.5-plus", "name": "qwen3.5-plus", "reasoning": false, "input": ["text", "image"], "contextWindow": 1000000, "maxTokens": 65536 }, { "id": "qwen3-coder-next", "name": "qwen3-coder-next", "reasoning": false, "input": ["text"], "contextWindow": 262144, "maxTokens": 65536 } ] } } },After adding "models", we also need to modify the "agents" part again to set the Bailian large model as the default.
The agents part before modification is as follows (the default is the OpenRouter we configured in the previous step)
xxxxxxxxxx "agents": { "defaults": { "model": { "primary": "openrouter/openrouter/free" }, "models": { "openrouter/auto": { "alias": "OpenRouter" }, "openrouter/openrouter/free": {} }, "workspace": "/root/.openclaw/workspace", "compaction": { "mode": "safeguard" }, "maxConcurrent": 4, "subagents": { "maxConcurrent": 8 } } },The agents part after modification is as follows
xxxxxxxxxx "agents": { "defaults": { "model": { "primary": "bailian/qwen3.5-plus" }, "models": { "openrouter/auto": { "alias": "OpenRouter" }, "openrouter/openrouter/free": {}, "bailian/qwen3.5-plus": {}, "bailian/qwen3-coder-next": {} }, "workspace": "/root/.openclaw/workspace", "compaction": { "mode": "safeguard" }, "maxConcurrent": 4, "subagents": { "maxConcurrent": 8 } } },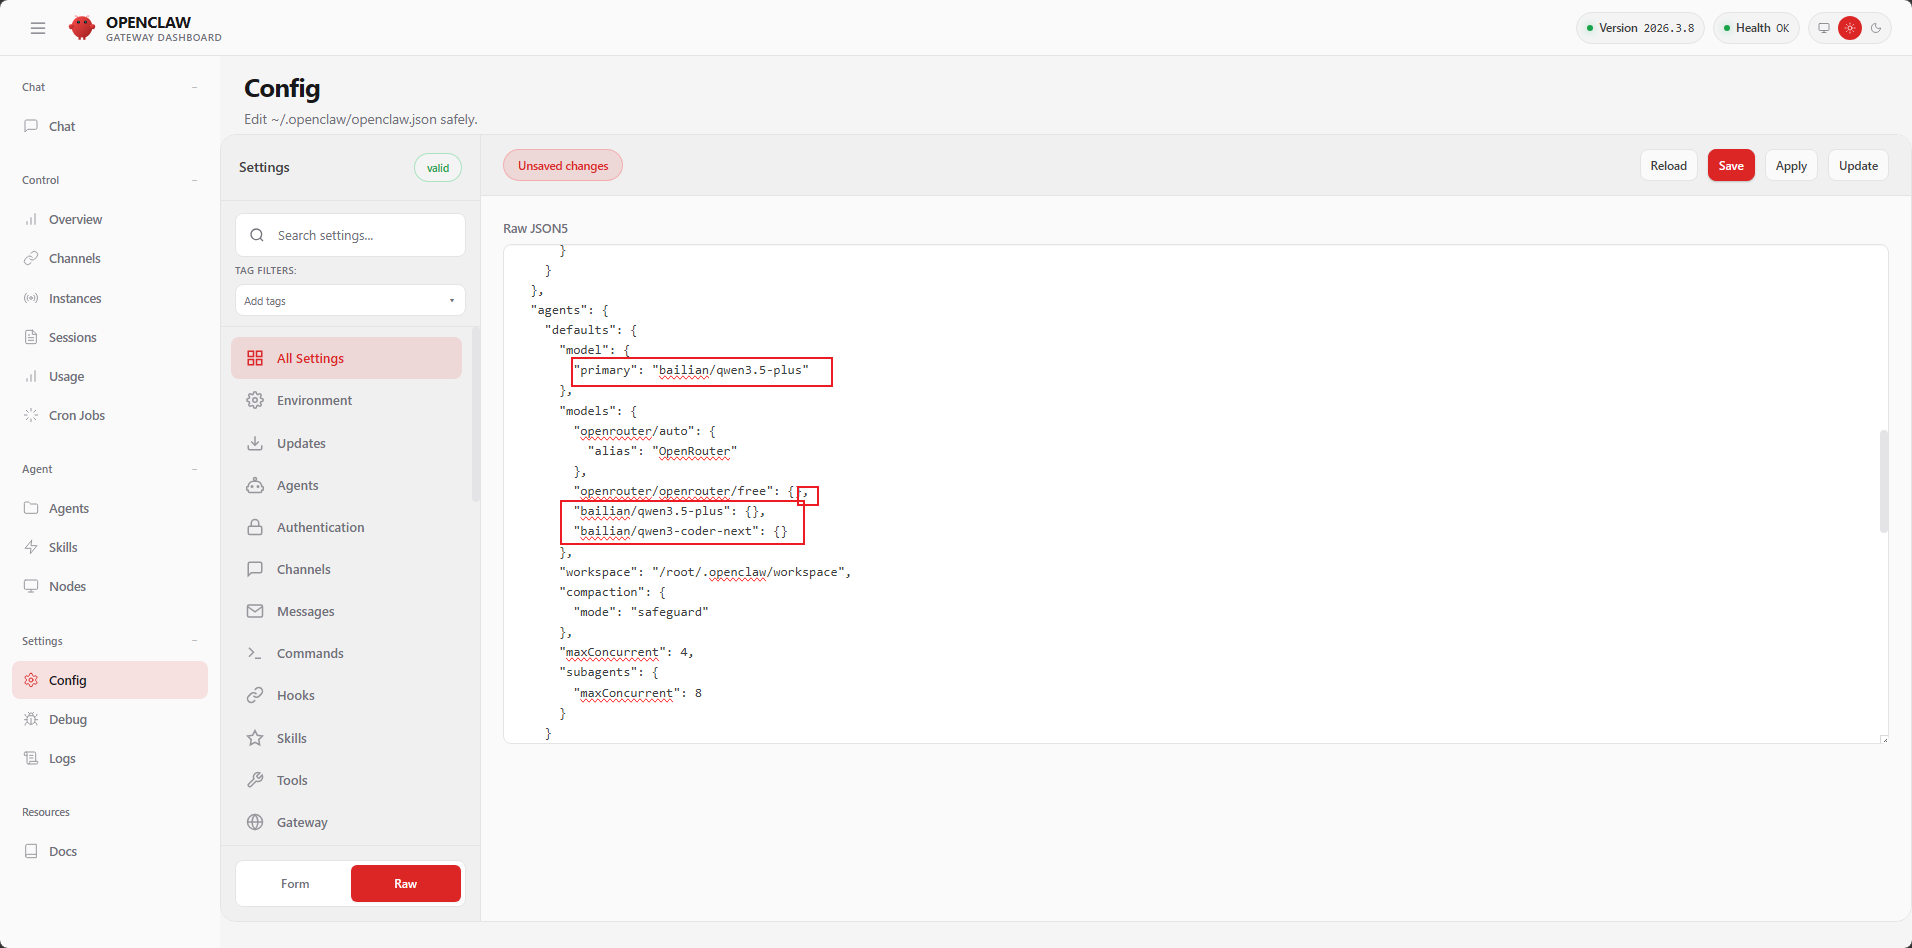
After the modification is complete, remember to save and reload
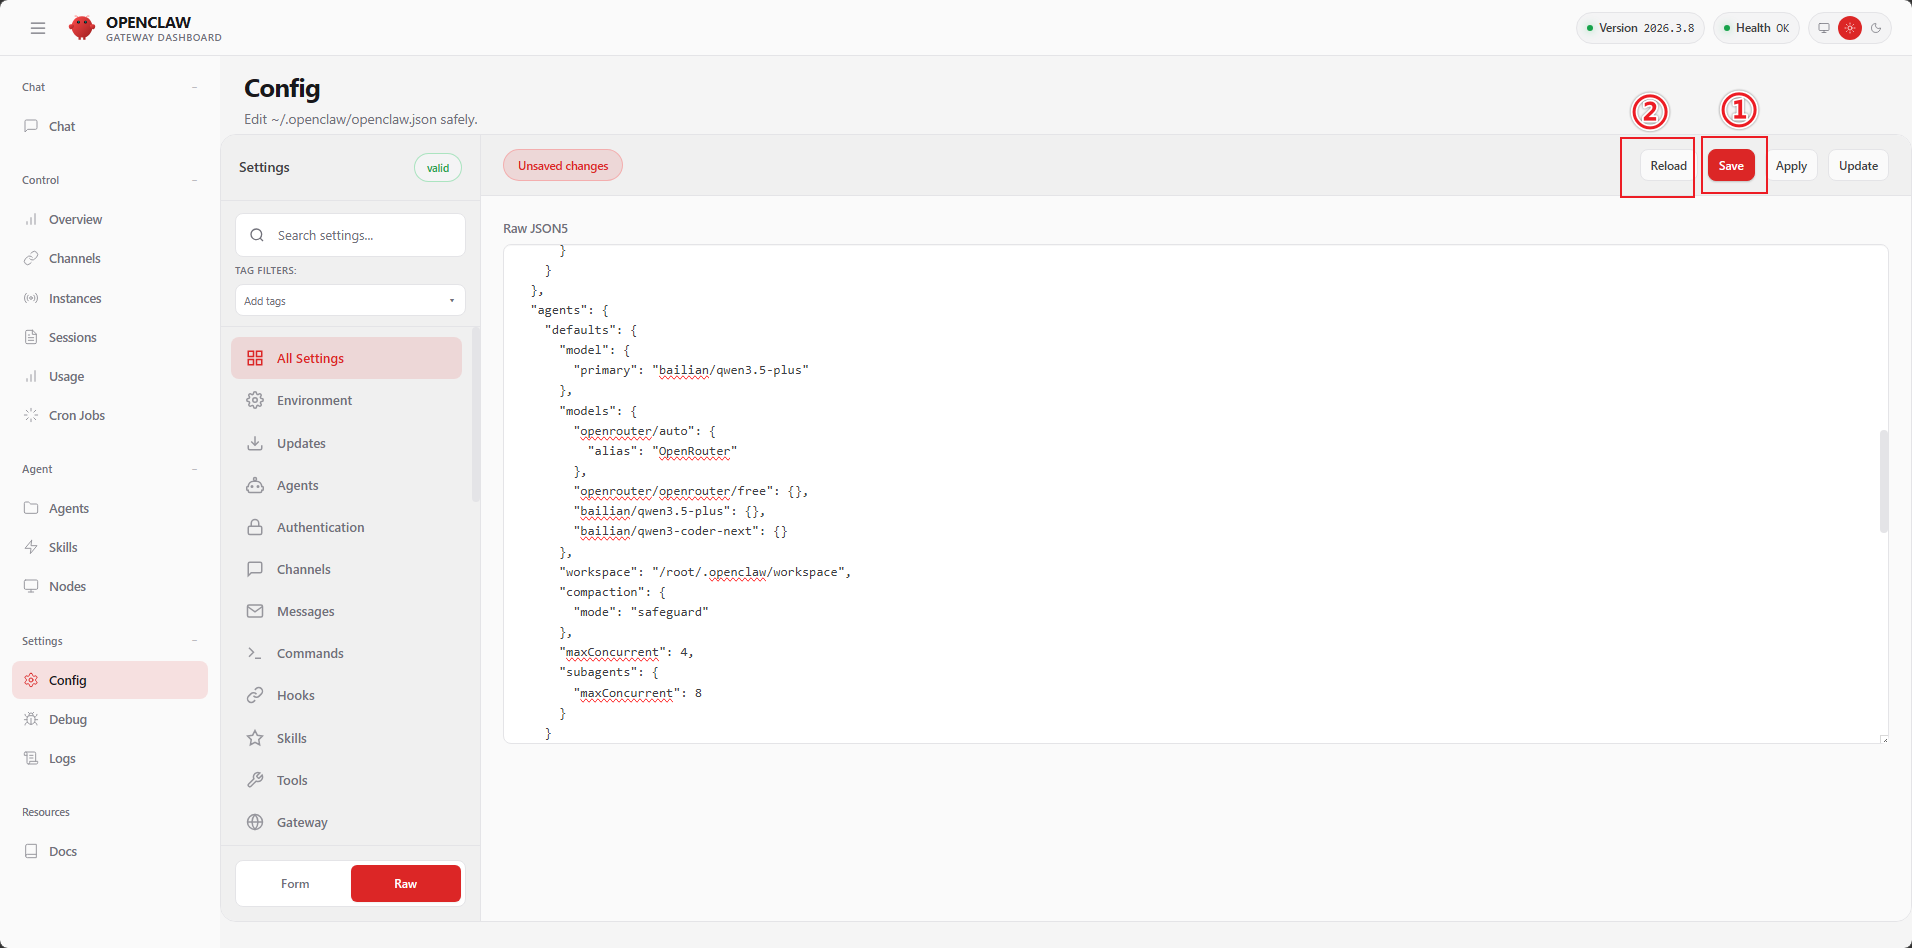
Version 2026.3.8 supports hot updating of the configuration file. After clicking Save, there is no need to restart the openclaw service. In general, restarting openclaw tui is sufficient. If you find that restarting openclaw tui has no effect, then try restarting openclaw gateway
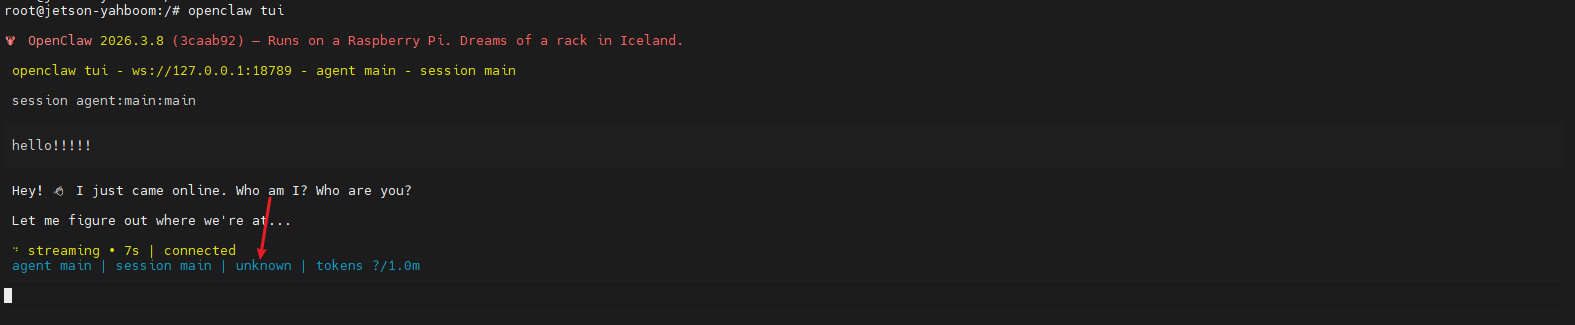
Here it initially shows unknown, and after waiting for a while the current model is recognized correctly
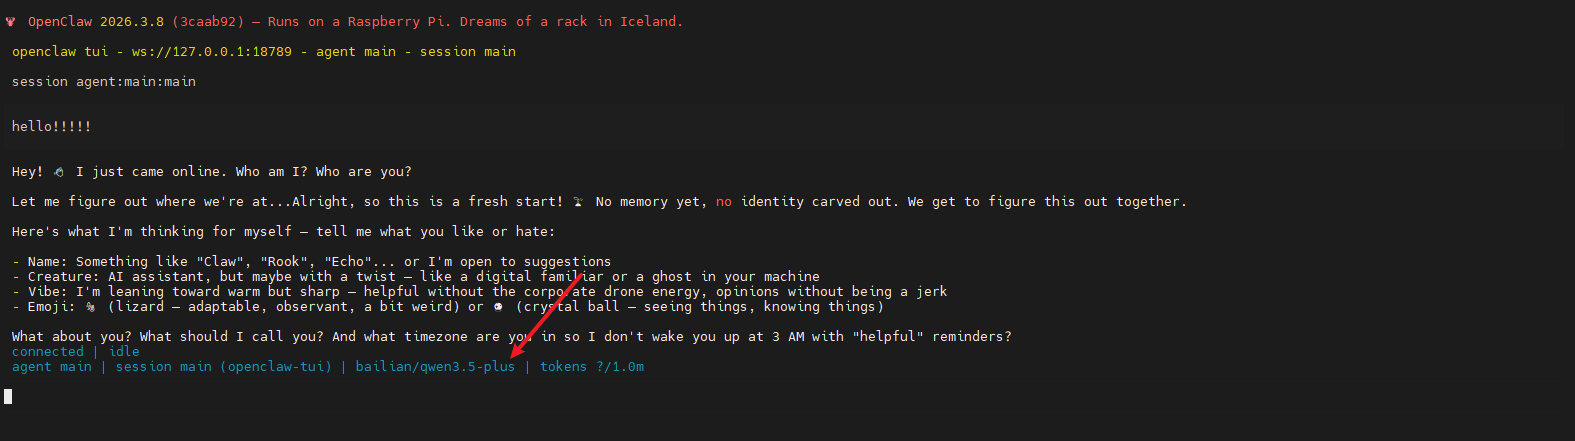
Similarly, in addition to the TUI interface, we can also chat and converse in the OpenClaw Control UI (that is, the web page)
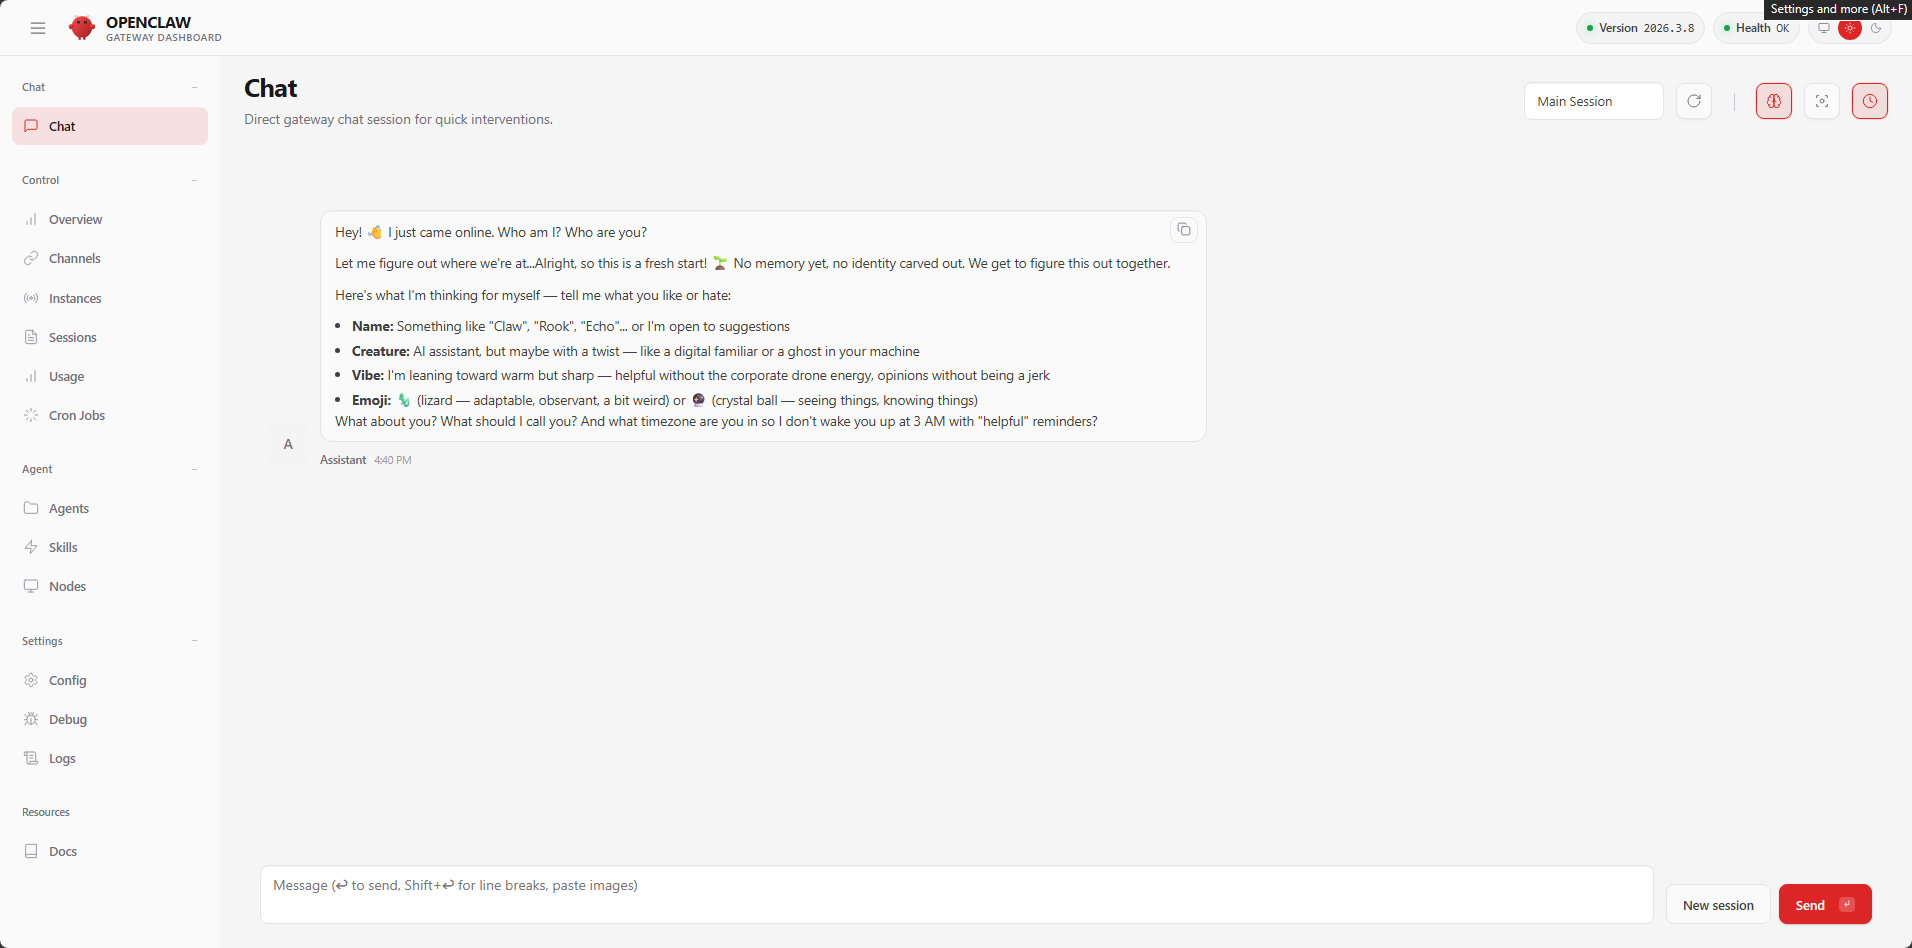
We can actually observe that the dialogue content in the TUI is the same as the content in our Control UI. This is because OpenClaw's dialogue uses a Session mechanism to separate different conversations, and our TUI and Control UI are actually in the same Session. You can try clicking the New session button in the lower right corner to start a new round of conversation