Welcome to Jetson Orin NANO Developer Kit repository
11.3D human skeleton detection
TAO BodyPose3DNet 3D Human Skeleton Detection
TAO BodyPose3DNet 3D Human Skeleton Detection1. Case Goal and Processing Flow2. Pre-Run Checks3. Starting Detection4. USB Camera Real-Time Detection4.1 Direct Run4.2 Common Parameters5. CSI Camera Real-Time Detection5.1 Direct Run5.2 Common Parameters6. Common Issues
Applicable environment: Jetson Orin Nano, JetPack 7.2.1, DeepStream 9.1
After setting the power mode to MAXN, running the case may pop up an over-current warning; just ignore it.
1. Case Goal and Processing Flow
It first detects and tracks persons, then estimates 34 2.5D/3D body keypoints and draws the skeleton.
video/USB/CSI → PeopleNet → NvDCF Tracker → BodyPose3DNet → skeleton rendering → preview + MP4 + JSONKey point estimation is affected by camera viewing angle, occlusion, detection boxes, and the training domain; it is not medical-grade measurement.
2. Pre-Run Checks
xxxxxxxxxxcd ~/DeepStream/tao-toolkit-shell-demols -lh video_in/bodypose.mp4ls -ld video_outRun in a Jetson desktop/VNC graphical session, and confirm the input and output directories are available.
3. Starting Detection
xxxxxxxxxx./run_video.sh bodypose3d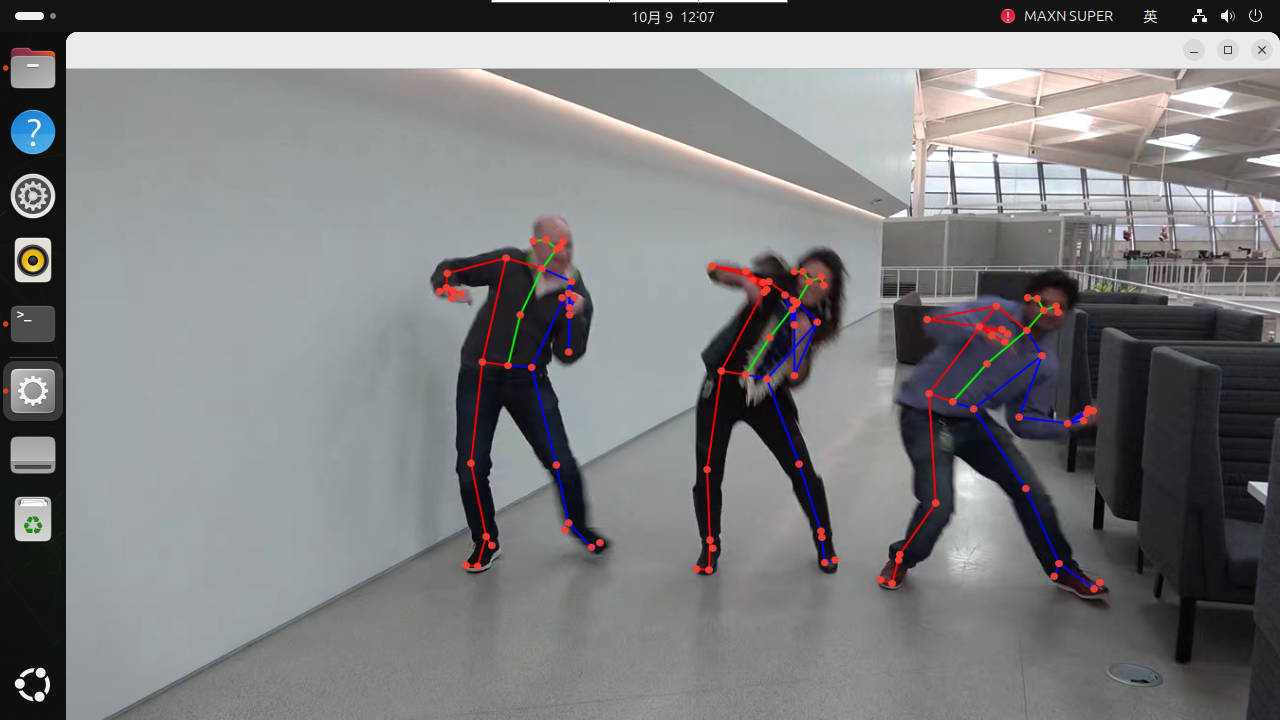
The input is video_in/bodypose.mp4; the outputs are video_out/out_bodypose3d.mp4 and video_out/out_bodypose3d.json. After natural EOS, check the video and JSON:
xxxxxxxxxxgst-discoverer-1.0 video_out/out_bodypose3d.mp4python3 -m json.tool video_out/out_bodypose3d.json > /dev/nullAlso confirm that the JSON contains frame/person records rather than an empty structure.
Replacing the test video: the input path is determined by this case's configuration. Before replacing, check the source path, put in a video the device supports decoding, and keep the original file; the new material should preferably contain clear, complete human bodies. The output file has the same name; rename old results first when you need to keep them.
4. USB Camera Real-Time Detection
4.1 Direct Run
USB mode supports live preview. The dedicated camera entry feeds frames to the application through a local RTSP relay; do not treat the video file output path as camera recording results.
After confirming the USB camera device node exists, run:
xxxxxxxxxxls -l /dev/video*cd ~/DeepStream/tao-toolkit-shell-demo./run_usb.sh bodypose3d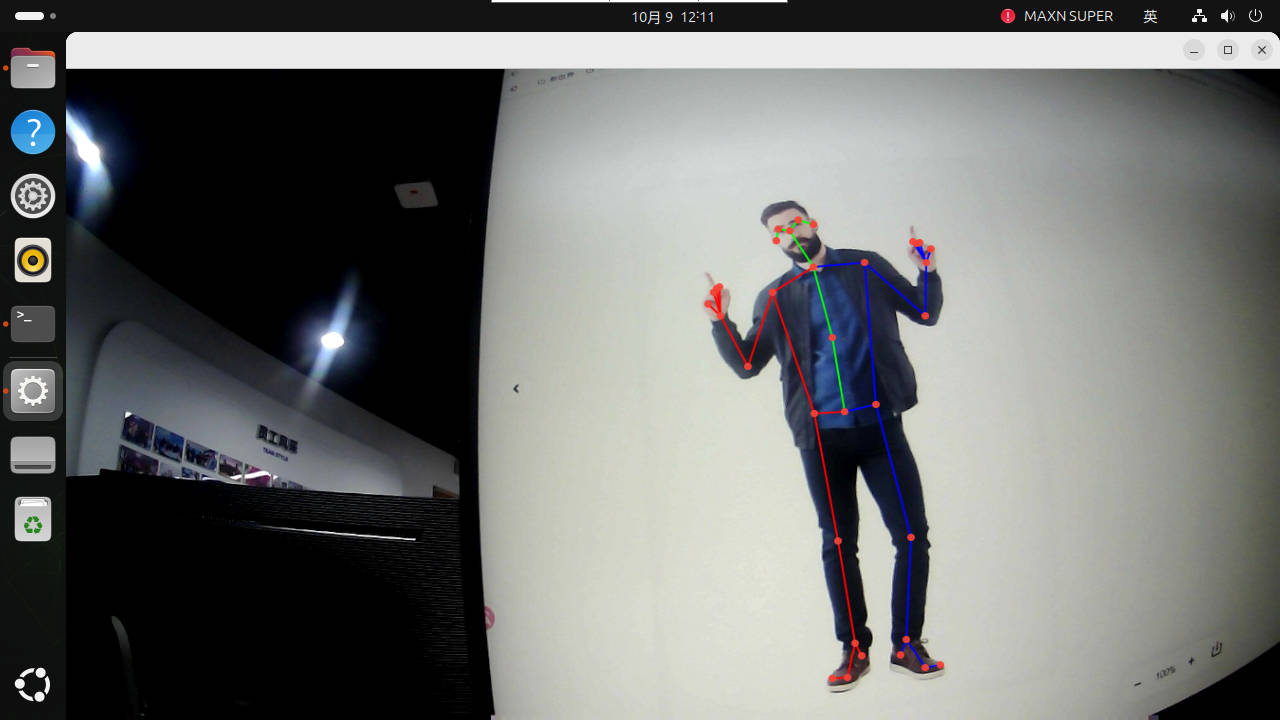
4.2 Common Parameters
Before running, you can check the formats, resolutions, and frame rates supported by the camera:
xxxxxxxxxxv4l2-ctl -d /dev/video0 --list-formats-ext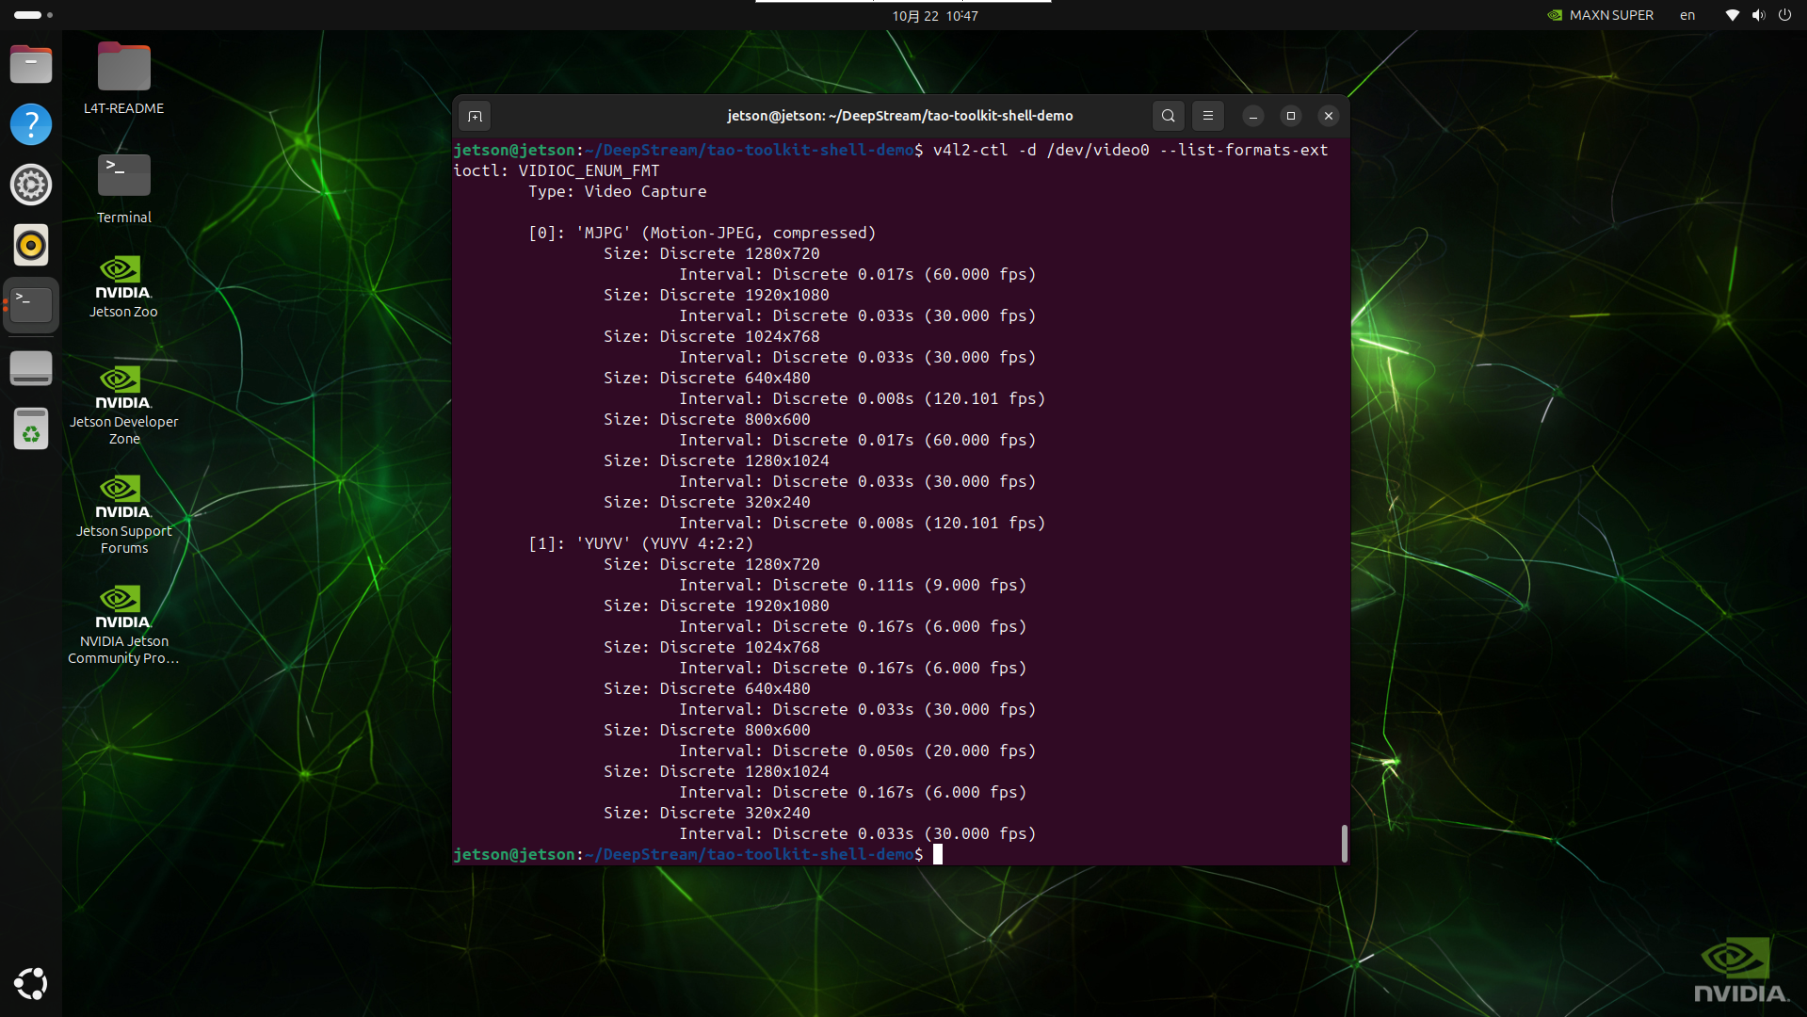
Note: the USB pipeline of Object Embedding Vector Generation is fixed to MJPEG, so among the parameters below, choose the MJPEG parameters
x# View all parameters./run_usb.sh bodypose3d --help
# Use another video device./run_usb.sh bodypose3d --device /dev/video1
# Choose from the configurations found above that the camera supports; here we use 1280×720, 60FPS./run_usb.sh bodypose3d --width 1280 --height 720 --fps 605. CSI Camera Real-Time Detection
5.1 Direct Run
CSI mode supports live preview; the entry captures via Argus and sends frames into the dedicated application through a local RTSP relay.
xxxxxxxxxxcd ~/DeepStream/tao-toolkit-shell-demo./run_csi.sh bodypose3d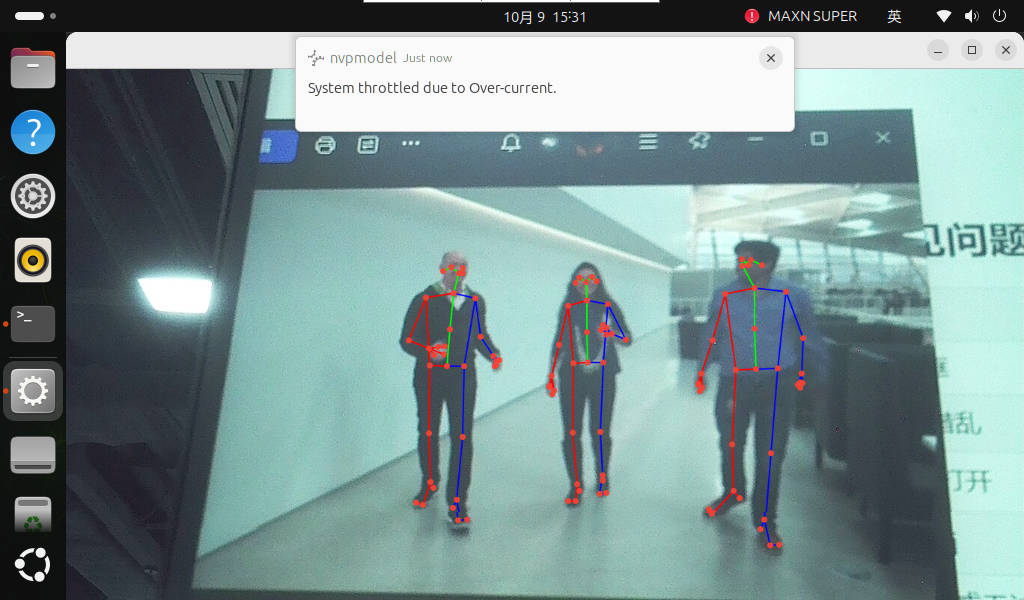
USB/CSI stream continuously and will not end naturally. To stop, press Ctrl+C once in the launching terminal, wait for the application and camera relay to exit, then start other camera tasks.
5.2 Common Parameters
Before running, you can check the formats, resolutions, and frame rates supported by the camera; this must be run in a graphical interface:
xxxxxxxxxxgst-launch-1.0 nvarguscamerasrc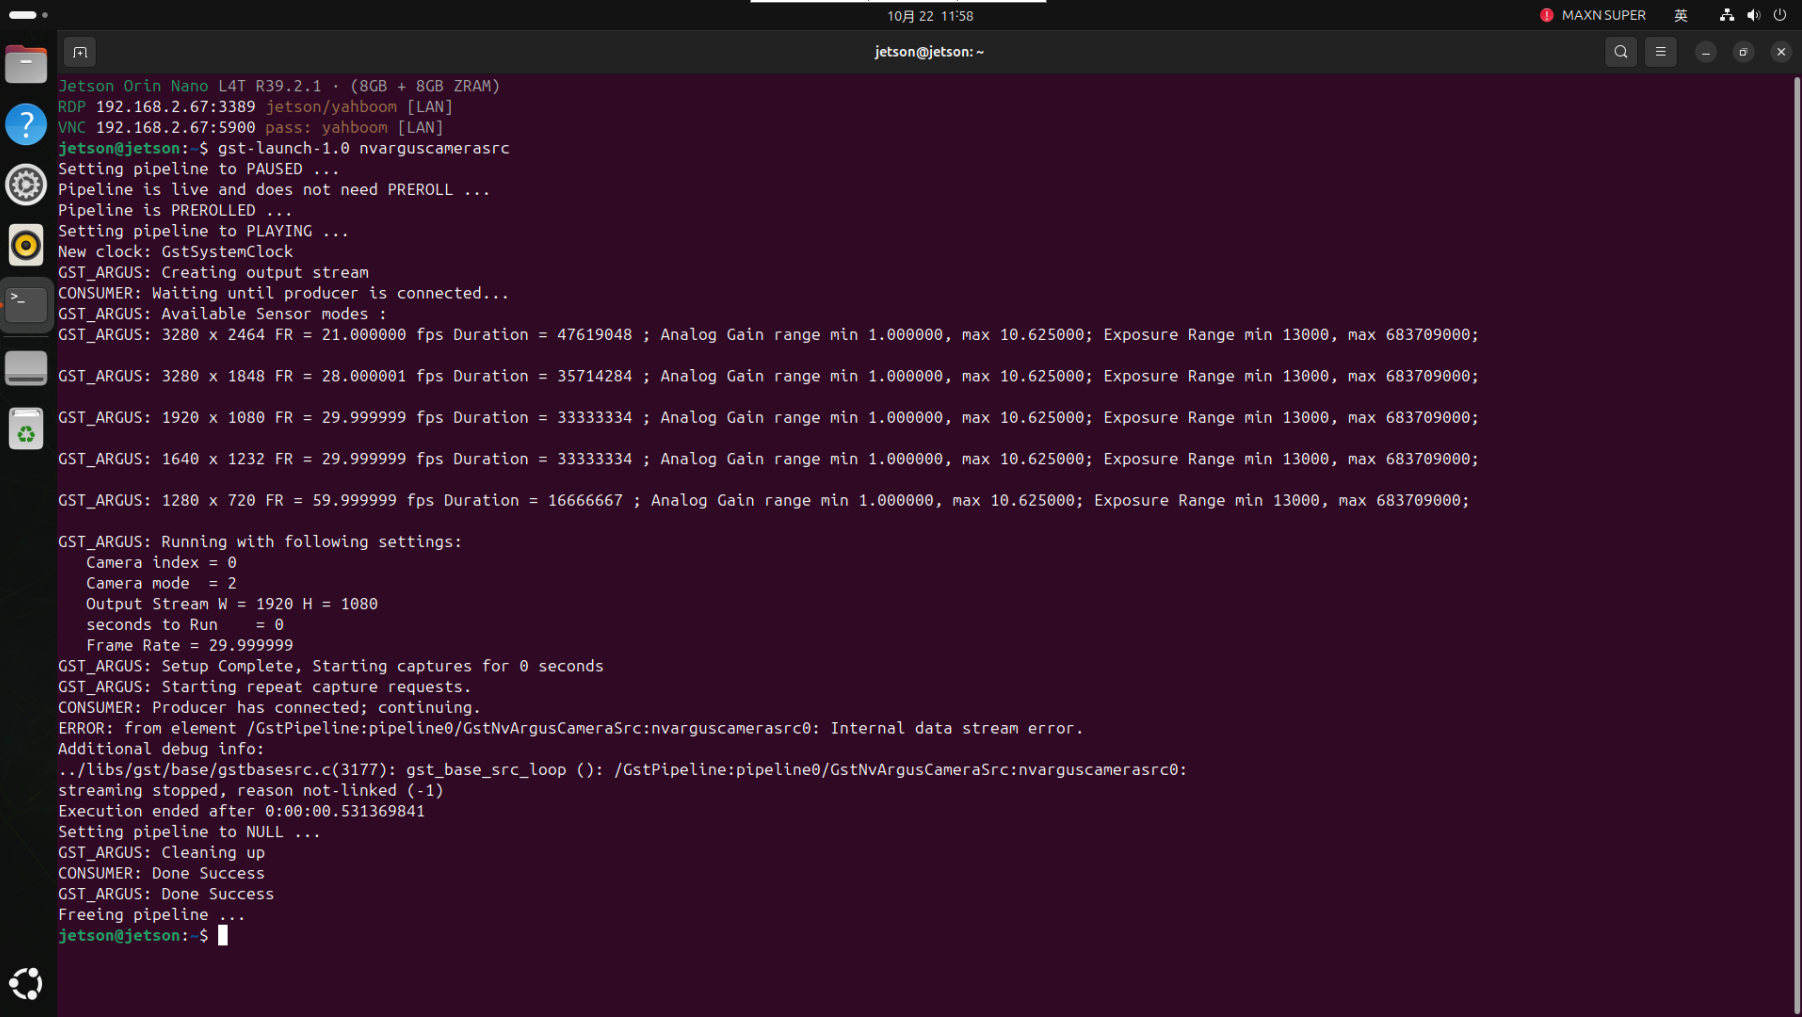
xxxxxxxxxx# View all parameters./run_csi.sh bodypose3d --help
# Use the second CSI camera./run_csi.sh bodypose3d --sensor-id 1
# Adjust input size and frame rate./run_csi.sh bodypose3d --width 1920 --height 1080 --fps 30
6. Common Issues
| Symptom | Check and Handling |
|---|---|
| No skeleton | Check the PeopleNet detection, Tracker, BodyPose3DNet, and model loading logs in order. |
| MP4 normal but JSON empty | Check the JSON output configuration/permissions and confirm the keypoint branch has run. |
| Video cannot seek after early stop | Wait for EOS; or press Ctrl+C once and wait for the process to complete wrap-up, avoiding force killing. |
| Window remains after Ctrl+C | Wait for the launcher to finish cleanup; confirm process ownership before targeted troubleshooting, and do not mistakenly kill other cases. |