Welcome to Jetson Orin NANO Developer Kit repository
02.Multimodal text image application
Multimodal Text-to-Image Application
Multimodal Text-to-Image Application1. Concept Introduction1.1 What Is Text-to-Image?Core Principles1.2 What Is FastSDCPU?Core FeaturesApplicable Scenarios2. Project Deployment2.1 Deployment Environment2.2 LAN Access2.3 Using the Text-to-Image Feature2.4 Startup Method After Successful Deployment3. Online Large Model Text-to-Image (Text/Voice Interaction)3.1 Configuring Tongyi Wanxiang3.2 Online Text Input3.3 Online Voice Input
Hardware requirement: a 4GB Jetson cannot run this case; use a Jetson with 8GB or more.
Since Ollama does not support the text-to-image feature, we need to use other tools to implement the local text-to-image feature.
1. Concept Introduction
1.1 What Is Text-to-Image?
Text-to-image is an artificial intelligence technology that automatically generates a corresponding image from a text description. You only need to enter a piece of text (for example "a Shiba Inu wearing sunglasses surfing on a beach"), and the AI model generates a picture that matches the description based on semantic understanding, without any drawing or design background.
Core Principles
Language understanding: The AI first parses your text and identifies keywords (such as "Shiba Inu", "sunglasses", "beach").
Image generation: Trained on massive image data, the AI converts the text into visual elements and combines them into a reasonable picture.
Style adaptation: A style can be specified (realistic, cartoon, watercolor, and so on), and the AI adjusts the generated result.
1.2 What Is FastSDCPU?
FastSDCPU is an open-source Stable Diffusion text-to-image project optimized specifically for CPU devices. Through algorithmic and engineering optimization, it achieves fast generation of high-quality images on ordinary computers without a GPU, significantly lowering the hardware threshold for AI painting.
Core Features
Pure CPU operation: No discrete graphics card is required; it can run directly on a laptop, desktop, or edge device.
High-speed inference: Combined with technologies such as Latent Consistency Models (LCM), an image can be generated in only 4–8 steps, greatly shortening the waiting time.
Lightweight deployment: Supports model quantization (such as INT8) and OpenVINO acceleration, reducing resource usage and improving response efficiency.
Applicable Scenarios
Localized AI creation tools
Image generation services on enterprise intranets
Teaching demonstrations and prototype development
Lightweight deployment in resource-constrained environments
2. Project Deployment
2.1 Deployment Environment
Note: If you are using our factory image, no environment deployment is required; skip the deployment steps directly. Refer to <2.4 Startup Method After Successful Deployment> at the bottom and start it directly.
Open a terminal and execute the following code:
x#If git is not installed on the mainboard, run this firstsudo apt updatesudo apt install git -ysudo apt install python3.10-venv -y#Add environment variablesecho 'export PATH="$HOME/.local/bin:$PATH"' >> ~/.bashrcsource ~/.bashrc# Clone the project codegit clone https://github.com/rupeshs/fastsdcpu.gitcd fastsdcpu# Create a virtual environment and install dependenciespython -m venv venvsource venv/bin/activate#Install uvcurl -Ls https://astral.sh/uv/install.sh | sh(this step may fail in China without a proxy; if it does not succeed, you can skip this step and run the next command)#If uv was not installed successfully with the curl command in the previous step, run these three commandswget https://mirrors.huaweicloud.com/astral/uv/0.8.4/uv-aarch64-unknown-linux-gnu -O ~/.local/bin/uvchmod +x ~/.local/bin/uv~/.local/bin/uv --versionchmod +x install.sh start-webui.sh./install.sh --disable-gui
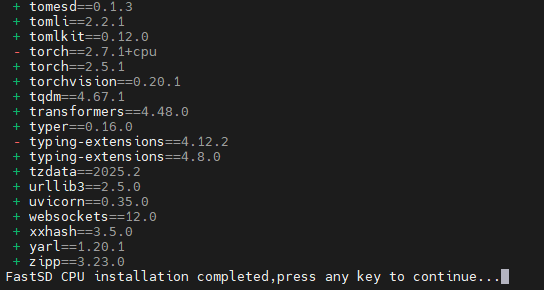
The installation is successful; press any key to exit:
2.2 LAN Access
Before starting, you need to modify a file to support LAN access; otherwise the webui can only be accessed locally:
xxxxxxxxxxvim ~/fastsdcpu/src/frontend/webui/ui.py
After opening the ui.py file, scroll to the last line, find the code webui.launch(share=share), and change it to webui.launch(server_name="0.0.0.0",share=share)
Then save
Start:
xxxxxxxxxx./start-webui.sh
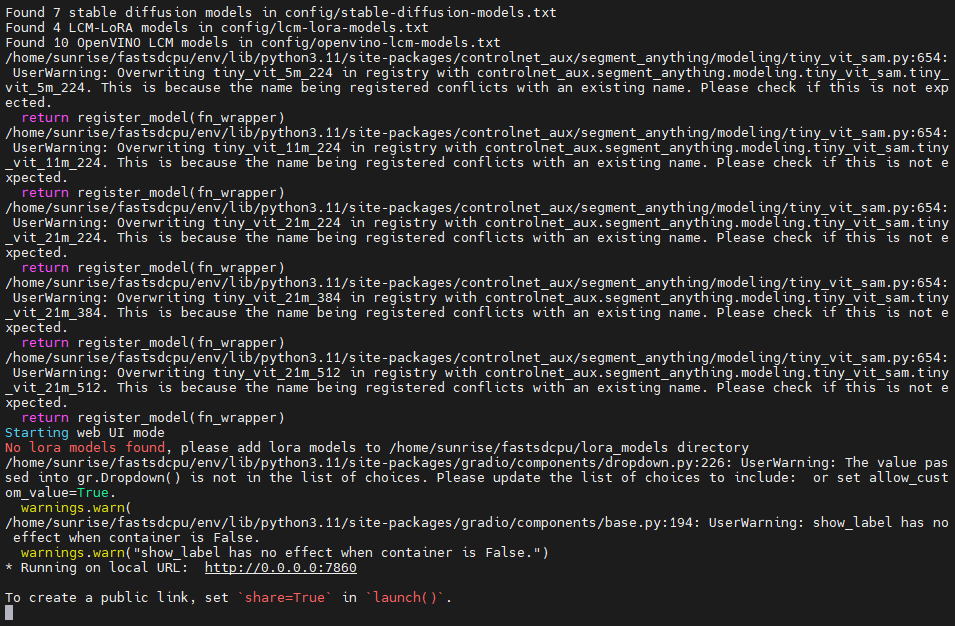
Then you can enter your mainboard IP:7860 in the browser to access this webui.
Local text-to-image runs the model on the Jetson itself, so generation speed depends on the mainboard's compute and is usually slower than online services; the model size and the number of generation steps also affect the waiting time.
2.3 Using the Text-to-Image Feature
In the terminal, use ifconfig to query the IP of our mainboard; for example, mine is 192.168.2.106.
Then open the browser and enter your mainboard ip:7860. For example, I would enter 192.168.2.106:7860, and then I can enter the webui.
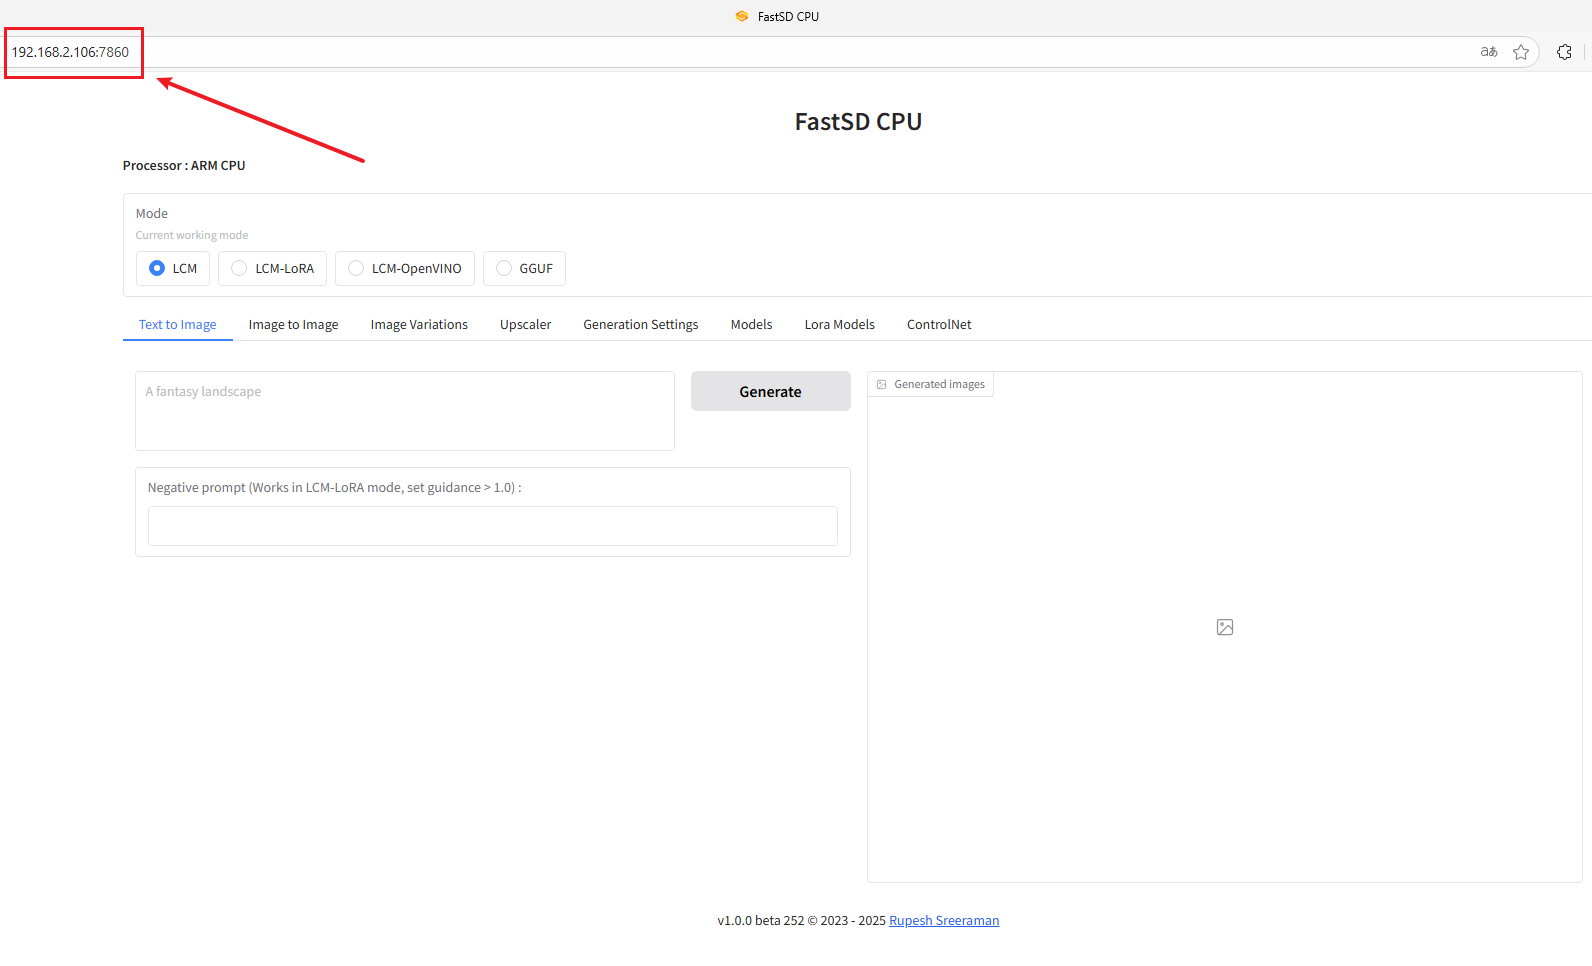
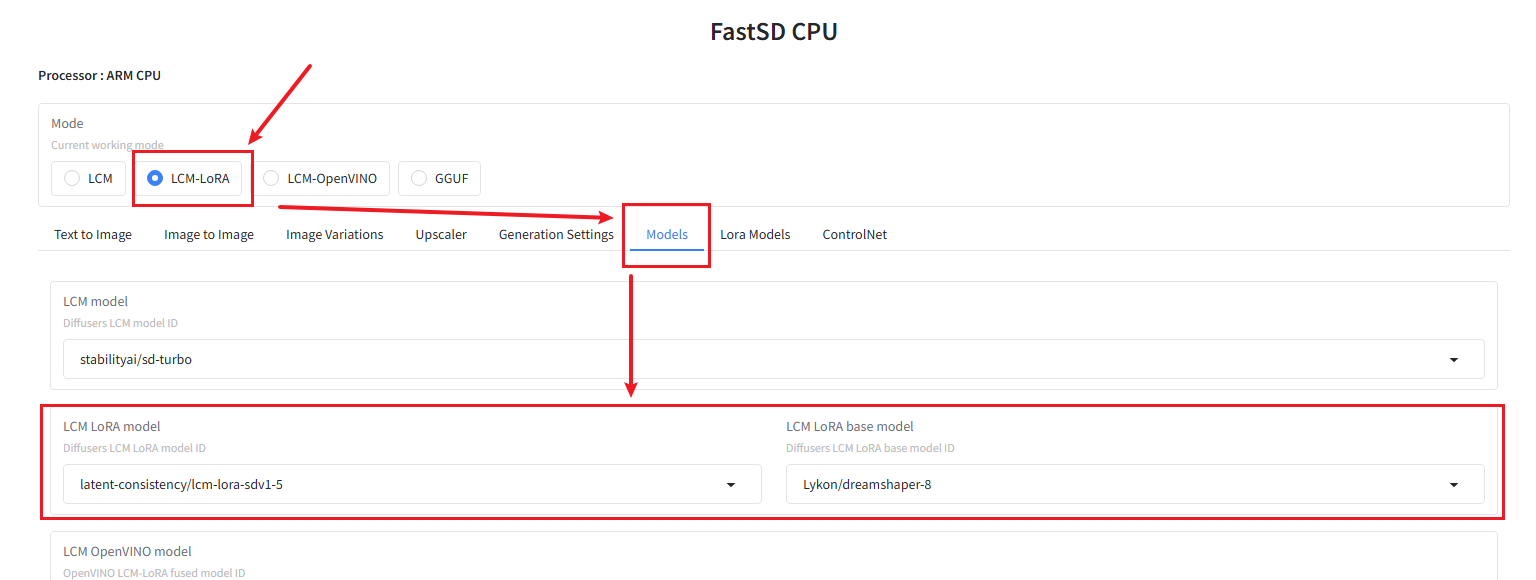
Next, click LCM-LoRA; this model uses relatively little memory. If you want to use other models, you can explore them yourself.
Then click Models, and you can see the model settings of LCM LoRA. You can change to the model you want, or you can choose the default as I did.
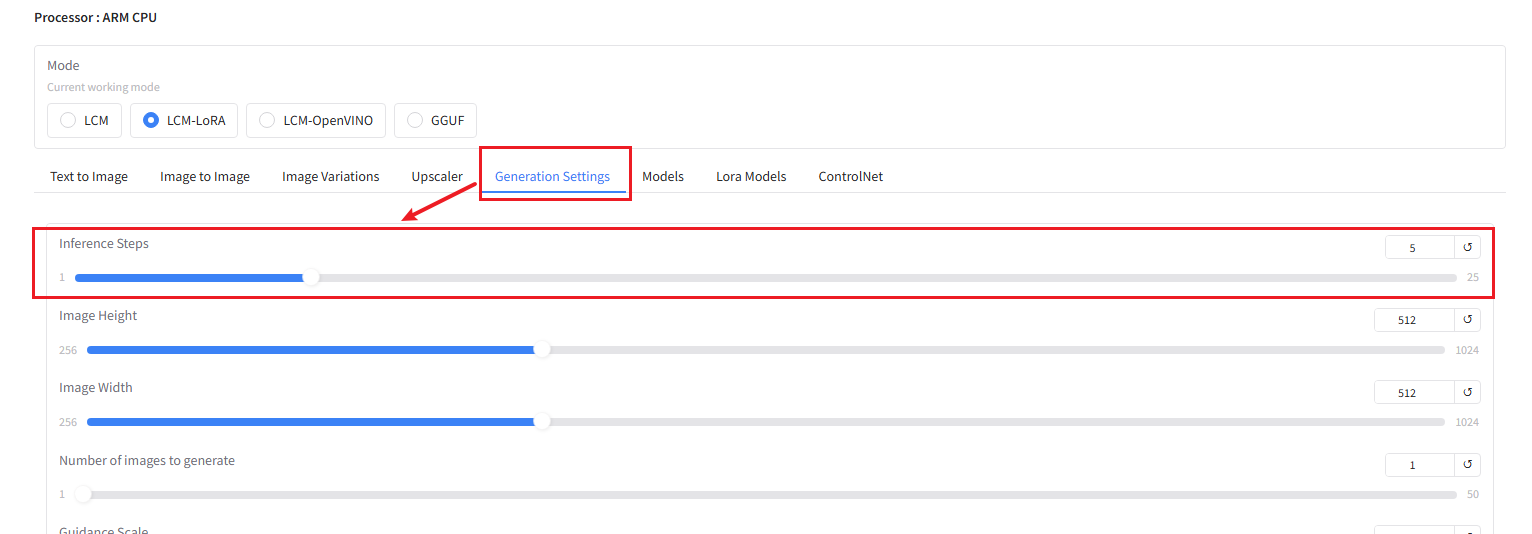
Next, click Generation Settings and increase the Inference Steps inside; this can improve the quality of the generated images. Here I set it to 5.
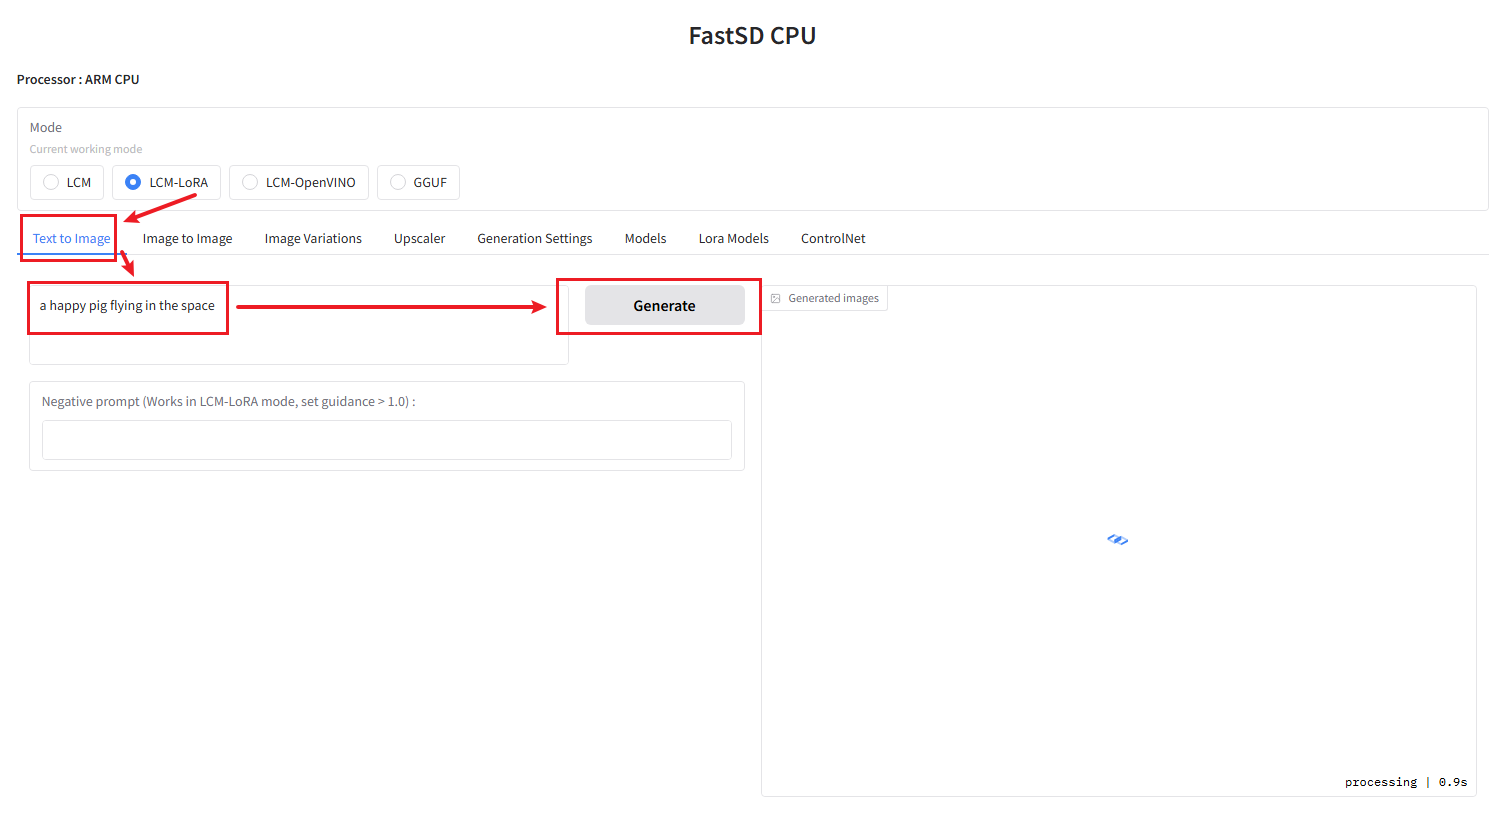
Then go back to our Text to Image, enter the content we want to generate in the dialog box, and then press Generate to start generating the image.
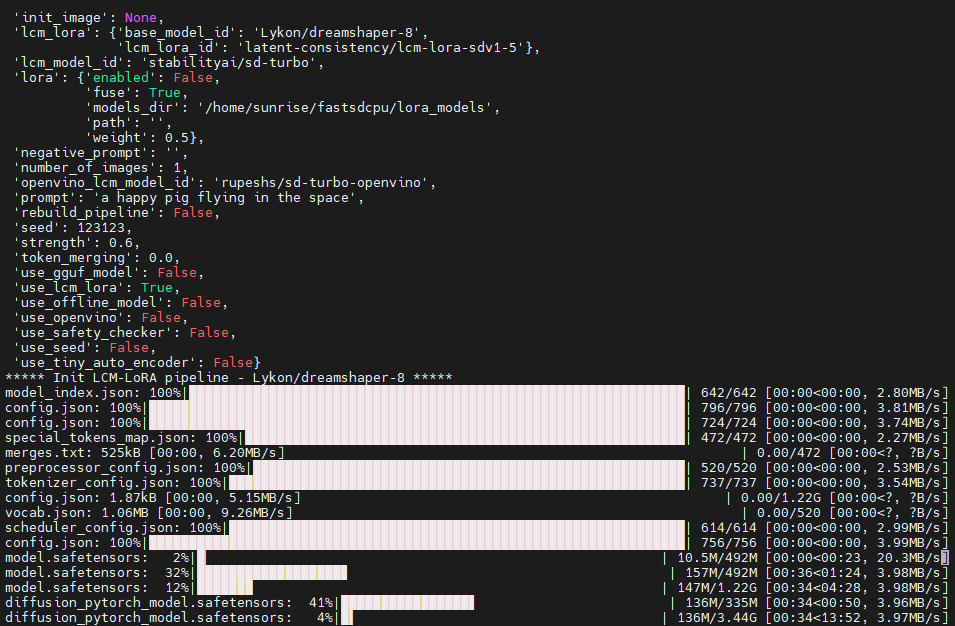
If you are using it for the first time, the model needs to be downloaded. You can see in the terminal that the model selected by default just now is being downloaded; after it finishes downloading, the text-to-image feature will start executing.
The generated result:
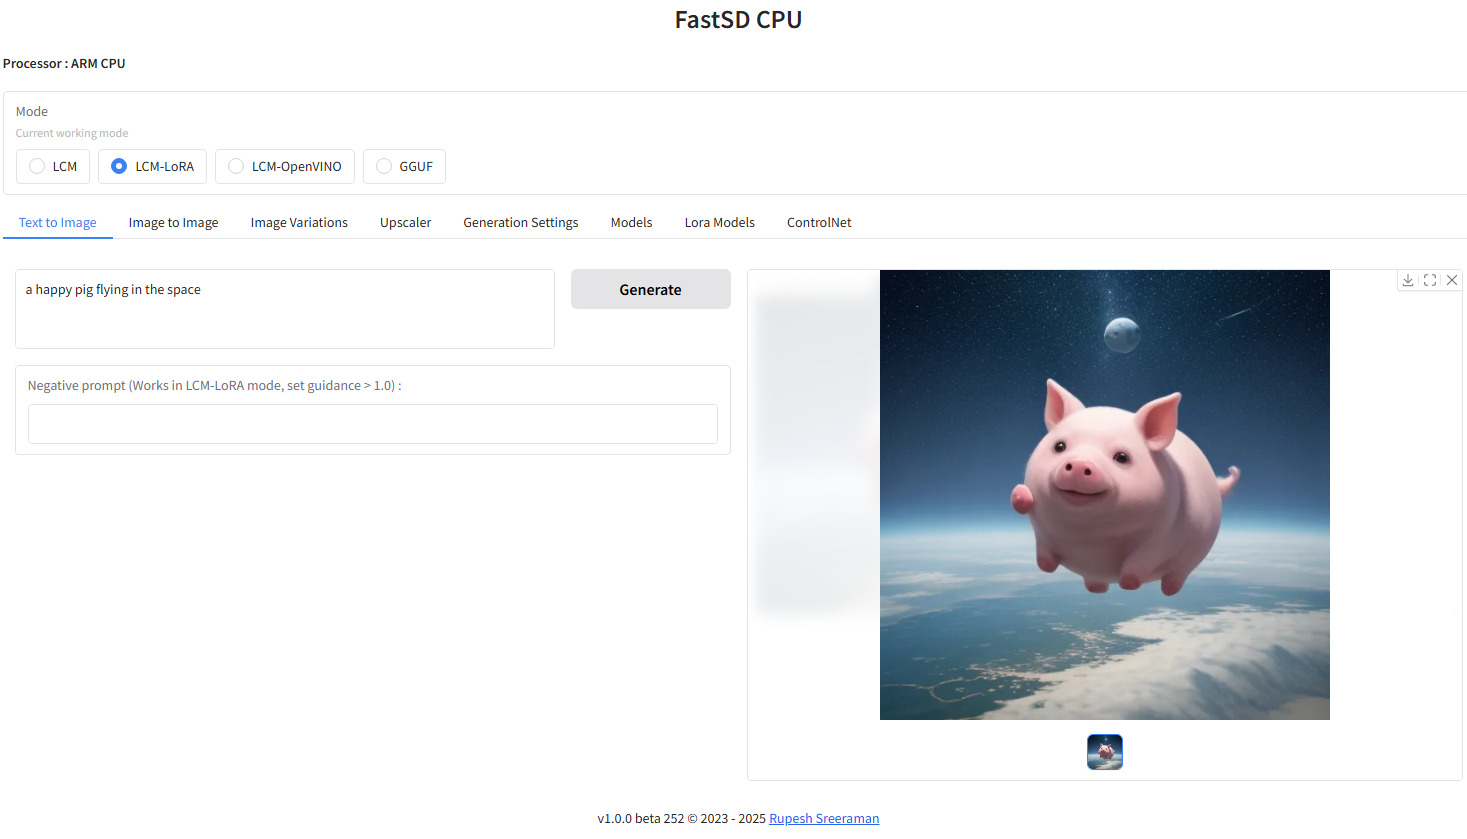
In actual testing, this project supports English better, and the generated images match the text more closely. It is recommended to use English descriptions to generate images.
2.4 Startup Method After Successful Deployment
xxxxxxxxxxcd fastsdcpu #Enter the fastsdcpu directorysource venv/bin/activate #Enter the virtual environment./start-webui.sh #Start the webui
After the webui starts successfully, enter your mainboard IP:7860 in the browser, and you can start the text-to-image feature.
3. Online Large Model Text-to-Image (Text/Voice Interaction)
The local FastSDCPU path is operated through a web page and does not support voice control; online text-to-image calls Tongyi Wanxiang through largemodel and can use text or voice input. Online and local are two independent operation modes; choose as needed.
3.1 Configuring Tongyi Wanxiang
First apply for a Tongyi Qianwen API Key according to the online large model basic tutorial, and confirm that the account has available quota. Open the model interface configuration file:
xxxxxxxxxxvim ~/yahboom_ws/src/largemodel/config/large_model_interface.yamlFind the Tongyi Qianwen configuration item, and fill in the API Key and the online text-to-image model. Text-to-image uses the tongyi_media_model parameter, not the qianwen_model used for visual question answering:
xxxxxxxxxxqianwen_api_key"Replace with your API-Key"tongyi_media_model"flux-schnell"After saving, open the main configuration file:
xxxxxxxxxxvim ~/yahboom_ws/src/largemodel/config/yahboom.yamlIn the existing model_service.ros__parameters parameter block, select the Tongyi platform; if llm_platform already exists, modify its value and do not add it again:
xxxxxxxxxxmodel_service ros__parameters llm_platform'tongyi'After saving both configuration files, restart largemodel for the settings to take effect. Online calling requires that the Jetson can access the Tongyi service, that the API Key is valid, and that the account has available quota. Do not disclose or show real API Keys in screenshots.
3.2 Online Text Input
Start text mode:
xxxxxxxxxxros2 launch largemodel largemodel_control.launch.py text_chat_mode:=trueIn another terminal that has already loaded the ROS 2 and workspace environments, run:
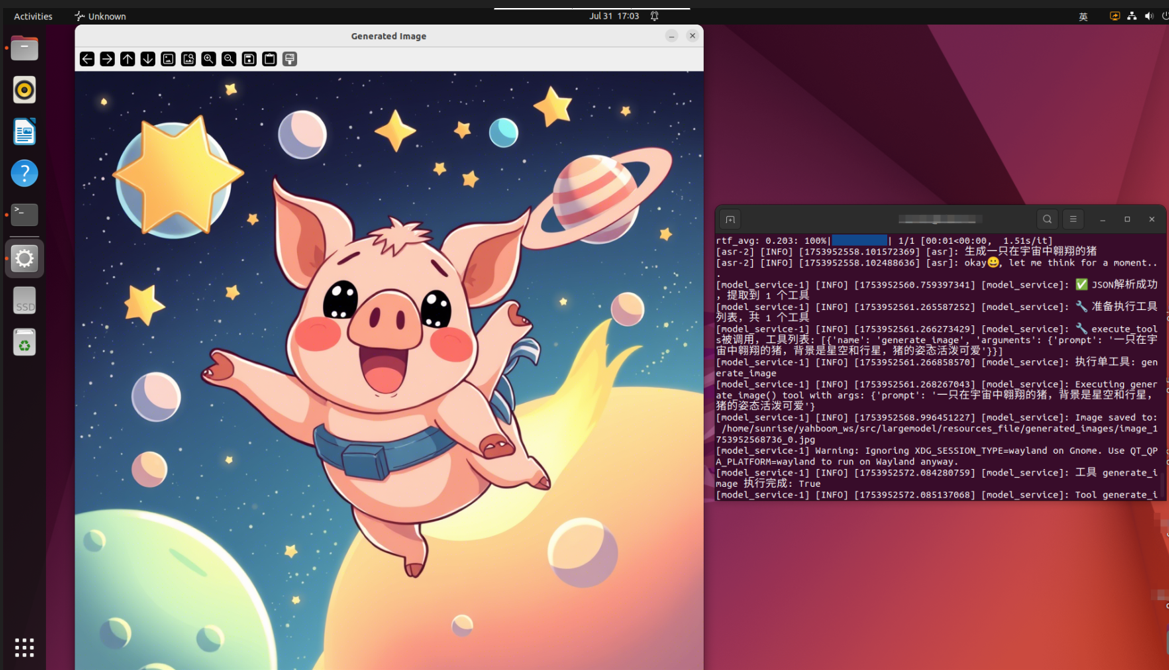
xxxxxxxxxxros2 run text_chat text_chatEnter, for example, "Generate a pig soaring in the universe". Observe the main program logs and the generated image that pops up; the generated file is saved in ~/yahboom_ws/src/largemodel/resources_file/generated_images.
3.3 Online Voice Input
Voice input and announcement are controlled independently by the ASR/TTS parameters. Configure the credentials according to the online voice ASR/TTS tutorials, and set in yahboom.yaml:
xxxxxxxxxxmodel_service ros__parameters llm_platform'tongyi' use_oline_asrTrue useolinettsTrueStart voice mode:
xxxxxxxxxxros2 launch largemodel largemodel_control.launch.pyAfter waking the device, say "Generate a pig soaring in the universe". Confirm that the terminal recognizes the voice request, that the model call succeeds, that the image pops up, and that the speaker announces the result. If you only need an online LLM with offline ASR or TTS, adjust the corresponding switches separately and configure the services according to the respective tutorials.
The running speed of local FastSDCPU is affected by the computing power of the Jetson mainboard; the generation time of online Tongyi Wanxiang depends on the network and the response of the cloud service.