Welcome to Jetson Orin NANO Developer Kit repository
04.Object embedding vector generation
Object Embedding Vector Generation
Object Embedding Vector Generation1. NVIDIA Official Application2. Example Goals and Processing Chains2.1 Person Feature Vector2.2 Retail Item Feature Vector3. Course Script Entry Points and Output4. Local Video Recognition4.1 Running4.2 Changing the Local Video4.3 Why the Retail Video Preview Plays Slowly Frame by Frame, but out.mp4 Is Smooth5. Real-Time Recognition with a USB Camera5.1 Direct Run5.2 Common Parameters5.3 Recognition Strategy and the Cause of Stuttering6. Real-Time Recognition with a CSI Camera6.1 Direct Run6.2 Common Parameters7. Stopping, Video Output, and Troubleshooting
Applicable environment: JetPack 7.2.1, Ubuntu 24.04, DeepStream 9.1, Jetson Orin Nano Super. The factory environment already has the MDX application, models, TensorRT engines, and course entry points ready. Daily study starts from Section 4; Section 1 only needs to be consulted for redeployment when the models, engines, or program are damaged
After the power mode is set to MAXN, running the example may pop up an over-current warning; just ignore it
1. NVIDIA Official Application
This example uses the NVIDIA DeepStream official deepstream-mdx-perception-app, whose source code is located at:
~/DeepStream/src/apps/tao_apps/apps/tao_others/deepstream-mdx-perception-appOfficial documentation: https://github.com/NVIDIA/DeepStream/tree/main/src/apps/tao_apps/apps/tao_others/deepstream-mdx-perception-app
The highlight of MDX is not just detection boxes, but attaching an embedding (feature vector) to each target. A feature vector is a string of numbers that can be used for subsequent matching of same-class targets, similar-target retrieval, cross-frame association, or database analysis.
The current course environment has completed application compilation, model download, and engine building. Do not casually delete the .engine files under models/; the engines are tied to the current Jetson, CUDA, and TensorRT environment, and after deletion the first run will rebuild them and take considerably longer.
2. Example Goals and Processing Chains
The course provides two MDX chains: person and retail item.
2.1 Person Feature Vector
xxxxxxxxxxPeopleNet Transformer person detection ↓NvDCF Tracker target tracking ↓ReIdentificationNet ↓Person embedding (256 dimensions)The person mode is usually faster than the retail mode; about 20 FPS was measured with CSI. The reason is that the person detection model is lighter, and person targets in the frame are generally fewer than product targets on shelves.
2.2 Retail Item Feature Vector
xxxxxxxxxxRetail DINO product detection ↓NvDCF Tracker target tracking ↓Retail Object Recognition ↓Product category + embedding (448 dimensions)The retail mode performs secondary recognition and extracts a feature vector for each detected product. The input of Retail DINO is 960×540, noticeably heavier than person detection, so real-time camera scenarios require a dedicated low-latency strategy.
3. Course Script Entry Points and Output
The current unified launch script is located at ~/DeepStream/deepstream-shell-demo/:
xxxxxxxxxxcd ~/DeepStream/deepstream-shell-demo| Input Source | Person Mode | Retail Mode |
|---|---|---|
| Local video | ./run_video.sh mdx --people | ./run_video.sh mdx --retail |
| USB camera | ./run_usb.sh mdx --people | ./run_usb.sh mdx --retail |
| CSI camera | ./run_csi.sh mdx --people | ./run_csi.sh mdx --retail |
All three entry points display a window on the Jetson local desktop or the VNC desktop. Embeddings are written as JSONL by default; each line corresponds to one target's detection information and full feature vector:
| Mode | Default JSONL Output |
|---|---|
| Local video person | ~/DeepStream/src/apps/tao_apps/apps/tao_others/deepstream-mdx-perception-app/mdx_people_reid_embeddings.jsonl |
| Local video retail | ~/DeepStream/src/apps/tao_apps/apps/tao_others/deepstream-mdx-perception-app/mdx_retail_embeddings.jsonl |
| USB person / retail | mdx_people_usb_embeddings.jsonl / mdx_retail_usb_embeddings.jsonl |
| CSI person / retail | mdx_people_csi_embeddings.jsonl / mdx_retail_csi_embeddings.jsonl |
You can use --output to specify your own JSONL file, for example:
xxxxxxxxxxcd ~/DeepStream/deepstream-shell-demo./run_video.sh mdx --retail --output ~/mdx-result.jsonl4. Local Video Recognition
4.1 Running
xcd ~/DeepStream/deepstream-shell-demo
# Person feature vectors./run_video.sh mdx --people
# Retail product feature vectors./run_video.sh mdx --retail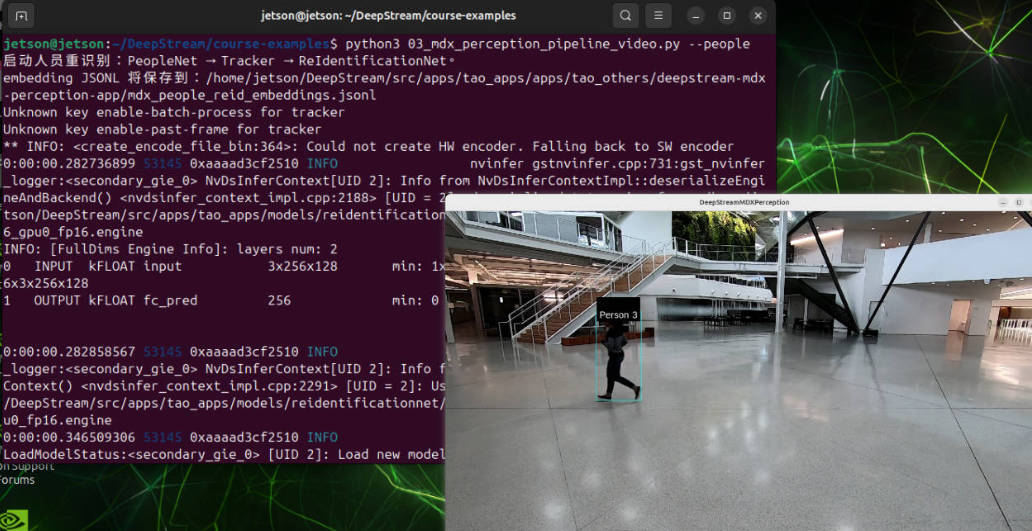
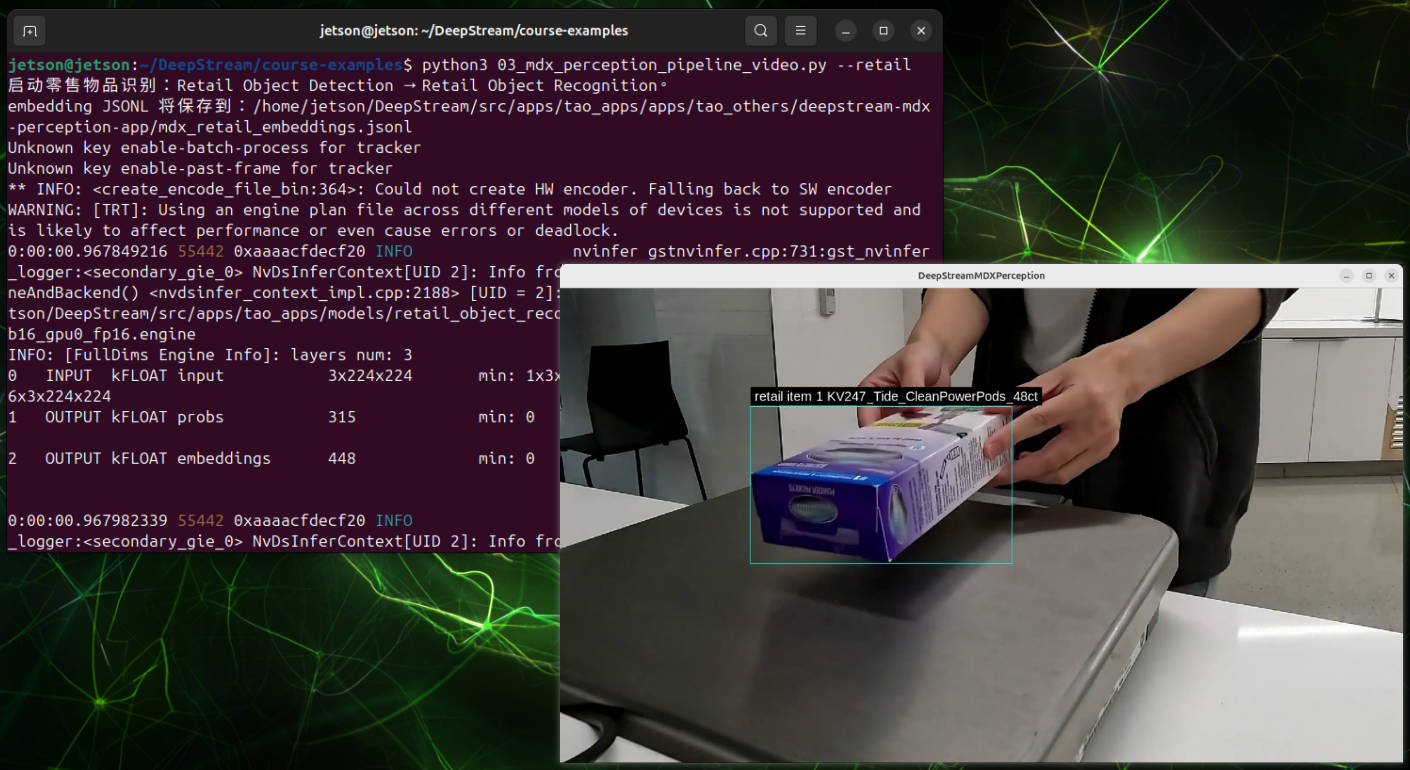
The video entry displays the detection results in real time and generates an out.mp4 with detection boxes in the MDX application directory:
xxxxxxxxxx~/DeepStream/src/apps/tao_apps/apps/tao_others/deepstream-mdx-perception-app/out.mp4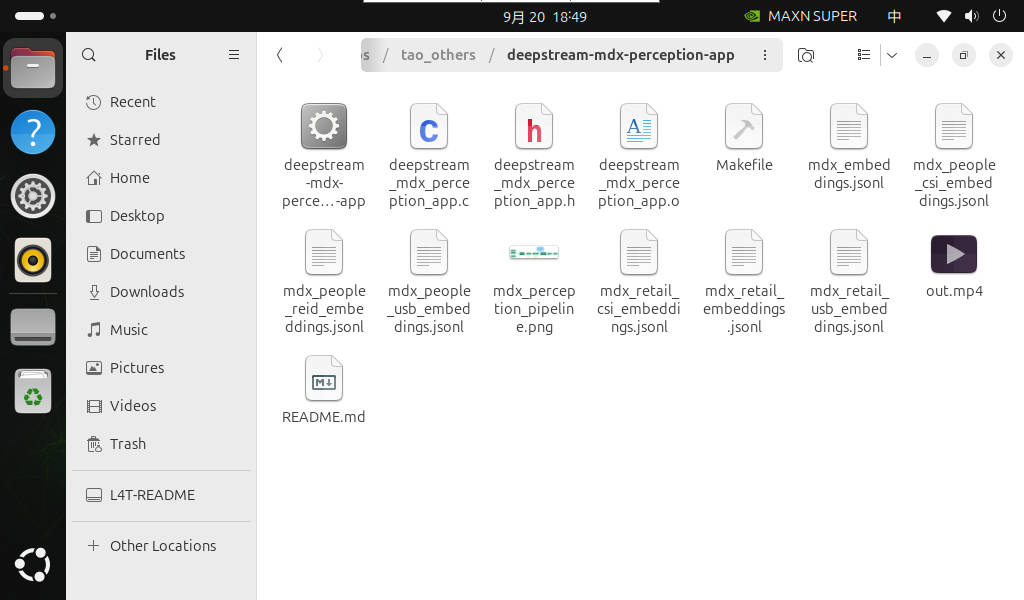
4.2 Changing the Local Video
For the person mode, modify:
xxxxxxxxxx~/DeepStream/src/apps/tao_apps/configs/app/sources.csvFor the retail mode, modify:
xxxxxxxxxx~/DeepStream/course-examples/common/sources_retail_object_visual.csvChange the video URI in the CSV to an absolute path on the Jetson:
xxxxxxxxxx1,3,file:///home/jetson/videos/test.mp4,1,0,0MP4/H.264 files are recommended. A Jetson path must be filled in here; a Windows path cannot be used.
4.3 Why the Retail Video Preview Plays Slowly Frame by Frame, but out.mp4 Is Smooth
The speed of the full retail model chain is lower than the frame rate of the original video. For example, when the source video is 30 FPS while Retail DINO plus secondary recognition can only process more slowly, the file source can be back-pressured by the downstream pipeline: the program reduces the file reading and advancement speed, waiting for the previous frame to finish inference.
xxxxxxxxxxLocal video file → inference slows down → file reading slows accordingly → frames processed one by oneTherefore the preview window looks like a slow frame-by-frame playback, but it is still processing the complete video frames in order. The output MP4 keeps the original video timestamps, and the player plays it on the normal timeline, so out.mp4 looks continuous and smooth.
This is not "automatically reducing the number of pushed frames" or actively dropping video frames; rather, the file input can wait for inference to complete. For a local video, the cost is a longer total processing time; for a real-time camera, the same approach cannot be used, because the camera does not pause its output.
When stopping a local video early, press Ctrl+C once and wait for the terminal to show the EOS finishing message before exiting. The program lets the MP4 muxer finish writing the moov index; do not press Ctrl+C repeatedly, close the terminal directly, or use kill -9, otherwise out.mp4 may become unplayable.
5. Real-Time Recognition with a USB Camera
5.1 Direct Run
xxxxxxxxxxcd ~/DeepStream/deepstream-shell-demo
./run_usb.sh mdx --people# or./run_usb.sh mdx --retail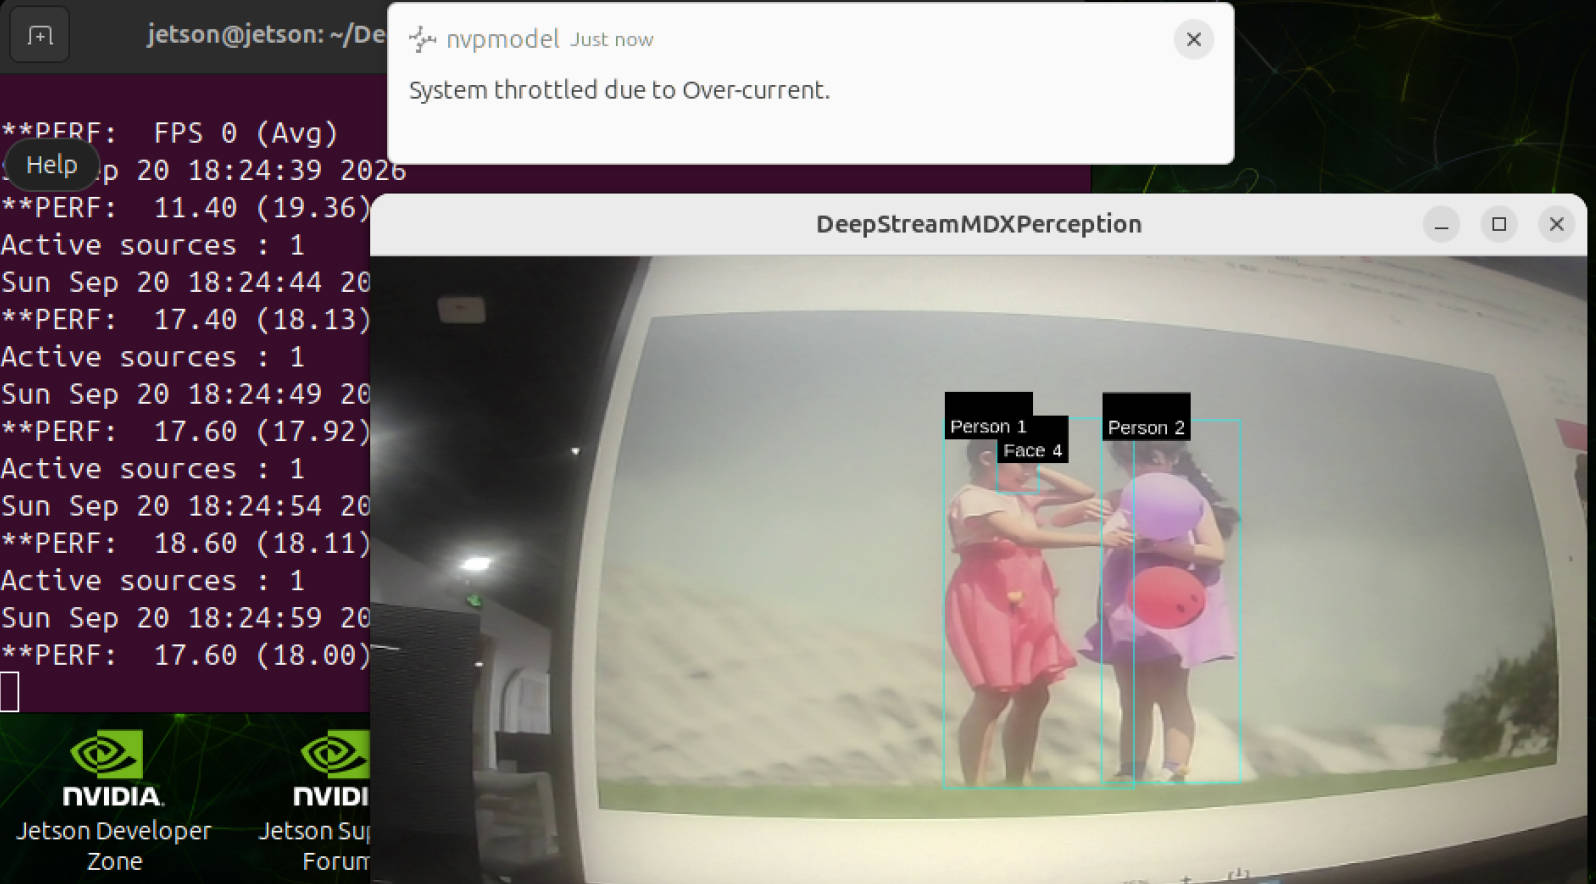
The current USB defaults are:
xxxxxxxxxx/dev/video0640×48030 FPS5.2 Common Parameters
Before running, you can check the formats, resolutions, and frame rates supported by the camera:
xxxxxxxxxxv4l2-ctl -d /dev/video0 --list-formats-ext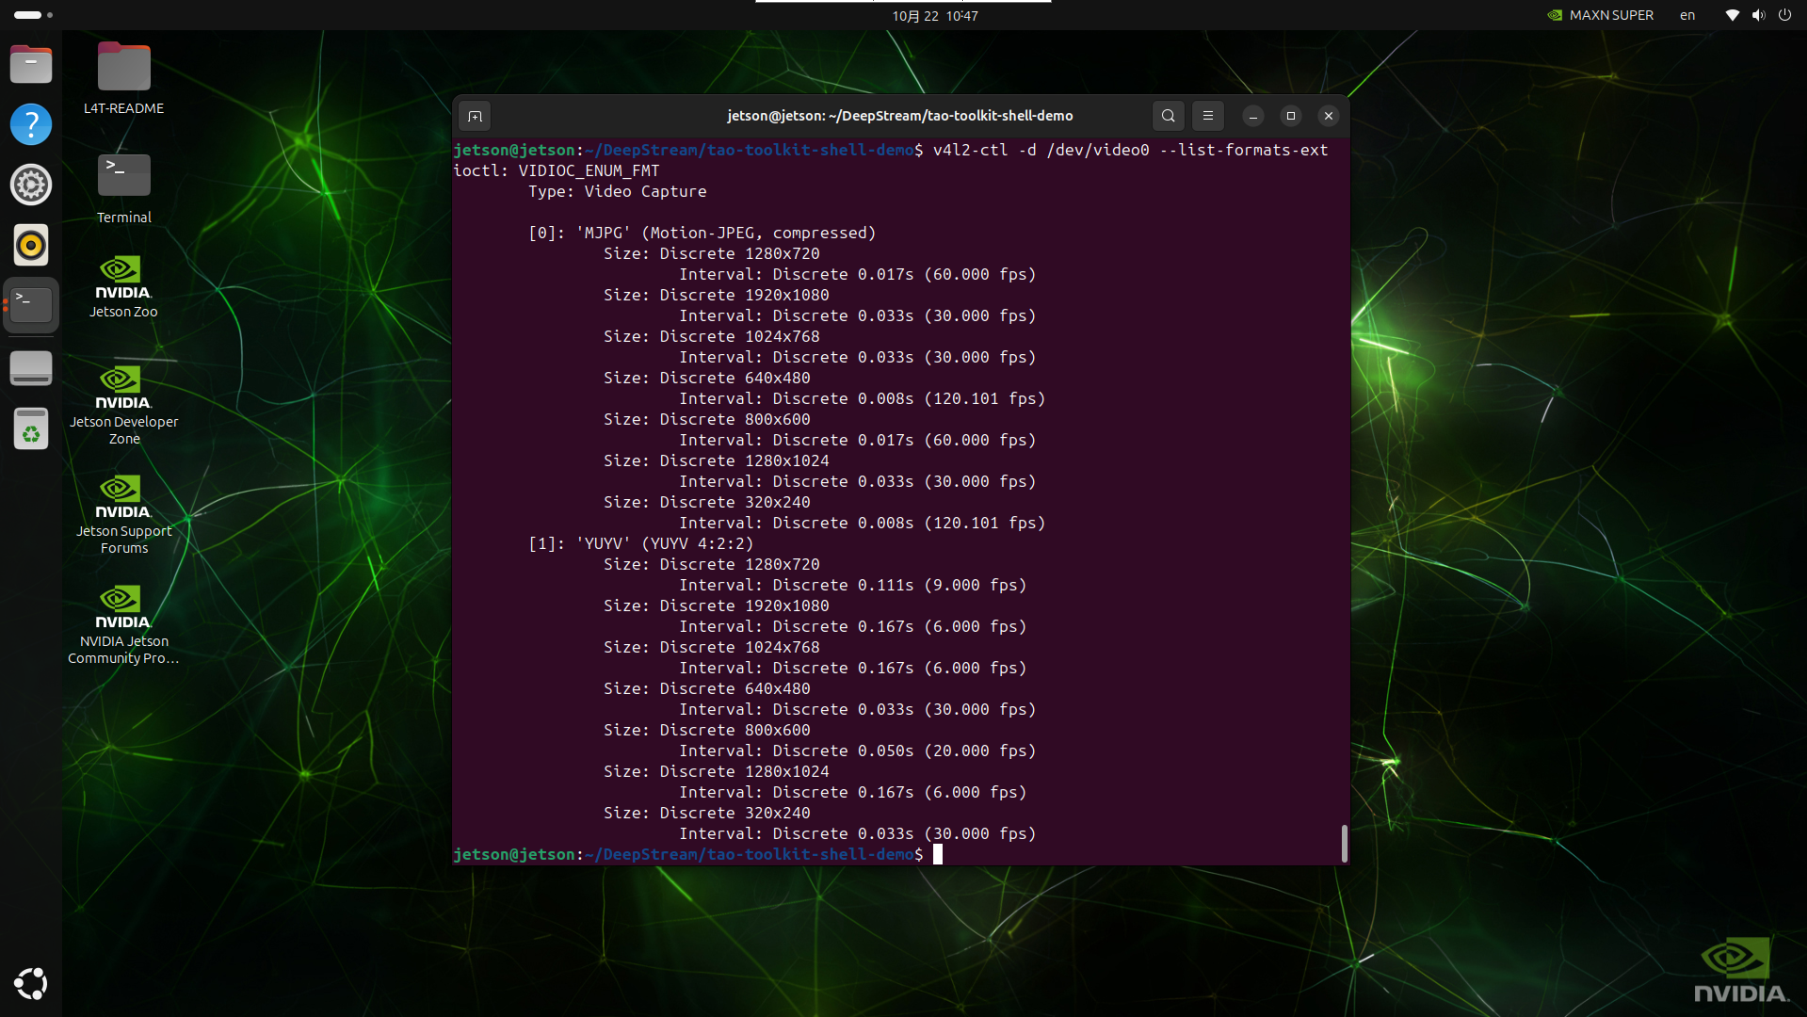
Note: the USB pipeline of object embedding vector generation is fixed to YUY2, so when choosing from the parameters below, select the YUY2 ones
xxxxxxxxxx# View all parameters./run_usb.sh mdx --help
# Use another video device./run_usb.sh mdx --people --device /dev/video1
# Choose among the supported configurations listed above; here 1280×720, 9 FPS is used./run_usb.sh mdx --people --width 1280 --height 720 --fps 9
5.3 Recognition Strategy and the Cause of Stuttering
The current setup no longer drops frames at the source, and the camera keeps the full 30 FPS input:
xxxxxxxxxxdrop-frame-interval=0However, the heavy inference is executed only every 6 frames:
xxxxxxxxxx# Retail DINO main detectioninterval5
# Retail Recognition and embeddinginterval5The actual structure is as follows:
xxxxxxxxxxCamera 30 FPS ↓Every 6 frames: Retail DINO + Recognition + embedding ↓Remaining frames: NvDCF Tracker continues the target boxes ↓OSD real-time displayThis does not remove MDX's embeddings: each execution of the secondary recognition still generates a 448-dimensional product feature vector; only the vector update frequency for the same product is about 5 FPS instead of recomputing every frame. The intermediate frames have their box positions maintained by the Tracker.
Note that this strategy can only mitigate the stuttering; it cannot guarantee that the preview is as smooth as the original camera. The reason is that the current preview is still inside the same DeepStream inference pipeline: camera frames must pass through the Tracker, the OSD, and the interval-executed DINO/Recognition before reaching the preview window. When there are many products, targets appear frequently, or the Tracker metadata is insufficient, the later processing may still block the earlier display.
Therefore, the actual effect of the current USB retail mode is: the input stays at 30 FPS, the heavy model runs about once every 6 frames, and the preview frame rate is much higher than per-frame inference, but brief pauses or delayed detection box updates may still occur. The purpose of interval: 5 is to reduce repeated inference, not to decouple the preview from inference; nor does it make Retail DINO reach the camera's 30 FPS.
If you need "the original frame always at 30 FPS while Retail embeddings are kept in the background", the camera feed must be split into an independent preview branch and an inference branch, with the latest detection results asynchronously overlaid onto the preview. The current course entry does not yet adopt this dual-branch structure.
gstnvtracker: Unable to acquire a user meta buffermay appear in the current configuration. Previously, increasing the Tracker'suser-meta-pool-sizecaused a noticeable drop in retail performance, so the current setup prioritizes actual preview smoothness, and adjusting this parameter on your own is not recommended.
If the USB camera only outputs MJPEG and the current generic V4L2 configuration cannot capture the stream, a dedicated adaptation with jpegparse → nvv4l2decoder → nvvideoconvert → NVMM needs to be added; first confirm the camera format with the command below:
xxxxxxxxxxv4l2-ctl -d /dev/video0 --list-formats-ext6. Real-Time Recognition with a CSI Camera
6.1 Direct Run
xxxxxxxxxxcd ~/DeepStream/deepstream-shell-demo
./run_csi.sh mdx --people# or./run_csi.sh mdx --retail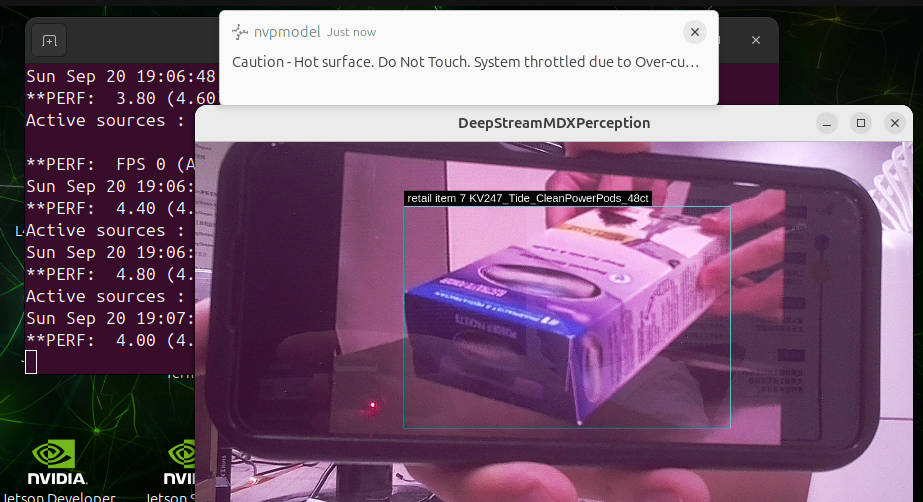
CSI uses the Jetson native Argus camera source:
xxxxxxxxxxsensor-id=01280×72030 FPSThe CSI camera of the current device is imx219. The person mode has been measured at about 20 FPS; the retail mode keeps the embeddings and is configured for low-latency display. Before running, confirm that no other program is occupying the CSI camera.
6.2 Common Parameters
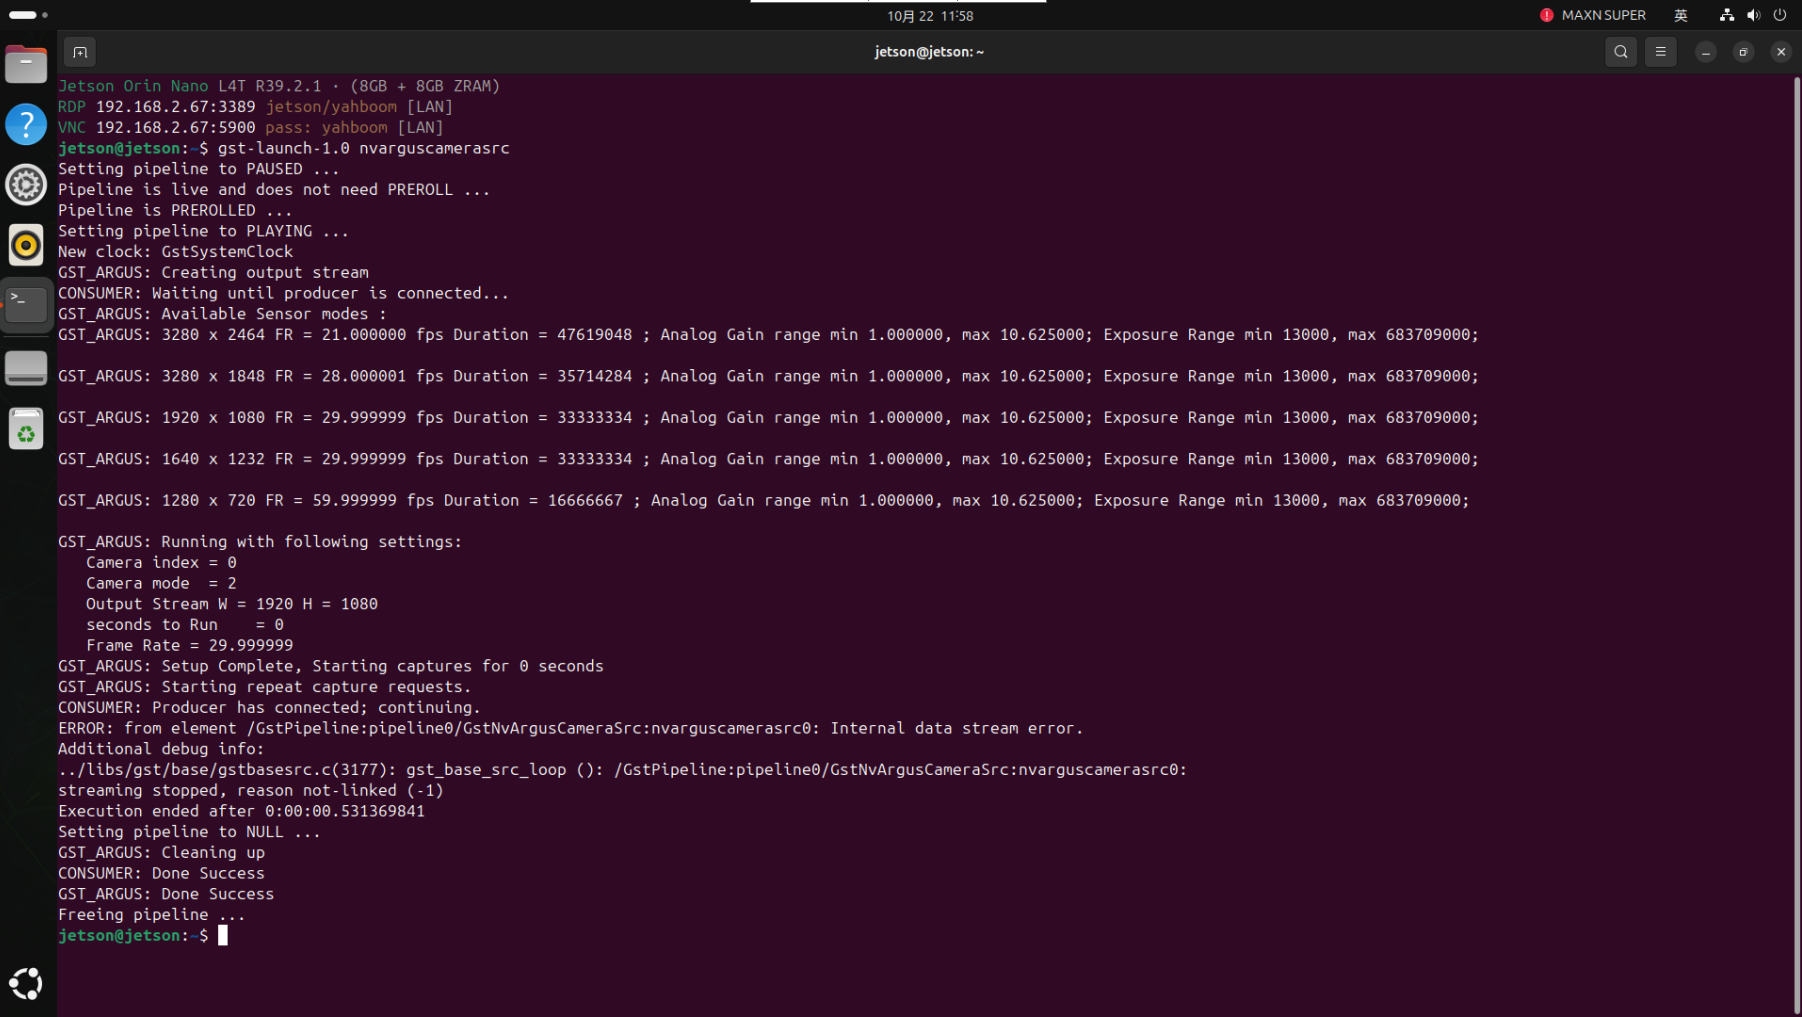
Before running, you can check the formats, resolutions, and frame rates supported by the camera; this needs to be run in a graphical interface:
xxxxxxxxxxgst-launch-1.0 nvarguscamerasrc
xxxxxxxxxx# View all parameters./run_csi.sh mdx --people --help
# Use the second CSI camera./run_csi.sh mdx --people --cn --sensor-id 1
# Adjust the input size and frame rate./run_csi.sh mdx --people --width 1920 --height 1080 --fps 30
7. Stopping, Video Output, and Troubleshooting
The real-time USB/CSI modes by default only preview and write JSONL, without generating out.mp4. The local video mode generates out.mp4.
When stopping a real-time camera or file task:
Return to the terminal where the launch command was run.
Press
Ctrl+Conly once.Wait for
Received EOS. Exiting ...orApp run successfulbefore closing the terminal.
| Symptom | Priority Checks |
|---|---|
| No JSONL records in the person mode | Whether persons actually appear in the frame; no embeddings are generated when there are no detection targets. |
| The retail preview still has noticeable latency | Confirm the USB-specific configuration is used and both PGIE/SGIE are interval: 5; do not change back to per-frame inference. |
| Product boxes update slowly | Detection currently runs once every 6 frames, which is a normal trade-off of the low-latency strategy; interval can be lowered to increase the update frequency, but the preview frame rate will drop. |
| USB shows no picture | Run v4l2-ctl -d /dev/video0 --list-formats-ext and check the device number, output format, and whether it is occupied. |
| CSI shows no picture | First confirm the basic CSI example works, then check sensor-id=0 and nvargus-daemon. |
out.mp4 cannot be played | Check whether the program was force-terminated before finishing its EOS wrap-up; run again and wait for a normal end. |