Welcome to Jetson Orin NANO Developer Kit repository
05.Pose recognition
DeepStream Human Pose Recognition and Action Classification
DeepStream Human Pose Recognition and Action Classification1. Example Goal and Processing Chain2. NVIDIA Official Deployment Method (For Environment Restoration Reference Only)3. Course Script Entry Points and Output Rules4. Local Dual-Video Pose Classification4.1 Running4.2 Changing the Videos4.3 Video Output5. Real-Time Pose Classification with a USB Camera5.1 Direct Run5.2 Common Parameters6. Real-Time Pose Classification with a CSI Camera6.1 Direct Run6.2 Common Parameters7. Notes on the Current Implementation8. Stopping and Troubleshooting
Applicable environment: JetPack 7.2.1, Ubuntu 24.04, DeepStream 9.1, CUDA 13.2, Jetson Orin Nano Super. The factory system has already completed model download, TensorRT engine building, application compilation, and course entry deployment. For normal study, run directly from Section 3; consult Section 2 to restore the environment only when the program, models, or engines are missing.
After the power mode is set to MAXN, running the example may pop up an over-current warning; just ignore it
1. Example Goal and Processing Chain
Based on NVIDIA's official deepstream-pose-classification, this example recognizes persons in the frame, draws the human skeleton, and determines the action category from continuous motion.
The complete processing chain is as follows:
Input video or camera ↓PeopleNet: detect persons ↓NvDCF Tracker: assign and maintain track IDs for persons ↓BodyPose3DNet: output 34 2D/3D body keypoints ↓Pose post-processing: draw the skeleton ↓Temporal preprocessing: accumulate 300 frames of keypoints for the same track ID ↓PoseClassificationNet (ST-GCN): output the action categoryThe red boxes in the frame are person detection boxes, and the colored line segments and dots are the human skeleton. Text inside the box such as person 3 walking means: person 3 is the Tracker's target ID, and walking is the current action classification result for that target.
This example is not "single-image classification". The input to the action classification model is temporal data of 300 consecutive frames with 34 keypoints per frame. Therefore, when a person first appears, while the keypoint sequence has not yet accumulated enough data, there may only be a person box and a skeleton at first, and the stable action label is displayed later. With 30 FPS input, 300 frames correspond to about 10 seconds of action history.
2. NVIDIA Official Deployment Method (For Environment Restoration Reference Only)
Official source code and README: https://github.com/NVIDIA/DeepStream/tree/main/src/apps/tao_apps/apps/tao_others/deepstream-pose-classification
Source directory:
xxxxxxxxxx~/DeepStream/src/apps/tao_apps/apps/tao_others/deepstream-pose-classificationThe first environment restoration requires Eigen, the CUDA NVTX headers, and the PeopleNet, BodyPose3DNet, PoseClassificationNet, and ReIdentificationNet models. The current system corresponds to CUDA 13.2, and the compile command must specify the version explicitly:
x# Create only when /usr/include/Eigen does not exist; the symlink persists and survives rebootssudo ln -sf /usr/include/eigen3/Eigen /usr/include/Eigen
# Install only when nvtx3/nvToolsExt.h is missingsudo apt install cuda-nvtx-13-2
cd ~/DeepStream/src/apps/tao_apps/apps/tao_others/deepstream-pose-classificationmake CUDA_VER=13.2On the first run, DeepStream may need to build engines according to the local GPU, CUDA, and TensorRT versions, which takes considerably longer. The current course environment has already generated and verified the required engines; do not casually delete the .engine files under the models/ directory.
3. Course Script Entry Points and Output Rules
The current unified launch script is located at ~/DeepStream/deepstream-shell-demo/:
xxxxxxxxxxcd ~/DeepStream/deepstream-shell-demo| Input Source | Launch Command |
|---|---|
| Local dual video | ./run_video.sh pose |
| USB camera | ./run_usb.sh pose |
| CSI camera | ./run_csi.sh pose |
The real-time window is displayed on the Jetson local desktop or the VNC desktop. All three entry points use the same PeopleNet → Tracker → BodyPose3DNet → PoseClassificationNet model chain; only the input source and the output method differ.
When stopping early in all modes, press Ctrl+C only once, then wait for the terminal to show End of stream and exit automatically. Do not press Ctrl+C repeatedly, close the terminal directly, or use kill -9.
4. Local Dual-Video Pose Classification
4.1 Running
xxxxxxxxxxcd ~/DeepStream/deepstream-shell-demo./run_video.sh pose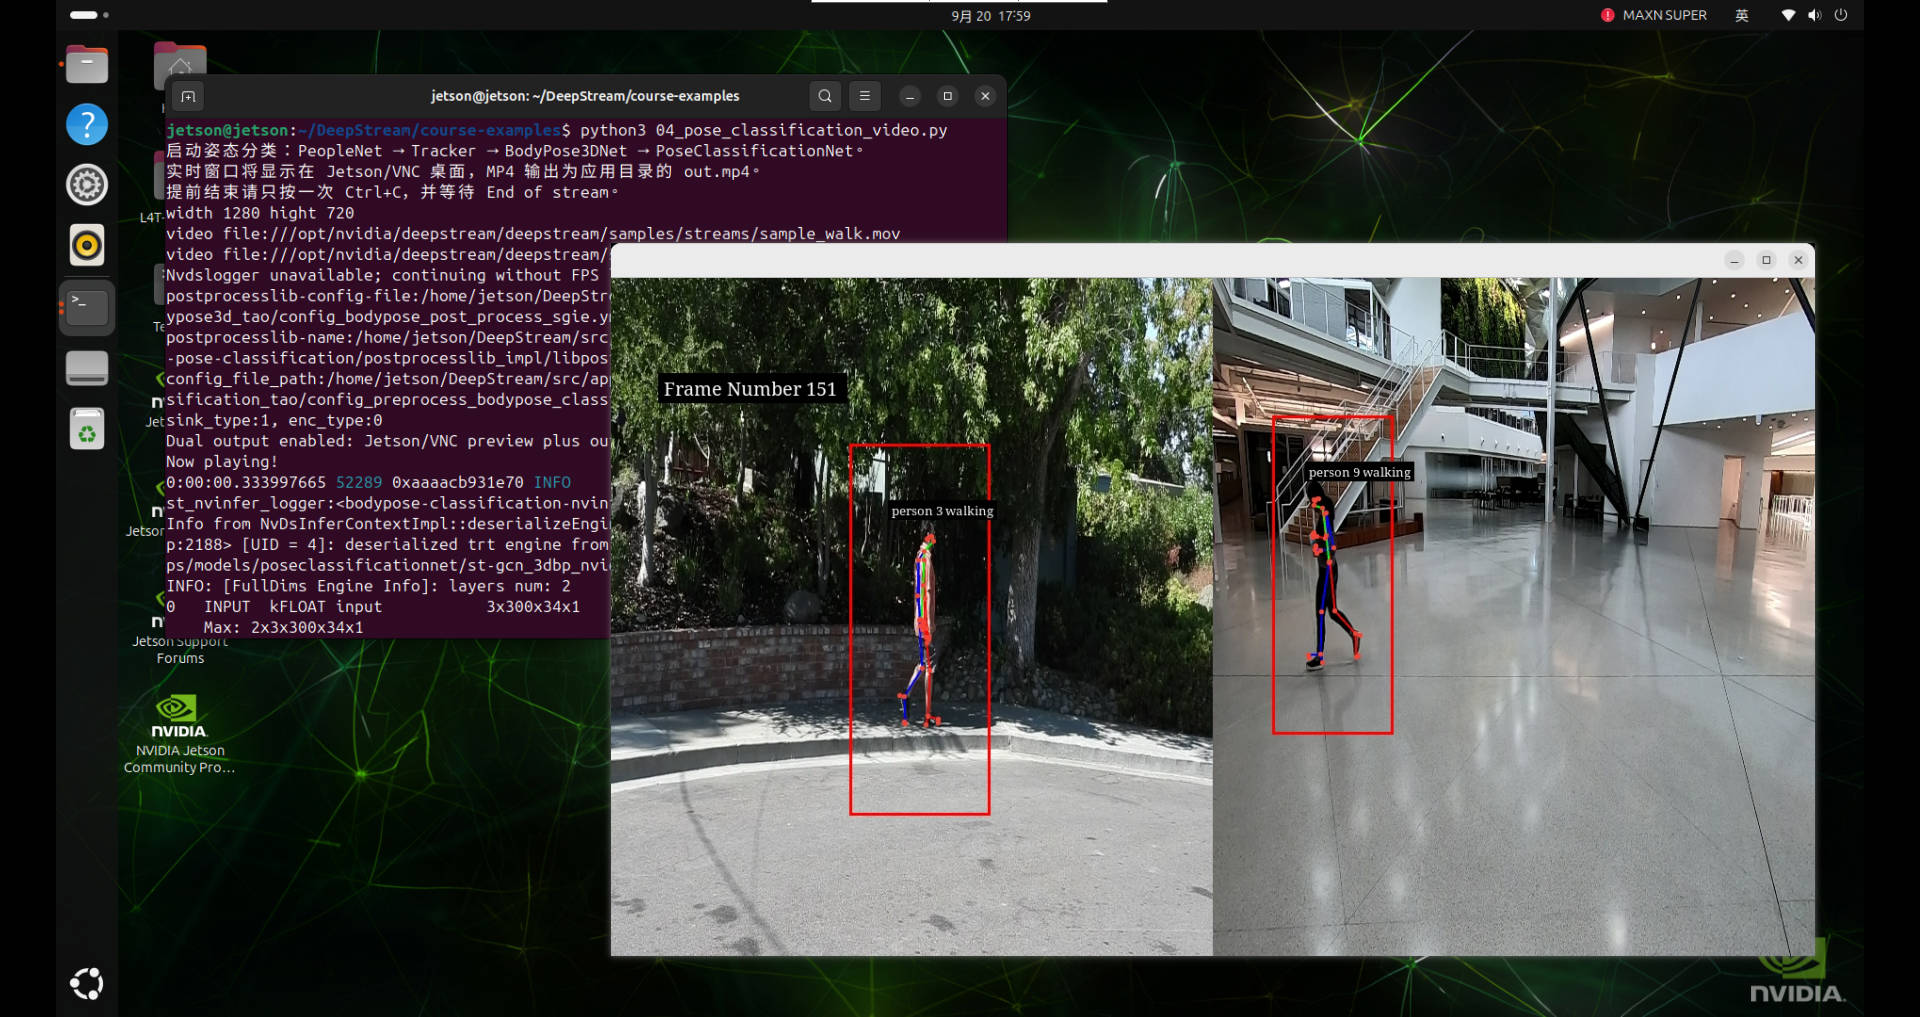
The current course YAML configures two inputs:
xxxxxxxxxxsource-list listfile///opt/nvidia/deepstream/deepstream/samples/streams/sample_walk.mov;file///opt/nvidia/deepstream/deepstream/samples/streams/sample_run.movTherefore the preview window has one video on each side, each independently performing person detection, skeleton drawing, and action classification; they are not repeated displays of the same frame. The Tiler combines the two streams into one window for simultaneous observation.
4.2 Changing the Videos
Edit the source-list.list of the following file:
xxxxxxxxxx~/DeepStream/src/apps/tao_apps/configs/app/deepstream_pose_classification_config.yamlThe two videos are separated by a semicolon, for example:
xxxxxxxxxxsource-list listfile///home/jetson/videos/a.mp4;file///home/jetson/videos/b.mp4When only one URI is kept, the program switches to single-stream file input. The path must be an absolute path on the Jetson; MP4/H.264 material that DeepStream can decode easily is recommended.
4.3 Video Output
The video mode previews in real time and simultaneously saves a complete MP4 with detection boxes, skeletons, and action labels:
xxxxxxxxxx~/DeepStream/src/apps/tao_apps/apps/tao_others/deepstream-pose-classification/out.mp4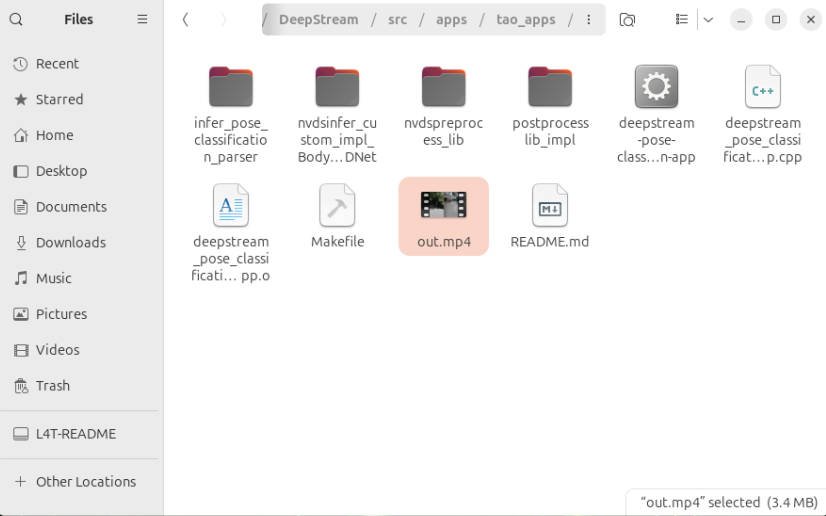
The current implementation sends EOS at the first Ctrl+C and exits after the MP4 index has been written. Only after normal playback ends or the EOS wrap-up completes is out.mp4 a complete, playable file.
5. Real-Time Pose Classification with a USB Camera
5.1 Direct Run
xxxxxxxxxxcd ~/DeepStream/deepstream-shell-demo./run_usb.sh pose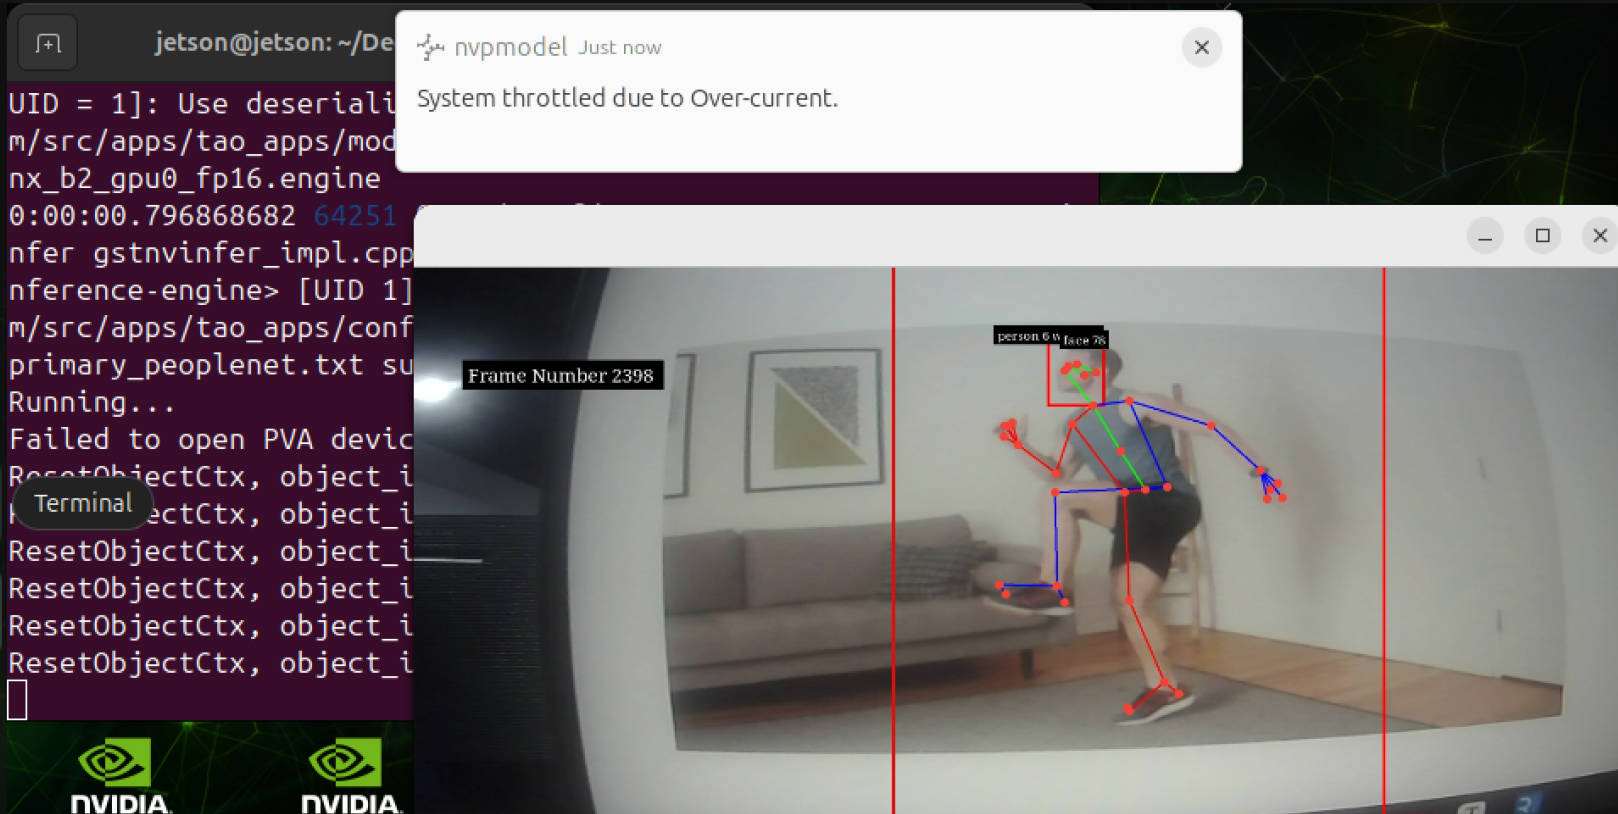
The default parameters fit the commonly used USB UVC camera:
xxxxxxxxxxDevice: /dev/video0Format: YUY2Resolution: 640×480Frame rate: 30 FPSThe USB mode only previews in real time, forces the display sink, and does not create or overwrite the out.mp4 in the pose classification application directory.
5.2 Common Parameters
Before running, you can check the formats, resolutions, and frame rates supported by the camera:
xxxxxxxxxxv4l2-ctl -d /dev/video0 --list-formats-ext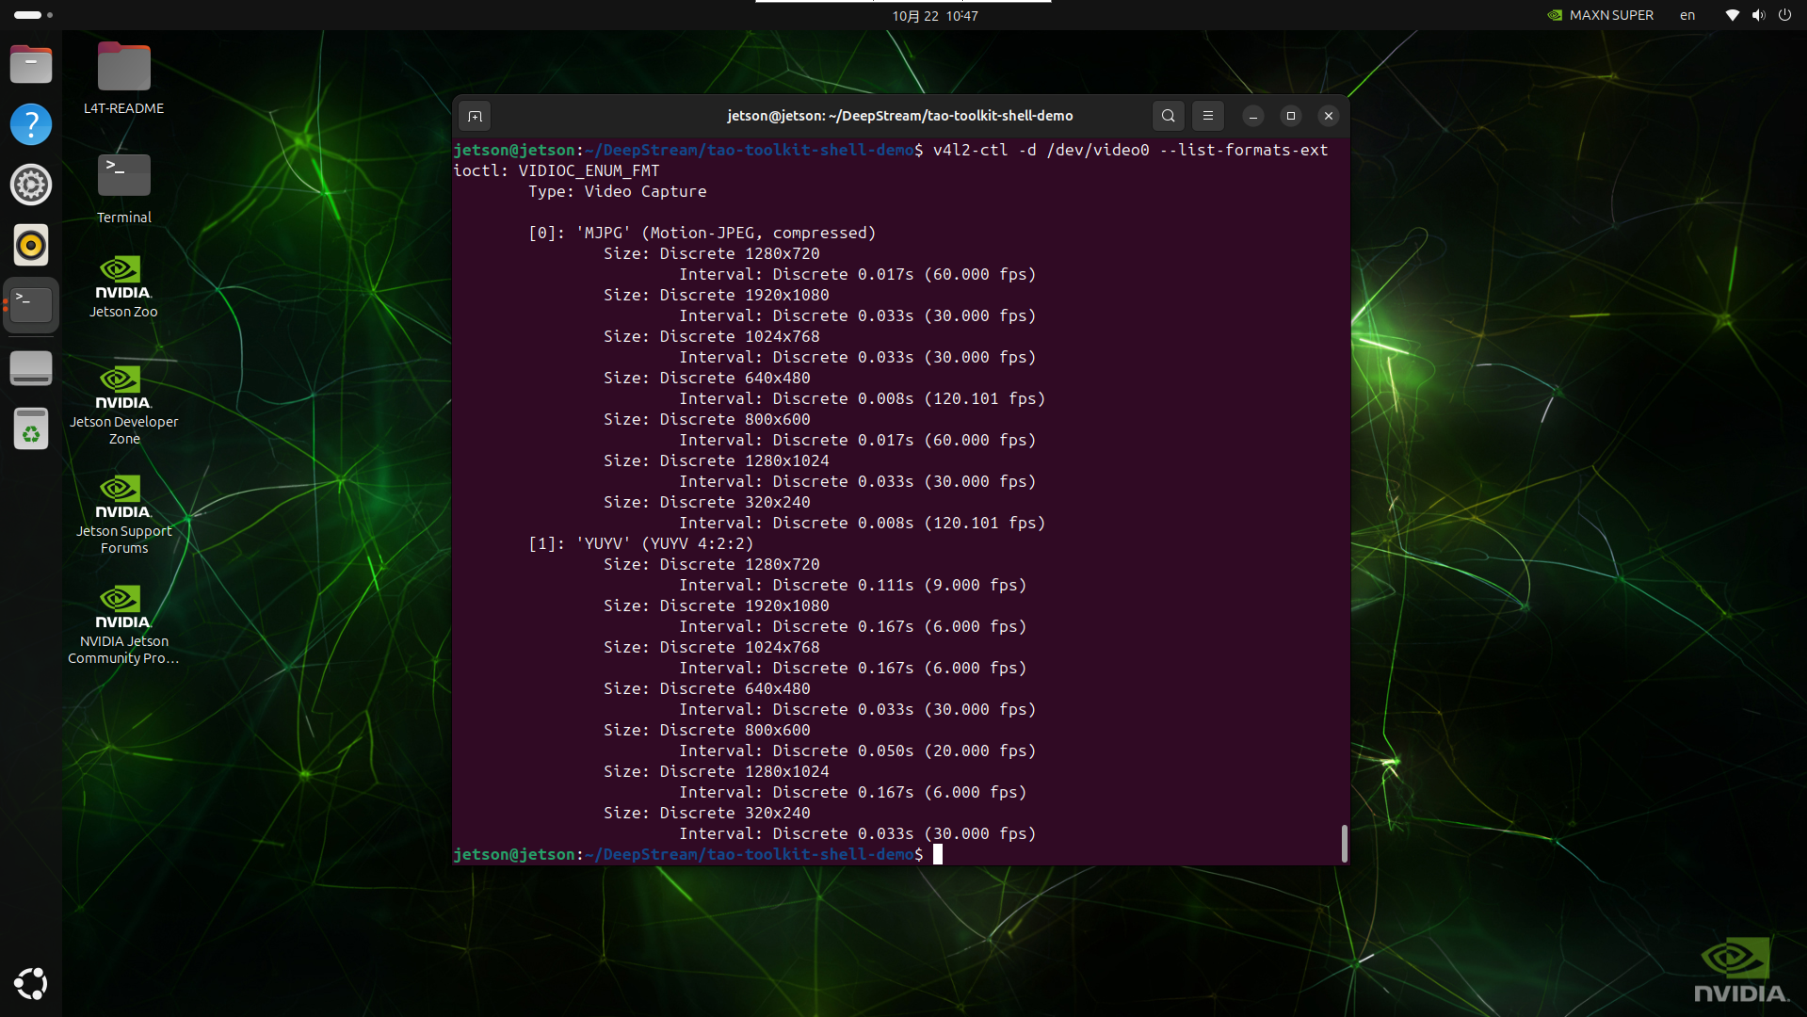
xxxxxxxxxx# View all parameters./run_usb.sh pose --help
# Use another video device./run_usb.sh pose --device /dev/video1
# Choose among the supported configurations listed above; here 1280×720, 9 FPS is used./run_usb.sh pose --width 1280 --height 720 --fps 9
The current course entry uses the raw YUY2 format by default. If the camera only supports MJPEG, first confirm the actual format, then add a dedicated decoding adaptation for MJPEG;
6. Real-Time Pose Classification with a CSI Camera
6.1 Direct Run
xxxxxxxxxxcd ~/DeepStream/deepstream-shell-demo./run_csi.sh pose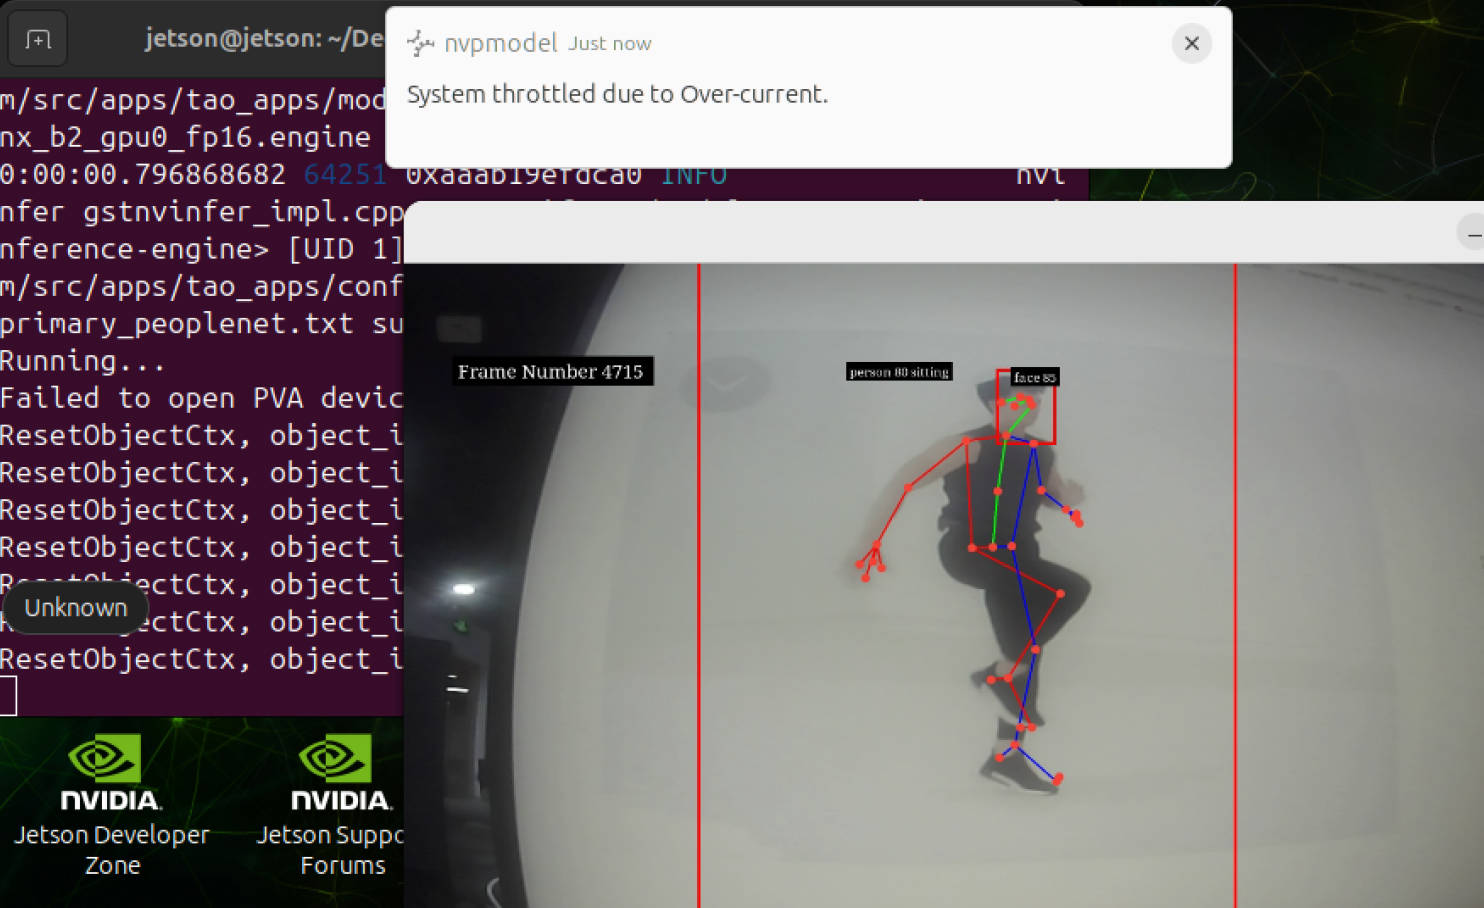
The CSI mode uses the Jetson native nvarguscamerasrc, with the default parameters:
xxxxxxxxxxsensor-id: 0Resolution: 1280×720Frame rate: 30 FPS6.2 Common Parameters
Before running, you can check the formats, resolutions, and frame rates supported by the camera; this needs to be run in a graphical interface:
xxxxxxxxxxgst-launch-1.0 nvarguscamerasrc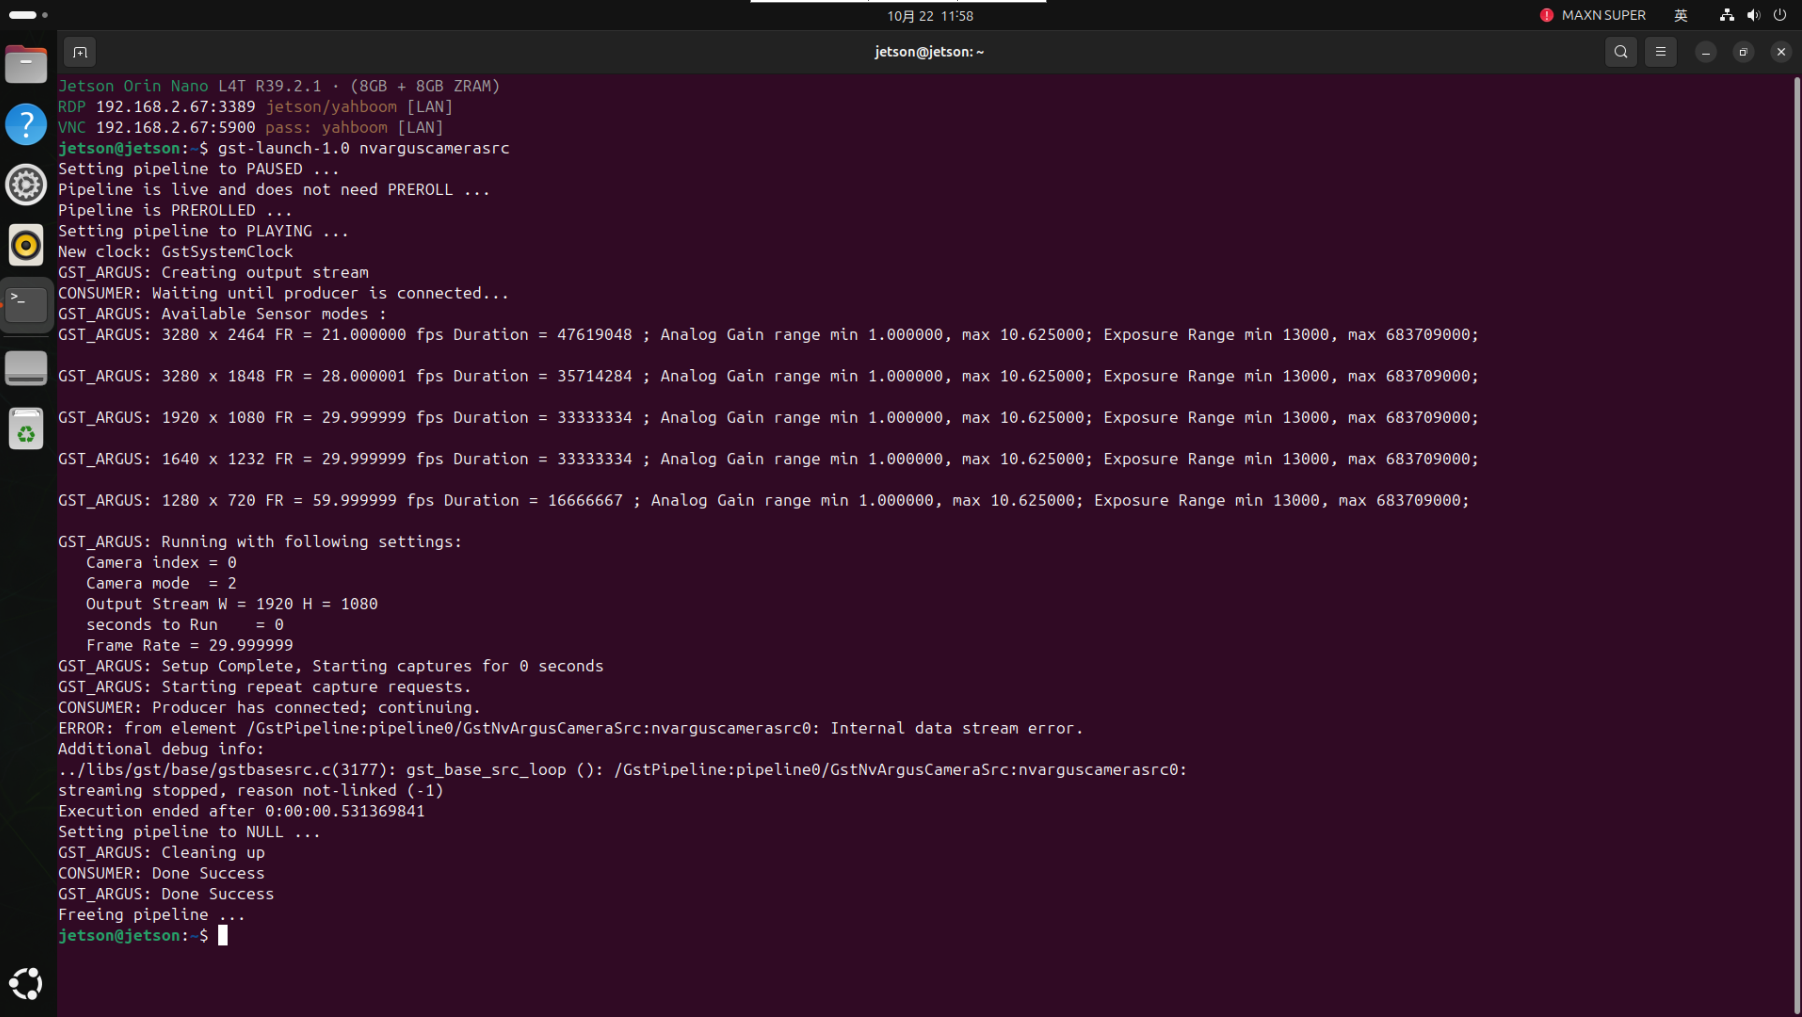
xxxxxxxxxx# View all parameters./run_csi.sh pose --help
# Use the second CSI camera./run_csi.sh pose --sensor-id 1
# Adjust the input size and frame rate./run_csi.sh pose --width 1920 --height 1080 --fps 30
The current course environment has verified that the CSI entry can complete single-source pipeline initialization, model loading, and the EOS wrap-up; if the terminal reports No cameras available, Argus currently does not recognize a CSI sensor, and the flex cable, camera module, sensor-id, and nvargus-daemon status should be checked.
7. Notes on the Current Implementation
The official example originally creates the input sources from the file URIs in the YAML. Without modifying the video YAML, the course version adds two kinds of camera sources:
xxxxxxxxxxUSB: v4l2src → videoconvert → nvvideoconvert → NVMMCSI: nvarguscamerasrc → nvvideoconvert → NVMMThe USB/CSI entries select the camera source via environment variables and force the output policy to "preview only"; the local video entry keeps "preview + MP4 recording". This is why the three scripts share the same main program but behave differently in output.
To make the pose classification model correctly receive the upstream data, the course environment also fixed two configuration linkages in the official example:
PeopleNet uses GIE ID
1, BodyPose3DNet/post-processing uses ID2, and PoseClassificationNet classifies the human pose results of ID2.The Tracker uses the ReIdentificationNet TensorRT engine already present in the current environment, avoiding a reference to the legacy missing
.etltmodel.
These are already fixed in the current environment; when using the course entry points normally, no manual changes are needed.
8. Stopping and Troubleshooting
| Symptom | Priority Checks |
|---|---|
| No person box or skeleton | Whether the person appears fully in the frame, whether the size is sufficient, and whether the lighting is too dark. |
| Skeleton present but no action text yet | The 300-frame keypoint sequence of the same person has not finished accumulating; keep the target continuously in the frame. |
USB reports Device ... is busy | Another program is using that /dev/video*; close the program occupying the camera and run again. |
| USB shows no picture or negotiation fails | Use v4l2-ctl -d /dev/video0 --list-formats-ext to verify the device number, format, resolution, and frame rate. |
CSI reports No cameras available | Check the CSI module, flex cable, sensor-id, and nvargus-daemon. |
Nvdslogger unavailable appears | The current system lacks the optional OpenTelemetry runtime library; the course program skips the FPS logger, which does not affect pose inference. |
Unable to acquire a user meta buffer appears | A known Tracker warning that does not block this example; do not blindly increase the metadata pool, as it may degrade performance. |
The video out.mp4 cannot be played | Check whether it was force-terminated before the EOS wrap-up; run again and wait for End of stream. |