Welcome to ROSMASTER M1 PRO repository
2.User Manual
ROSMASTER-M1PRO User Manual
ROSMASTER-M1PRO User Manual0. Preparation1. First-Time Use1.1 Entering the Configuration Wizard1.2 Selecting the Hardware Configuration1.3 Quick Start of Joystick Control2. How to Connect to the Car2.1 VNC Connection2.2 SSH Connection3. Connecting the Car to Wi-Fi3.1 How to Obtain the Car's IP Address3.2 Connecting the Car to an External Wi-FiMethod 1: Plug in an Ethernet cable and connect via the VNC GUI (recommended)Method 2: Without an Ethernet cable, configure Wi-Fi via the hotspot IP and set the Wi-Fi priority for auto-connect4. Tutorial Symbol Description5. Viewing Source Code and Compiling Packages5.1 Viewing the Code5.2 Compiling Packages
0. Preparation
Refer to 【Robot Configuration and Operation Guide — Assembly Videos】 to complete the assembly of the car's components and power on the car
If you selected the configuration Raspberry Pi mainboard + Slamtec C1 LiDAR, you first need to connect to the car by referring to 2.1 VNC Connection, bind the LiDAR's rule file, and then continue with the following steps. Other bundles can skip this step
sh ~/yahboomcar_ros2_ws/software/library_ws/src/sllidar_ros2/scripts/create_udev_rules.sh
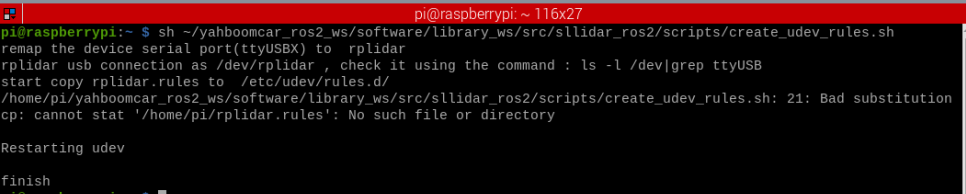
After the prompt above appears, unplug and replug the Slamtec C1 LiDAR to complete the device port rule binding
1. First-Time Use
1.1 Entering the Configuration Wizard
After the car finishes booting, the OLED screen shows the car's hotspot
IP:192.168.1.11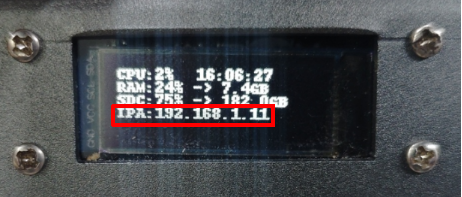
Connect your phone or computer to the car's hotspot, open a browser, and go to the initial configuration wizard page:
xxxxxxxxxxhttp://192.168.1.11:8080You can switch the display language (Chinese/English) at the bottom of the page
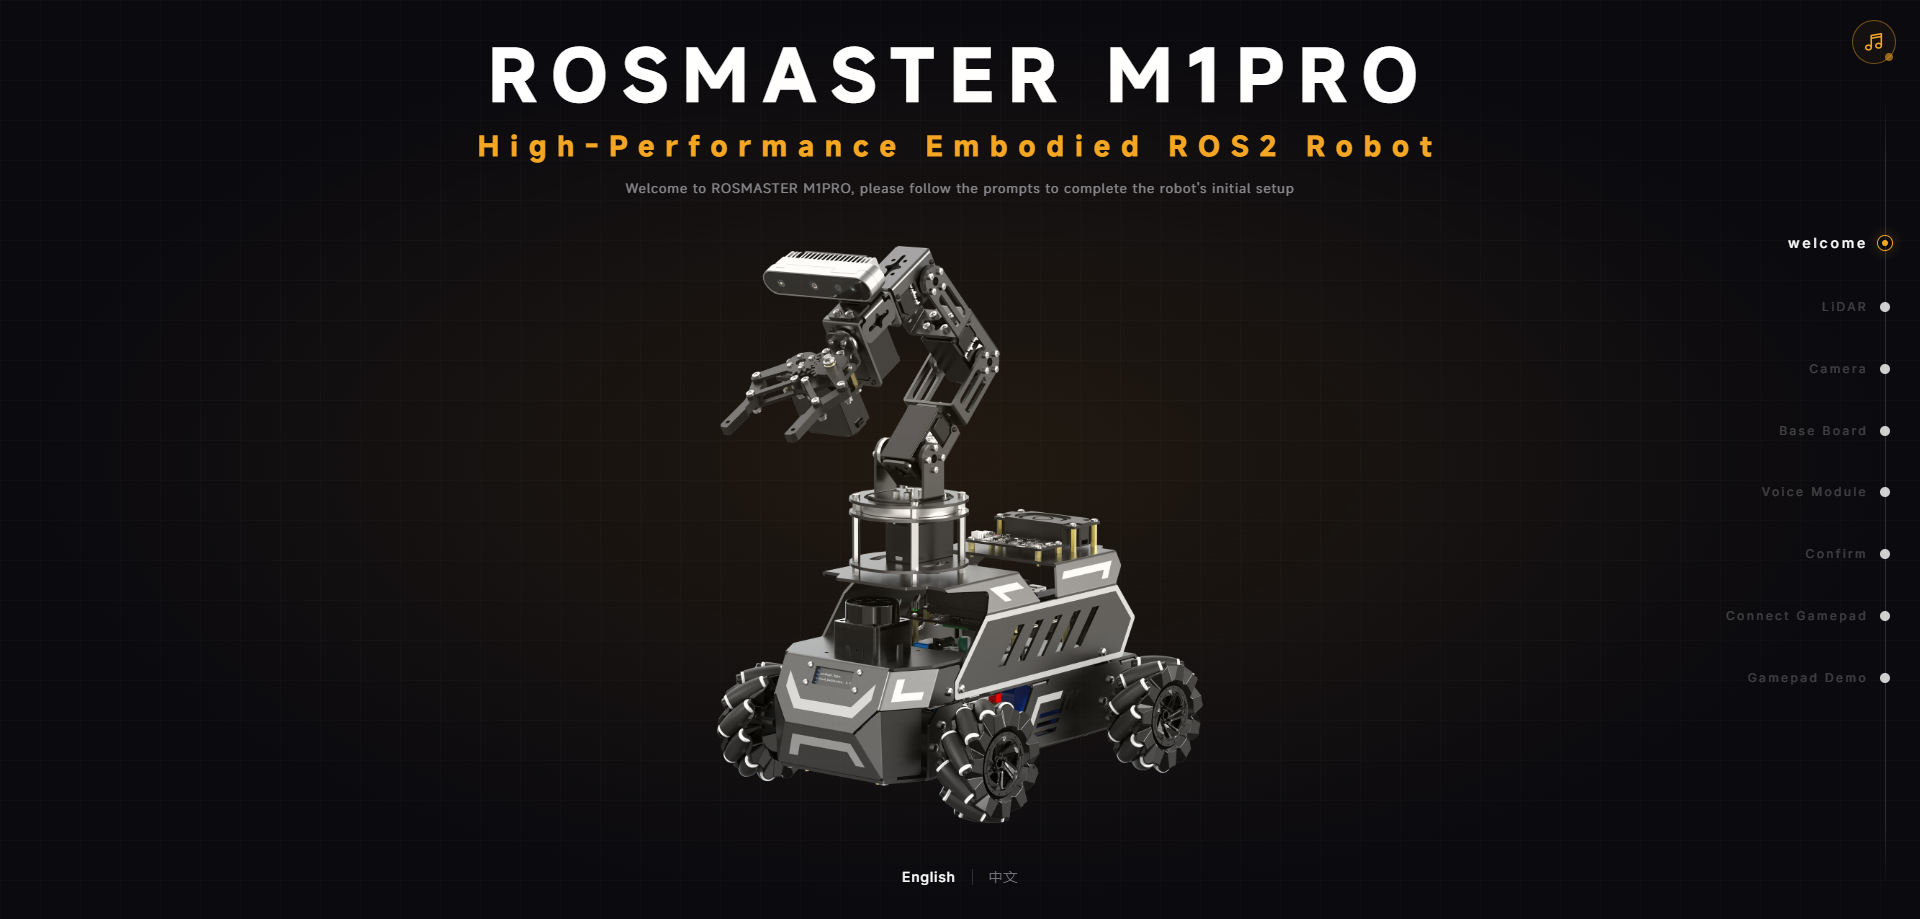
1.2 Selecting the Hardware Configuration
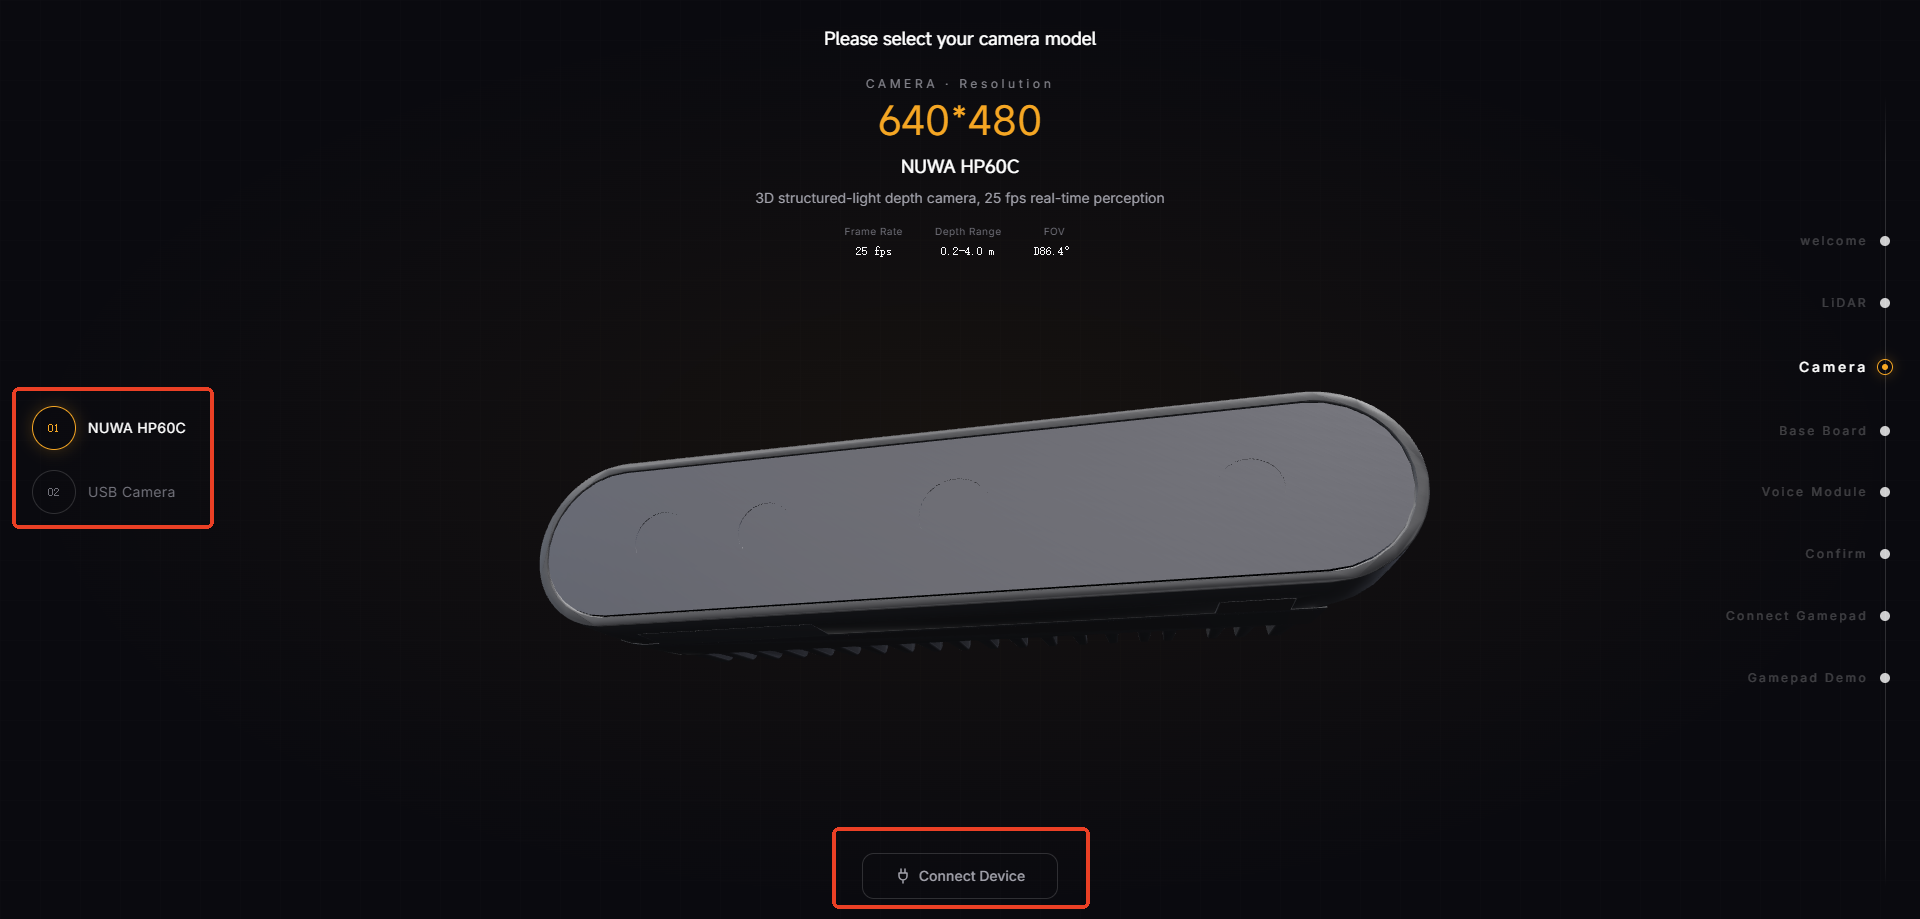
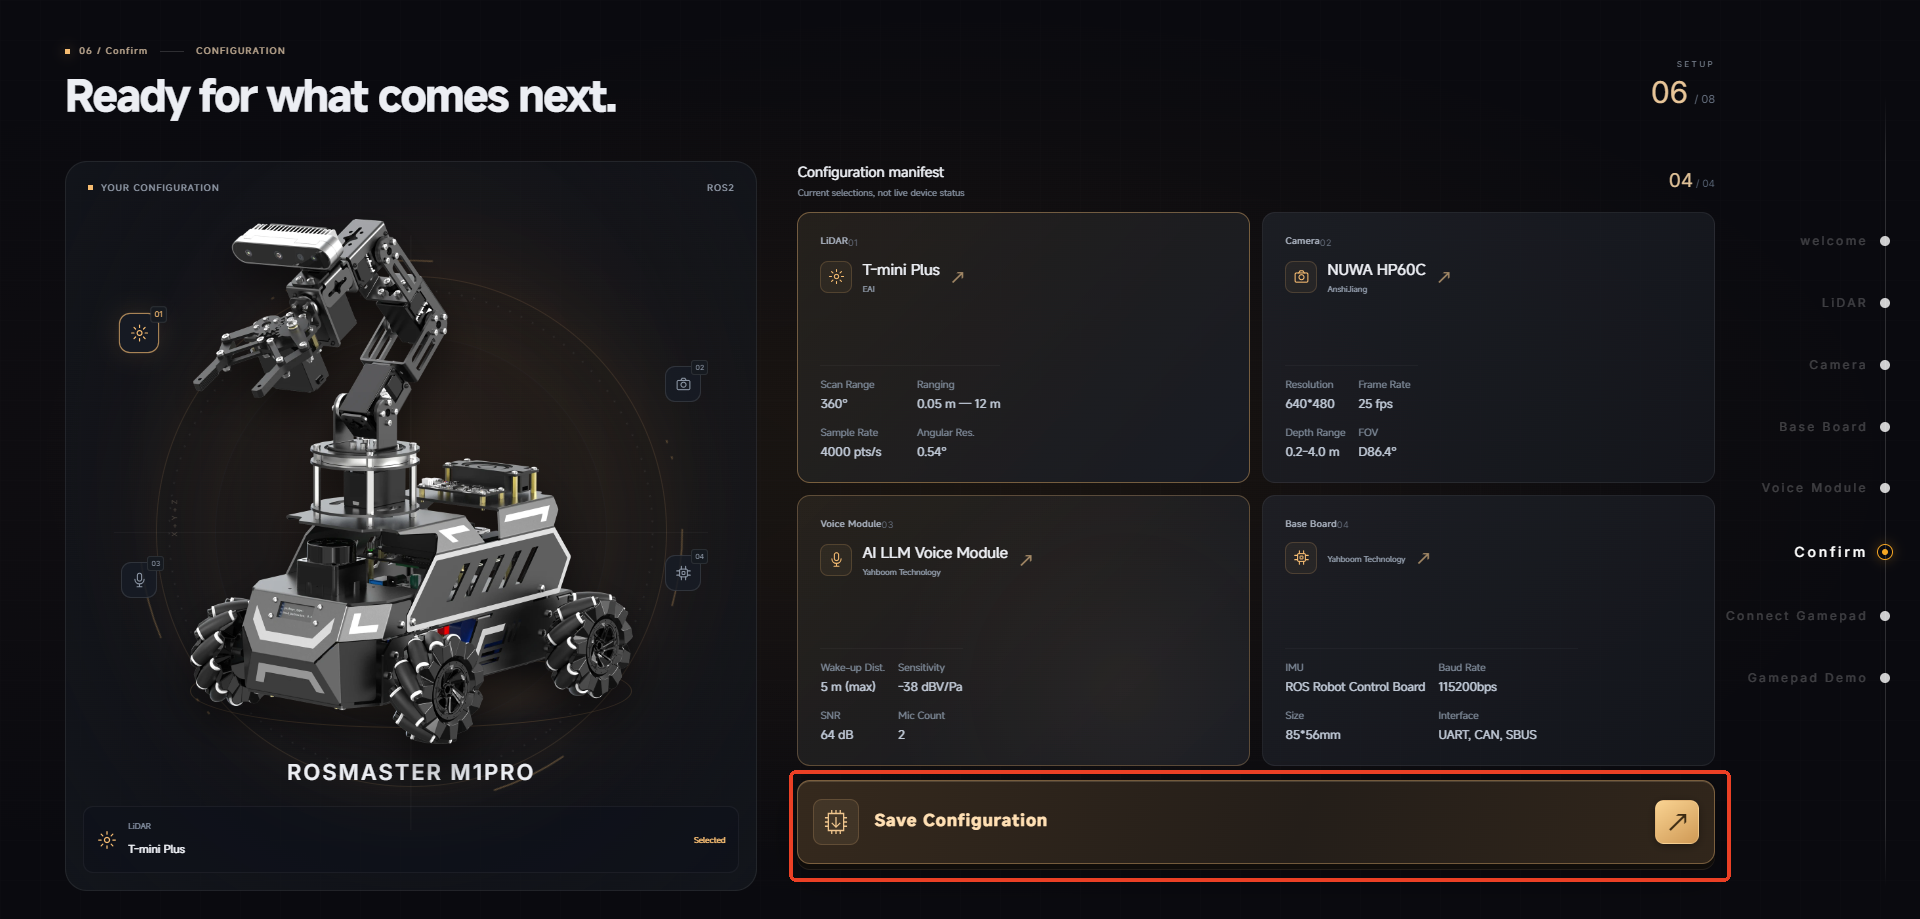
ROSMASTER-M1PRO provides different cameras 【depth camera, USB monocular camera】 and LiDARs 【Slamtec C1, Tmini Plus】. Select your own camera and LiDAR version in the configuration wizard
For LiDAR selection, choose your LiDAR model on the left, then click Connect Device
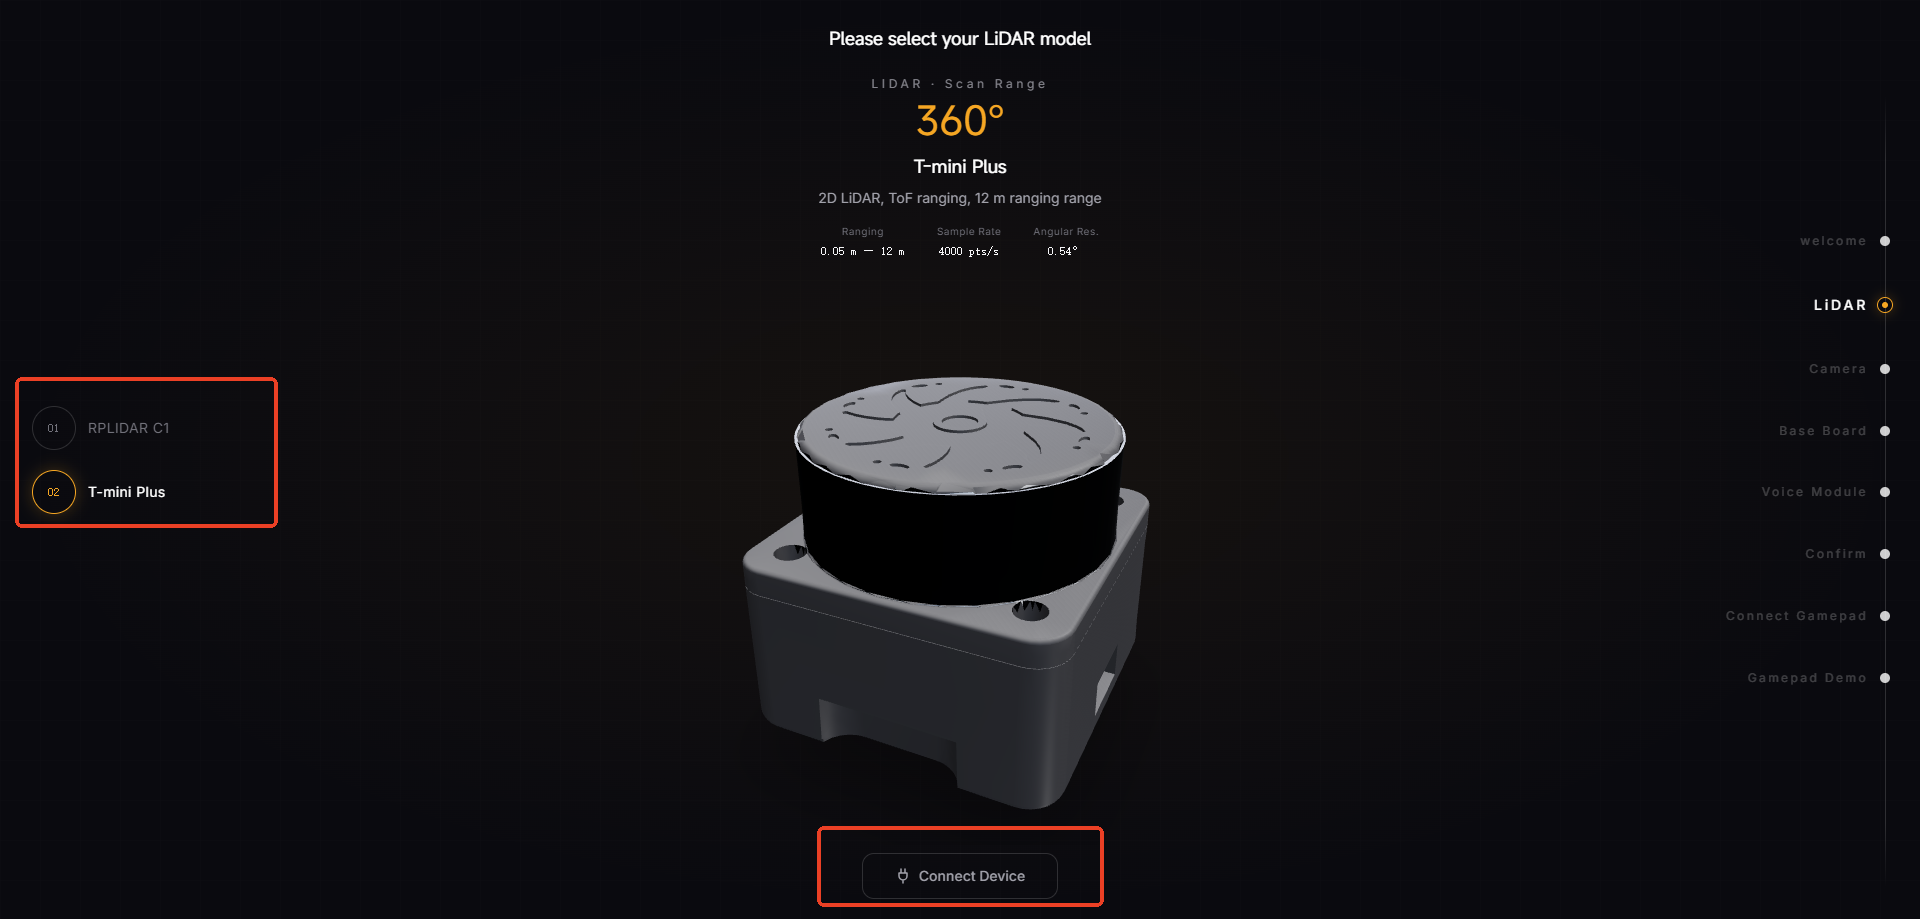
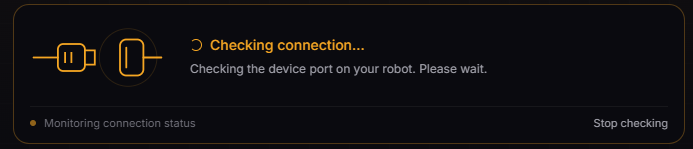
If the device is wired correctly, a prompt will indicate that the device is connected successfully

If it prompts that it is waiting for the device to be connected, check whether the device wiring is loose, or unplug and replug the device
For camera selection, do the same: select the device on the left, then click Connect Device
Note
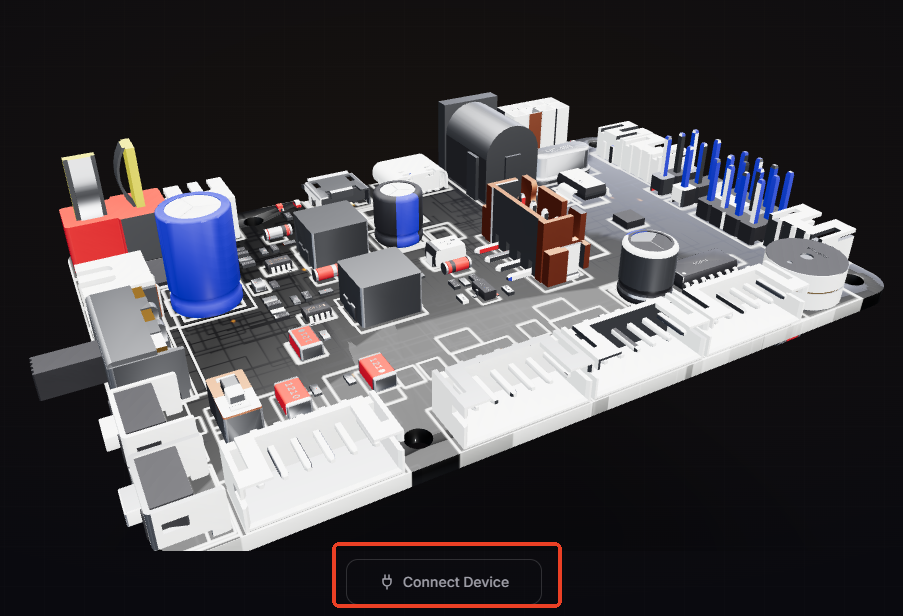
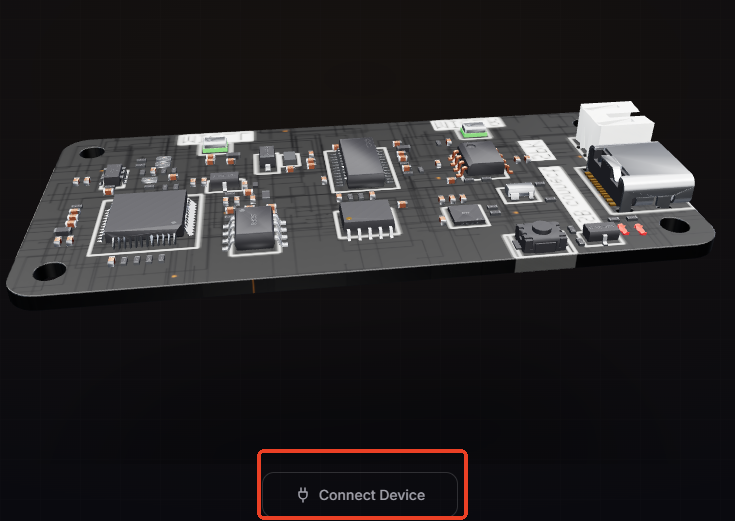
The same applies to the other device pages. The remaining devices do not require model selection — just click Connect Device to determine whether the device harnesses are connected properly during assembly
Robot control board: click Connect Device
Voice module: click Connect Device
After completing the camera and LiDAR selection and confirming the device wiring is correct, click Save Configuration

1.3 Quick Start of Joystick Control
Tip
For first-time use, after completing the hardware configuration, plug the joystick receiver into the USB port of the upper host controller, then click Start Joystick Control
Plug the joystick receiver into the main control board. Once the joystick receiver shows it is ready, click Start Joystick Control
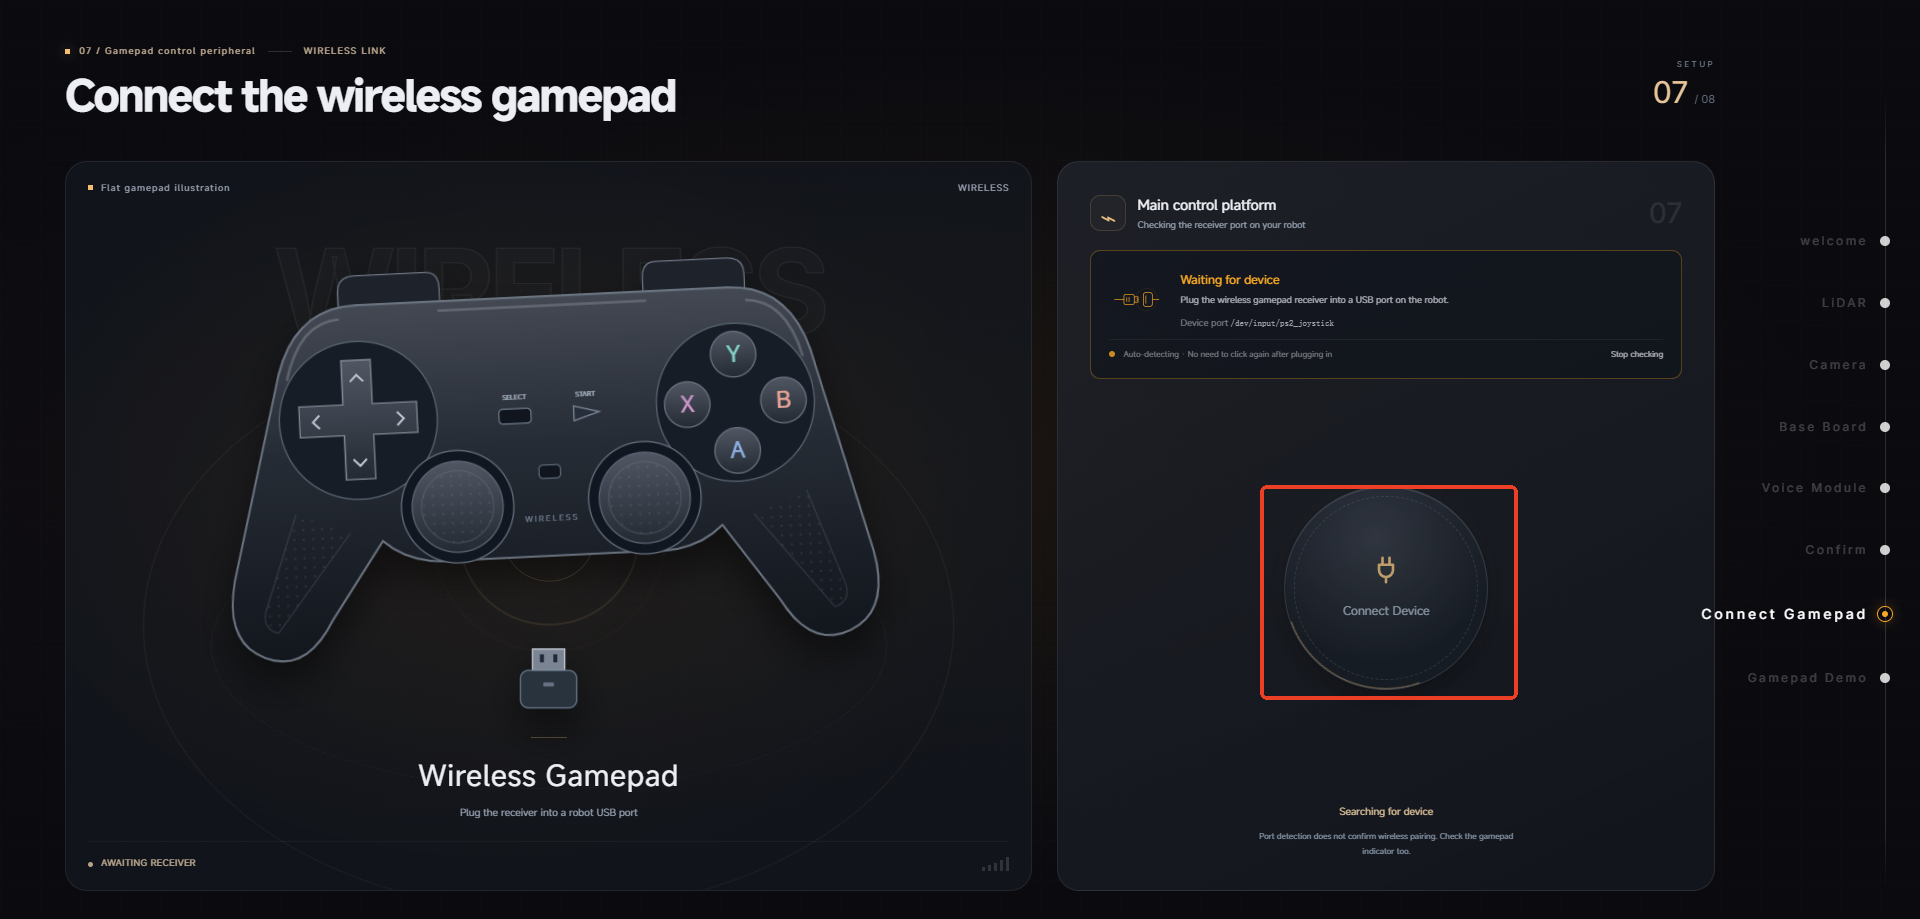
Wait 1-2 minutes for the program to be ready. Press the START button on the joystick; after you hear a "beep-beep-beep" prompt, joystick control takes effect
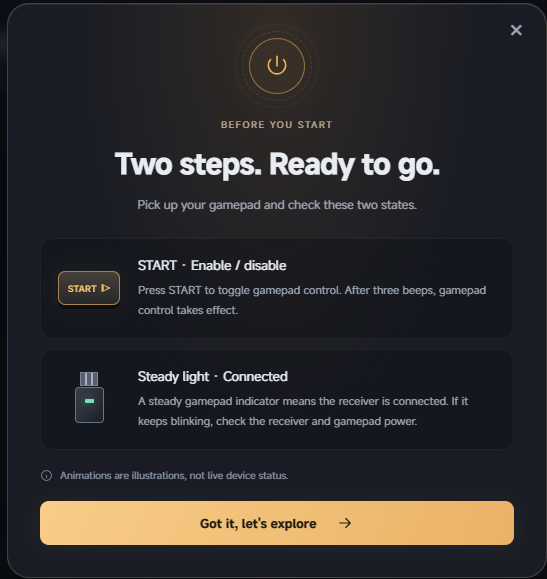
Follow the joystick key mapping instructions on the page to quickly try out joystick control
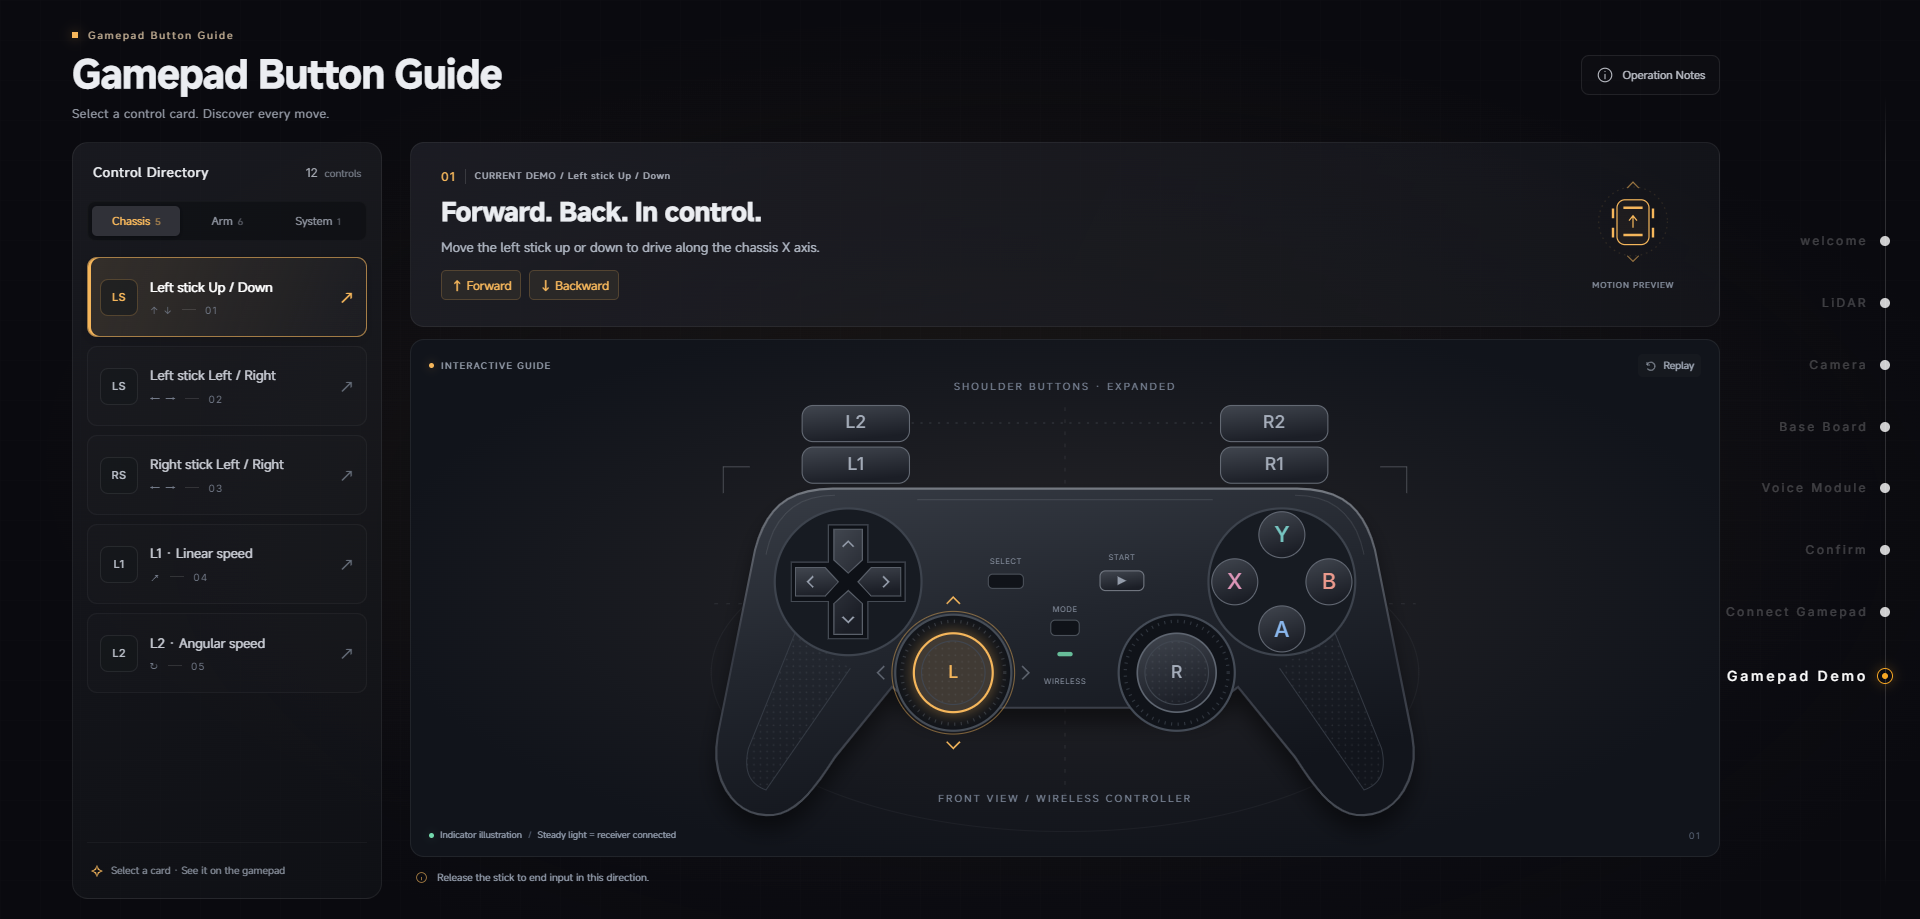
You can click the key cards on the left or the visualized joystick buttons to quickly view the function of the corresponding button
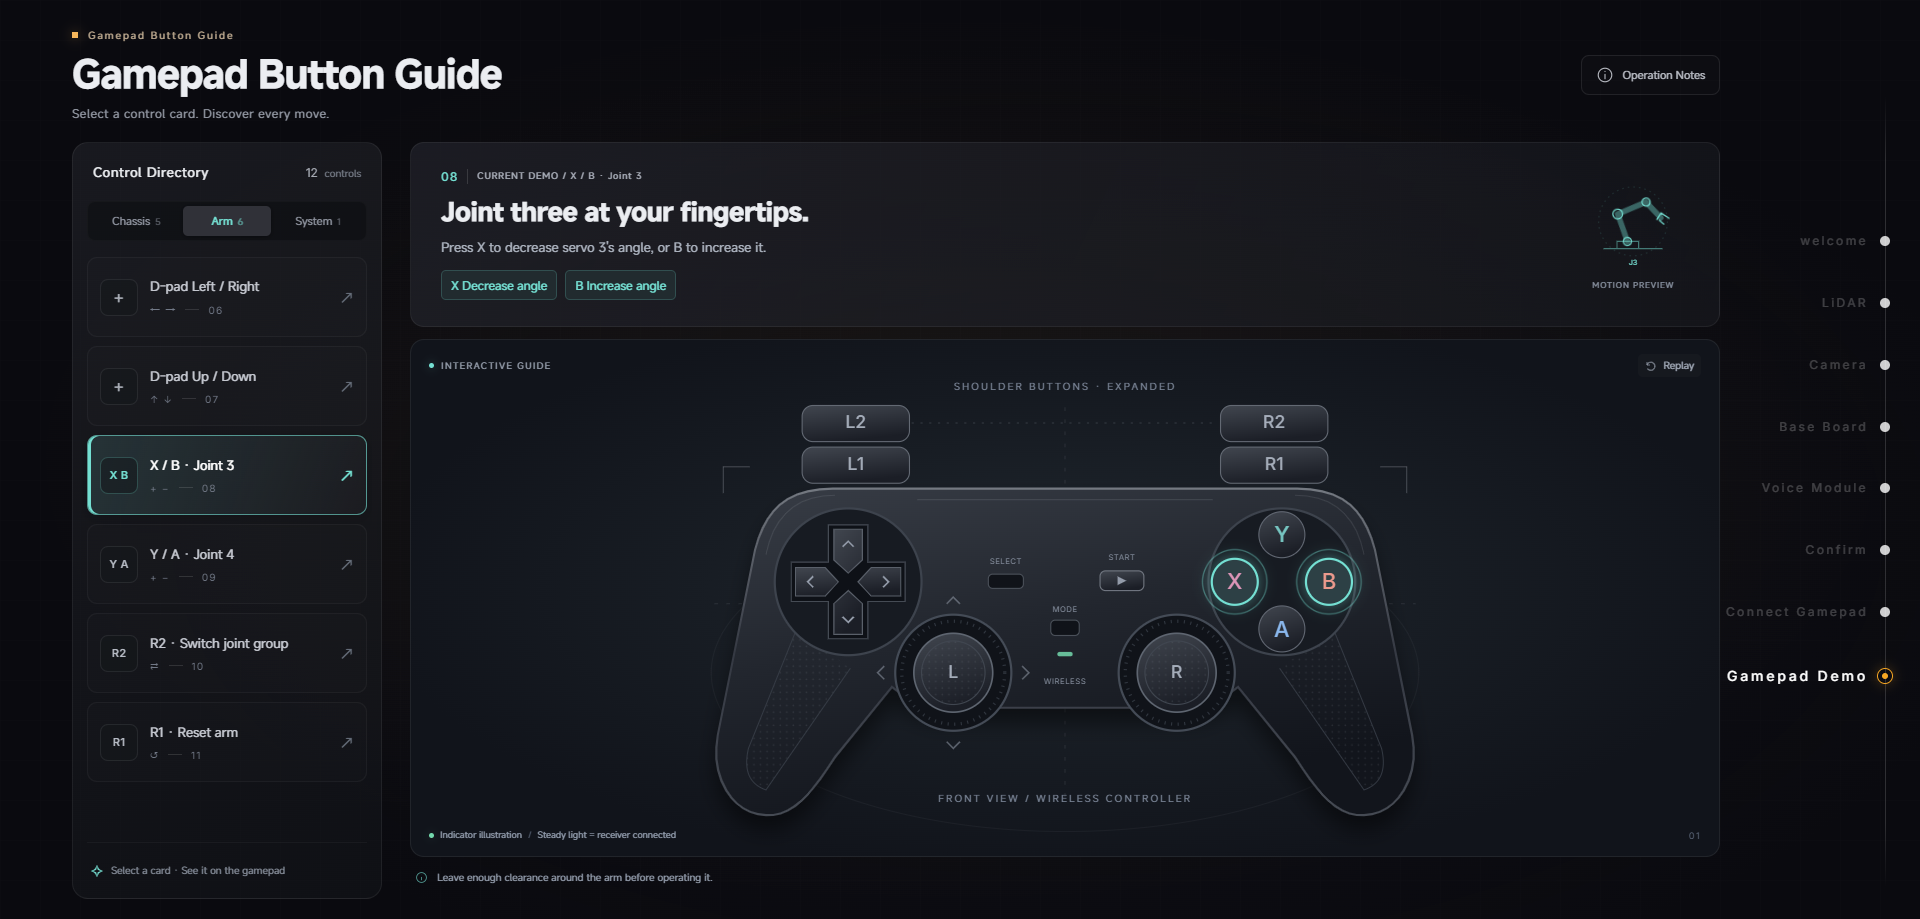
In subsequent use, you can also quickly start the joystick function via the launch icon in the VNC desktop. If it needs to work together with other features such as mapping and navigation, note that you must start the other programs first, and start the joystick control program last

2. How to Connect to the Car
2.1 VNC Connection
Tip
There are many kinds of VNC connection tools. Here we give the recommended tool for Windows; macOS and Linux users can choose other VNC tools — the tool is not unique
On the first connection, you can connect your computer to the car's hotspot and then log in via the IP 192.168.1.11
VNC allows users to remotely access and control another computer's desktop environment over the network, so when we need to access the car's desktop environment — for example, to start image display — we can use VNC to log in to the car. The VNC download link is as follows: Download VNC Viewer by RealVNC®
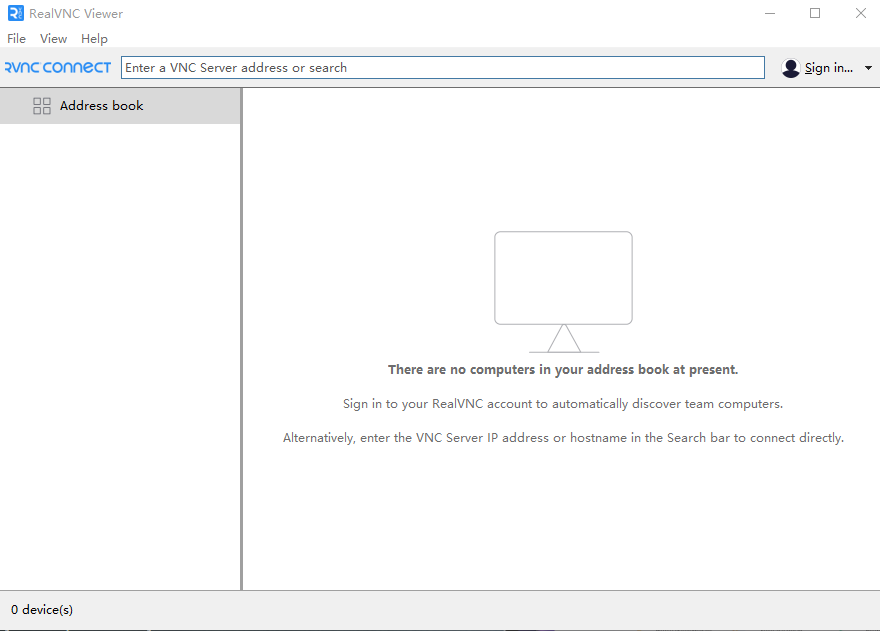
Download and install according to your computer version. After successful installation, double-click to open it; the screen shown is as follows
Enter the car's IP address. Here my IP address is 192.168.2.92, as shown below
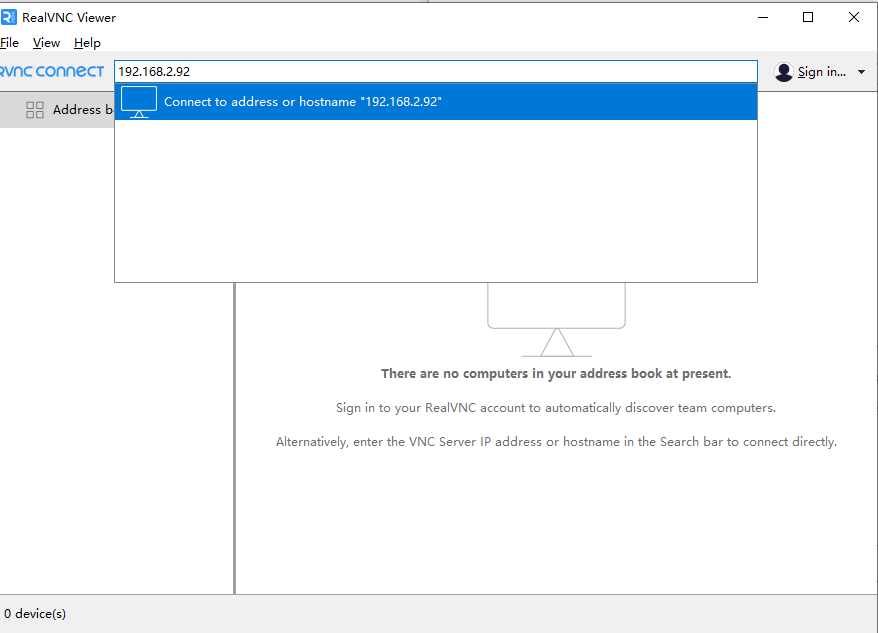
Then press Enter
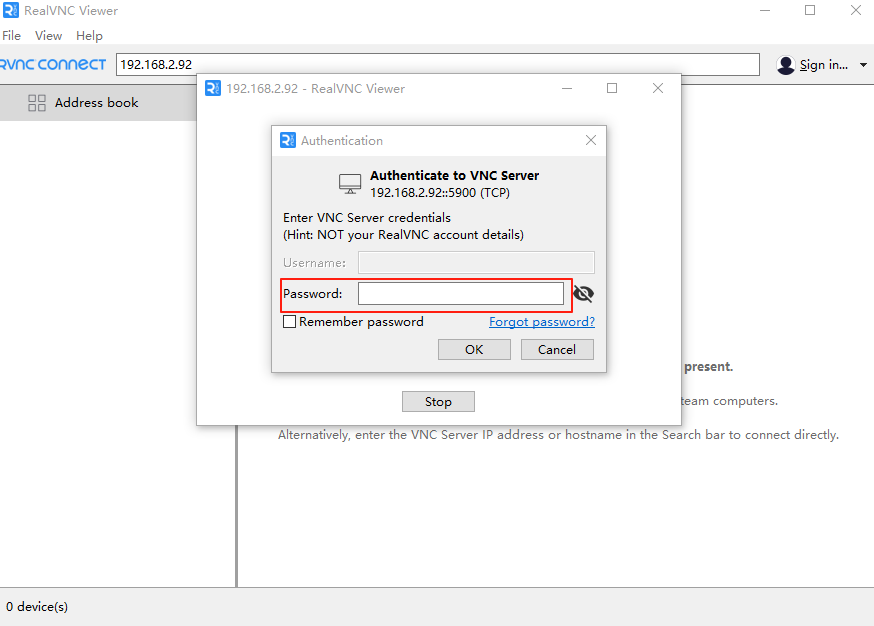
Enter the username in Username and the password in Password. The password for all mainboards is yahboom; then click OK to enter the desktop, as shown below
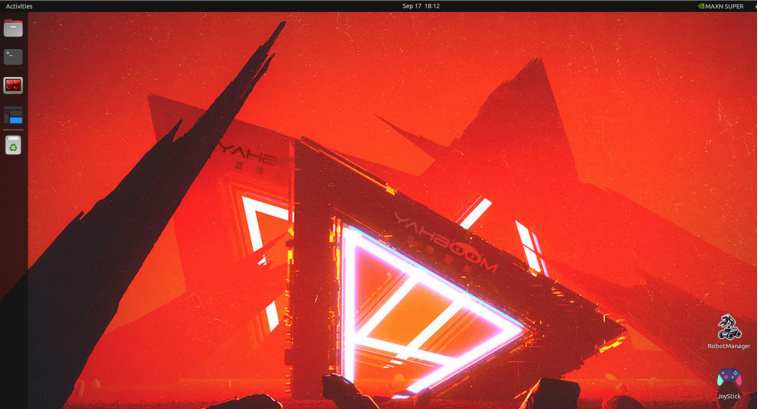
2.2 SSH Connection
Note
There are many kinds of SSH connection tools. Here we give the recommended SSH tool for Windows; macOS and Linux users can choose other SSH tools
Connect to the car with PuTTY, MobaXterm, or another SSH login tool. Here PuTTY is used as an example; the PuTTY download link is as follows: Download PuTTY: latest release (0.83)
Choose and install according to your computer version. After successful installation, double-click to open it; the PuTTY interface is shown below
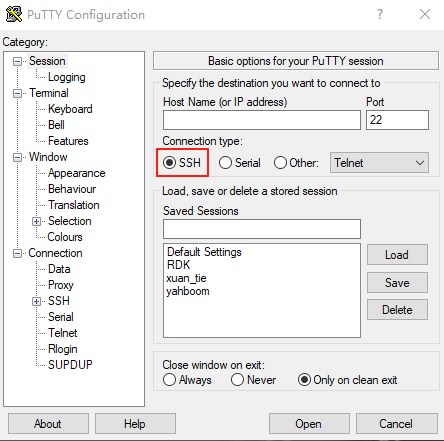
Select SSH, then enter the IP address shown on the OLED in the Host Name(or IP address) field. Here my IP address is 192.168.2.92, so enter the IP address as shown below
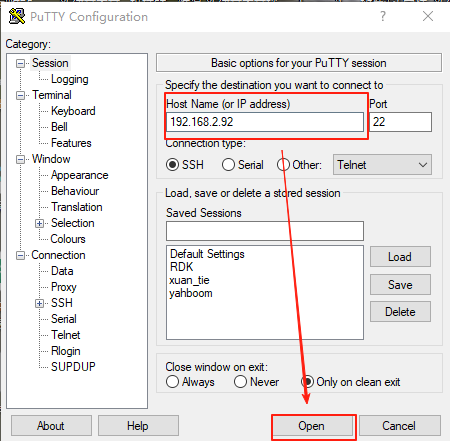
Then click Open, and you will enter a terminal window and a pop-up window. Click Accept to accept, as shown below
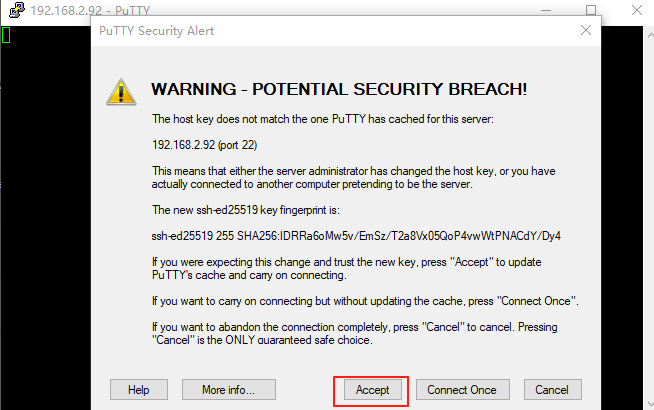
The terminal then shows login as. Enter the username of the car's mainboard and press Enter; you will then be prompted for the password. Enter the password. The username and password for each mainboard are as follows:
| Mainboard | Username | Password |
|---|---|---|
| Raspberry Pi 5 | pi | yahboom |
| RDK X5 | sunrise | yahboom |
| Orin-Nano | jetson | yahboom |
| Orin-NX | jetson | yahboom |
Here the Orin-Nano mainboard is used as an example. Enter jetson and press Enter, then enter the password. Nothing is displayed while you type the password; enter yahboom and press Enter
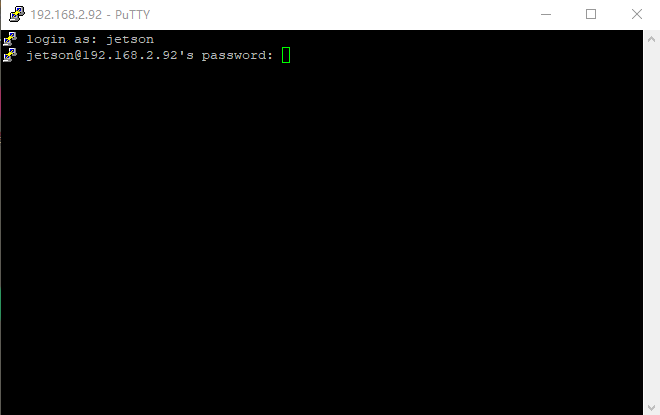
The screen after successfully connecting to the car is shown below
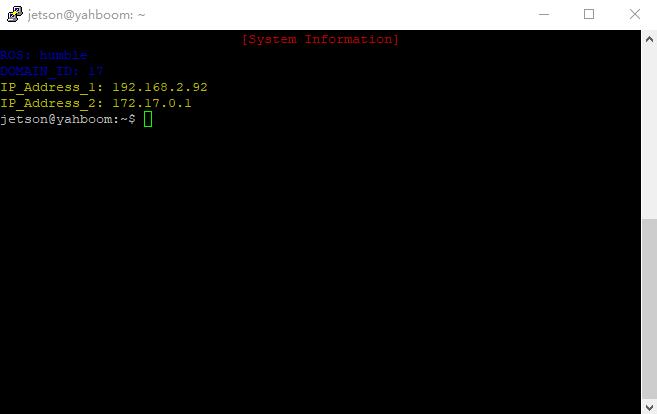
After that, you can operate the car through the SSH terminal. SSH is suitable for logging in when a graphical interface is not needed; it is much smoother than VNC and suitable for CLI command operations
3. Connecting the Car to Wi-Fi
Important
Whichever tool you use to connect to the car, the computer and the car must be on the same LAN
The factory auto-start hotspot cannot access the Internet. In normal use, the car connects to Wi-Fi, and you operate it from a computer on the same LAN
3.1 How to Obtain the Car's IP Address
Check the OLED screen on the body directly (most intuitive):
After the car boots, the OLED screen on the body shows the IP address assigned to the current network interface (for example,
192.168.12.57assigned by the router, or the built-in hotspot IP192.168.1.11).
Connect to the car's built-in hotspot (offline, no router needed):
On your computer, search for and connect to the car's hotspot
ROSMASTERin the Wi-Fi list (password12345678).After a successful connection, the car's static IP is fixed at
192.168.1.11.
Wired Ethernet connection (most recommended, most stable):
Plug one end of the Ethernet cable into the car's mainboard network port and the other end into the router. The car will automatically obtain a LAN IP via DHCP and display it on the OLED screen in real time.
3.2 Connecting the Car to an External Wi-Fi
The car's built-in hotspot has no Internet access. If you later need to use AI large models, install software packages online, or update the system, it is recommended to connect the car to your home router's Wi-Fi.
There are two common ways to connect to an external Wi-Fi:
Method 1: Plug in an Ethernet cable and connect via the VNC GUI (recommended)
Plug a wired Ethernet cable into the car's mainboard, read the IP address from the OLED screen (for example
192.168.12.57), and log in to the car with VNC Viewer remote desktop (see section 2.1 for VNC login details). After a successful login, the desktop is shown below: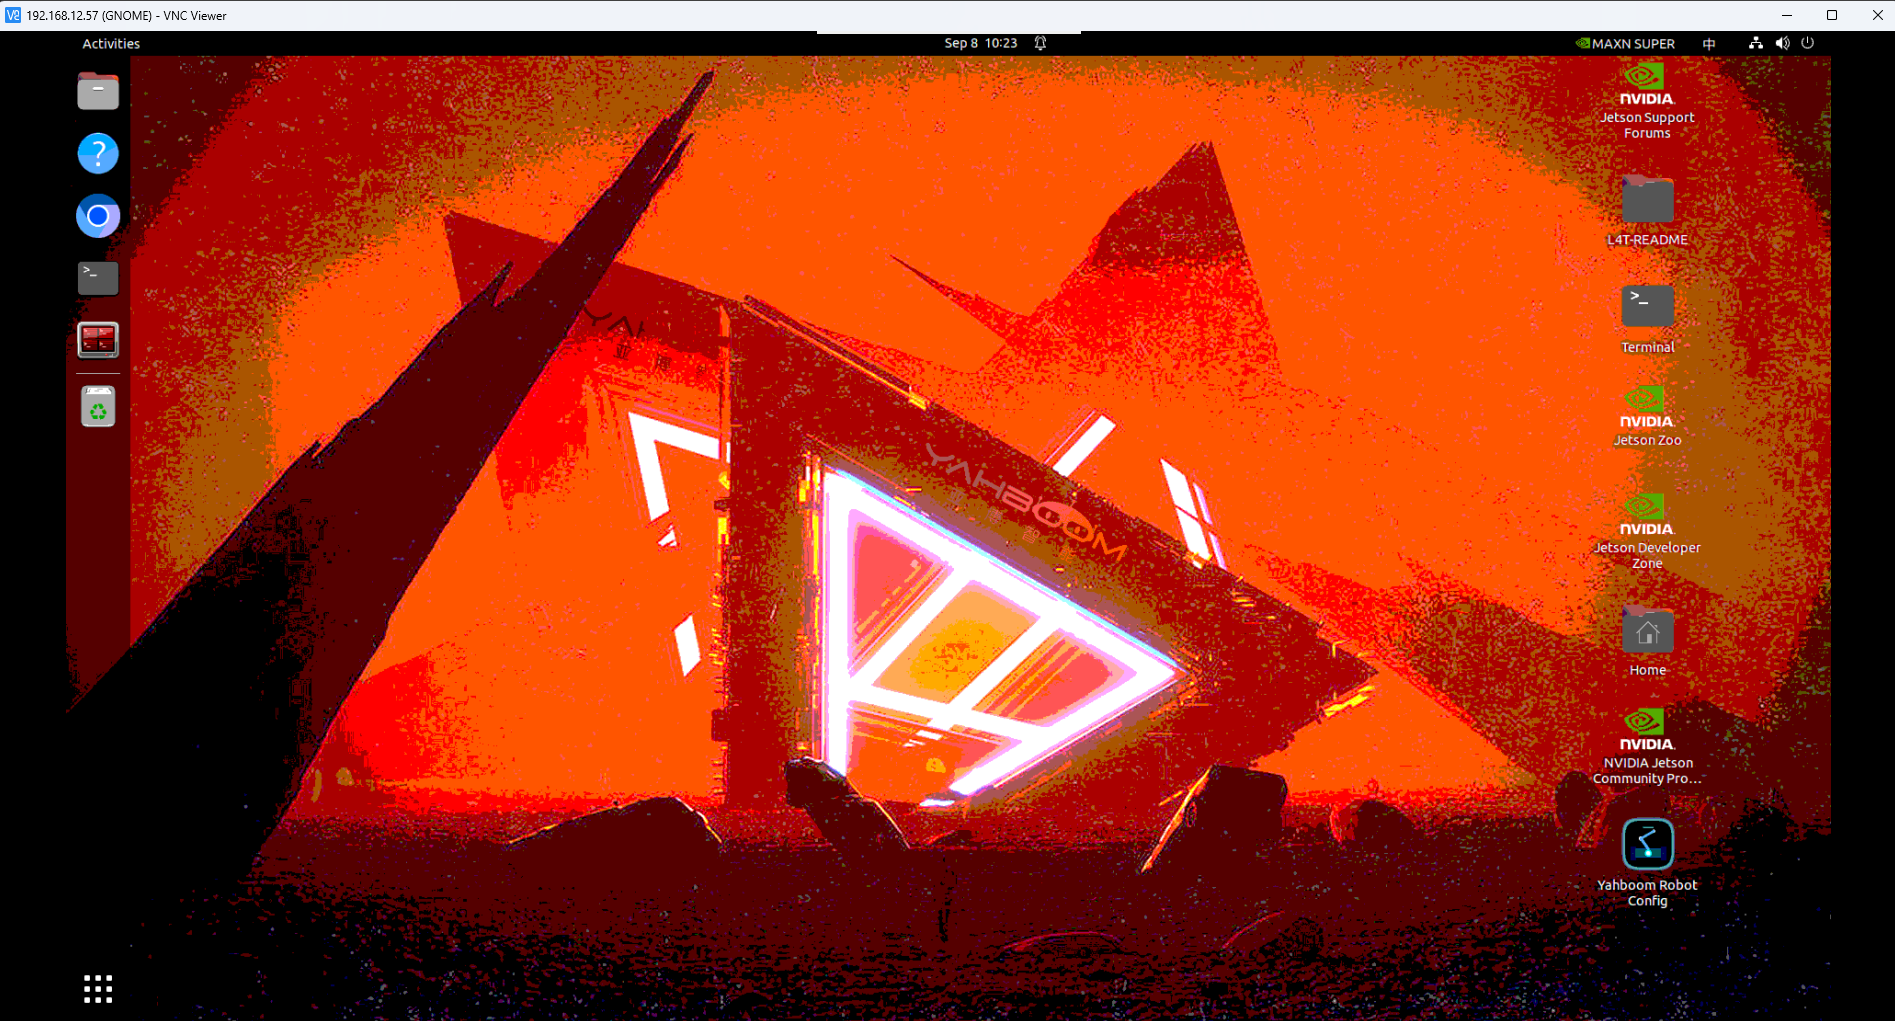
Open the system settings (Settings) and go to the Wi-Fi settings page. First turn off the car's built-in hotspot so that the network adapter can scan for external Wi-Fi:
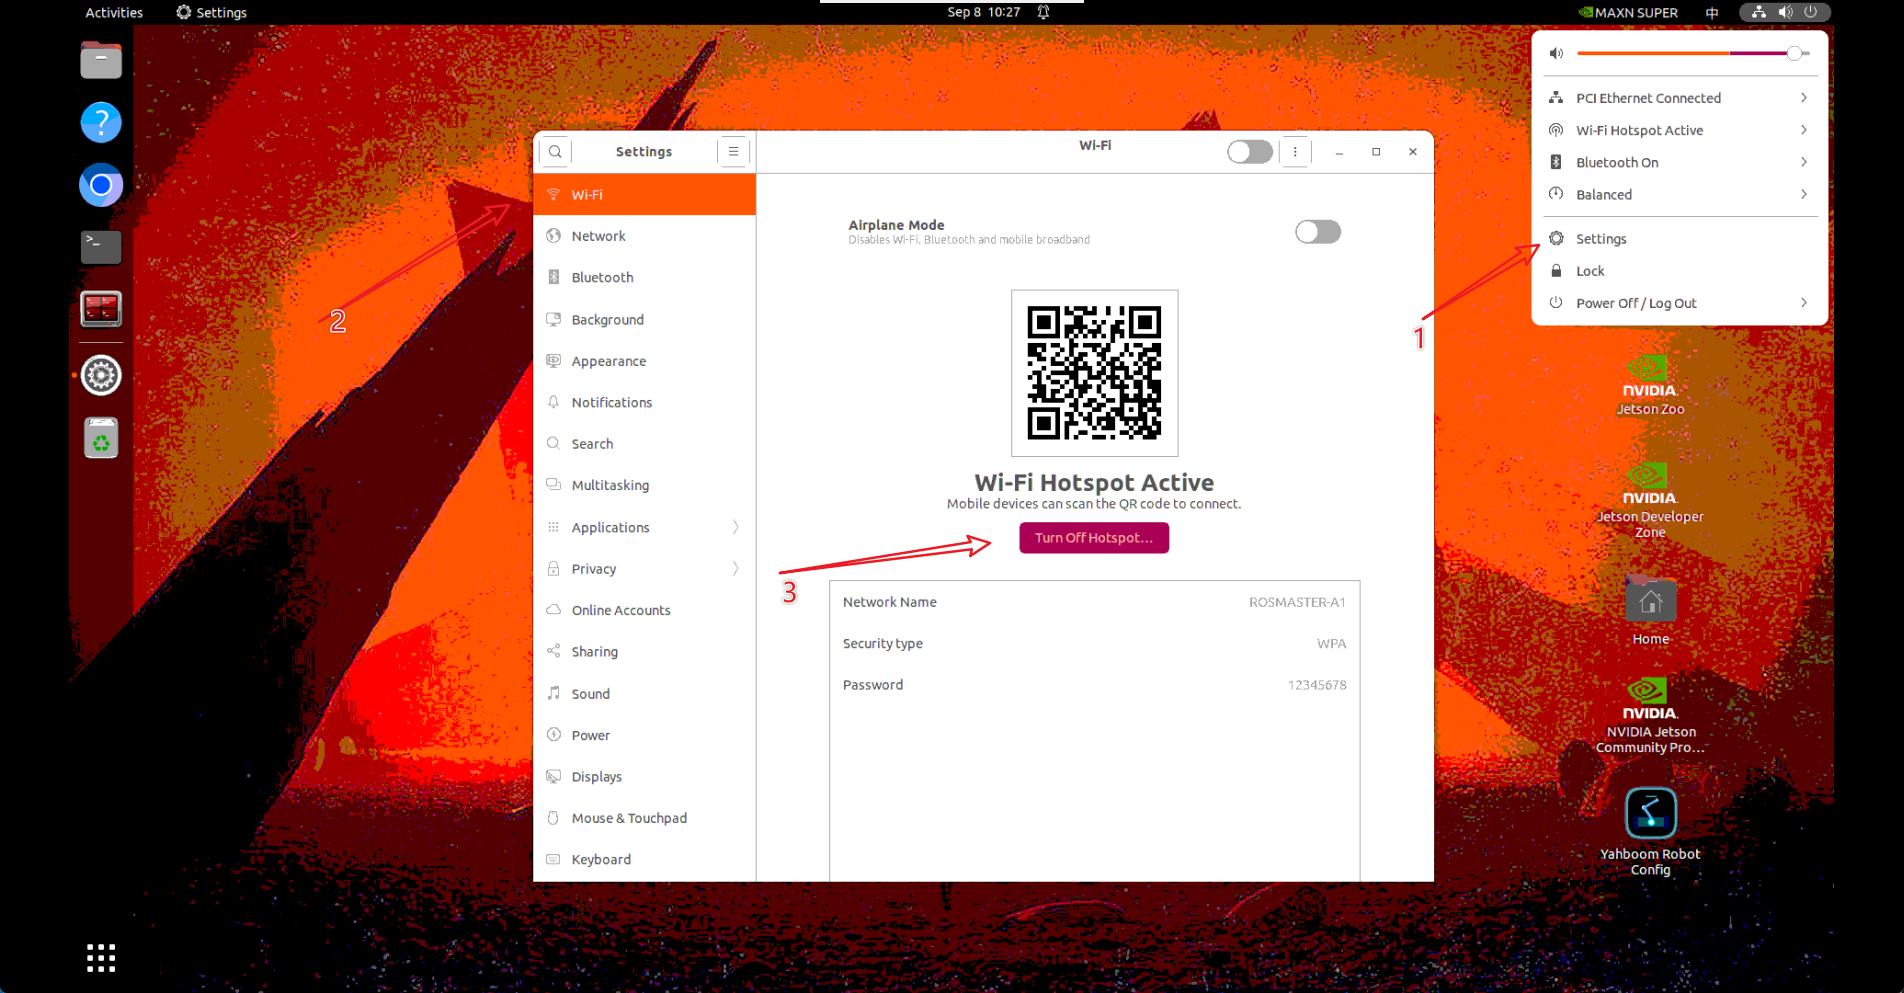
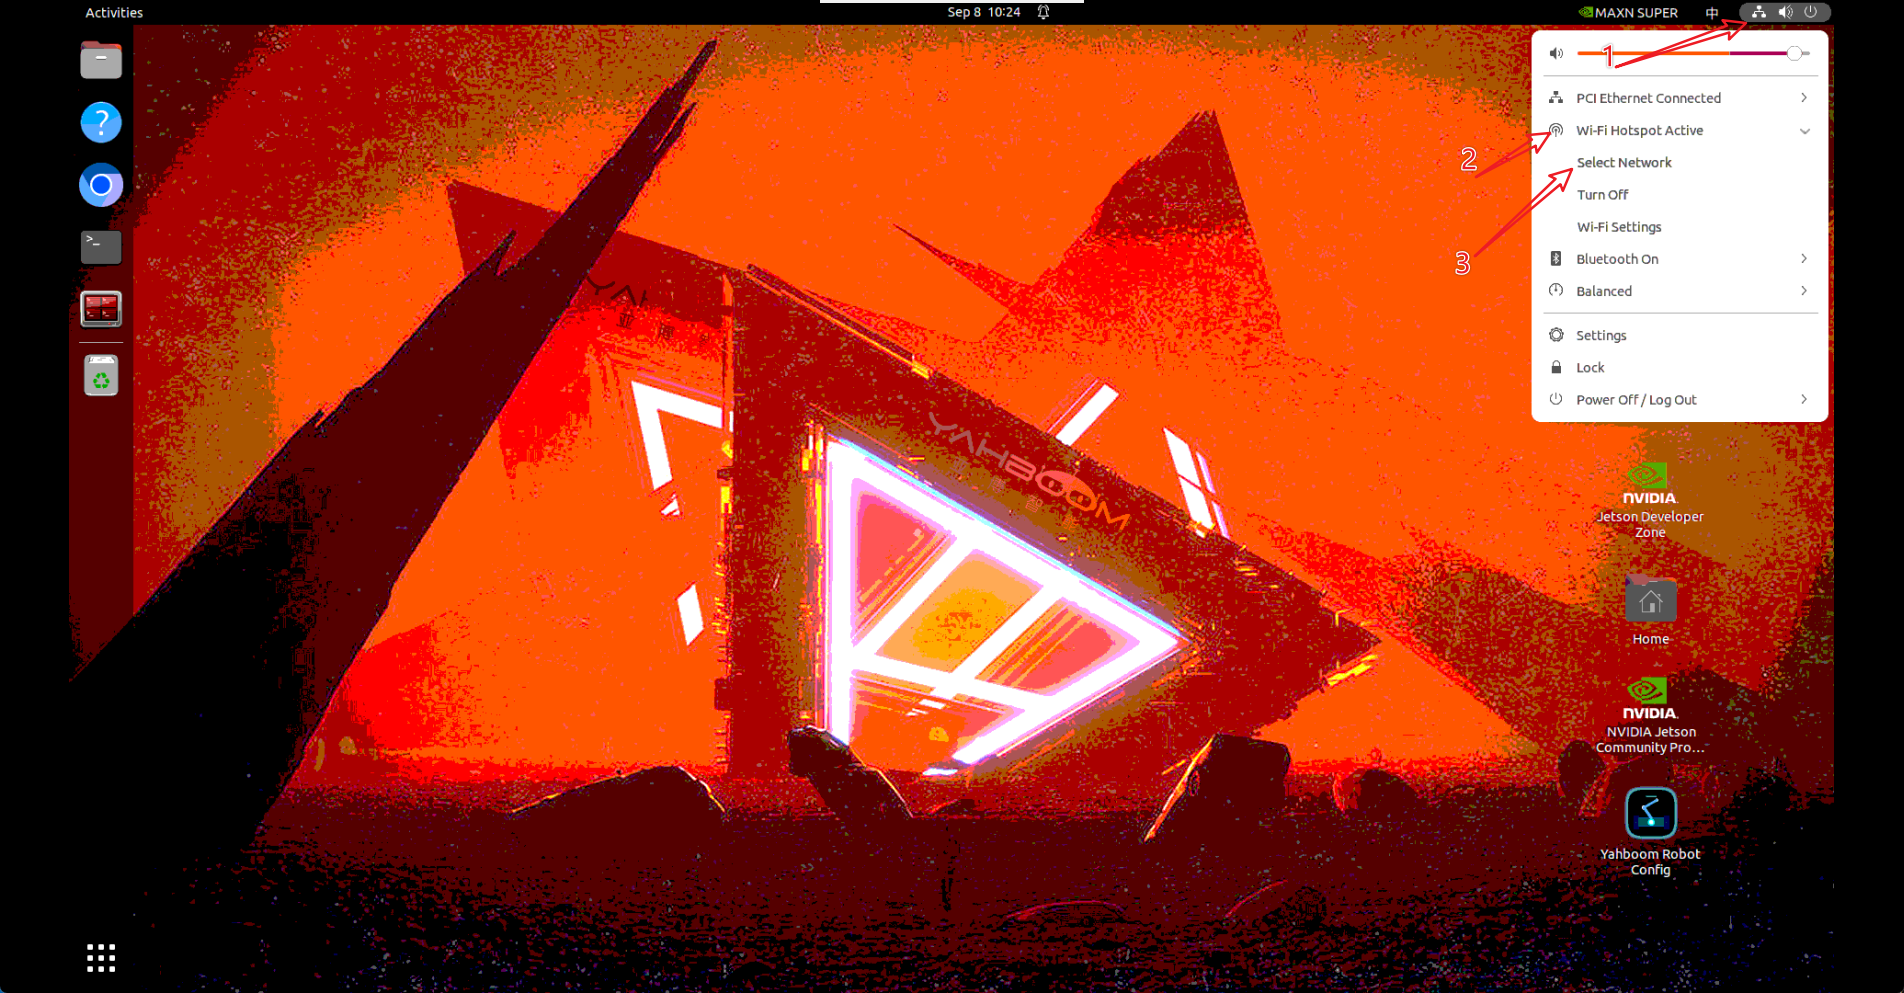
Click the network icon in the upper-right corner of the desktop, and click Select Network in the drop-down menu:
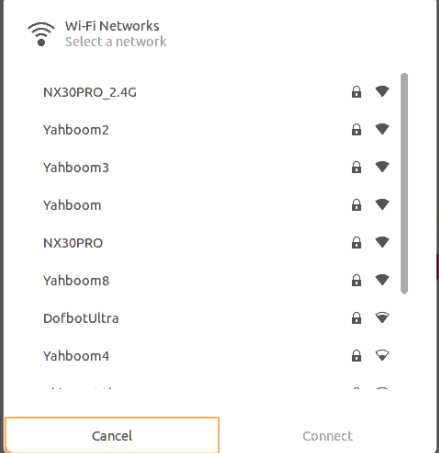
Select the name of the external Wi-Fi you want to connect to, enter the password, and click Connect:
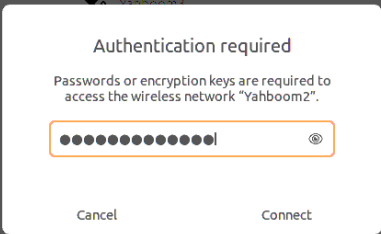
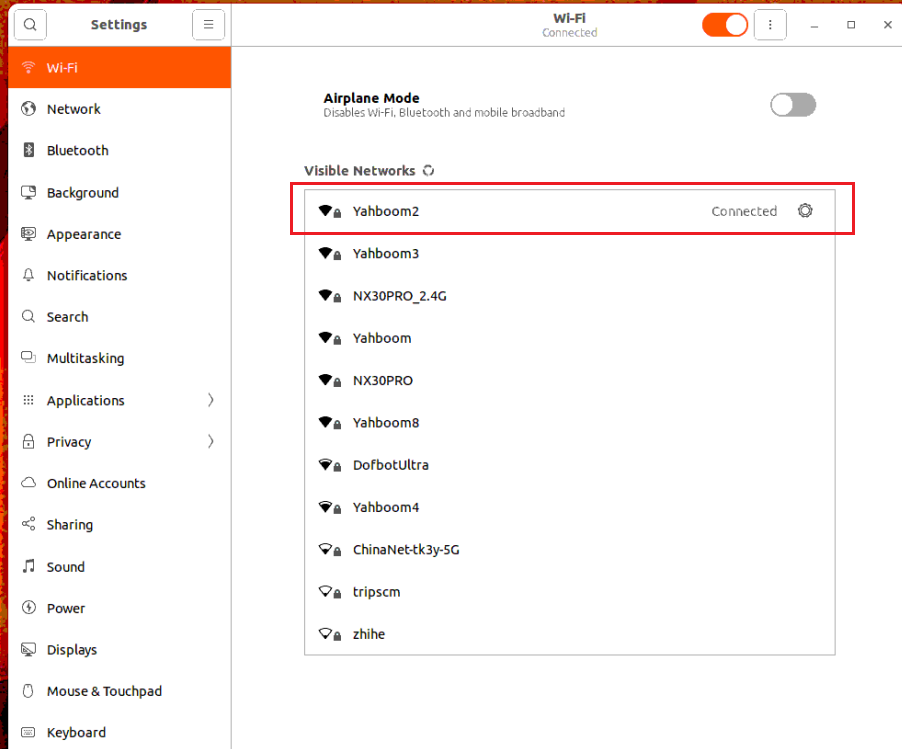
After a successful connection, the network icon shows as connected. Now unplug the Ethernet cable; the OLED screen will also update to your new Wi-Fi IP address. You can then use this new IP for remote connections.
Method 2: Without an Ethernet cable, configure Wi-Fi via the hotspot IP and set the Wi-Fi priority for auto-connect
If no router Ethernet cable is available, you can connect your computer directly to the car's default Wi-Fi hotspot:
Connect your computer to the car's hotspot
ROSMASTER(password12345678), and use VNC Viewer to connect to the hotspot's default IP:192.168.1.11.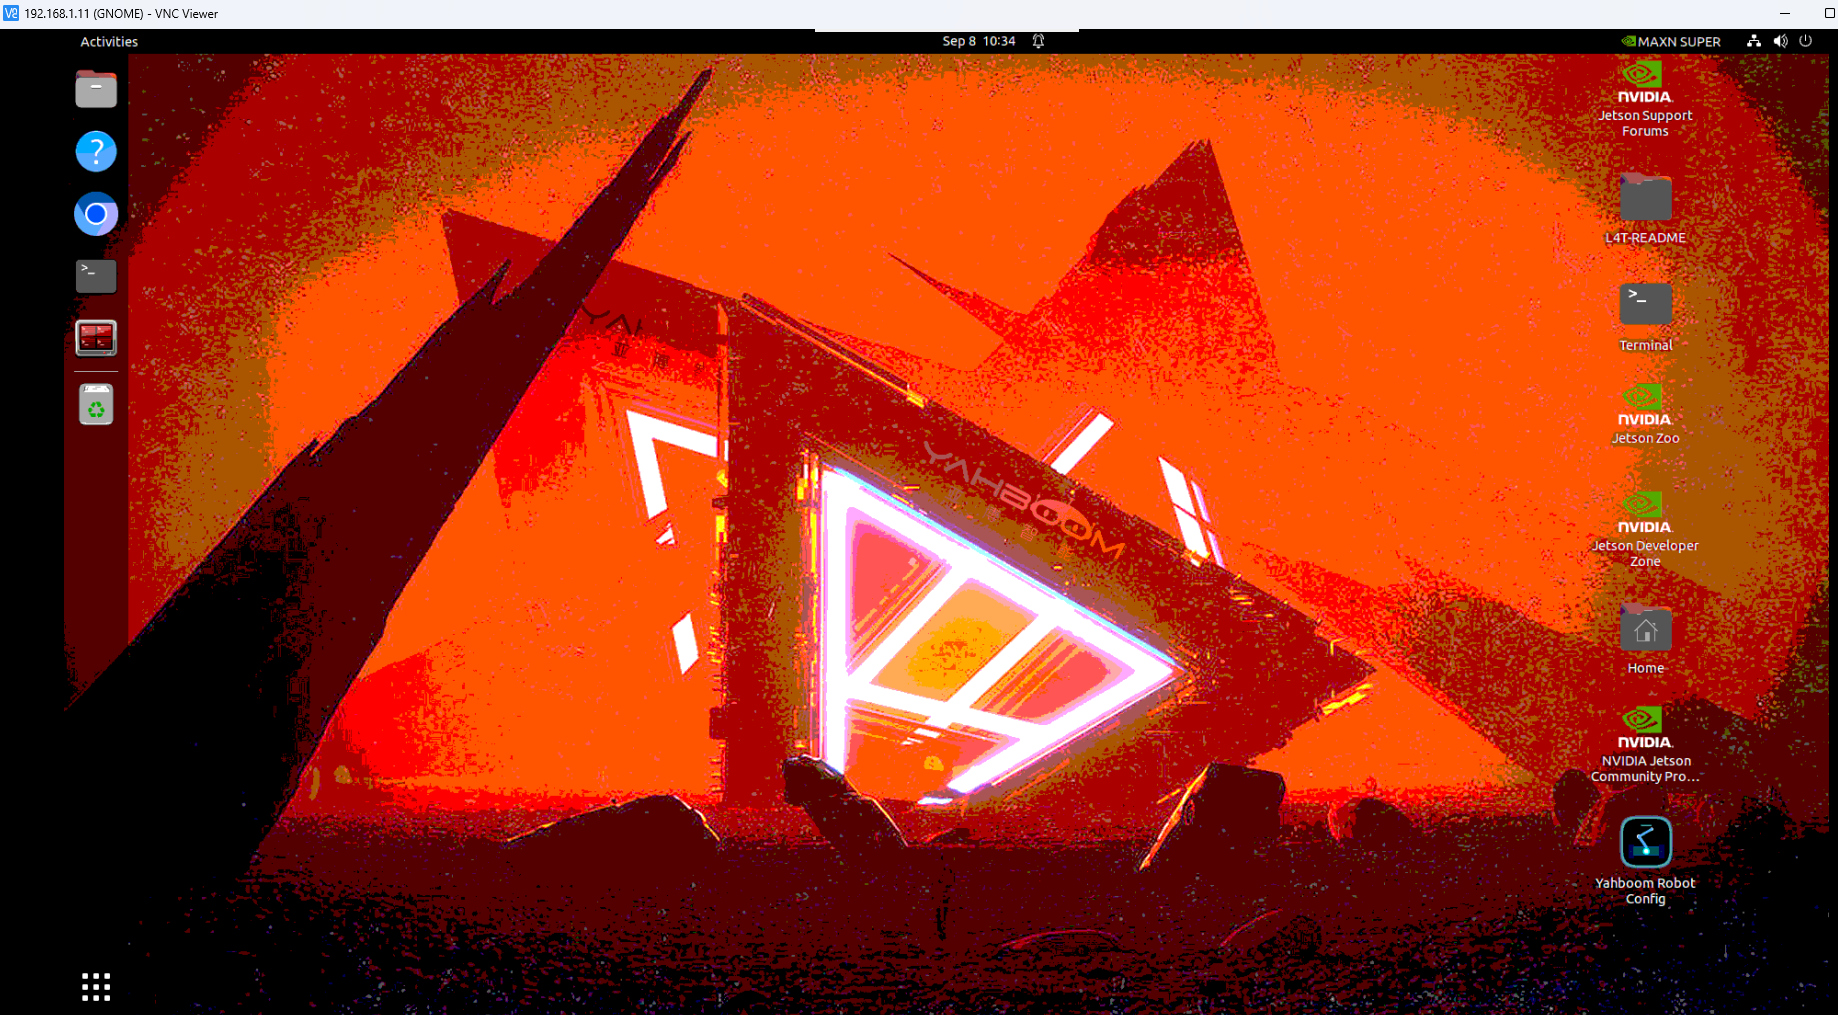
Open a terminal on the desktop and enter the network configuration tool command:
xxxxxxxxxxnm-connection-editor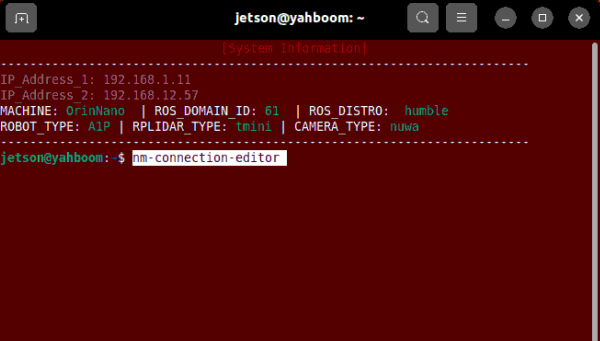
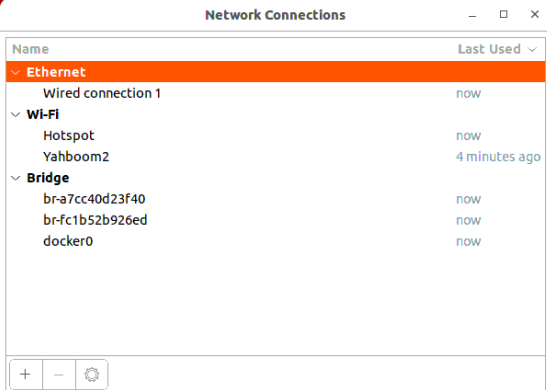
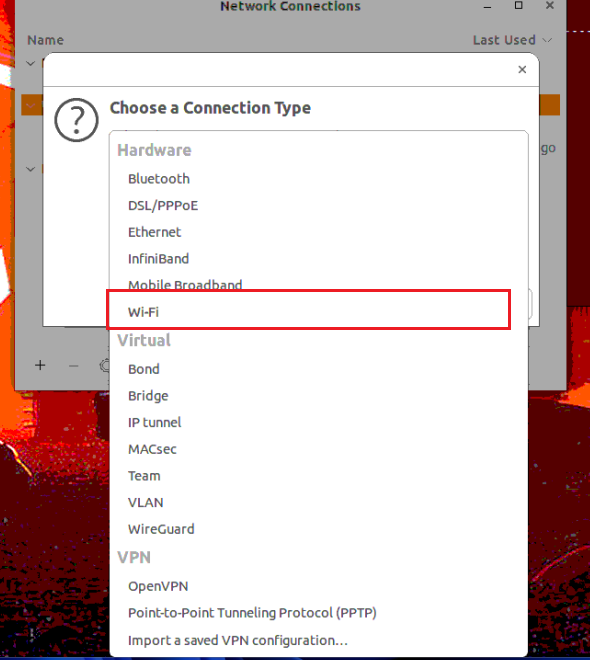
In the Network Connections window that pops up, click 【+】 in the lower-left corner to create a new connection, select Wi-Fi as the connection type, and click Create:
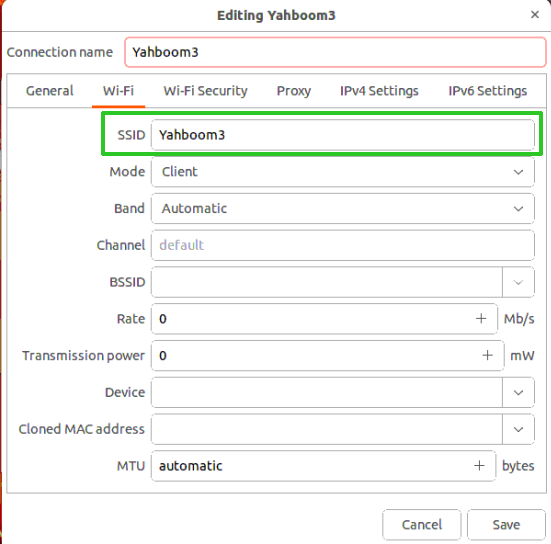
In the Wi-Fi tab, enter the SSID of the router Wi-Fi you want to connect to in the SSID field:
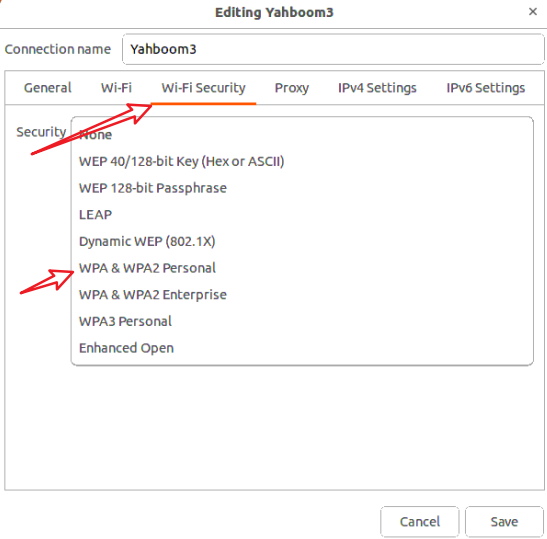
Switch to the Wi-Fi Security tab, select WPA & WPA2 Personal as the security type, and enter the connection password of that Wi-Fi in the Password field:
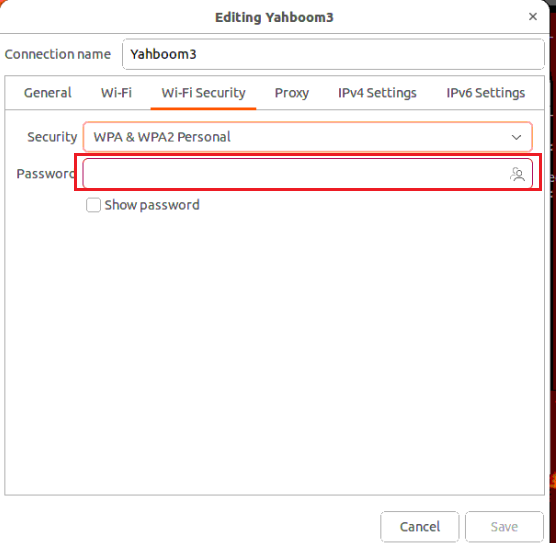
Switch to the General tab, check "Connect automatically", and increase the Priority value (for example, set it to
10; the larger the value, the higher the priority):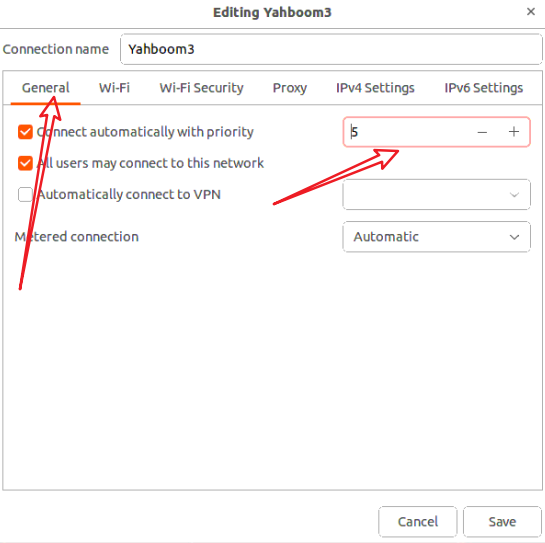
Click Save in the lower-right corner. Likewise, you can double-click the hotspot connection in the list to view the hotspot's priority — as long as the external Wi-Fi's priority is higher than the hotspot's:
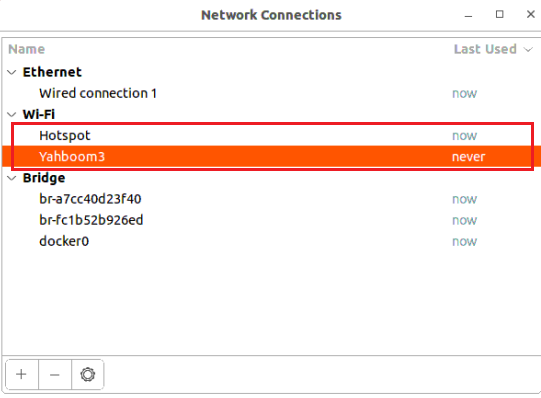
After configuration, close the window and reboot the mainboard. On the next boot, the car will automatically connect to the configured external Wi-Fi first.
4. Tutorial Symbol Description
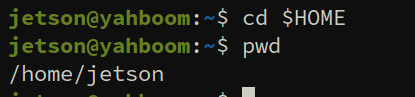
The ~ and $HOME symbols that appear in this tutorial represent the mainboard's user directory in Linux, for example
The < xxx > symbol is a placeholder representing custom content
5. Viewing Source Code and Compiling Packages
Important
Visual Studio Code here is a recommended tool. If you have an IDE you prefer, you can use any tool.
Visual Studio Code is a lightweight, efficient, extensible IDE with core development tools integrated. Official site: https://code.visualstudio.com/
5.1 Viewing the Code
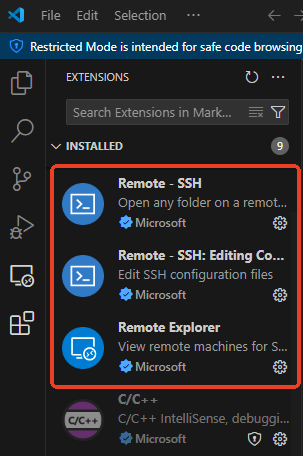
If Visual Studio Code is not installed, download and install it from the link above. Launch Visual Studio Code and click Extensions on the left — install the three remote connection extensions: Remote-SSH, Remote - SSH: Editing Configuration Files, and Remote Explorer
Then click Remote Connection on the left — click New Remote
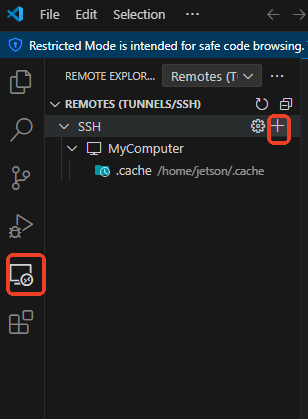
In the input box that pops up, enter username@IP address according to your mainboard. After pressing Enter, enter the user password yahboom to log in to the car

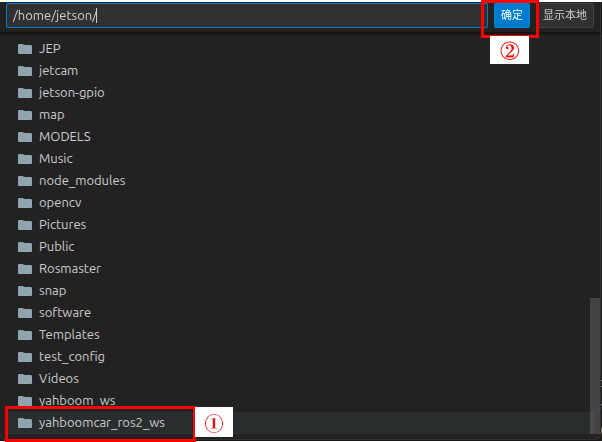
Then click Open Folder. In the window that pops up, you can select the folder you want to view — here yahboomcar_ros2_ws is used as an example — and then click OK.
5.2 Compiling Packages
In the VS Code interface, press the shortcut Ctrl+Shift+B to open the build options window

Two build modes are provided: linked build and normal build
Linked build: yahboomcar_bringup, yahboomcar_description, m1pro_moveit_config (after modifying the package's configuration files and launch files, the changes take effect directly without recompiling)
Normal build: other package source code must be compiled before it takes effect
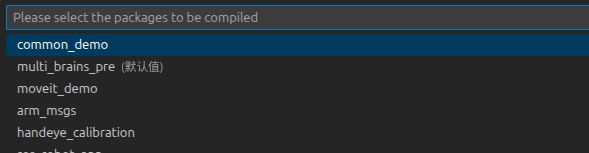
After selecting a build option, select the function name to be compiled and press Enter to confirm; the command to compile the corresponding package will be executed automatically

Important
All configuration files and launch files in the yahboomcar_bringup package take effect immediately after being modified and saved, with no need to recompile. Compiling is only used when you have development needs and need to modify the source code