Welcome to ROSMASTER M1 PRO repository
1.MovelT2 configuration
MoveIt2 Configuration
MoveIt2 Configuration1. Content Description2.1 Differences from MoveIt2.2. MoveIt2 Core Features2.3 Reference Websites3. Package Configuration Process
1. Content Description
This section explains how to configure MoveIt2 and generate the parameter files and launch files required for simulation.
Important
The factory system image already includes and pre-generates the matching MoveIt2 package (m1pro_moveit_config), so no re-configuration is needed!
It is strongly recommended to first experience the features covered in the chapters following [.MoveIt2 Simulation] (such as MoveIt2 simulation-reality linkage, random movement, forward/inverse kinematics design, Cartesian path planning and obstacle avoidance, etc.). If you later want to do your own secondary development (for example, customizing the robotic arm URDF model, modifying joint limits, or adding new planning groups), refer back to this tutorial section to reconfigure.
If you need to modify the MoveIt2 configuration package, please configure and create the package in the matching virtual machine.
MoveIt 2 is the next-generation version of MoveIt, designed specifically for ROS 2 (Robot Operating System 2). It is an open-source framework for robot motion planning, manipulation, 3D perception, kinematics, collision detection, and task planning. It is widely used in industrial robots, service robots, mobile manipulators, and scientific research and education.
2.1 Differences from MoveIt
| Feature | MoveIt | MoveIt2 |
|---|---|---|
| ROS Version | ROS1 | ROS2 |
| Real-time | Limited support | Better real-time performance |
| Cross-platform Support | Mainly Linux | Supports Linux, Windows, macOS (ROS 2 feature) |
| Motion Planning Interface | ActionLib (ROS 1) | Action (ROS 2) |
| Default Planner | OMPL | OMPL + more optimization options |
2.2. MoveIt2 Core Features
Motion Planning: Supports multiple planning algorithms (such as OMPL, CHOMP, STOMP, etc.) to generate collision-free motion trajectories.
Inverse Kinematics (IK): Computes the robot joint angles to achieve a target pose.
Collision Checking: Performs real-time collision detection based on FCL (Flexible Collision Library).
3D Perception: Supports point cloud (PointCloud) and depth camera (e.g., RealSense, Kinect) data.
Manipulation: Provides high-level interfaces for grasping and placement.
Task Planning: Combines Behavior Trees for high-level task orchestration.
2.3 Reference Websites
Official tutorial documentation:
MoveIt 2 Documentation — MoveIt Documentation: Humble documentation
3. Package Configuration Process
First, create a folder to store the files generated after MoveIt configuration. Taking the moveit2_ws workspace in the virtual machine as an example, enter the following in the virtual machine terminal:
cd moveit2_wsmkdir test_config
Enter the following command in the virtual machine terminal to start MoveIt2 configuration:
xxxxxxxxxxros2 run moveit_setup_assistant moveit_setup_assistantAfter the program starts, the following configuration screen appears:
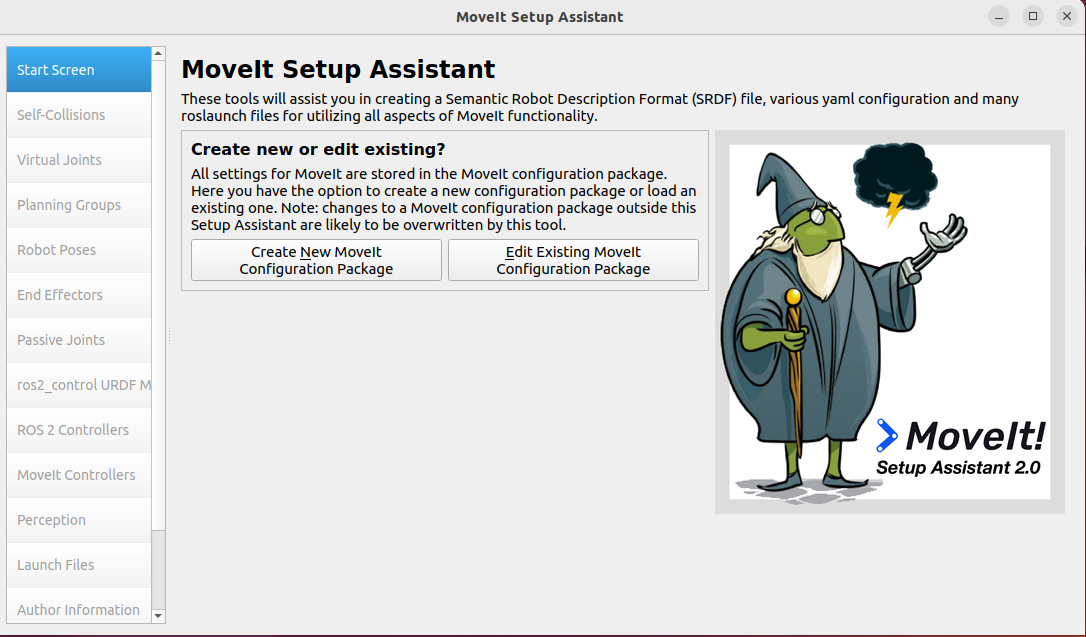
Click 【Create New MoveIt Configuration Package】, and the following screen appears:
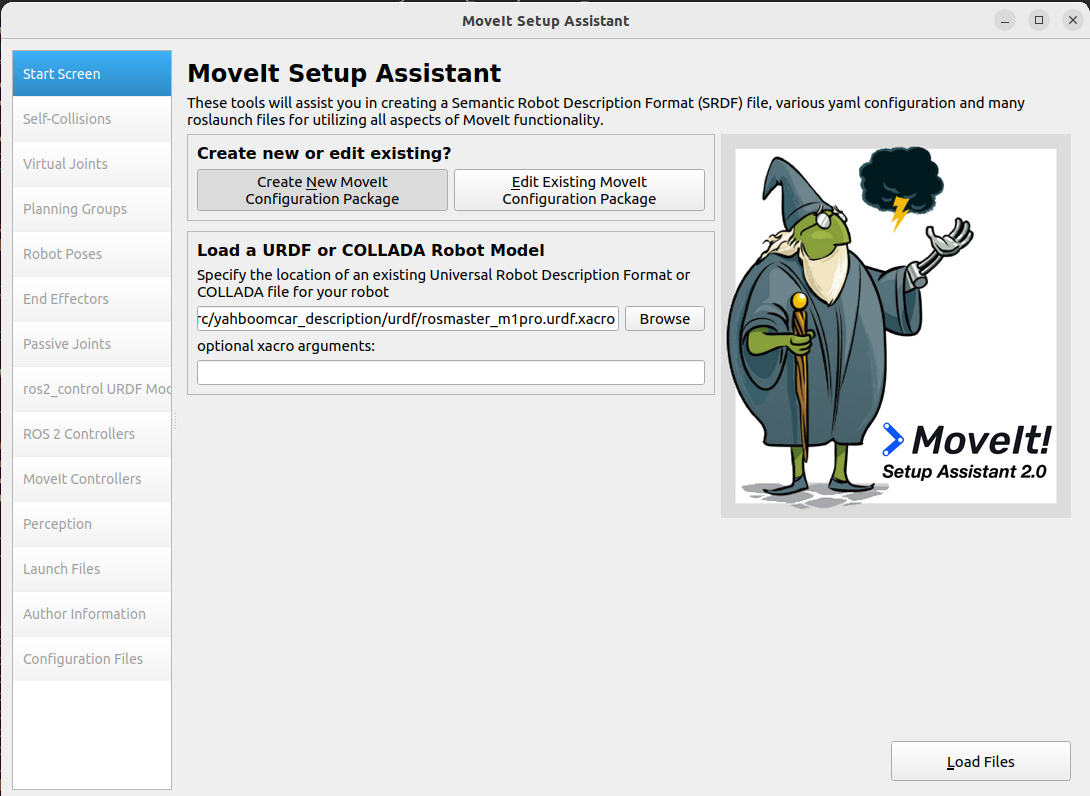
Select the M1PRO model file. The file path is:
xxxxxxxxxx/home/yahboom/yahboomcar_ros2_ws/yahboomcar_ws/src/yahboomcar_description/urdf/rosmaster_m1pro.urdf.xacro
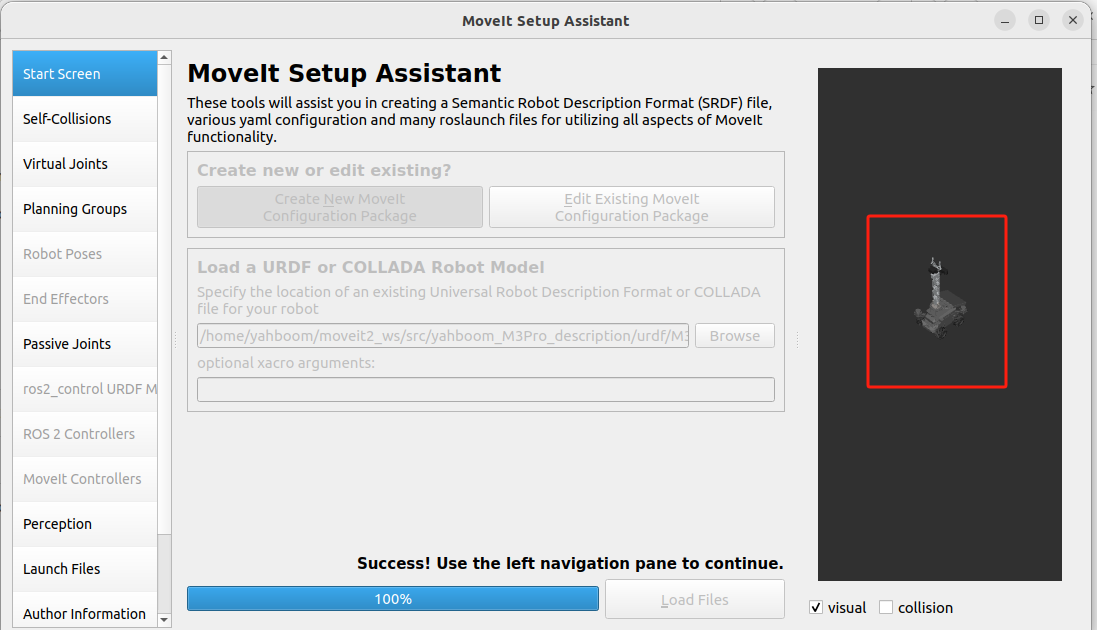
Click 【Browse】, then select the URDF file: rosmaster_m1pro.urdf. After the selection is complete, click 【Load Files】. The program will then load the selected URDF file. When loading is complete, the following screen appears, with the loaded M1Pro car model displayed on the right.
Next, click 【Self-Collisions】 in the configuration bar on the left. This step is to configure self-collision detection. As shown in the figure below, click 【Generate Collisions Matrix】 to complete the configuration:
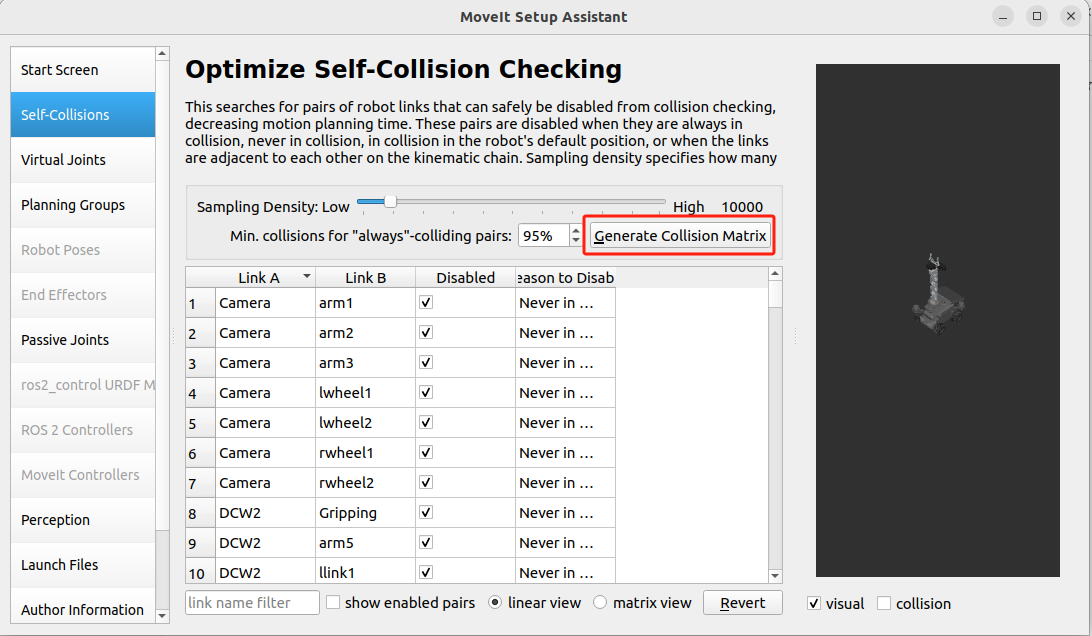
Then, click 【Planning Groups】 in the configuration bar on the left. This step is to create planning groups. Click 【Add Group】 to create the first planning group, as shown in the figure below:
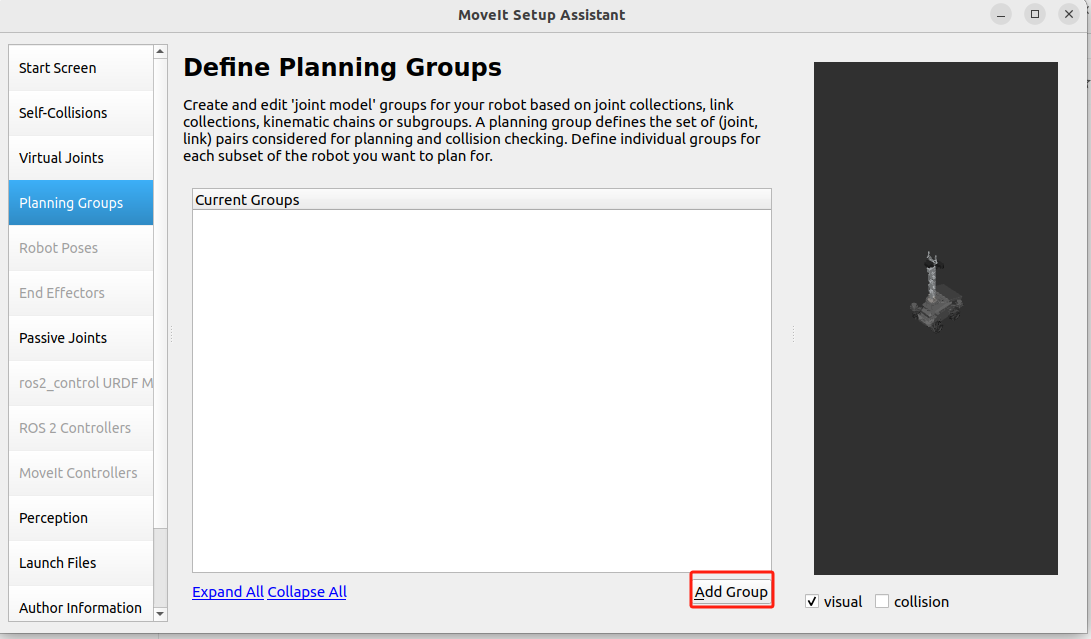
Then create the arm_group planning group to control the robotic arm, and set it as shown below:
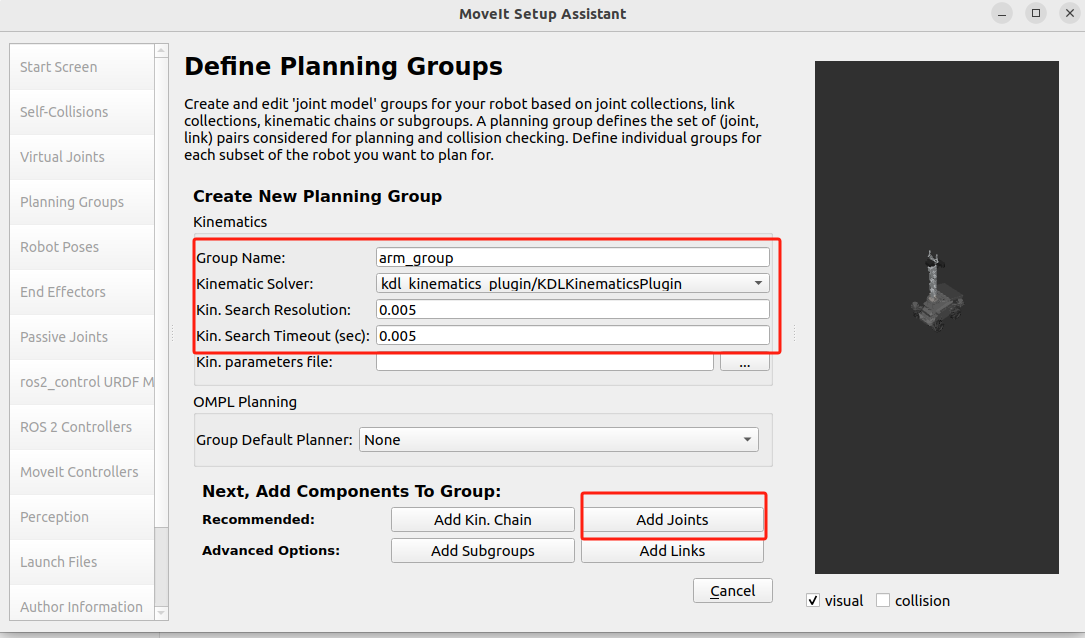
Next, we need to add [joints] to this planning group. Click 【Add Joints】 below to enter the add interface. In the add interface, select arm_Joint1 through arm_Joint5 on the left, click > to finish adding them, and then click 【Save】 to save and exit.
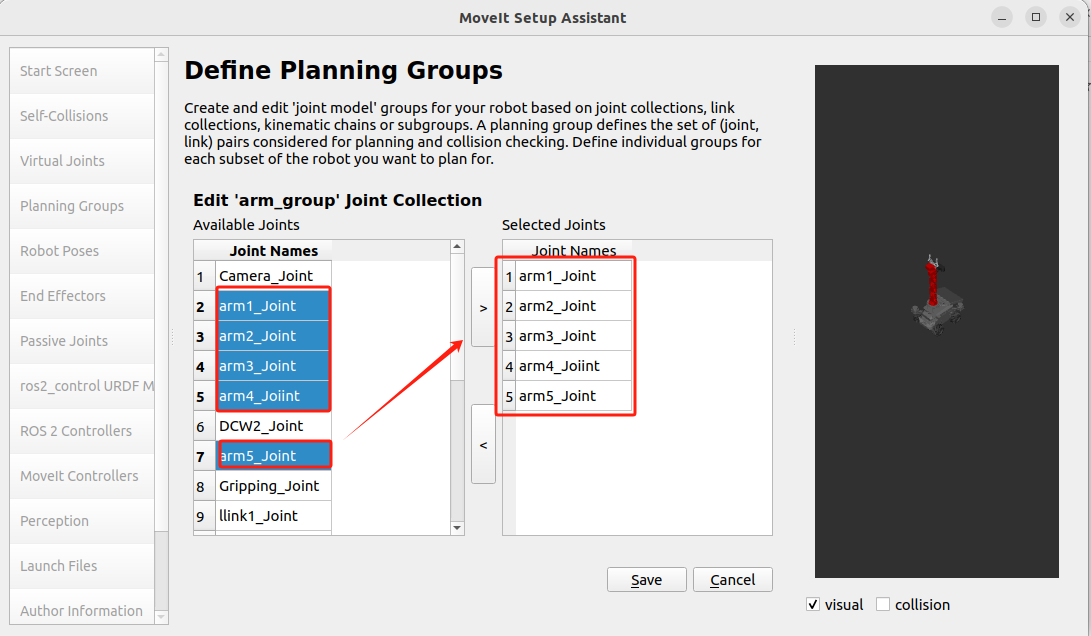
The completed arm_group planning group setup is shown in the figure below:
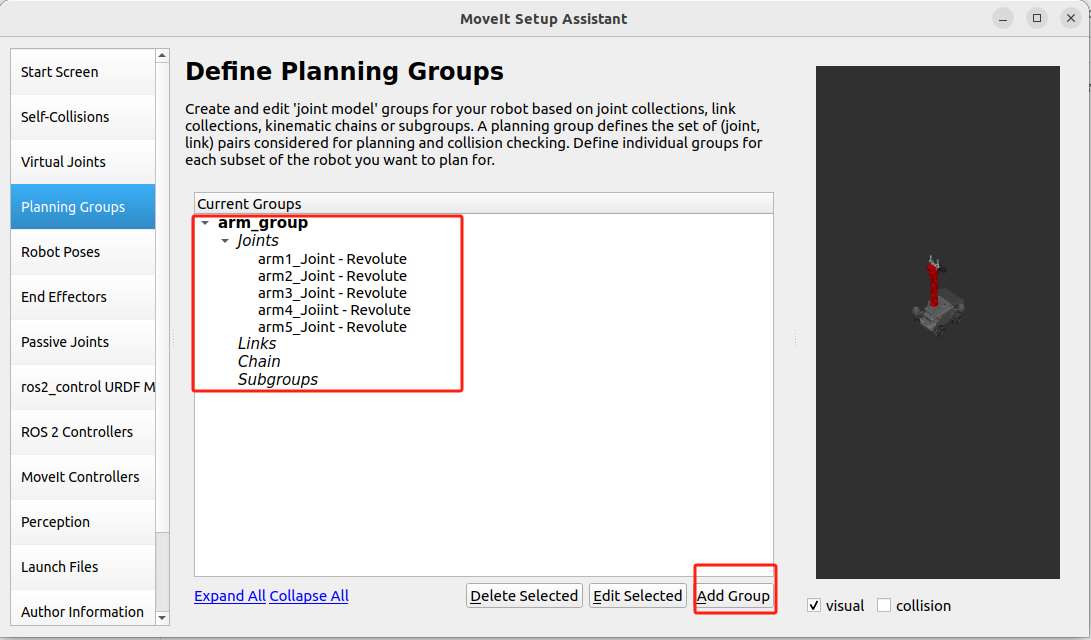
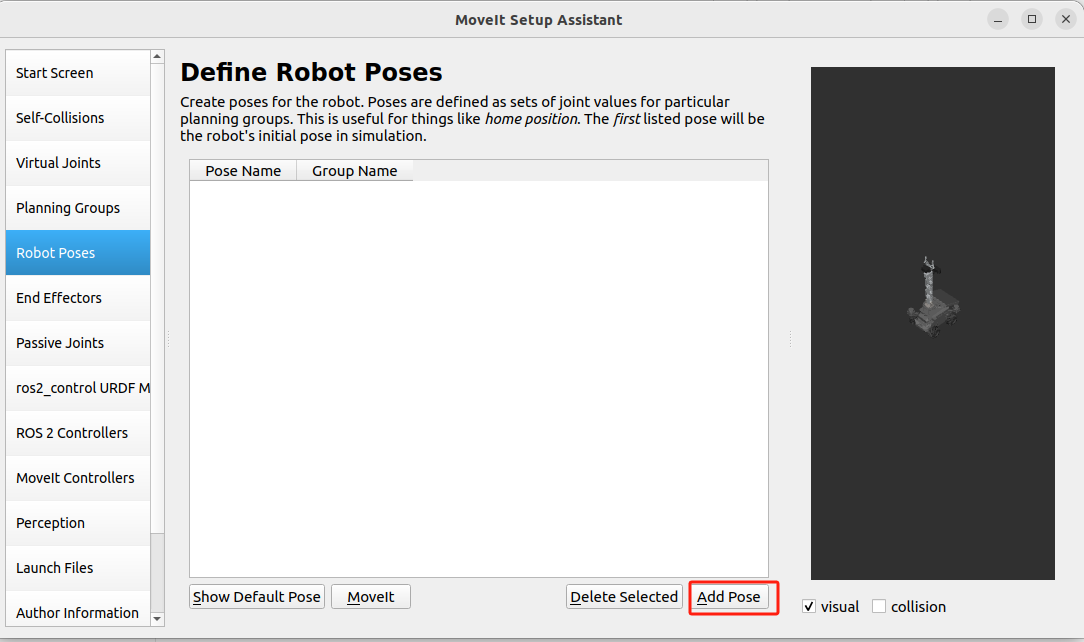
At this point, the planning group setup is complete. Next, click 【Robot Groups】 in the settings bar on the left. This step is to set the predefined poses of the robotic arm and gripper:
As shown in the figure below, click 【Add Pose】:
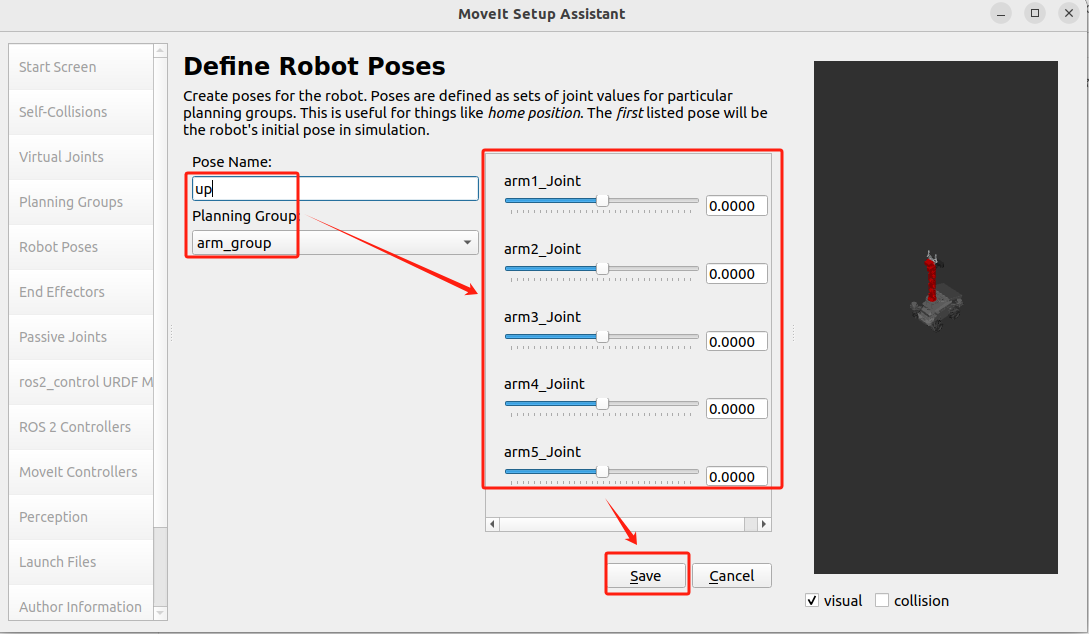
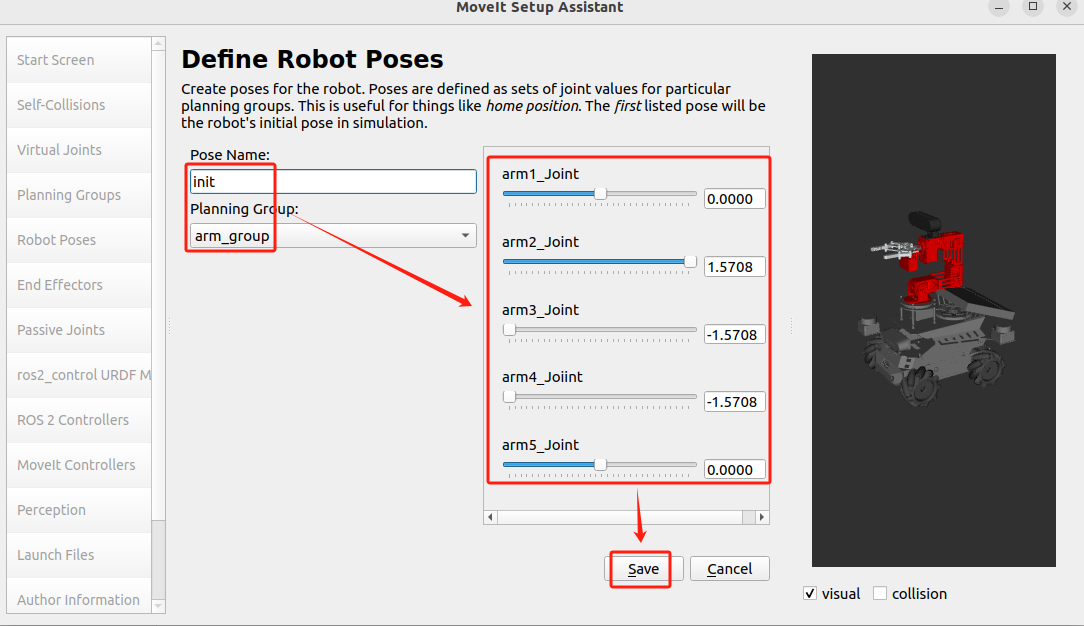
Then configure it as shown below to set the up pose of the arm_group planning group. The slider in the middle can adjust the pose, and the URDF on the right will also display the configured pose. After the setup, click 【Save】 to complete the configuration.
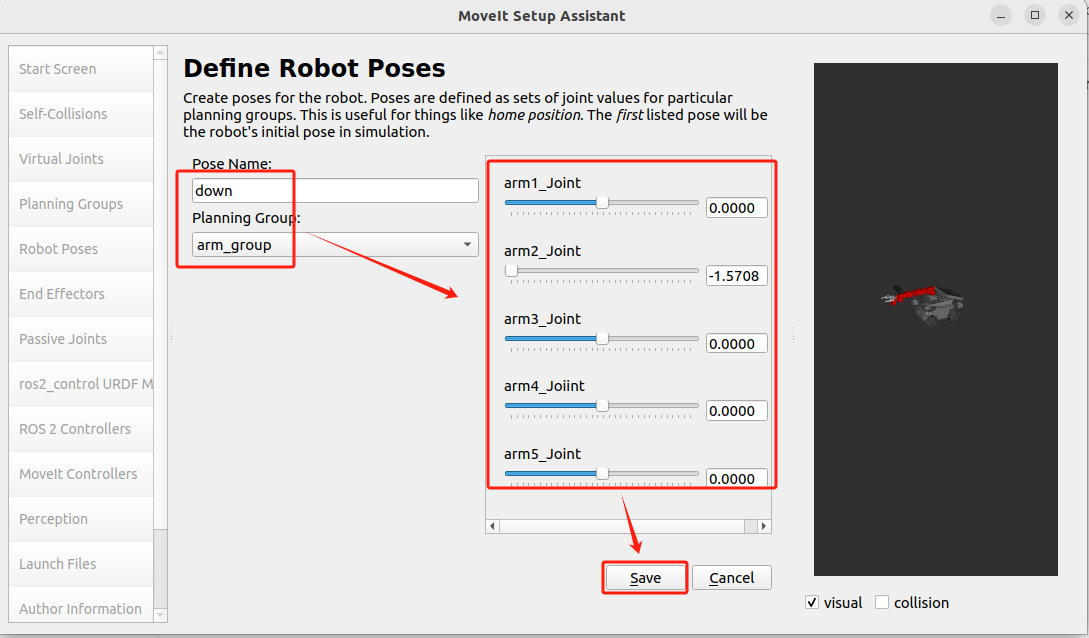
Next, following the same steps used to set the up pose, configure the down pose and init pose of the arm_group planning group. Refer to the figures below:
down pose:
init pose:
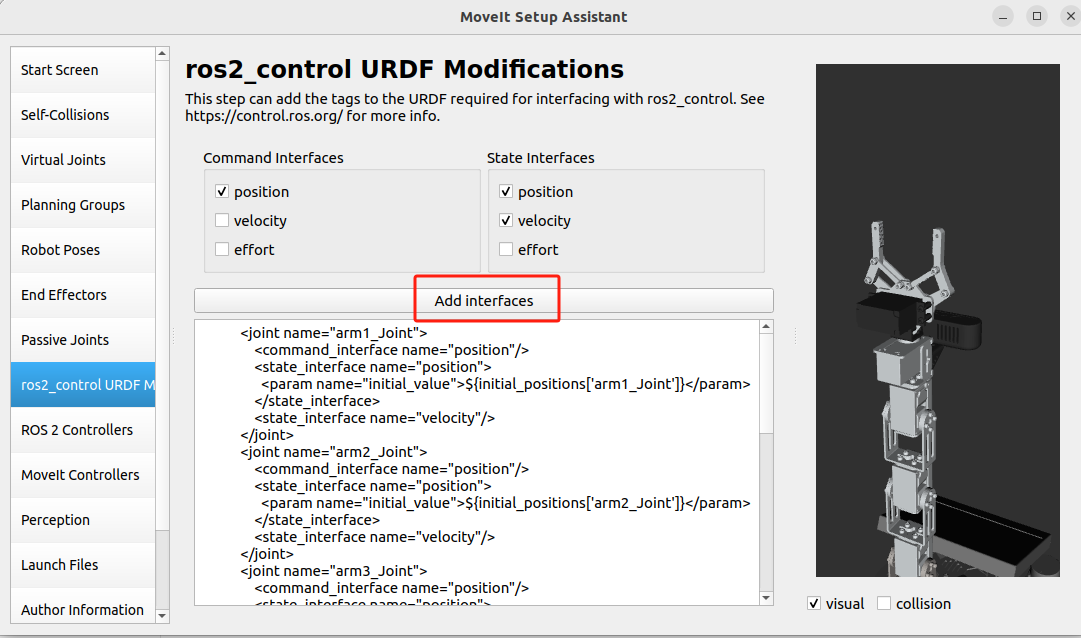
Next, click 【ros2_control URDF Modifications】 in the settings bar on the left. This step is to configure the URDF model. We do not need to modify the URDF model; simply click 【Add interfaces】, as shown in the figure below:
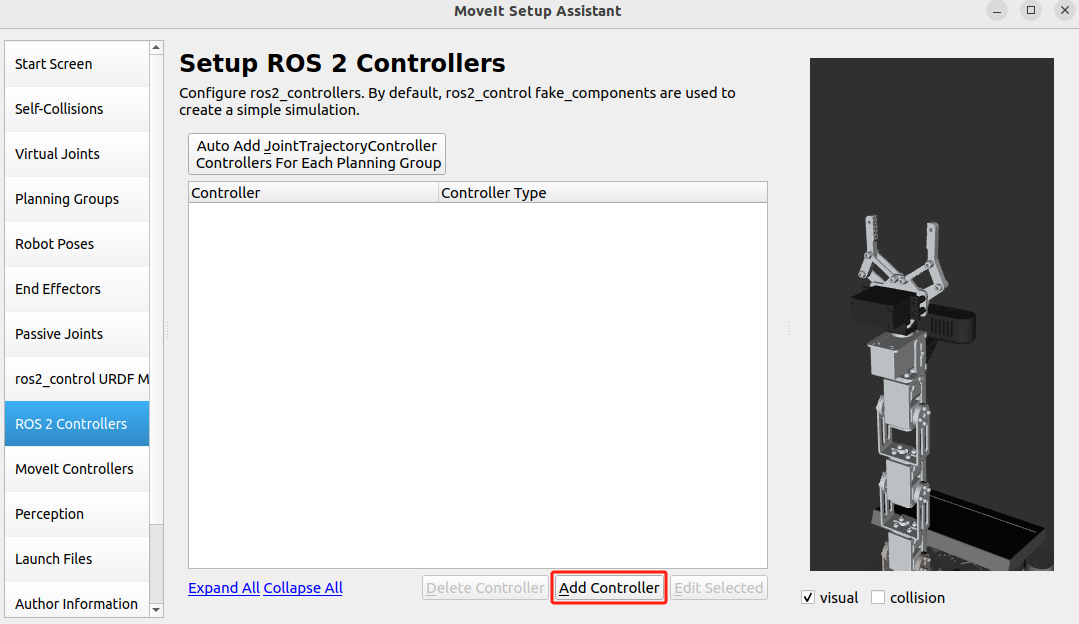
Click 【ROS2 Controllers】 in the settings bar on the left. This step is to configure robot motion control. Click 【Add Controller】 to add a controller, as shown in the figure below:
Once inside the settings, add the arm_group_controller as shown in the figure below:
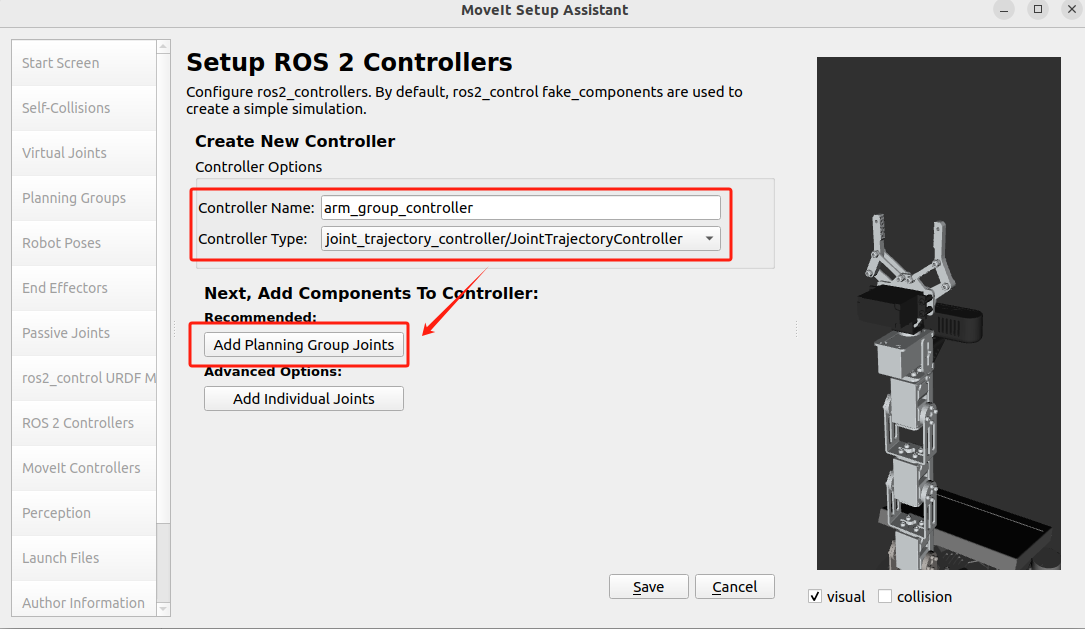
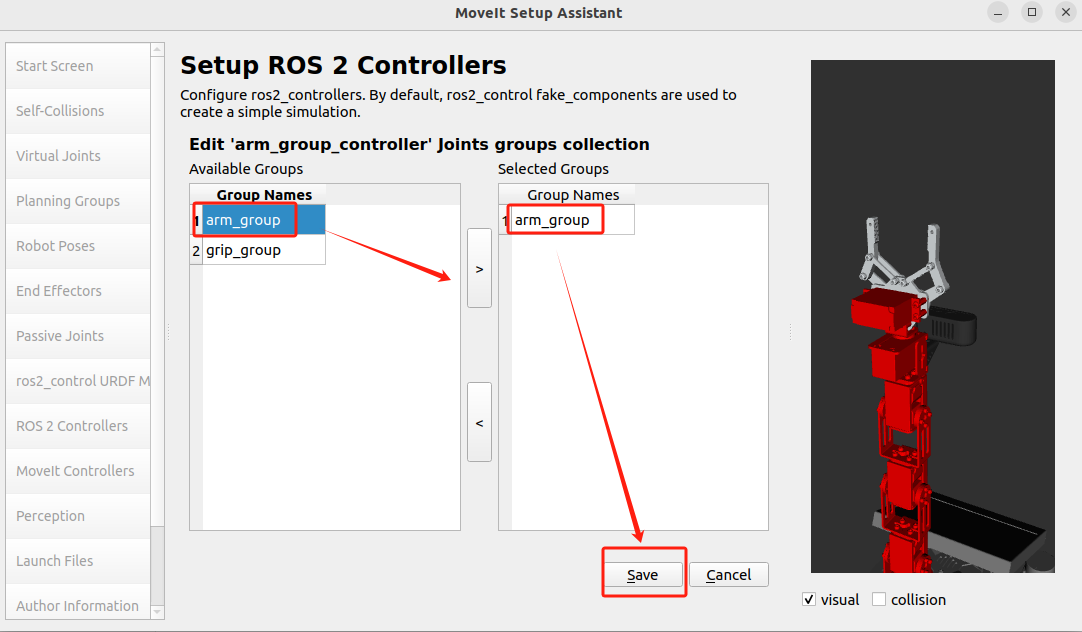
Then click 【Add Planning Group Joints】 to add the joints of the control group. As shown in the figure below, add the arm_group control group: select arm_group on the left and click > to complete the addition. Finally, click 【Save】 to save and exit:
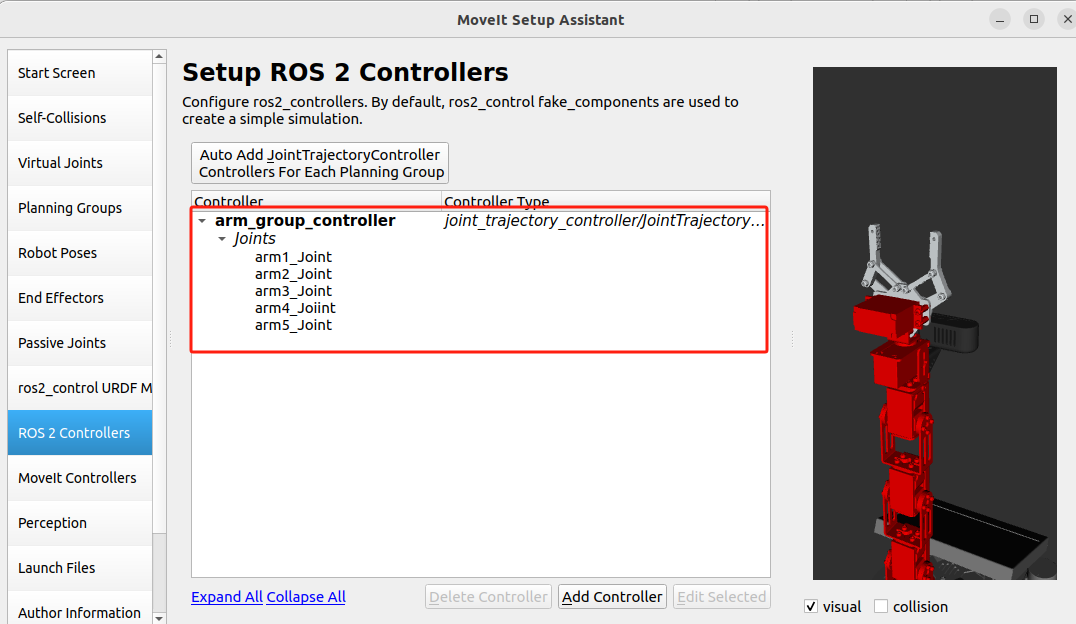
The first controller after setup is shown in the figure below:
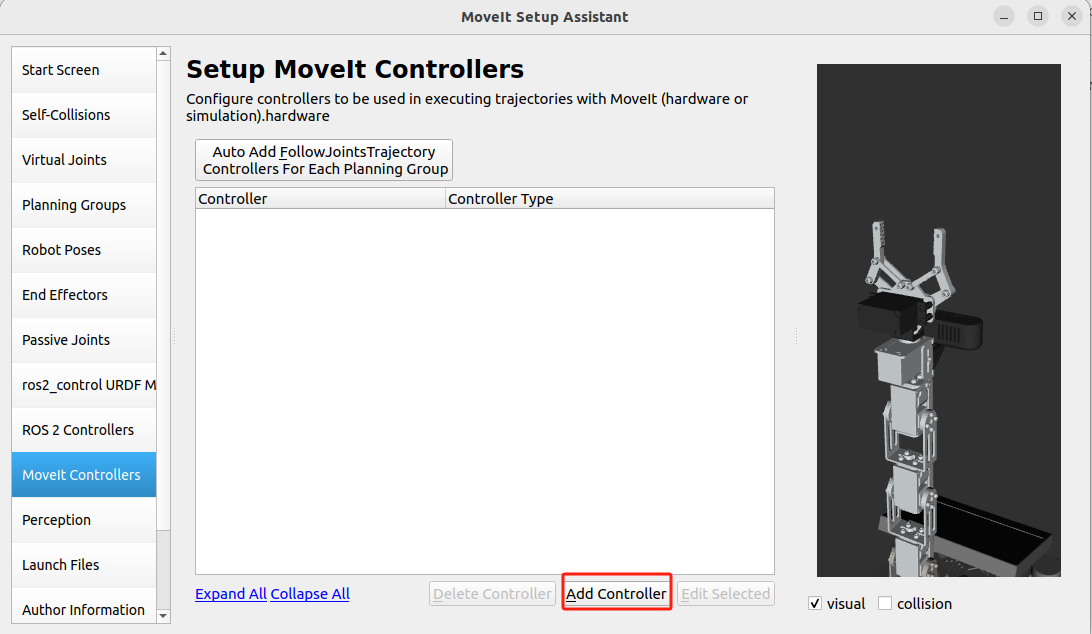
Next, click 【MoveIt Controllers】 in the settings bar on the left. This step is to configure the trajectory controller to execute the planned trajectories and send the generated
trajectories to the robot's ROS2 controller. Click 【Add Controller】 to add a trajectory controller, as shown in the figure below:
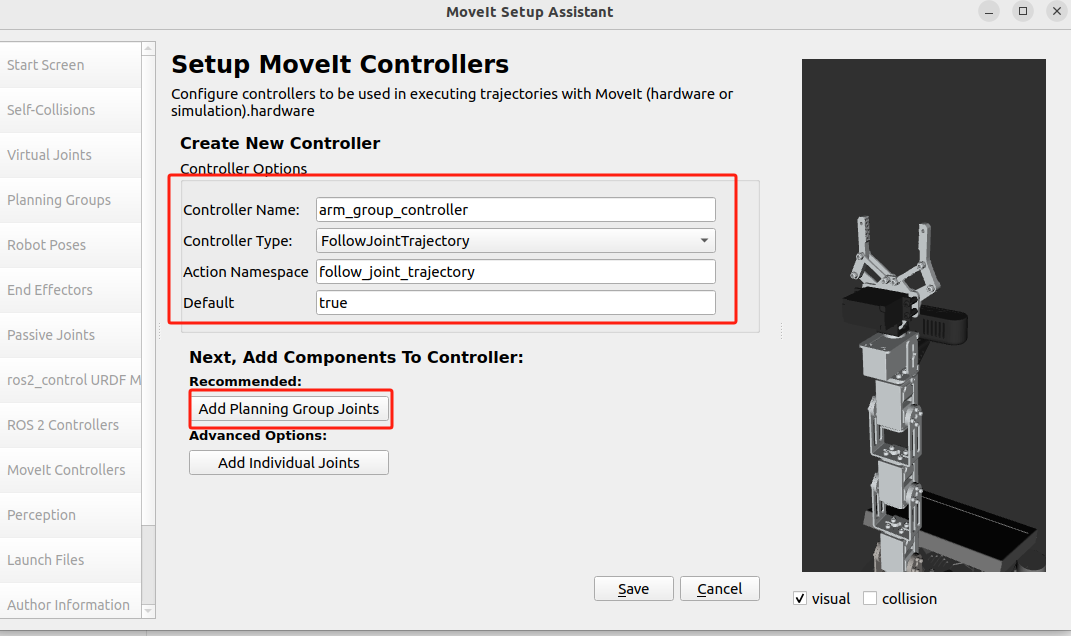
Once inside the setup interface, configure it according to the figure below. Note that the 【Controller Name】 here must match the 【ROS2 Controller】 set in the previous step, and then click 【Add Planning Group Joints】 to add the control joints:
As shown in the figure below, add the arm_group control group: select arm_group on the left and click > to complete the addition. Finally, click 【Save】 to save and exit:
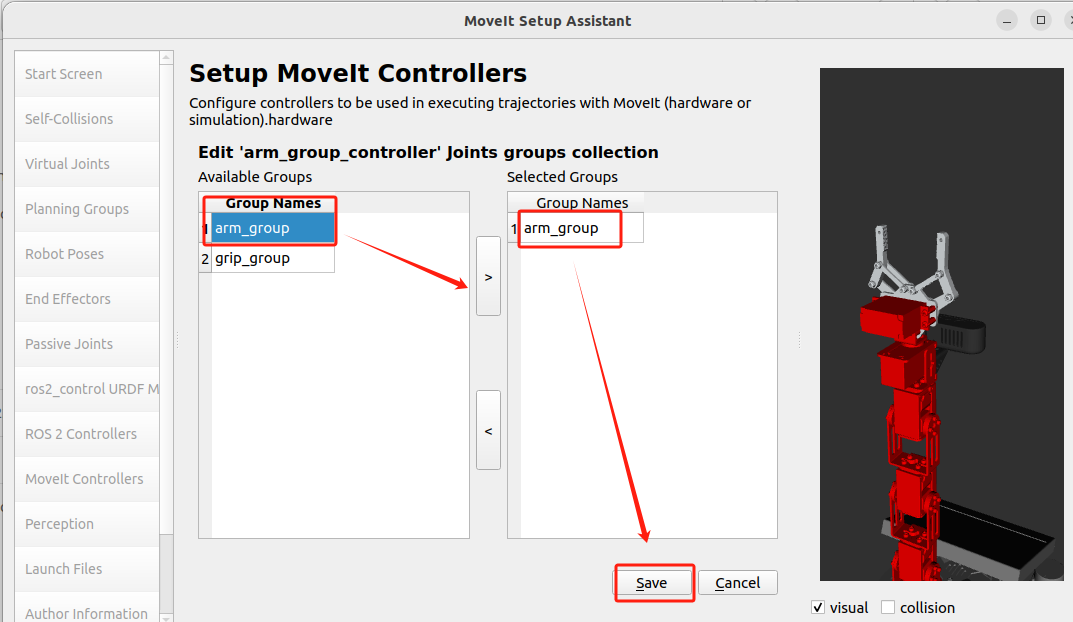
After the setup is complete, as shown in the figure below:
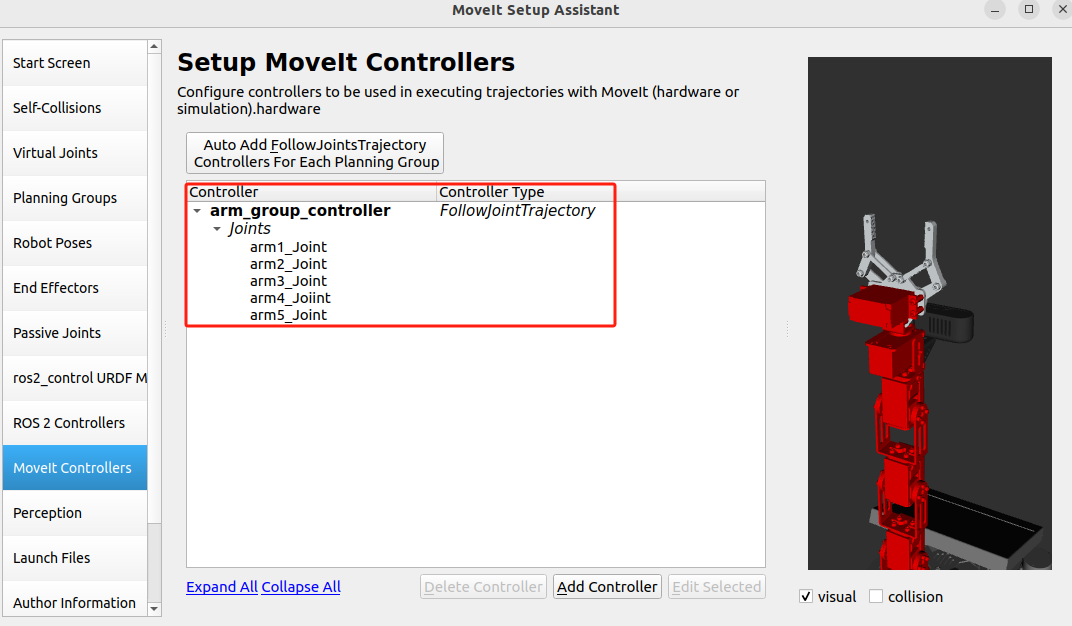
Next, click 【Author Information】 in the settings bar on the left, then fill in your name and email address, as shown in the figure below:
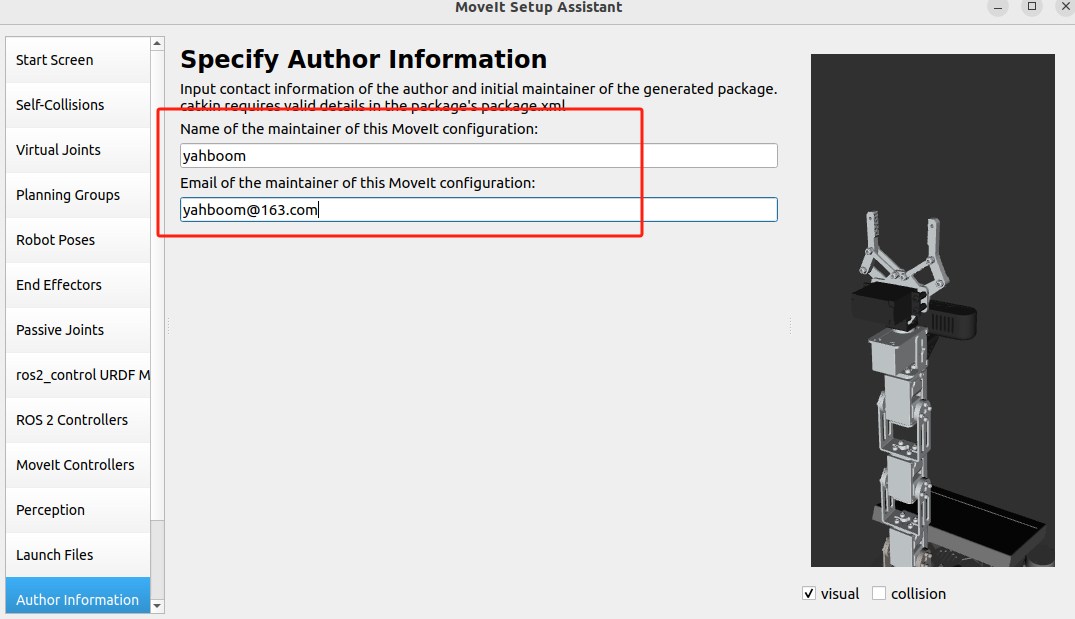
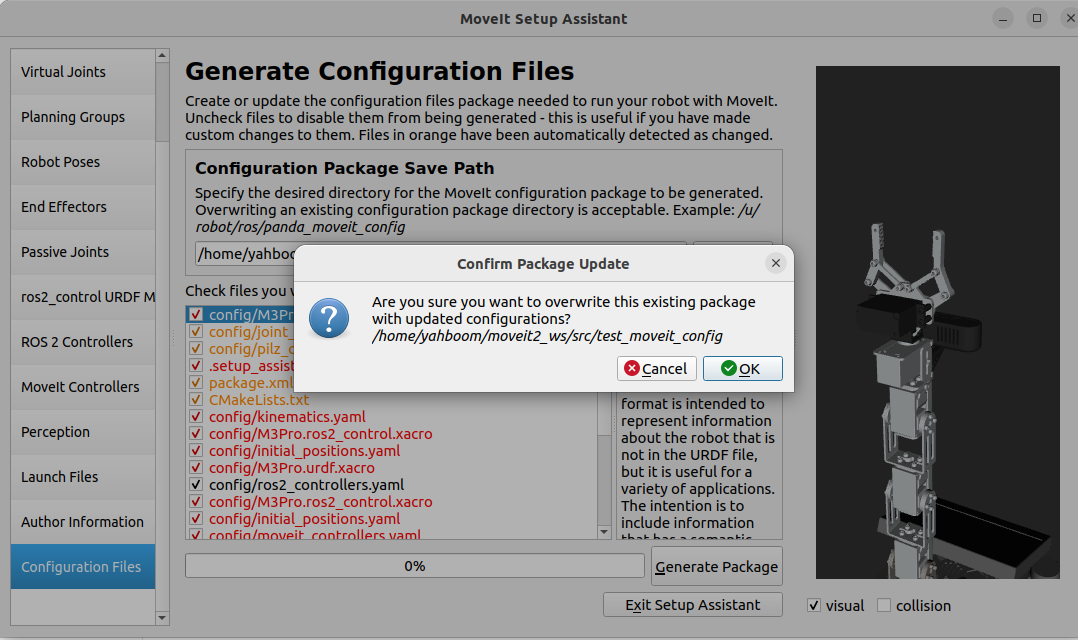
Finally, click 【Configuration Files】 in the settings bar on the left, click 【Browse】 to find the folder we created earlier. Here /home/yahboom/moveit2_ws/test_moveit_config is selected. When the following information appears, click 【ok】:
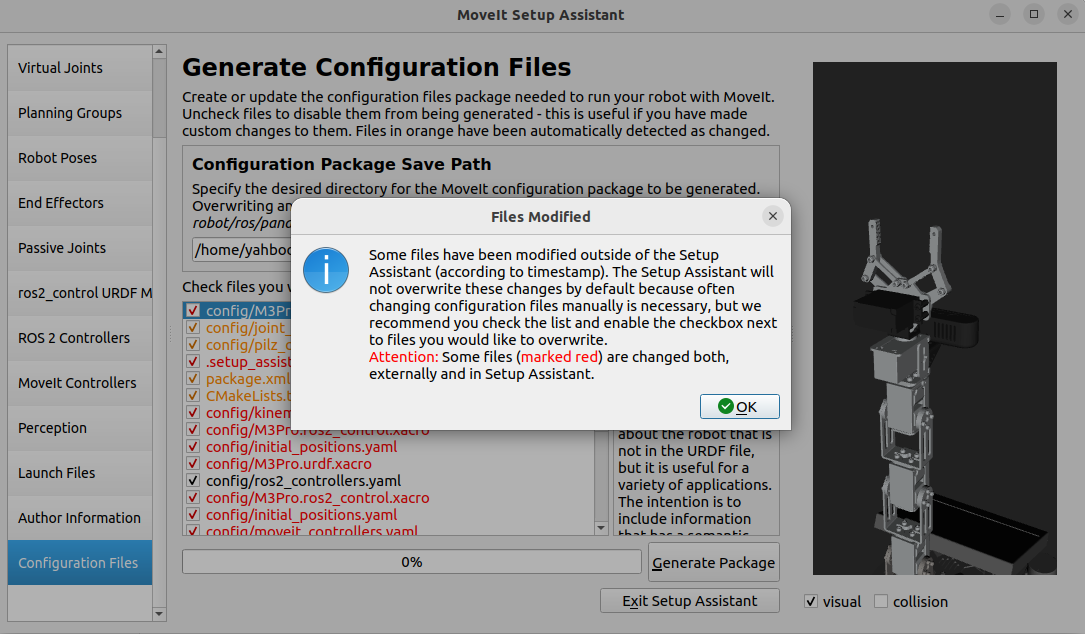
Then click 【Generate Package】 below to generate the package. As shown in the figure below, when a prompt appears, click 【ok】:
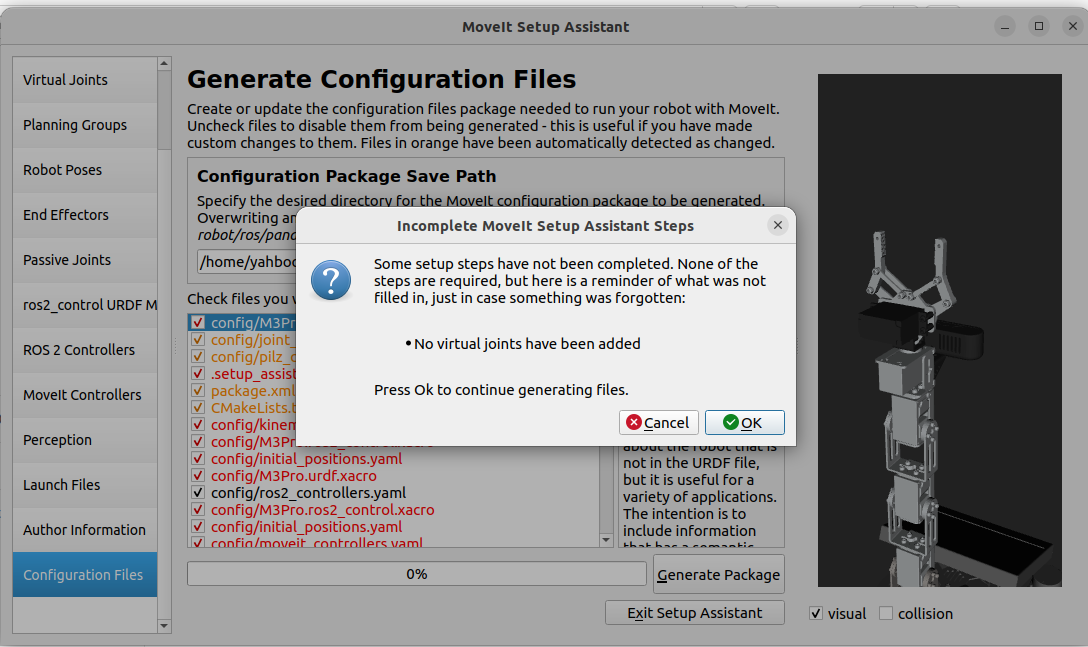
When a prompt appears, click 【ok】:
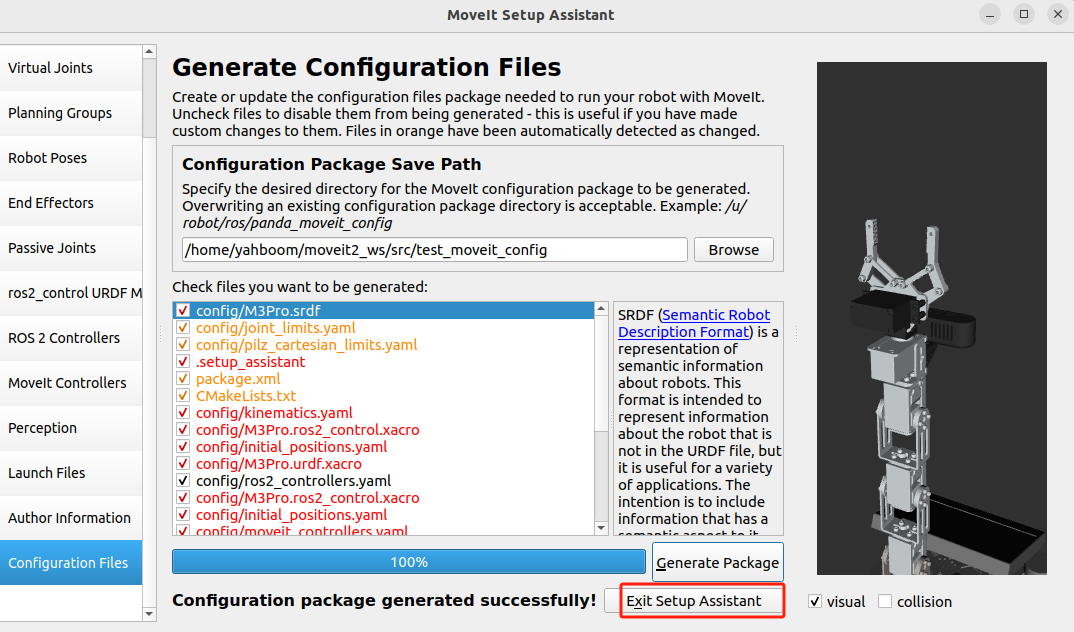
As shown in the figure below, when Configuration package generated successfully appears, click 【Exit Setup Assistant】 to complete all the setup:
Everything configured just now is saved in the test_moveit_config package. Next, we need to modify the joint_limits.yaml in the ~/test_moveit_config/config directory — simply change the integers inside to decimals while keeping the values unchanged. The modified file is as follows:
x# joint_limits.yaml allows the dynamics properties specified in the URDF to be overwritten or augmented as needed
# For beginners, we downscale velocity and acceleration limits.# You can always specify higher scaling factors (<= 1.0) in your motion requests. # Increase the values below to 1.0 to always move at maximum speed.default_velocity_scaling_factor0.1default_acceleration_scaling_factor0.1
# Specific joint properties can be changed with the keys [max_position, min_position, max_velocity, max_acceleration]# Joint limits can be turned off with [has_velocity_limits, has_acceleration_limits]joint_limits arm1_Joint has_velocity_limitstrue max_velocity1.0 has_acceleration_limitsfalse max_acceleration0.0 arm2_Joint has_velocity_limitstrue max_velocity1.0 has_acceleration_limitsfalse max_acceleration0.0 arm3_Joint has_velocity_limitstrue max_velocity1.0 has_acceleration_limitsfalse max_acceleration0.0 arm4_Joiint has_velocity_limitstrue max_velocity1.0 has_acceleration_limitsfalse max_acceleration0.0 arm5_Joint has_velocity_limitstrue max_velocity1.0 has_acceleration_limitsfalse max_acceleration0.0 llink1_Joint has_velocity_limitsfalse max_velocity0.0 has_acceleration_limitsfalse max_acceleration0.0 llink2_Joint has_velocity_limitsfalse max_velocity0.0 has_acceleration_limitsfalse max_acceleration0.0 llink3_Joint has_velocity_limitsfalse max_velocity0.0 has_acceleration_limitsfalse max_acceleration0.0 rlink1_Joint has_velocity_limitstrue max_velocity1.0 has_acceleration_limitsfalse max_acceleration0.0 rlink2_Joint has_velocity_limitsfalse max_velocity0.0 has_acceleration_limitsfalse max_acceleration0.0 rlink3_Joint has_velocity_limitsfalse max_velocity0.0 has_acceleration_limitsfalse max_acceleration0.0Save and exit, then return to the workspace directory and compile with colcon build. Enter the following in the terminal:
xxxxxxxxxxcd moveit2_wscolcon build --packages-select test_configAfter compilation, refresh the environment variables by entering source ./install/setup.bash in the terminal. Then enter the following command in the terminal to launch MoveIt2:
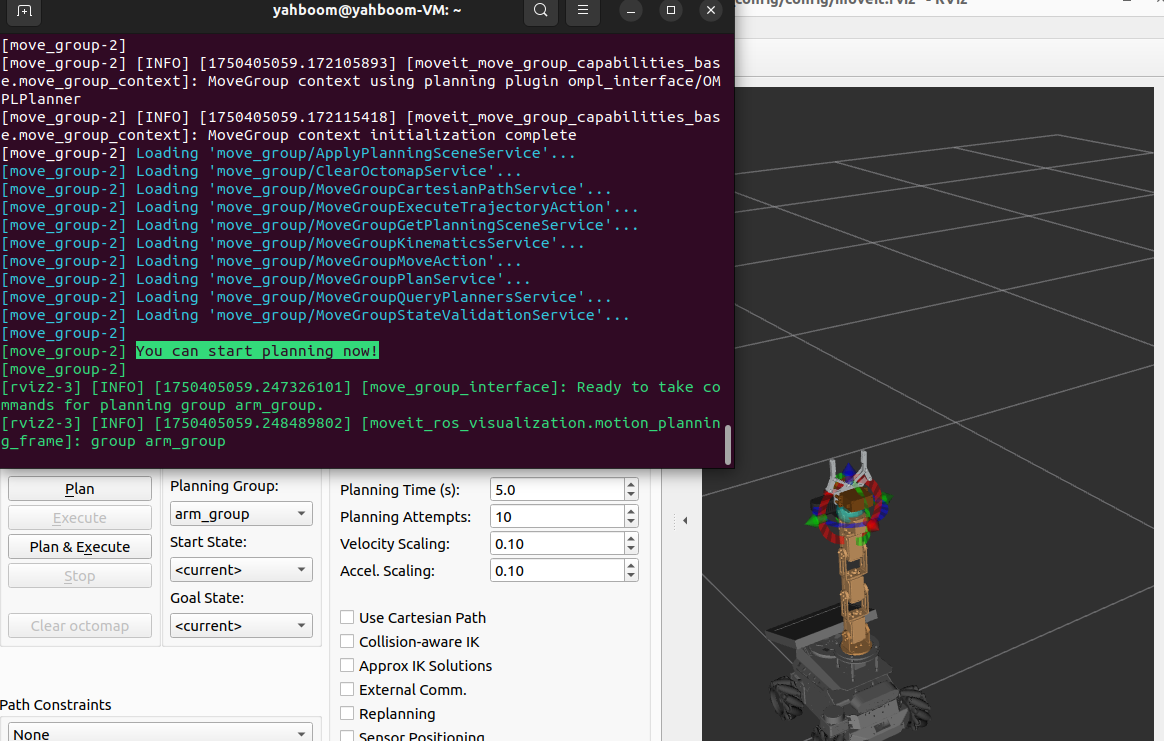
xxxxxxxxxxros2 launch test_config demo.launch.pyOnce the program starts, when You can start planning now! appears in the terminal, it means the startup was successful, as shown in the figure below: