Welcome to ROSMASTER M1 PRO repository
4.Road Network Navigation In Any Pose
Road Network Navigation in Any Pose
Road Network Navigation in Any Pose1. Course Content2. Preparation3. Road Network Planning and Navigation in Any Pose3.1 Case Demonstration3.2 Requesting Navigation Through the Action Service Interface4. Source Code Analysis5. Parameter Debugging
1. Course Content
Basic
Start the road network navigation feature, and master using the roadnet_nav visualization panel to send a goal pose so that, combined with the road network planning feature, the robot reaches the goal in any pose.
Advanced
Master the method of requesting navigation through the action service interface
Understand the implementation logic of the program source code
2. Preparation
ros2 launch yahboomcar_bringup roadnet_nav.launch.py
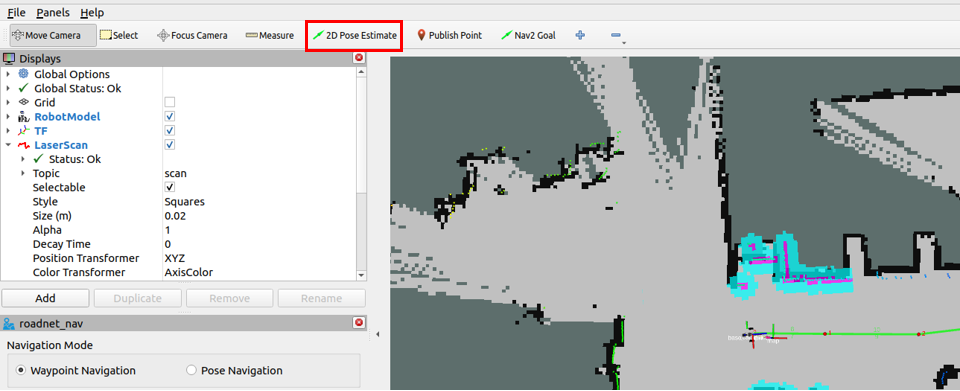
Click 2D Pose Estimate to initialize the robot's pose on the map
3. Road Network Planning and Navigation in Any Pose
Here we use road network navigation by publishing to the
/road_net_navtopic in the terminal. This topic can accept aPoseStampedgoal pose, travel along the road network to the vicinity of the goal pose, and then precisely adjust to the goal pose. The topic publishing format is as follows:
xxxxxxxxxxros2 topic pub -1 /road_net_nav geometry_msgs/PoseStamped "{ pose: { position: {x: xx, y: xx, z: 0.0}, orientation: {x: 0.0, y: 0.0, z: xx, w: xx} }}"Note
A pose consists of position and orientation. Here, for a ground mobile robot, the position has only planar x, y coordinates, and the orientation is only rotation about its own z axis. In pose:
position: {x: xx, y: xx, z: 0.0} is the position information
orientation: {x: 0.0, y: 0.0, z: xx, w: xx} is the body rotation information described by a quaternion
3.1 Case Demonstration
Use the Nav2 Goal tool to first navigate to a pose point
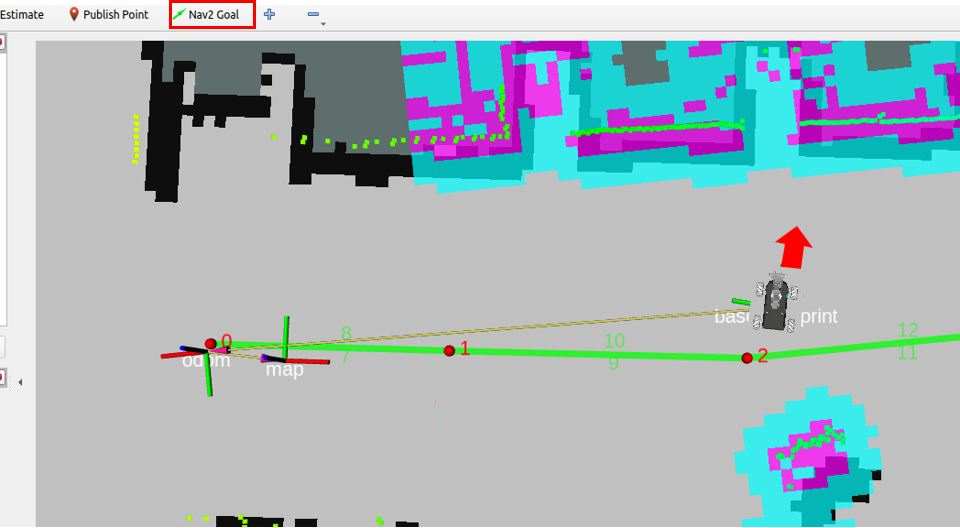
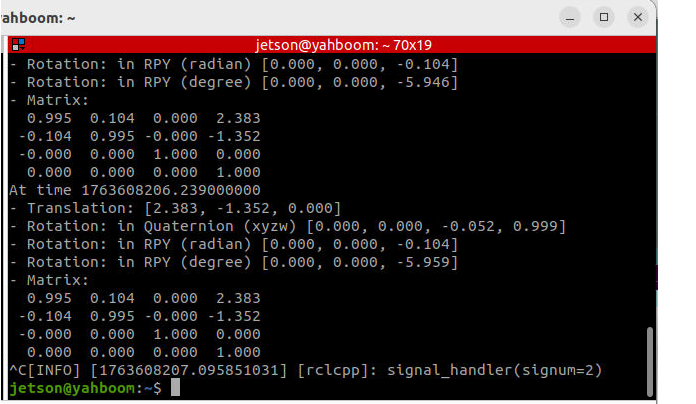
Use the following command to obtain the robot's current coordinates in the map
xxxxxxxxxxros2 run tf2_ros tf2_echo map base_footprint
Here Translation and Rotation: in Quaternion (xyzw) are the robot's pose in the global map.
Then we let the robot return to its initial position, and select Pose Navigation in the roadnet_nav panel, fill in the pose just queried, and click Start to begin navigation
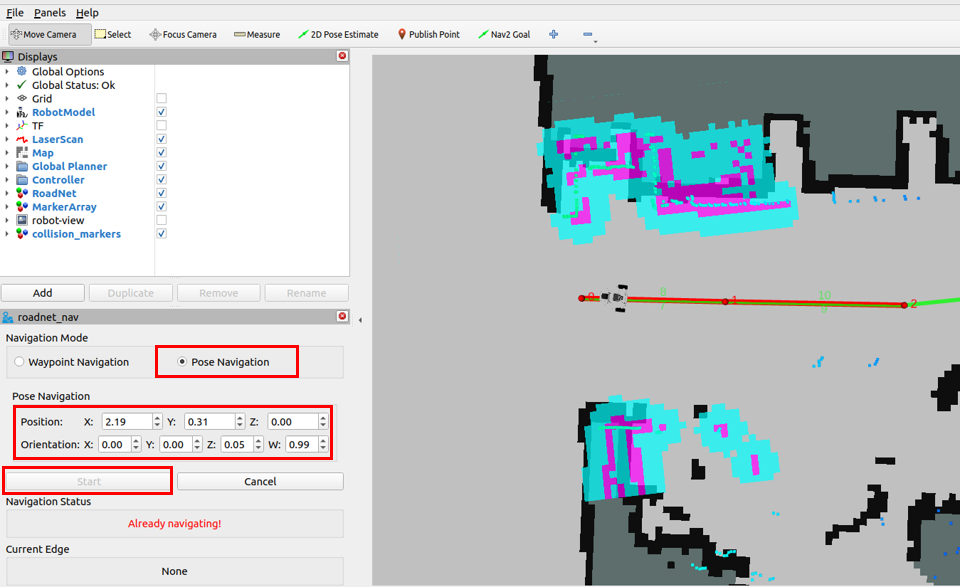
After that, the robot will first travel along the road network to a waypoint near the goal point, then navigate along a road network edge, and finally adjust to the goal pose.
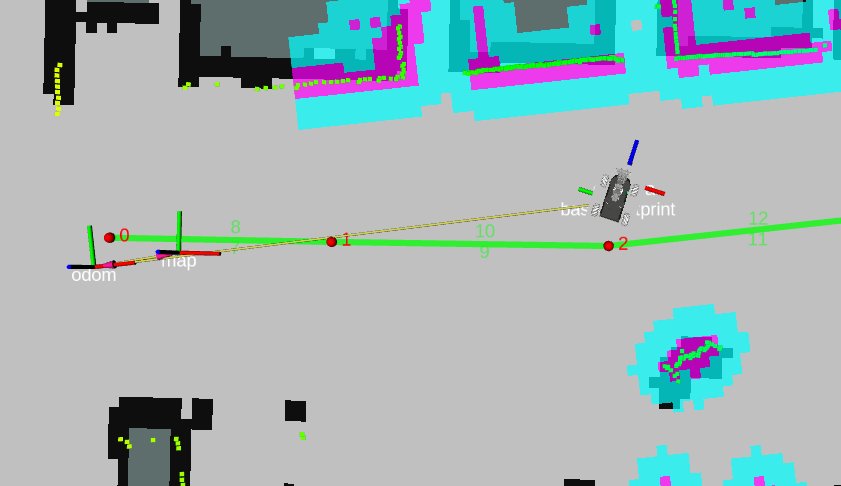
3.2 Requesting Navigation Through the Action Service Interface
Replace the pose parameter with the pose queried earlier; its function is the same as that in the roadnet_nav panel
xxxxxxxxxxros2 action send_goal --feedback /compute_route_and_follow roadnet/action/RoadNetToGoal \"{use_poses: true,goal: {header: {frame_id: 'map'},pose: {position: {x: 2.19, y: 0.31, z: 0.0}, orientation: {z: 0.05, w: 0.99}}}}"
4. Source Code Analysis
Refer to the source code analysis in the 【Waypoint-to-Waypoint Planning and Navigation】 chapter lesson; the
computeRouteAndFollowfunction contains the implementation of the pose navigation part
5. Parameter Debugging
Refer to the parameter debugging in the 【Waypoint-to-Waypoint Planning and Navigation】 chapter lesson; the parameter file is the same