Welcome to ROSMASTER M1 PRO repository
2.OpenClaw Arm Tracking And Grasping
OpenClaw Arm Tracking And Grasping
OpenClaw Arm Tracking And Grasping1. Course Content2. Preparation3. Arm Tracking And Grasping Target Case (Depth Camera)4. Grasping Color Blocks (Monocular Camera)5. Source Code Analysis5.1 pick() — Grasping an item with the depth camera5.2 _get_grasp_point() — Obtain the grasp point coordinates (depth camera)5.3 Grasping Color Blocks (USB Monocular Camera)6. Parameter Debugging7. Function Q&AHow to adjust when the grasp position is inaccurate and deviates from the ideal grasp point?How to adjust the grasp_offset offset
1. Course Content
Learn to control the robotic arm to grasp the target object through OpenClaw. The depth camera can track and grasp the target through point cloud information. The monocular camera grasping function grasps the specified color block (red, yellow, blue, green) on the plane.
2. Preparation
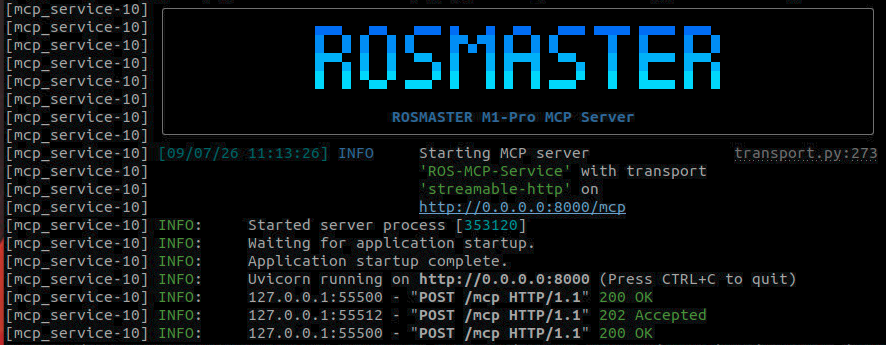
Start the MCP service. If you need voice replies, you must add the use_tts parameter:
use_tts:=true, otherwise it can be omitted.
ros2 launch yahboomcar_bringup mcp_service.launch.py use_camera:=true
3. Arm Tracking And Grasping Target Case (Depth Camera)
Tip
You can write the command yourself according to your needs. The following is a case demonstration. Just choose any one of the interaction methods. The demonstration here uses the web-based WebChat as an example.
Important
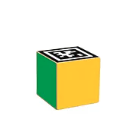
The block grasped in the depth camera demonstration here is a 4x4x4cm wooden block. Tracking and grasping can grasp any target object. Since the servo has no torque feedback, the gripper's gripping closed angle needs to be specified through parameters. If the gripper grasps too loosely or too tightly, it can be fine-tuned through parameters.
The monocular USB camera demonstration uses 3 x 3 x 3 cm color wooden blocks for grasping.
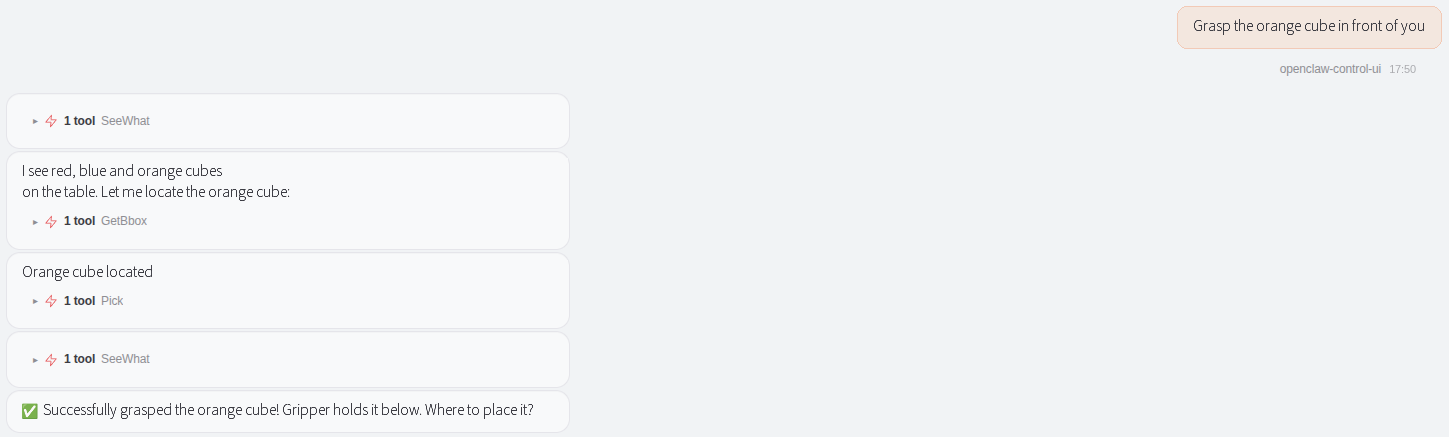
Grasp the orange block in front of you
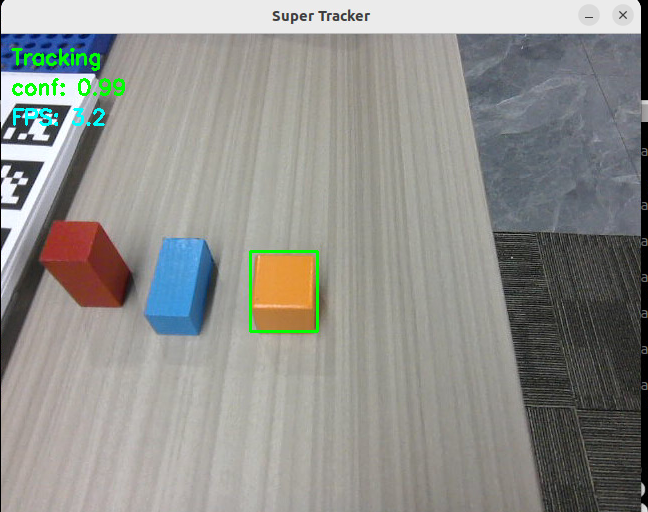
The figure below shows the tracking process of grasping the target. The robot will first adjust the chassis position to ensure that the target is within the grasping range of the robotic arm.
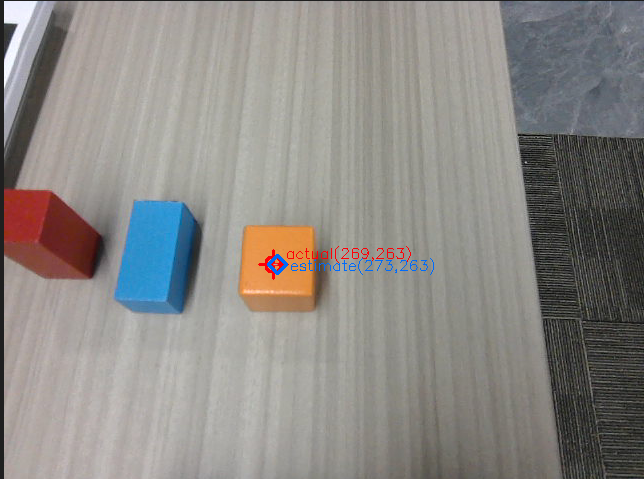
After the chassis adjustment is complete, the grasp point will be obtained as shown below. The program will automatically draw an image of the grasp point, which can be used to determine whether there is depth data near the grasp point. Image path:
~/yahboomcar_ros2_ws/yahboomcar_ws/cache/grasp_point_image.png
Tip
Under normal circumstances, actual and estimate should basically overlap, proving that the grasp point has accurate camera depth data. If the two points do not overlap, it proves that there is no camera depth data near the grasp point, and the grasp may have an obvious deviation.
Target grasping skills
OpenClaw controls the robot to grasp the target object. It will first read the robotic arm grasping skill and carry out the operation by referring to the SOP process.
For the robotic arm grasping skill, refer to: [OpenClaw Skills Development]
4. Grasping Color Blocks (Monocular Camera)

The MCP server will then start the color detection node through a subprocess to detect the target color block.
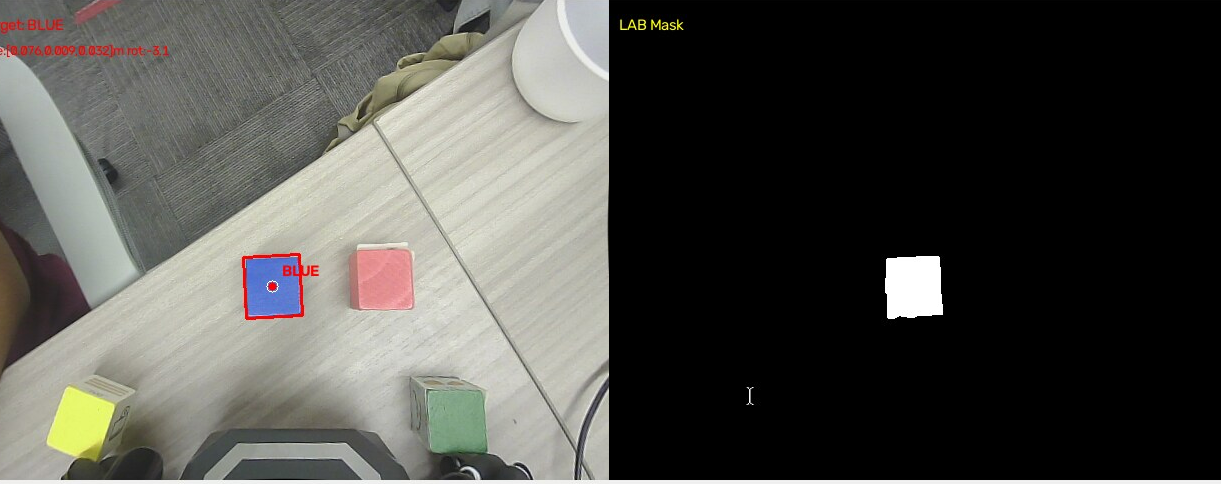
If no color block is detected due to the influence of ambient light, you can press the "C" key to perform color calibration. For the color calibration method, refer to the color calibration steps in the preceding course 【Robotic Arm and 3D Space Gripping Course — Color Block Color Sorting】.
If the camera is overexposed or too dark due to the influence of ambient light, you can refer to the method in the preceding course 【USB Camera & Depth Camera Vision Course — USB Camera Introduction】 to turn off auto exposure and manually adjust the camera exposure value. Save the parameters and restart the program for them to take effect.
5. Source Code Analysis
Source code path
xxxxxxxxxx~/yahboomcar_ros2_ws/yahboomcar_ws/src/multi_brains_pre/multi_brains_pre/action_controller.py
The core function functions of the grasping program are all defined in the ActionController class, and can be called by OpenClaw after being registered through the MCP Tool interface. The following is an explanation of the source code of each key function.
5.1 pick() — Grasping an item with the depth camera
Process Description:
Start tracking: Based on the target bounding box detected by vision (x1,y1,x2,y2), call the
/start_trackservice to start Smart Tracker target tracking._adjust_grasp_pose(): Internally loops through the process of "align the camera → measure the object's 3D pose → move the chassis" until the target is within the grasping range._get_grasp_point(): Call/get_box_centerto obtain the pixel coordinates of the grasp point, and convert them to spatial coordinates in combination with the 3D pose service. For detailed source code and explanation, see below:_grasp()(internal method): Solve the 6 joint angles through inverse kinematics (IK), publish them to thearm6_jointstopic to drive the robotic arm, and then close the gripper.Automatic retreat: After grasping is complete, retreat by the
auto_back_distdistance to avoid collisions and entering the costmap obstacle area.
x def pick(self,x1:int,y1:int,x2:int,y2:int) -> list[bool,str]: ''' Pick up item x1:int, y1:int, x2:int, y2:int ''' self.get_logger().info("Start tracking object") if not self.start_track_client.wait_for_service(timeout_sec=5.0): self.get_logger().error("StartTrack service not available") return [False,"Tracking service not available"] result:StartTrack.Response=self.start_track_client.call(StartTrack.Request(x1=x1, y1=y1, x2=x2, y2=y2)) if not result.success: self.get_logger().error("Failed to initialize tracking target") return [False,"Tracking failed"] time.sleep(1.0) self.get_logger().info("Start aligning to target") ok, message = self._adjust_grasp_pose(align_x=self.track_align_distance[0], align_y=self.track_align_distance[1]) if not ok: self.cancel_track_client.call(CancelTrack.Request()) self.get_logger().error(f"Failed to align to target: {message}") return [False, f"pick failed: {message}"] time.sleep(2.0)
result=self._get_grasp_point() if not result[0]: self.cancel_track_client.call(CancelTrack.Request()) self.get_logger().error("Failed to get grasp target position") return [False, "Failed to get grasp target position"] self.get_logger().info("Start grasping object") self.cancel_track_client.call(CancelTrack.Request()) success=self._grasp(grasp_x=result[1], grasp_y=result[2], grasp_z=result[3], grasp_pitch=self.grasp_offset[3], offset=self.grasp_offset) if not success: self.get_logger().error("Failed to grasp object") return [False, "Failed to grasp object"] if self.enable_auto_back: self.Move(direction='backward', value=self.auto_back_dist) return [True,""]
5.2 _get_grasp_point() — Obtain the grasp point coordinates (depth camera)
xxxxxxxxxx    def _get_grasp_point(self)->list:        if not self.box_center_client.wait_for_service(timeout_sec=8.0):            msg = "get grasp point service not available"            self.get_logger().error(Fore.YELLOW + msg + Fore.RESET)            return [False, msg]        self.SeeWhat()        response: GetBoxCenter.Response = self.box_center_client.call(GetBoxCenter.Request())
        if not response.success:            msg = response.message            self.get_logger().error(Fore.RED + msg + Fore.RESET)            return [False, response.message]                image = cv2.imread(self.image_path)        if image is None:            self.get_logger().warn(Fore.YELLOW + f"Failed to read image: {self.image_path}" + Fore.RESET)        else:            ax = int(response.actual_center[0])            ay = int(response.actual_center[1])            ex = int(response.estimate_center[0])            ey = int(response.estimate_center[1])
            has_actual   = (ax != 0 or ay != 0)            has_estimate = (ex != 0 or ey != 0)
            # draw actual_center: red crosshair + circle            if has_actual:                cross = 14                cv2.line(image, (ax - cross, ay), (ax + cross, ay), (0, 0, 255), 2)                cv2.line(image, (ax, ay - cross), (ax, ay + cross), (0, 0, 255), 2)                cv2.circle(image, (ax, ay), 8, (0, 0, 255), 2)                cv2.putText(image, f"actual({ax},{ay})", (ax + 12, ay - 6),                            cv2.FONT_HERSHEY_SIMPLEX, 0.5, (0, 0, 255), 1)
            # draw estimate_center: blue diamond            if has_estimate:                cv2.drawMarker(image, (ex, ey), (255, 100, 0), cv2.MARKER_DIAMOND, 18, 2)                cv2.putText(image, f"estimate({ex},{ey})", (ex + 12, ey + 6),                            cv2.FONT_HERSHEY_SIMPLEX, 0.5, (255, 100, 0), 1)
            # connect two points            if has_actual and has_estimate:                cv2.line(image, (ax, ay), (ex, ey), (180, 180, 180), 1, cv2.LINE_AA)
            cv2.imwrite(self.grasp_point_path, image)            self.get_logger().info(                f"Grasp point image saved: actual=({ax},{ay}) estimate=({ex},{ey})")
Code Explanation:
Here, based on engineering experience, a grasp center estimation algorithm is proposed. When most of the depth of the target object is missing due to the influence of ambient light, it can still estimate the 3D coordinates of the grasp target center. Due to space limitations, the theory is not derived here; only the program source code is explained.
Dual-center mechanism: The returned result contains
actual_center(the actual detected center) andestimate_center(the algorithm-estimated center). The pixel offset between the two is used to compensate for the error in the 3D spatial coordinates.Verification image: Automatically draw a red crosshair (actual) and a blue diamond (estimate) to
grasp_point_image.png, making it easy to debug whether the grasp point is accurate.Priority strategy:
estimate_posetakes priority overactual_pose, because it combines visual detection and the grasp center estimation algorithm for higher precision.
5.3 Grasping Color Blocks (USB Monocular Camera)
Code Explanation:
GraspColor: The main function for grasping color blocks with the USB monocular camera. It receives a color name parameter and completes the grasp in a four-step process._check_camera_action("GraspColor", "usb"): A pre-check to ensure that the USB monocular camera is currently in use. If the camera type does not match, it returns an error directly._pubSix_Arm(self.color_detect_pose): Move the robotic arm to the preset color detection pose to ensure that the camera can clearly capture the color blocks on the desktop._start_color_detect(color): Start an independentcolor_detectROS2 node process, running as a subprocess, to continuously detect the specified color block.-p target_color:={color}: Specify the target detection color through a command-line parameter, supporting four colors: red/green/blue/yellow.
xxxxxxxxxx    def GraspColor(self, color):        '''Grasp the color block with the given color, only available for usb camera'''        if (guard := self._check_camera_action("GraspColor", "usb")) is not None:            return guard        color = str(color).strip().strip("'\"")        if color not in ['red', 'green', 'blue', 'yellow']:            error_msg = f"GraspColor: invalid color '{color}', must be red/green/blue/yellow"            self.get_logger().error(error_msg)            return [False, error_msg]
        self._pubSix_Arm(self.color_detect_pose)        time.sleep(2.0)        try:            #step 1: launch the standalone color_detect process targeting the requested color            self.get_logger().info(f"GraspColor: start detecting {color} blocks")            self._start_color_detect(color=color)            if self._wait_for_color_target(color, timeout_sec=15.0) is None:                return [False, f"No {color} block detected in current scene"]            time.sleep(1.0)
            #step 2: align to target            self.get_logger().info(f"GraspColor: start aligning to {color} target")            ok, message = self._adjust_grasp_pose(                align_x=self.color_grasp_distance[0],                align_y=self.color_grasp_distance[1])            if not ok:                self.get_logger().error(f"GraspColor failed to align to target: {message}")                return [False, f"GraspColor failed to align: {message}"]            time.sleep(3.0)
            #step 3: get grasp point coordinates            grasp_point = self._get_color_grasp_point(color)            if not grasp_point[0]:                self.get_logger().error(f"GraspColor failed to get grasp point: {grasp_point[1]}")                return [False, f"GraspColor failed to get grasp point: {grasp_point[1]}"]
            #step 4: grasp object            self.get_logger().info(f"GraspColor: grasp point x={grasp_point[1]:.3f}, "                f"y={grasp_point[2]:.3f}, z={grasp_point[3]:.3f}, angle={grasp_point[4]:.1f}deg")            if not self._grasp(grasp_x=grasp_point[1],                               grasp_y=grasp_point[2],                               grasp_z=grasp_point[3],                               grasp_pitch=self.color_grasp_offset[3],                               grasp_roll=grasp_point[4],                               offset=self.color_grasp_offset):                self.get_logger().error("GraspColor: failed to grasp object")                return [False, "GraspColor failed to grasp object"]
            return [True, f"{color} block grasped successfully"]        finally:            self._stop_color_detect()                def _start_color_detect(self, color):        """Launch the standalone color_detect process targeting the requested color."""        self._stop_color_detect()        with self._color_target_lock:            self._color_target_cache.clear()        cmd = ['ros2', 'run', 'common_demo', 'color_detect', '--ros-args']        try:            common_param_file = file_manager.GetFileAndCheckExist("config_file")            cmd += ['--params-file', common_param_file]        except Exception as e:            self.get_logger().warn(f"Failed to load common param file: {e}")        color_clean = str(color).strip().strip("'\"")        cmd += ['-p', f'target_color:={color_clean}']        self.get_logger().info(f"Starting color_detect process: {' '.join(cmd)}")        self._color_process = subprocess.Popen(cmd)
6. Parameter Debugging
Parameter file path:
xxxxxxxxxx~/yahboomcar_ros2_ws/yahboomcar_ws/src/yahboomcar_bringup/param/common.yaml
The following is the mapping table between parameters and code:
xxxxxxxxxxmcp_service ros__parameters #depth camera tracking and grasping track_align_distance0.10 0.0 track_align_tolerance0.01 0.013 place_distance0.14 0.00.35 0.02 grasp_offset0.035-0.0150.0380.0 #monocular camera grasping color blocks color_detect_pose90 90 0 0 90 30 color_grasp_offset0.0150.00.01585.0 color_grasp_distance0.08 0.0 #automatic retreat enable_auto_backTrueImportant
The automatic retreat after grasping function of enable_auto_back is to avoid colliding with the edge of the map when used in combination with navigation. If you need to turn off automatic retreat, you can set enable_auto_back in the parameter file to False. The automatic retreat function for garbage grasping, AprilTag grasping, and placement in subsequent courses is all controlled by this parameter, and it will not be repeated in subsequent courses.
7. Function Q&A
How to adjust when the grasp position is inaccurate and deviates from the ideal grasp point?
Check in sequence:
Check whether the target object is accurately boxed in the verify_image.png saved by GetBbox
Is the grasp point accurate?
If the grasp point deviates too far from the center of the object, it means that the depth camera is too strongly affected by ambient lighting and there is completely no depth on the target object. The grasp center estimation algorithm also cannot estimate the 3D position of the target grasp point. You need to change the ambient lighting or adjust the alignment distance before grasping to keep the target at least 21 cm away from the depth camera, avoiding the depth camera's blind spot.
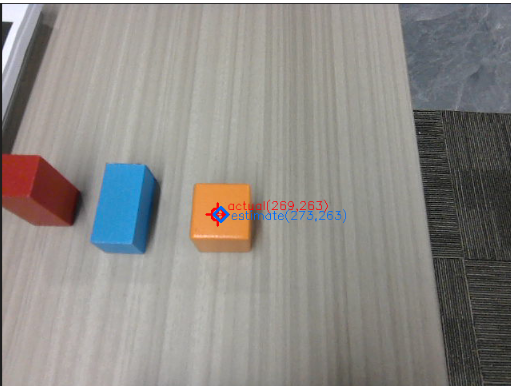
If the grasp point is accurate, for example the grasp point in the figure below is at the center of the object being grasped, but there is a slight offset in the grasp, it indicates that this is caused by the error of robotic arm rigidity degradation and servo backlash. Adjust grasp_offset; the offset follows the robot's right-hand coordinate system. Appropriately increase or decrease the grasp offset.
How to adjust the grasp_offset offset
Refer to the preceding tutorial 【Robotic Arm and 3D Space Gripping Course — Robotic Arm Basic Usage】