Welcome to ROSMASTER M1 PRO repository
5.Depth Camera Distance Measurement (Depth Camera Only)
Depth Camera Distance Measurement
1. Course Content
Run the example program; within the measurement range of the depth camera, use the depth camera to measure distance.
Important
Only depth camera users should refer to this section
2. Case Demonstration
Enter the command in the terminal:
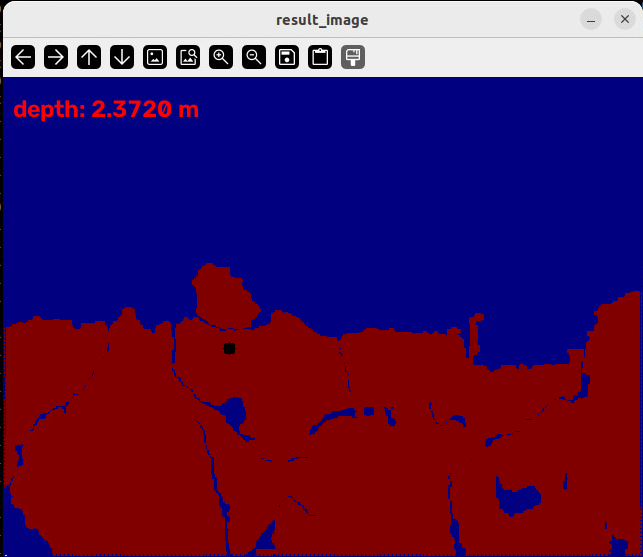
xxxxxxxxxxros2 launch yahboomcar_bringup camera_demo.launch.py demo:=Measure_DistanceAfter startup, as shown in the figure below, click with the mouse on the red area to select the point to measure; the selected point will turn black, and the distance measured by the depth camera will be printed directly in the upper-left of the image, in meters.
3. Source Code Analysis
Source code path:
xxxxxxxxxx~/yahboomcar_ros2_ws/yahboomcar_ws/src/common_demo/common_demo/camera/Measure_Distance.py
Import the required library files
xxxxxxxxxxfrom cv_bridge import CvBridgeimport cv2from rclpy.node import Nodeimport rclpyfrom sensor_msgs.msg import Imageimport numpy as npDefine the depth image decoding format
xxxxxxxxxxencoding = ['16UC1', '32FC1']Define the subscriber to subscribe to the depth image topic
xxxxxxxxxxself.sub_depth = self.create_subscription(Image,"/camera/depth/image_raw",self.get_DepthImgCallBack,10)
Define
self.depth_bridgeto convert the message format into an image format that opencv can process
xxxxxxxxxxself.depth_bridge = CvBridge()
Convert the image data message into an image
xxxxxxxxxxdepth_image = self.depth_bridge.imgmsg_to_cv2(depth_frame, encoding[1])Call the opencv image processing function
cv2.applyColorMapto convert the depth image
xxxxxxxxxxdepth_to_color_image = cv2.applyColorMap(cv2.convertScaleAbs(depth_image,alpha=1.0), cv2.COLORMAP_JET)Convert the image data Numpy array into a 32-bit single-precision floating-point array; this step ensures that subsequent calculations use floating-point precision.
xxxxxxxxxxdepth_image_info = depth_image.astype(np.float32)Get the depth information of a point; in a 2D image, (x,y) is used to determine the position of a point,
xxxxxxxxxxdist = depth_image_info[self.y,self.x]Process the obtained depth information and draw it onto the image,
xxxxxxxxxxdist = round(dist,3)dist = 'dist: ' + str(dist/1000) + 'm'cv2.putText(depth_to_color_image, dist, (10, 40), cv2.FONT_HERSHEY_SIMPLEX, 1.0, (0, 0, 255), 2)Call the opencv function to get the mouse click event; click a point within the valid area of the image to obtain the xy value of that point,
xxxxxxxxxxcv2.setMouseCallback(self.window_name, self.click_callback)def click_callback(self, event, x, y, flags, params): if event == 1: self.x = x self.y = yDraw the point selected by the mouse on the image and display the image,
cv2.circle(depth_to_color_image,(self.x,self.y),1,(0,0,0),10)cv2.imshow("result_image", depth_to_color_image)