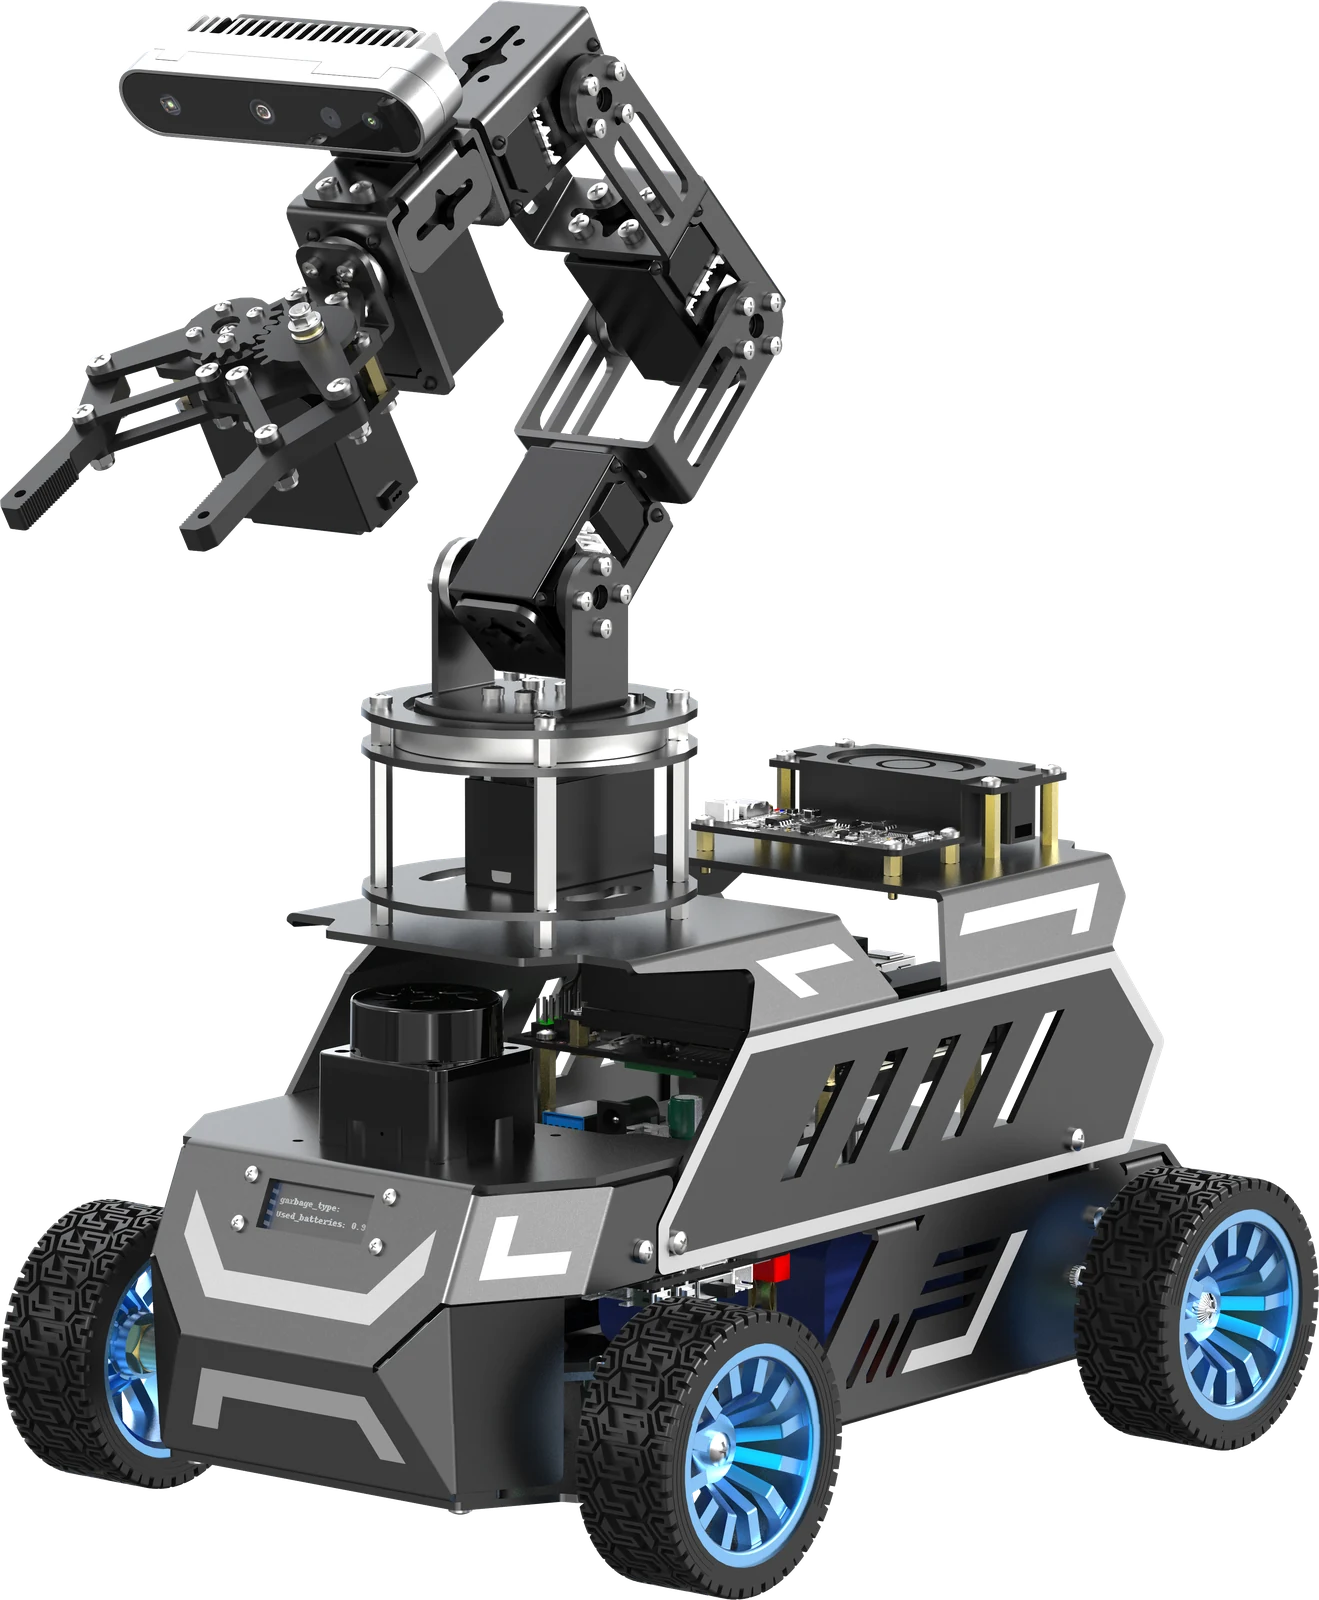
Welcome to ROSMASTER A1 PRO repository
2.User Manual
User Manual
0. Course Content and Background Introduction
Important
This lesson is the first step after receiving a new car or replacing hardware peripherals. After completing this tutorial, the robot system's underlying environment variables (such as LiDAR model, depth camera type, etc.) will take effect automatically and persist, ensuring the normal operation of subsequent ROS2 nodes, mapping, navigation, and visual recognition functions; at the same time, you will master the methods for logging into the car, connecting to the network, and viewing/developing source code.
Visual Hardware Selection Configuration: Master the robot's first hardware selection and configuration through the 3D Web UI guided wizard.
Physical Connection Real-time Detection Mechanism: Master the hardware detection mechanism for LiDAR, depth camera, control board, voice module, and joystick receiver.
Sensor Model and Parameter Correspondence: Understand the model and parameter correspondence of LiDAR (RPLIDAR C1 / T-mini Plus), camera (NUWA HP60C / USB camera) and control board modules.
PS2 Wireless Joystick Control: Master joystick receiver detection, one-click joystick control activation, and VNC desktop terminal interaction (support for
Ctrl + Cto close and key mapping teaching).Underlying Activation Mechanism: Master the underlying mechanism of configuration activation (
~/.bashrc,robot_info.jsonandfirst_setup.service).Car Network Configuration and External Wi-Fi Connection: Master viewing IP on the OLED screen, hotspot connection, and two ways to configure connecting to router Wi-Fi.
Multiple Login Methods: Master SSH command-line login and VNC remote graphical desktop login methods and troubleshooting.
VS Code Remote Development and Code Engineering Review: Master connecting to the car via VS Code remotely and understand the overall architecture of
yahboomcar_ros2_ws.
1. Quick Reference Core Information and Network Preparation
Regardless of web configuration or subsequent login development, the computer and the car must be on the same local area network.
1.1 Default Wi-Fi Hotspot Information
If the car is not connected to a known Wi-Fi after powering on, it will automatically emit a hotspot:
Hotspot Name (SSID):
ROSMASTER(or corresponding car model)Hotspot Password:
12345678Hotspot Default Static IP:
192.168.1.11
1.2 Mainboard Login Account and Password
| Mainboard Model | Login Username | Login Password | Default Home Directory | Applicable Models |
|---|---|---|---|---|
| RDK X5 | sunrise | yahboom | /home/sunrise | ROSMASTER Series (RDK mainboard) |
| Orin Nano / NX | jetson | yahboom | /home/jetson | ROSMASTER Series (Orin mainboard) |
| Raspberry Pi 5 | pi | yahboom | /home/pi | ROSMASTER Series (Raspberry Pi mainboard) |
1.3 Ways to Get the Car's IP Address
Directly view the OLED screen on the car body (most intuitive):
After powering on the car, check the IP address displayed on the OLED screen on the car body (such as
192.168.2.92assigned by the router or the hotspot IP192.168.1.11).
Connect to the car's built-in hotspot (offline, no router required):
Connect your computer or phone to the car's hotspot
ROSMASTER(password12345678), the car's static IP is fixed at:192.168.1.11.
Wired network cable connection (most recommended, most stable connection):
Insert one end of the network cable into the car mainboard's network port, and the other end into the router. The car will automatically obtain a LAN IP via DHCP and the OLED screen will display the address in real-time.
2. Accessing Web 3D Configuration Interface
After factory or reset, the robot system's boot self-start service first_setup.service automatically detects whether the first configuration has been completed. When not configured, the backend automatically starts the Web configuration service (listening on port 8080).
You can access the configuration interface in the following two ways:
2.1 Remote Browser Access via LAN (Recommended)
Get the car's IP address:
Check the IP address displayed on the OLED screen on the car body (such as
192.168.2.92).If connected to the car's built-in hotspot, the default IP is:
192.168.1.11.
Open browser:
Open Chrome/Edge browser on the computer, tablet, or phone connected to the same Wi-Fi or hotspot as the car.
Enter in the address bar:
http://<Car IP>:8080For example:
http://192.168.2.92:8080orhttp://192.168.1.11:8080.
2.2 Vehicle Screen / Hotspot Local Access
After connecting your computer to the car's hotspot, open browser directly and access:
xxxxxxxxxxhttp://192.168.1.11:8080
3. Detailed UI Interface Configuration Steps
The entire configuration process includes 8 stages, you can view progress through the vertical navigation bar on the right side of the interface, or use keyboard keys or click dots to advance and retreat:
Welcome: Welcome screen and vehicle model display
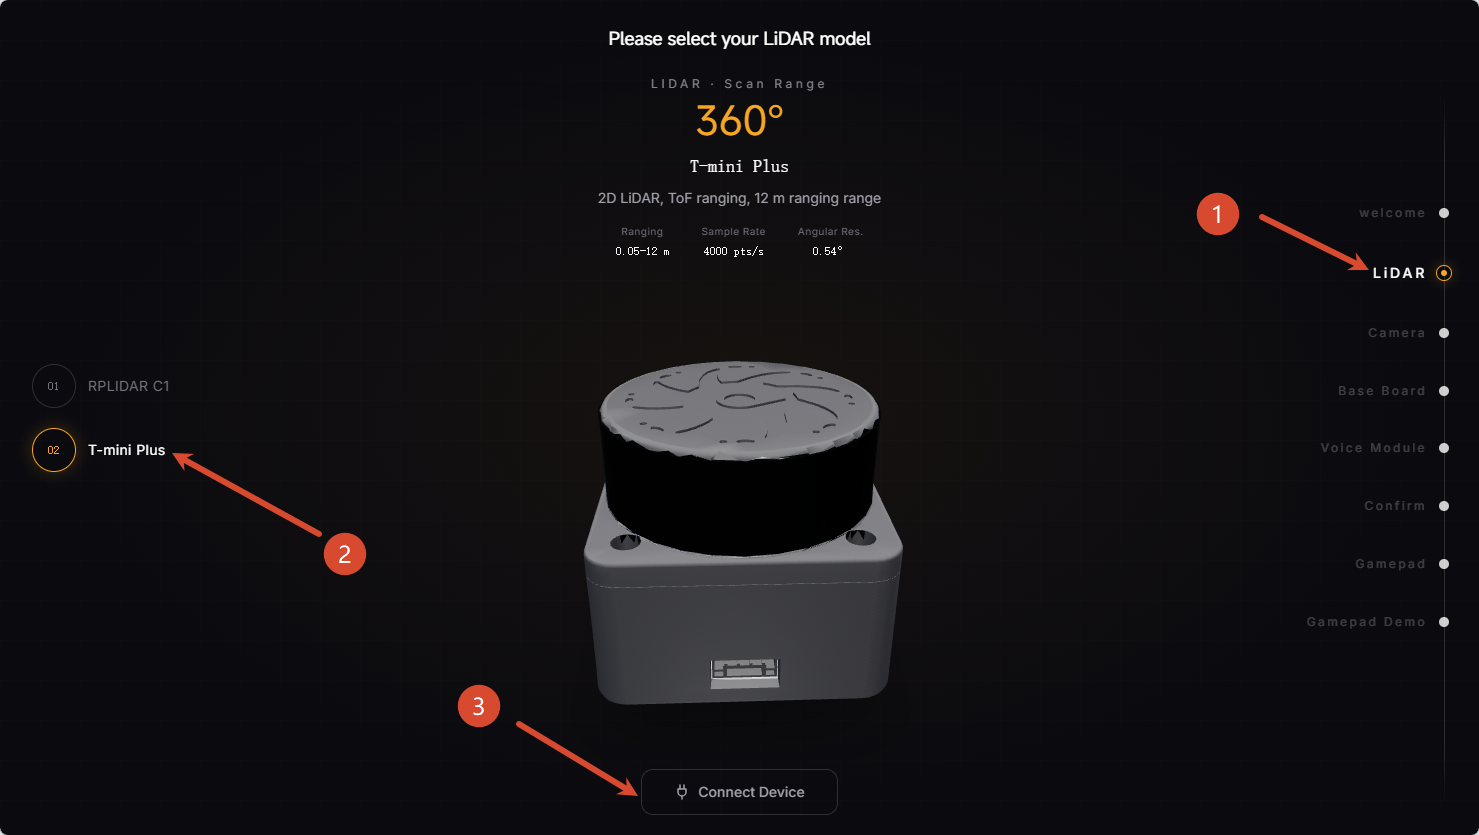
LiDAR: LiDAR model selection and physical connection detection
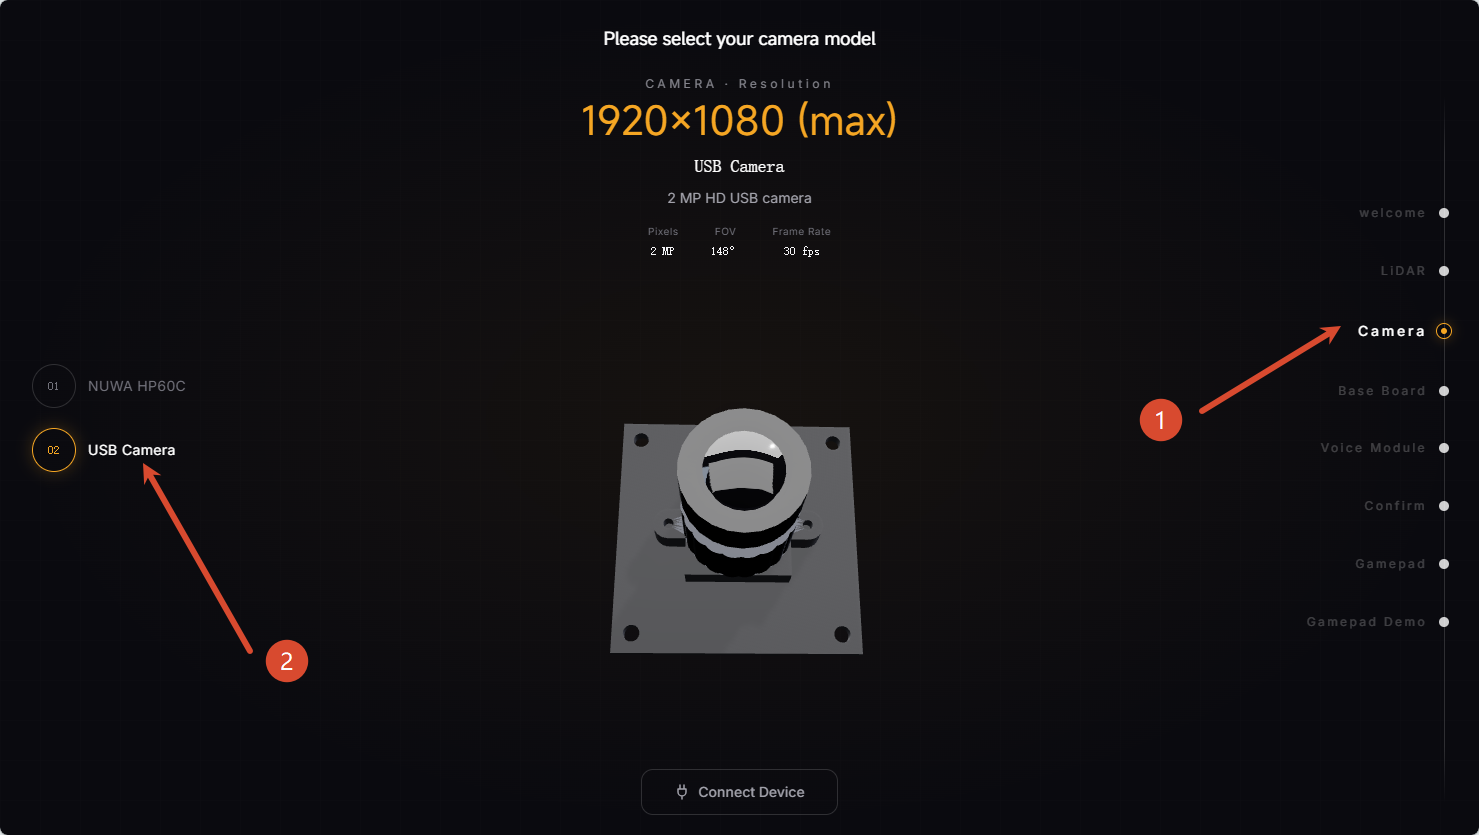
Camera: Camera model selection and USB depth camera detection
Base Board: Robot control mainboard connection detection
Voice Module: AI voice module connection detection
Confirm & Complete: Configuration parameter confirmation and persistent save
PS2 Joystick: PS2 wireless joystick receiver detection and one-click start control
Joystick Demo: Joystick key interaction demonstration and operation teaching
Tip
Keyboard shortcut support:
Keyboard right arrow
→: Next / Confirm and saveKeyboard left arrow
←: Previous stepKeyboard Enter key
Enter: Confirm and save (effective on confirmation page)
3D model interaction:
Mouse left button drag: Rotate 3D view to view sensor details.
Mouse wheel: Zoom in/out model.
3.1 Step 1: Welcome Interface (Welcome)
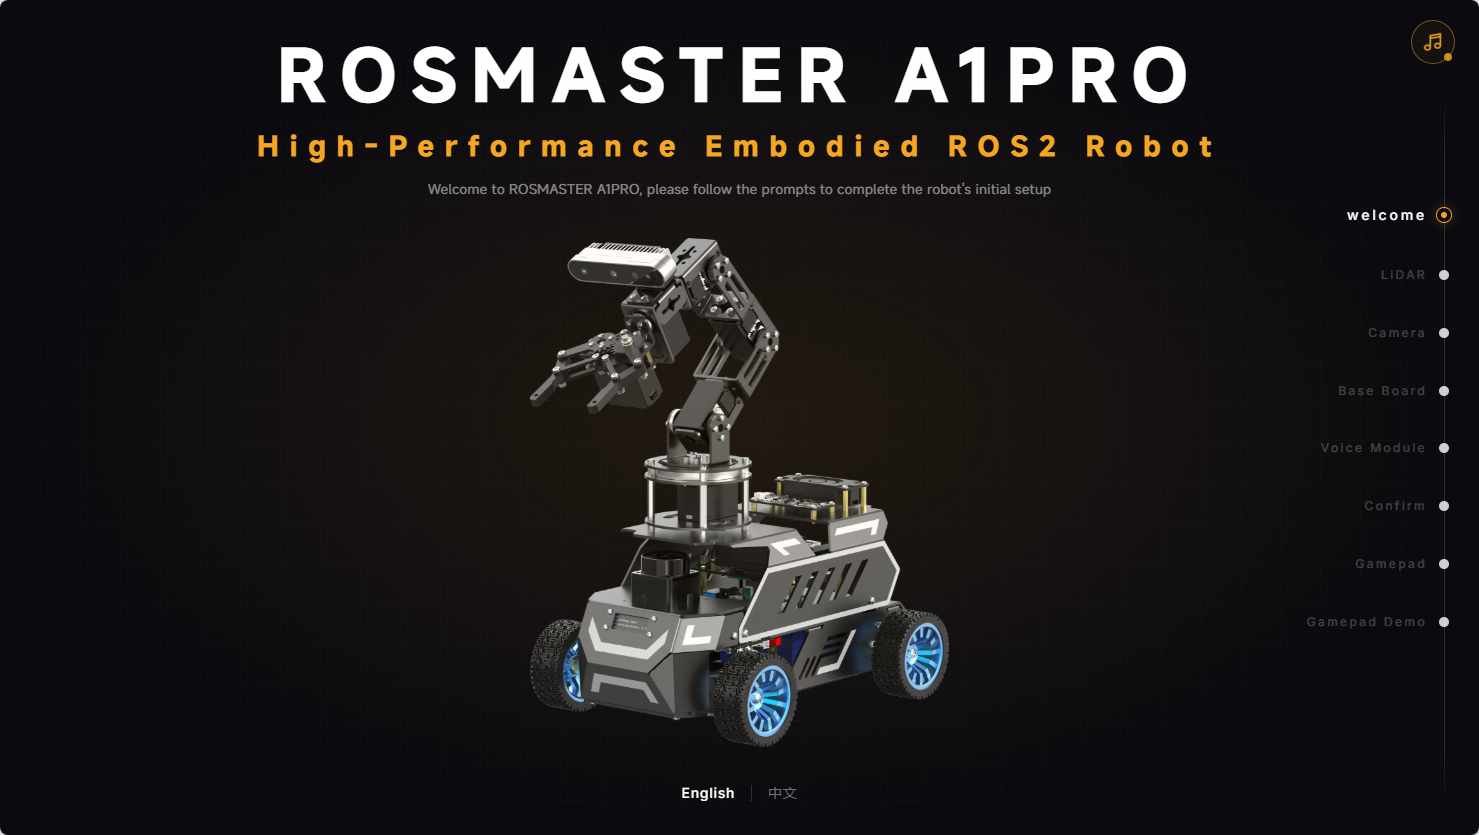
After entering, a high-definition 3D rendering view of the current robot model (such as ROSMASTER A1Pro / ROSMASTER M1Pro) will be displayed.
Language switch: One-click switch between
ChineseandEnglishin the lower right corner of the page.Start configuration: Press keyboard right arrow
→or click the second dot in the right navigation bar to enter LiDAR configuration.
3.2 Step 2: LiDAR Model Selection and Device Detection (LiDAR)
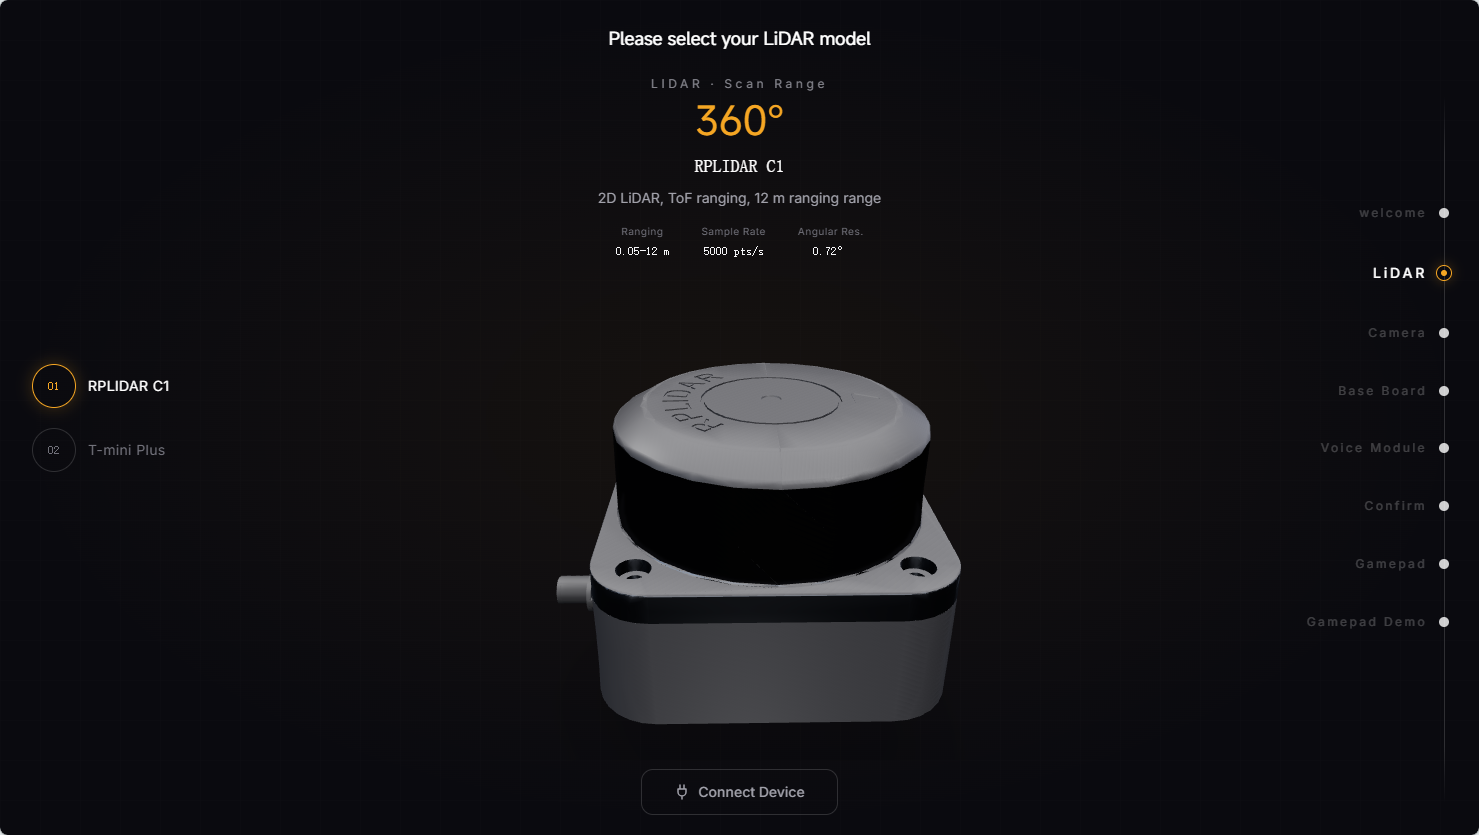
This page is used to configure the LiDAR hardware equipped on the robot and detect its physical connection status in real-time.
Supported LiDAR models:
01 RPLIDAR C1 (Slamtec)
02 T-mini Plus (EAI Technology)
Device physical connection dynamic detection:
The right side of the interface displays real-time connection status cards for the current LiDAR.
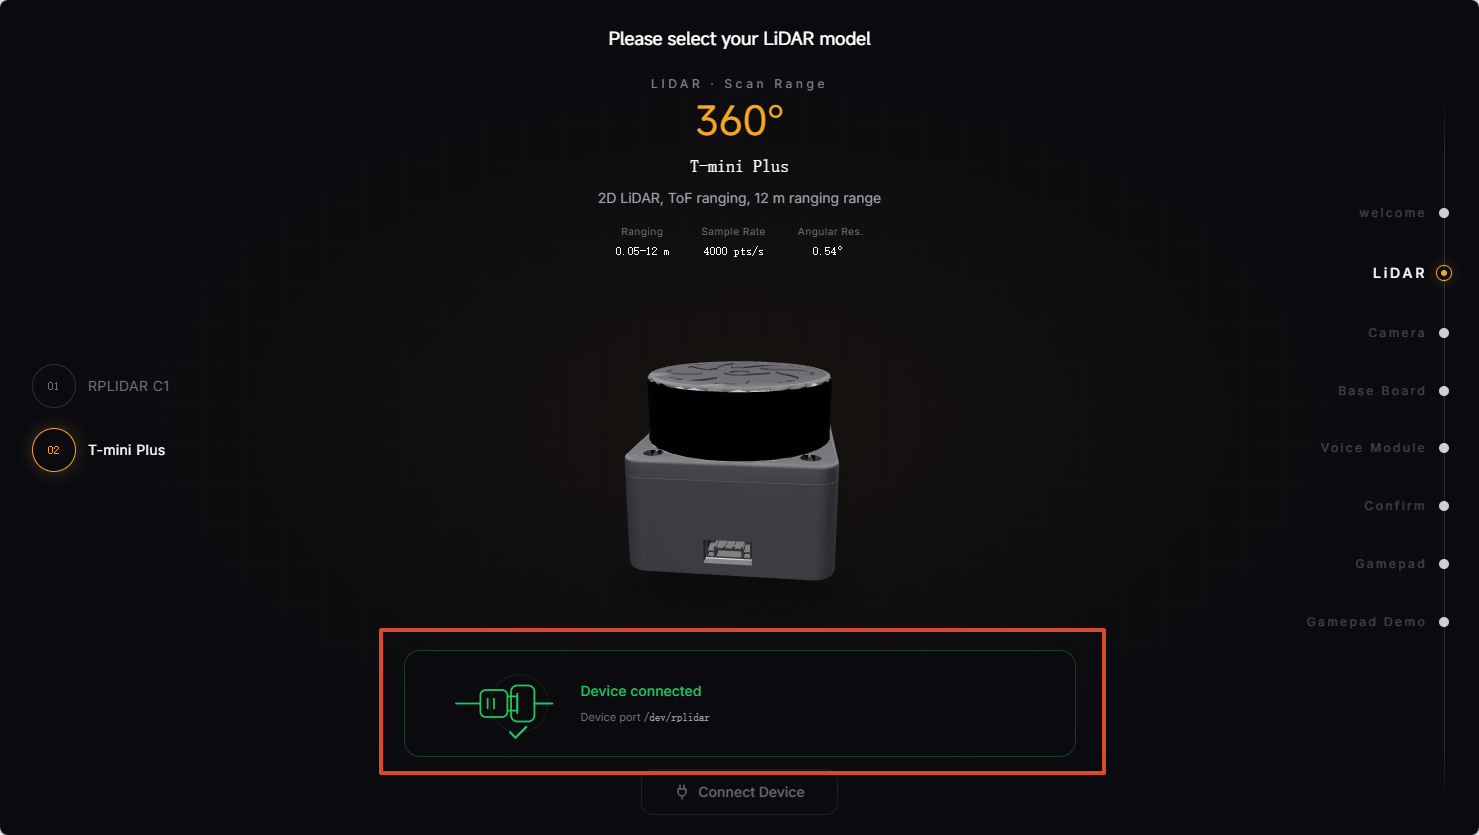
The system automatically detects the existence and read/write permissions of the LiDAR serial port soft links (
/dev/rplidaror/dev/ydlidar):Connected: Card shows green checkmark and corresponding port, plug and socket closed.
Disconnected: Card shows orange waiting animation, prompting to check LiDAR USB data cable and power supply.
Operation instructions:
Click to select the LiDAR model installed on your car in the left list (selected model will have a highlighted circle marker).
The middle area will load the high-precision 3D model and detailed technical parameters of the LiDAR in real-time.
After selecting and confirming the physical connection is normal, press keyboard
→or click the right navigation to proceed to the next step.
Device detection success prompt:
3.3 Step 3: Camera Model Selection and Device Detection (Camera)
This page is used to configure the visual camera peripheral installed and automatically identify USB physical devices.
Supported camera models:
01 NUWA HP60C (Angstrong)
02 USB Camera (Universal)
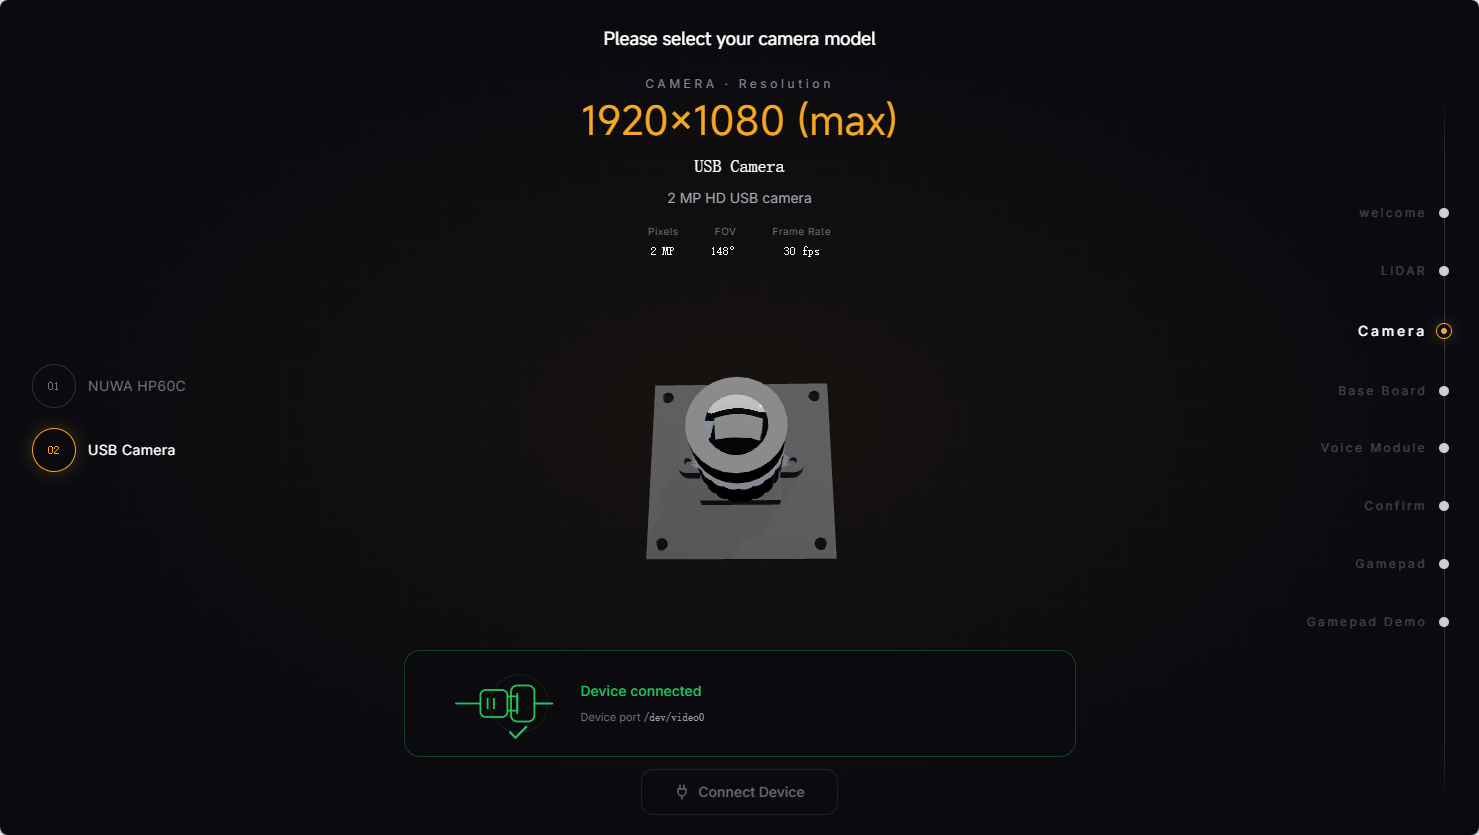
Device physical connection dynamic detection:
The interface monitors the physical connection status of the selected camera in real-time.
If the depth camera is not properly connected, the interface prompts to connect the camera's USB data cable; once inserted and recognized, it immediately lights up the successful connection status.
Operation instructions:
According to the actual camera type installed on the car, click the corresponding model on the left.
After confirming, press keyboard
→to proceed to the next step.
Device detection success prompt:
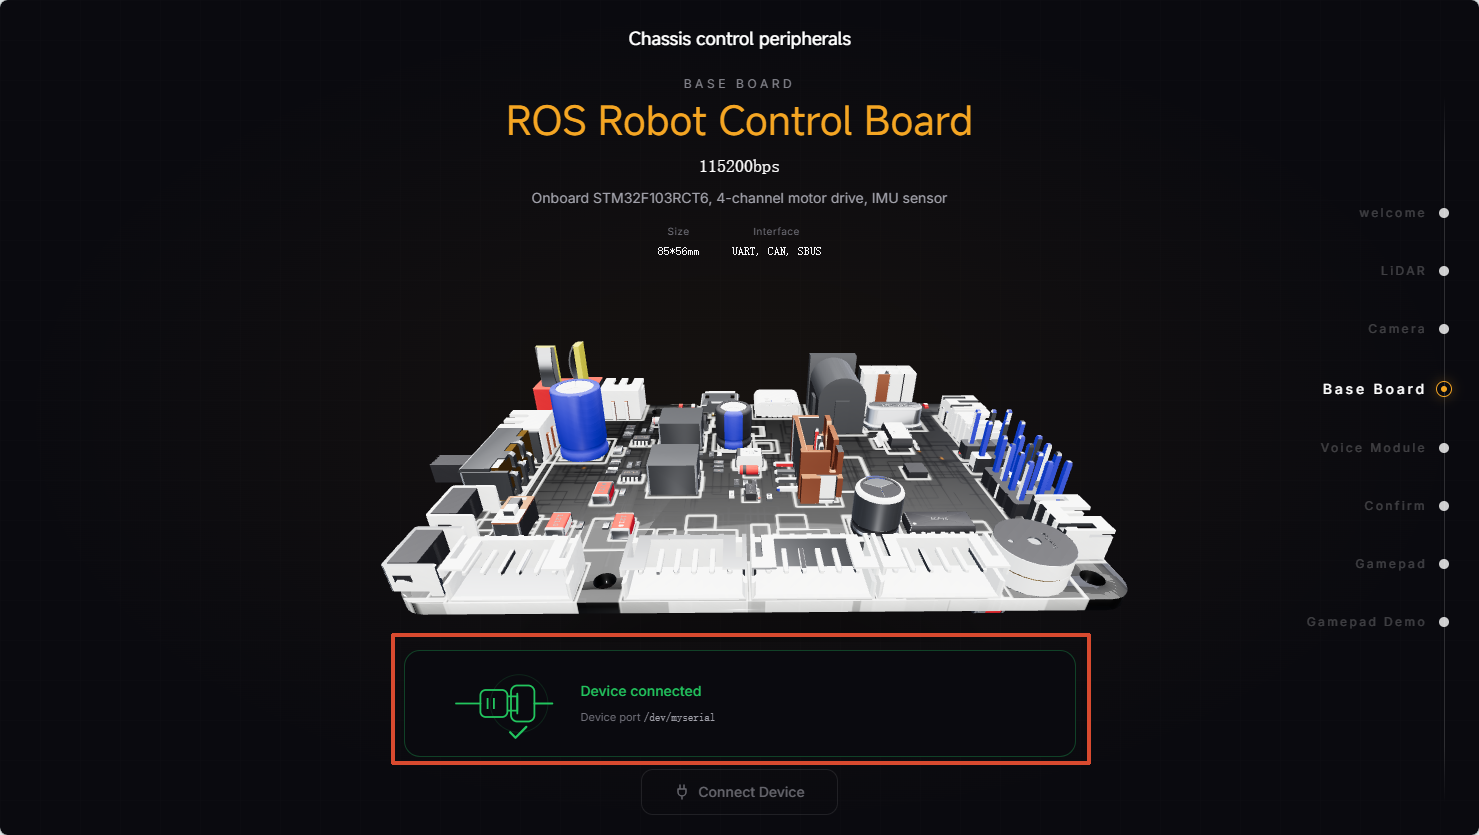
3.4 Step 4: Control Board Information Confirmation and Detection (Base Board)
This page displays the core motion control mainboard information of the car chassis.
Hardware information: ROS robot control board (onboard STM32F103RCT6, 4-channel motor drive, onboard ICM-20948 9-axis IMU sensor, communication baud rate 115200bps, serial port
/dev/myserial).Device connection detection: The system automatically polls the chassis mainboard serial port node
/dev/myserial. If the car's mainboard power is on and the communication cable with the host computer (Raspberry Pi/RDK X5/Orin) is well connected, the card shows green connected.Description: The system automatically matches mainboard information according to the car model configuration, no manual selection needed. After checking, press keyboard
→to continue.
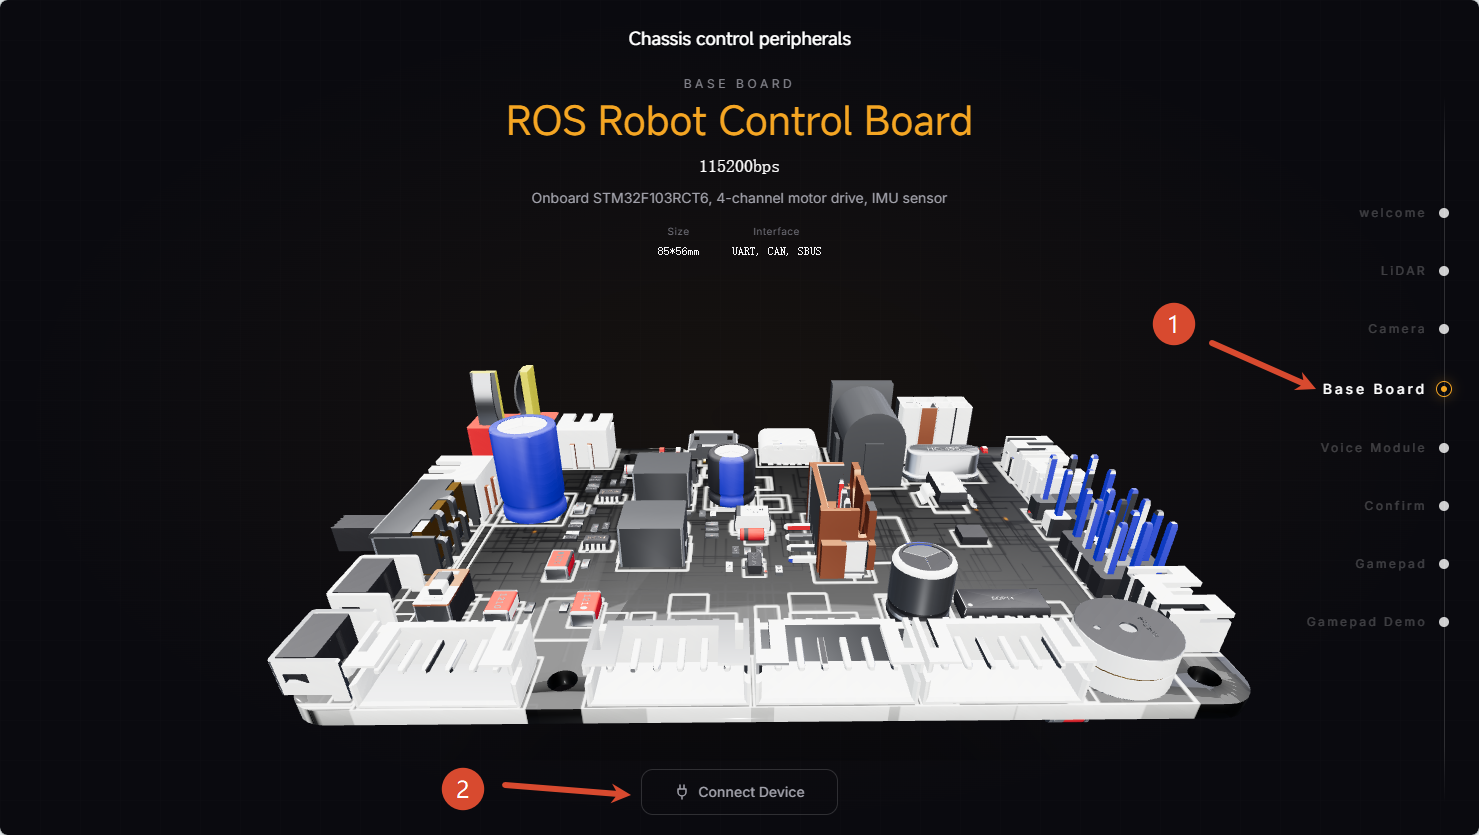
Device detection success prompt:
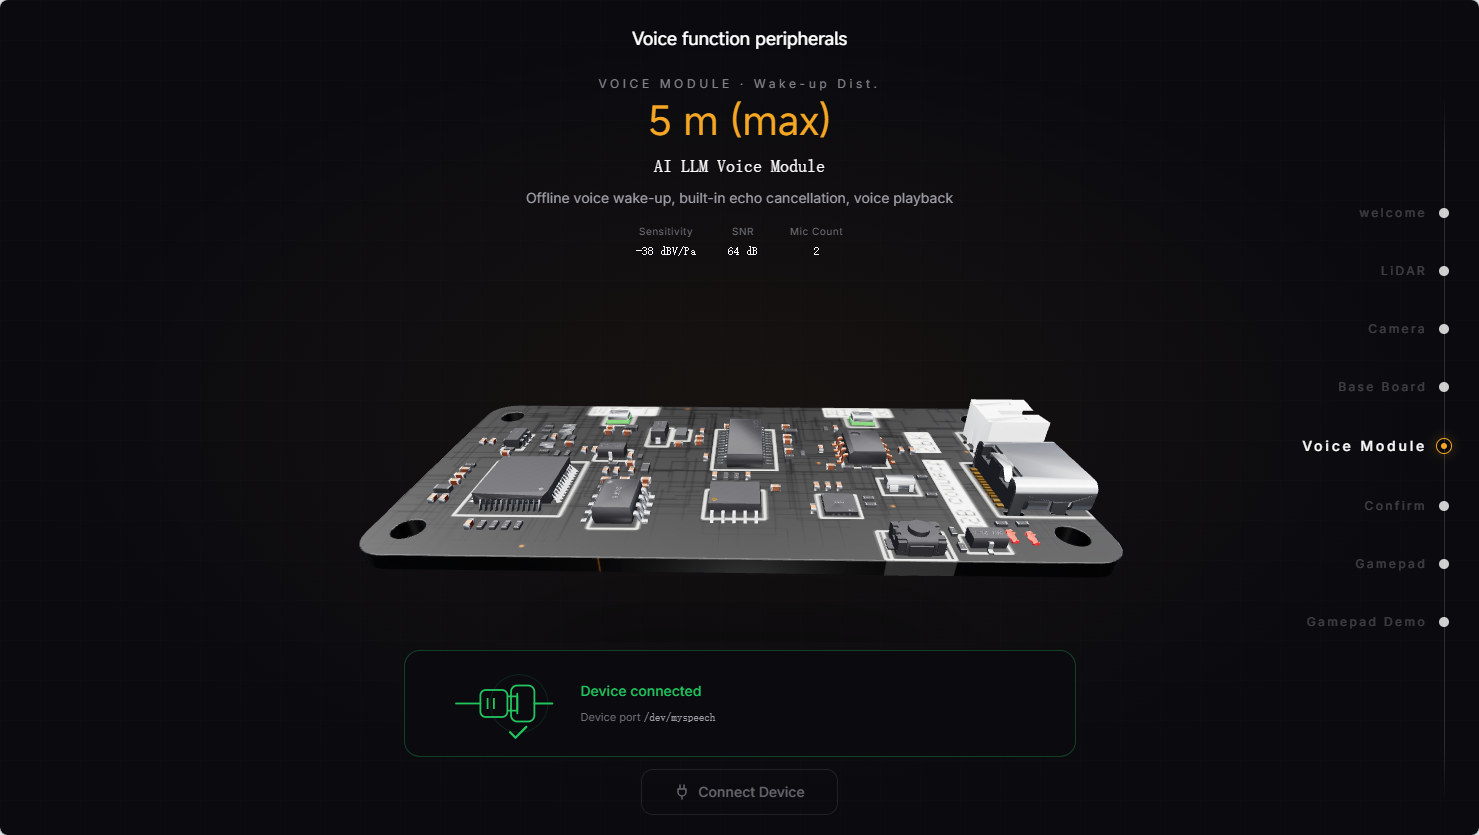
3.5 Step 5: Voice Module Confirmation and Detection (Voice Module)
Displays the equipped intelligent voice interaction module.
Hardware information: AI large model voice interaction module (offline voice wake-up, built-in echo cancellation, dual-microphone array, serial port
/dev/myspeech).Device connection detection: The system automatically detects the connection and permission status of the voice module's dedicated serial port
/dev/myspeech.Description: After checking parameters and connection status, press keyboard
→to proceed to the save confirmation page.
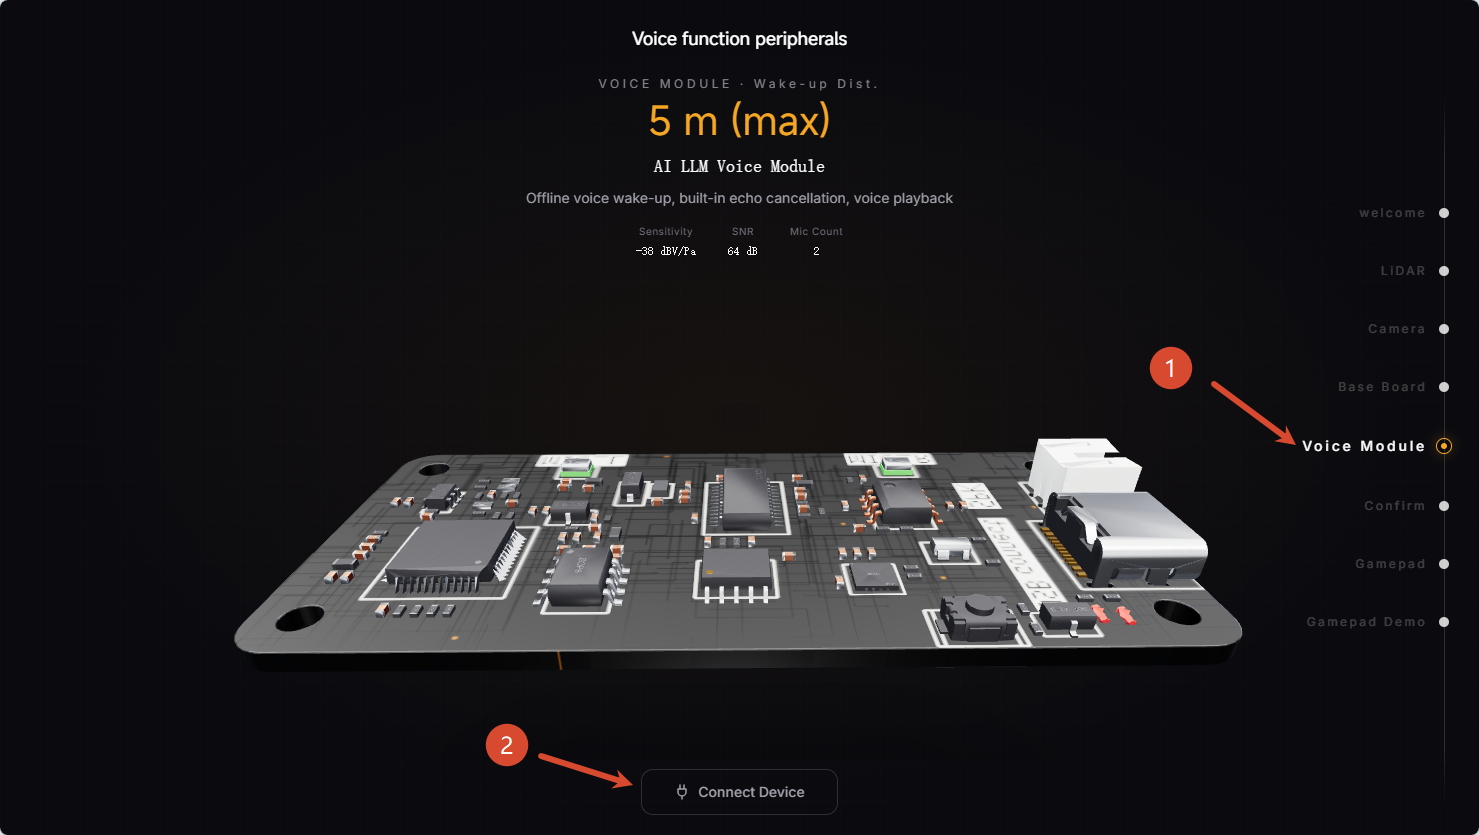
Device detection success prompt:
3.6 Step 6: Configuration Confirmation and Save (Confirm & Complete)
This page summarizes and displays the LiDAR, camera, and other hardware selected in the previous steps.
Check configuration information: Verify that the LiDAR and camera model names and specifications are consistent with the actual vehicle hardware.
Confirm and save:
Press keyboard
Enteror press→to save.The bottom of the interface will display "Saving configuration...".
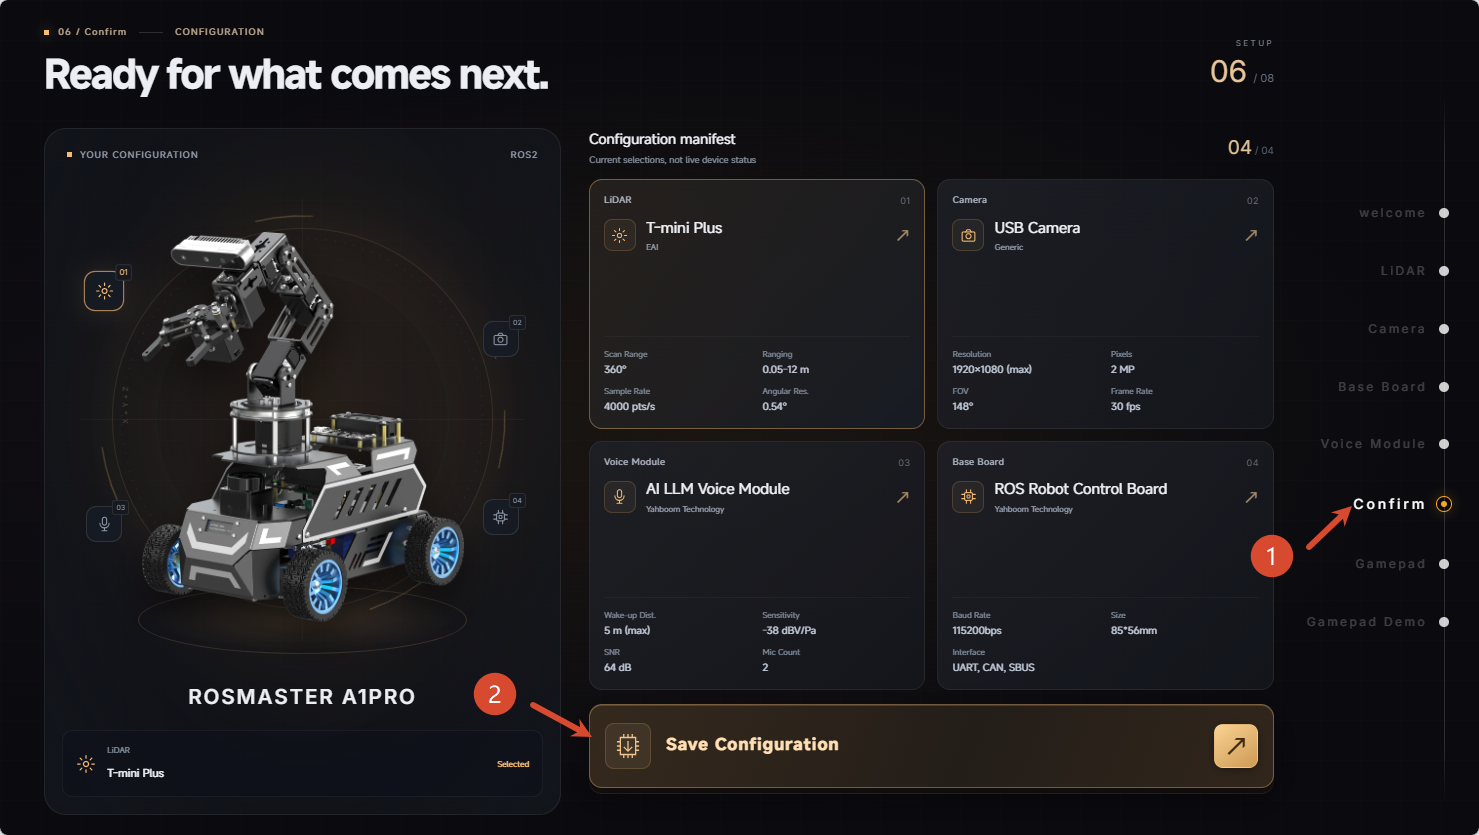
Save successful and continue wizard:
After saving is complete, the interface prompts "Configuration saved to ~/.bashrc".
The interface will then automatically advance to guide you to the PS2 wireless joystick detection and key teaching section.
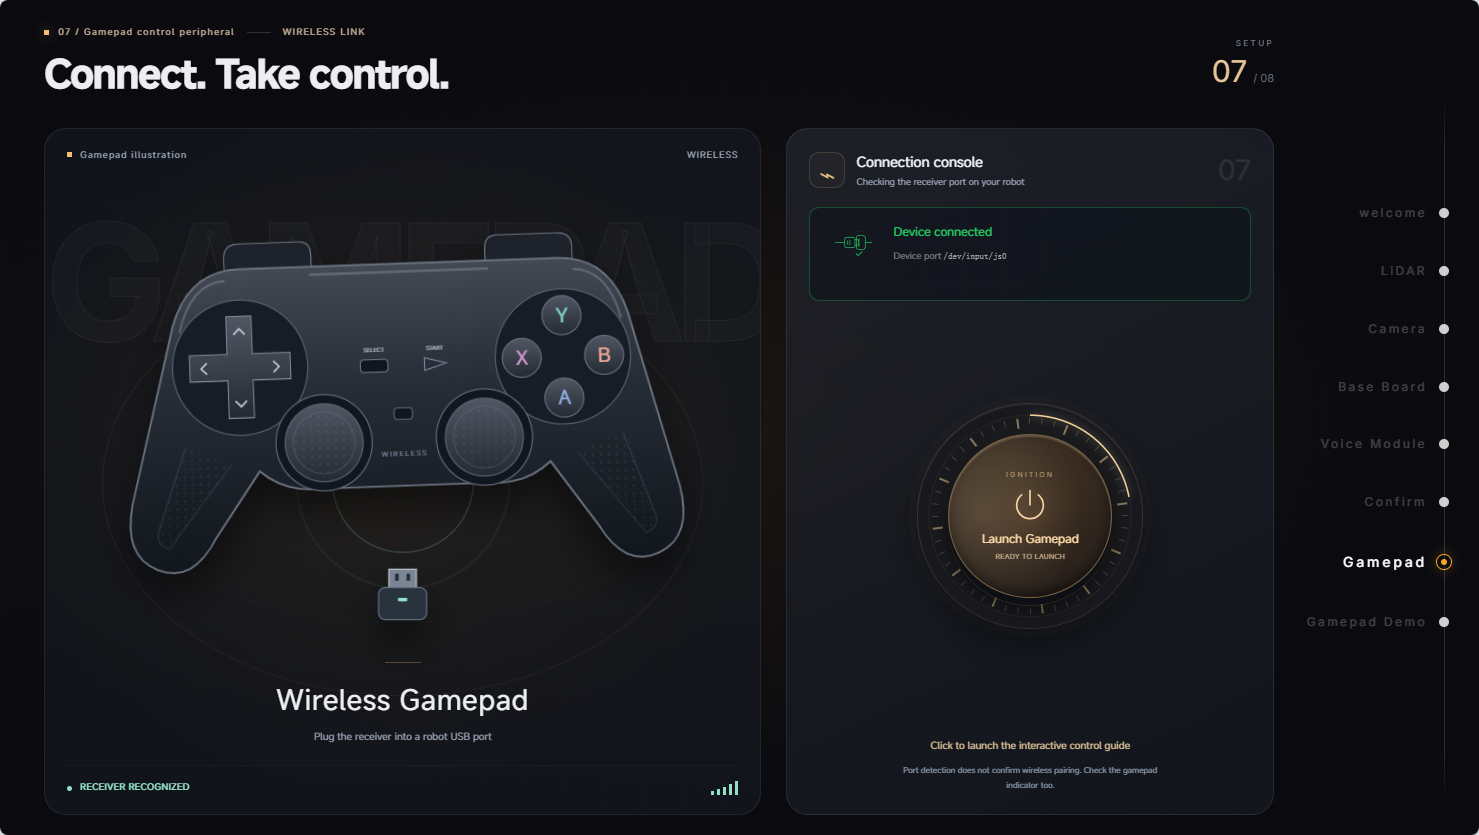
3.7 Step 7: PS2 Wireless Joystick Connection Detection and One-Click Start (Joystick)
Click to start joystick:
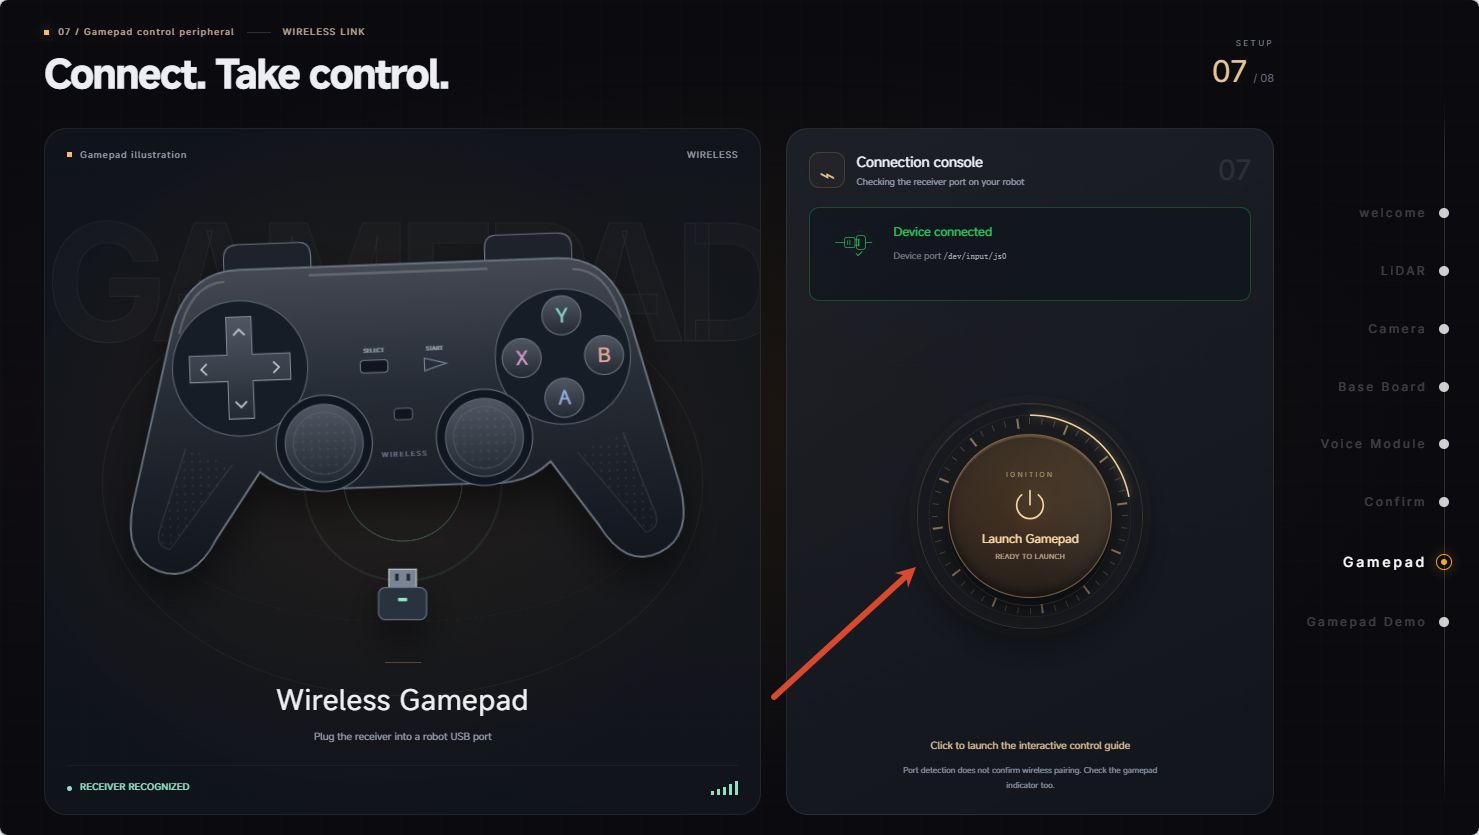
After successful start, it will automatically jump:
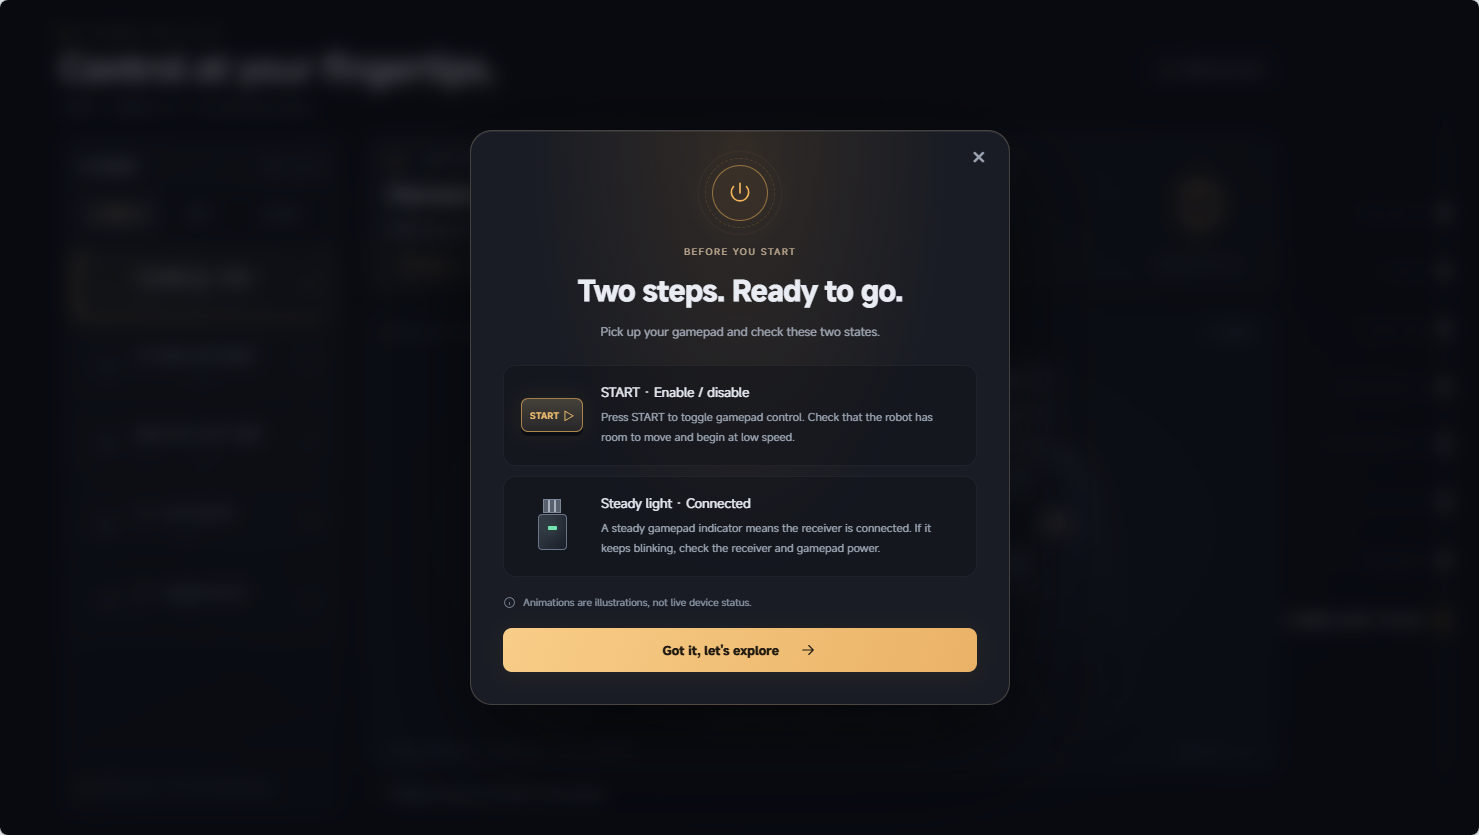
Click "Start Exploring" to enter key demonstration teaching:
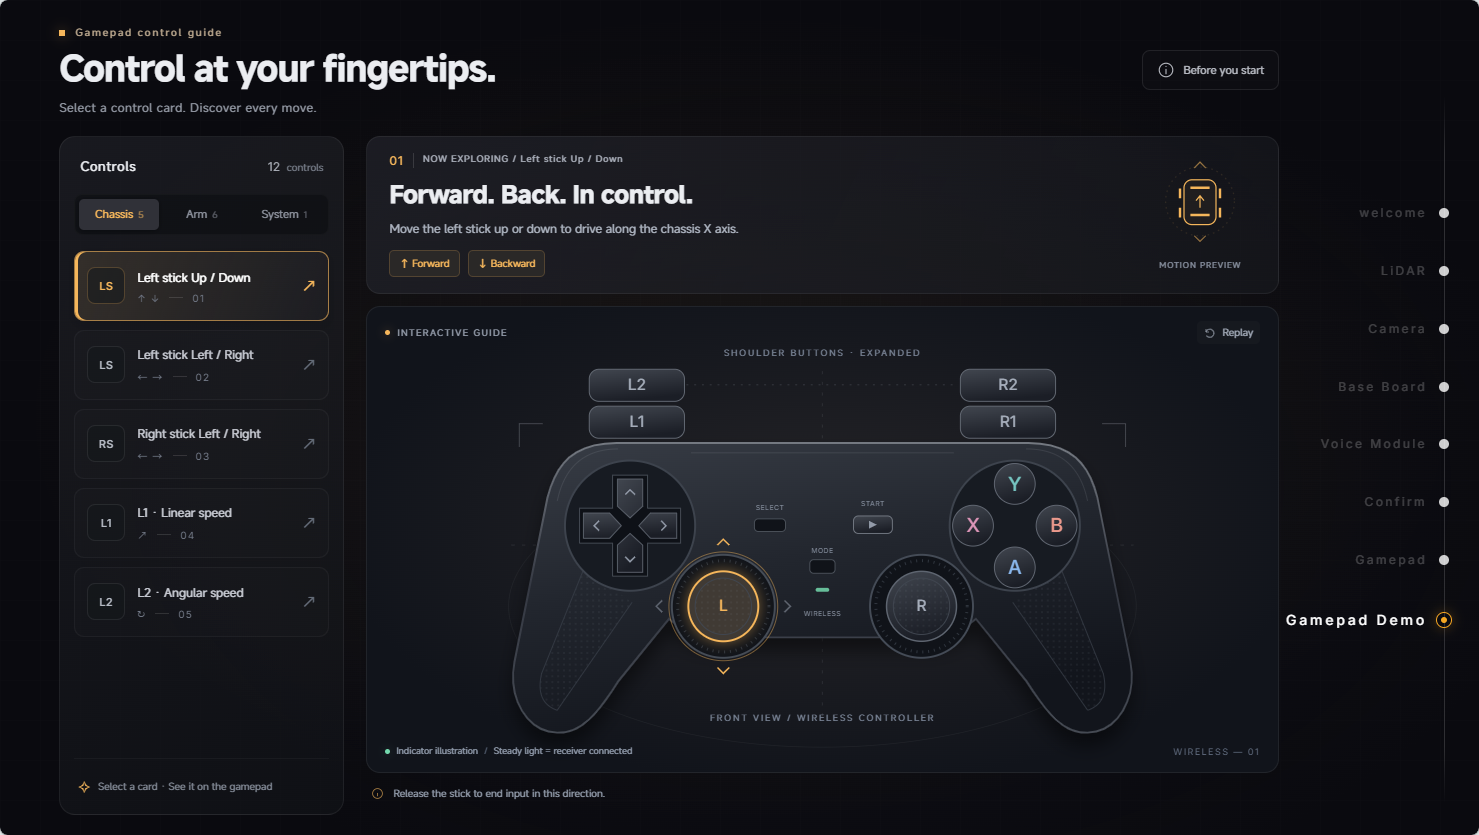
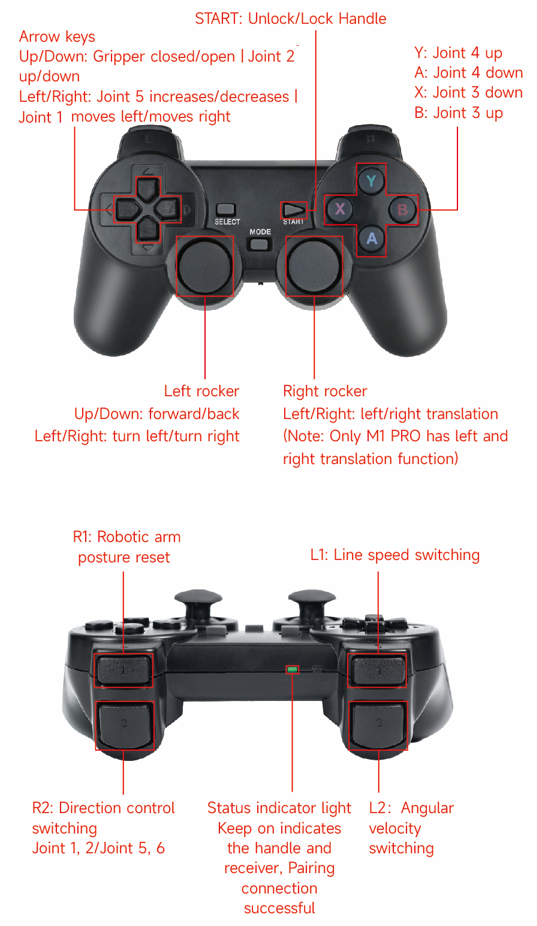
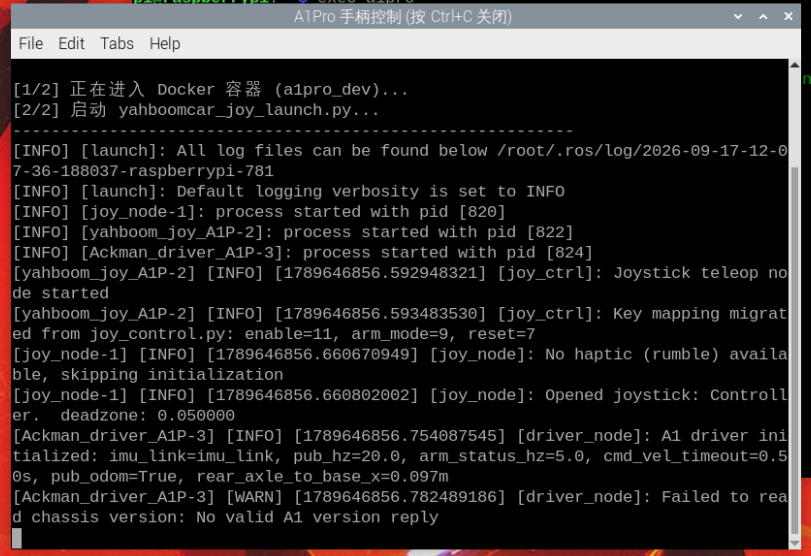
You can use VNC to open the remote desktop to see the joystick startup terminal. Below is how to access remote VNC.
Note
After completing key position browsing and learning, you can unplug or keep the joystick receiver at any time. Click the page completion button to enter the system and enjoy driving and development!
4. Underlying Activation Mechanism and Principles
After configuration is complete, the system backend (FastAPI service) automatically executes the following core operations in the background:
Update user environment variables (
~/.bashrc):Automatically update or add device environment variables in the current user's
~/.bashrcfile, for example:xxxxxxxxxxexport RPLIDAR_TYPE=c1export CAMERA_TYPE=nuwaexport ROBOT_TYPE="ROSMASTER A1PRO"If the system is running a Docker container, the system will automatically synchronize and update the environment inside the container.
Boot self-start mechanism description (
first_setup.service):At system boot, the systemd service starts
first_setup_check.py.When detecting
FIRST_SETUPas"true", the service determines that initialization is complete, automatically skips and exits, freeing port 8080 and system memory.
5. Configuring the Car to Connect to External Wi-Fi
The car's built-in hotspot has no external network access capability. If you need to use AI large models, install software packages online, or update the system in the future, it is recommended to connect the car to the home router Wi-Fi. There are two common ways to connect to external Wi-Fi:
5.1 Method 1: Connect via VNC Graphical Interface Using Wired Cable (Recommended)
Insert a wired network cable into the car mainboard, read the IP address from the OLED screen on the car body (for example
192.168.12.57), and use VNC Viewer to remotely log in to the car (see Section 6.2 for detailed VNC login method). After successful login, the desktop is as follows: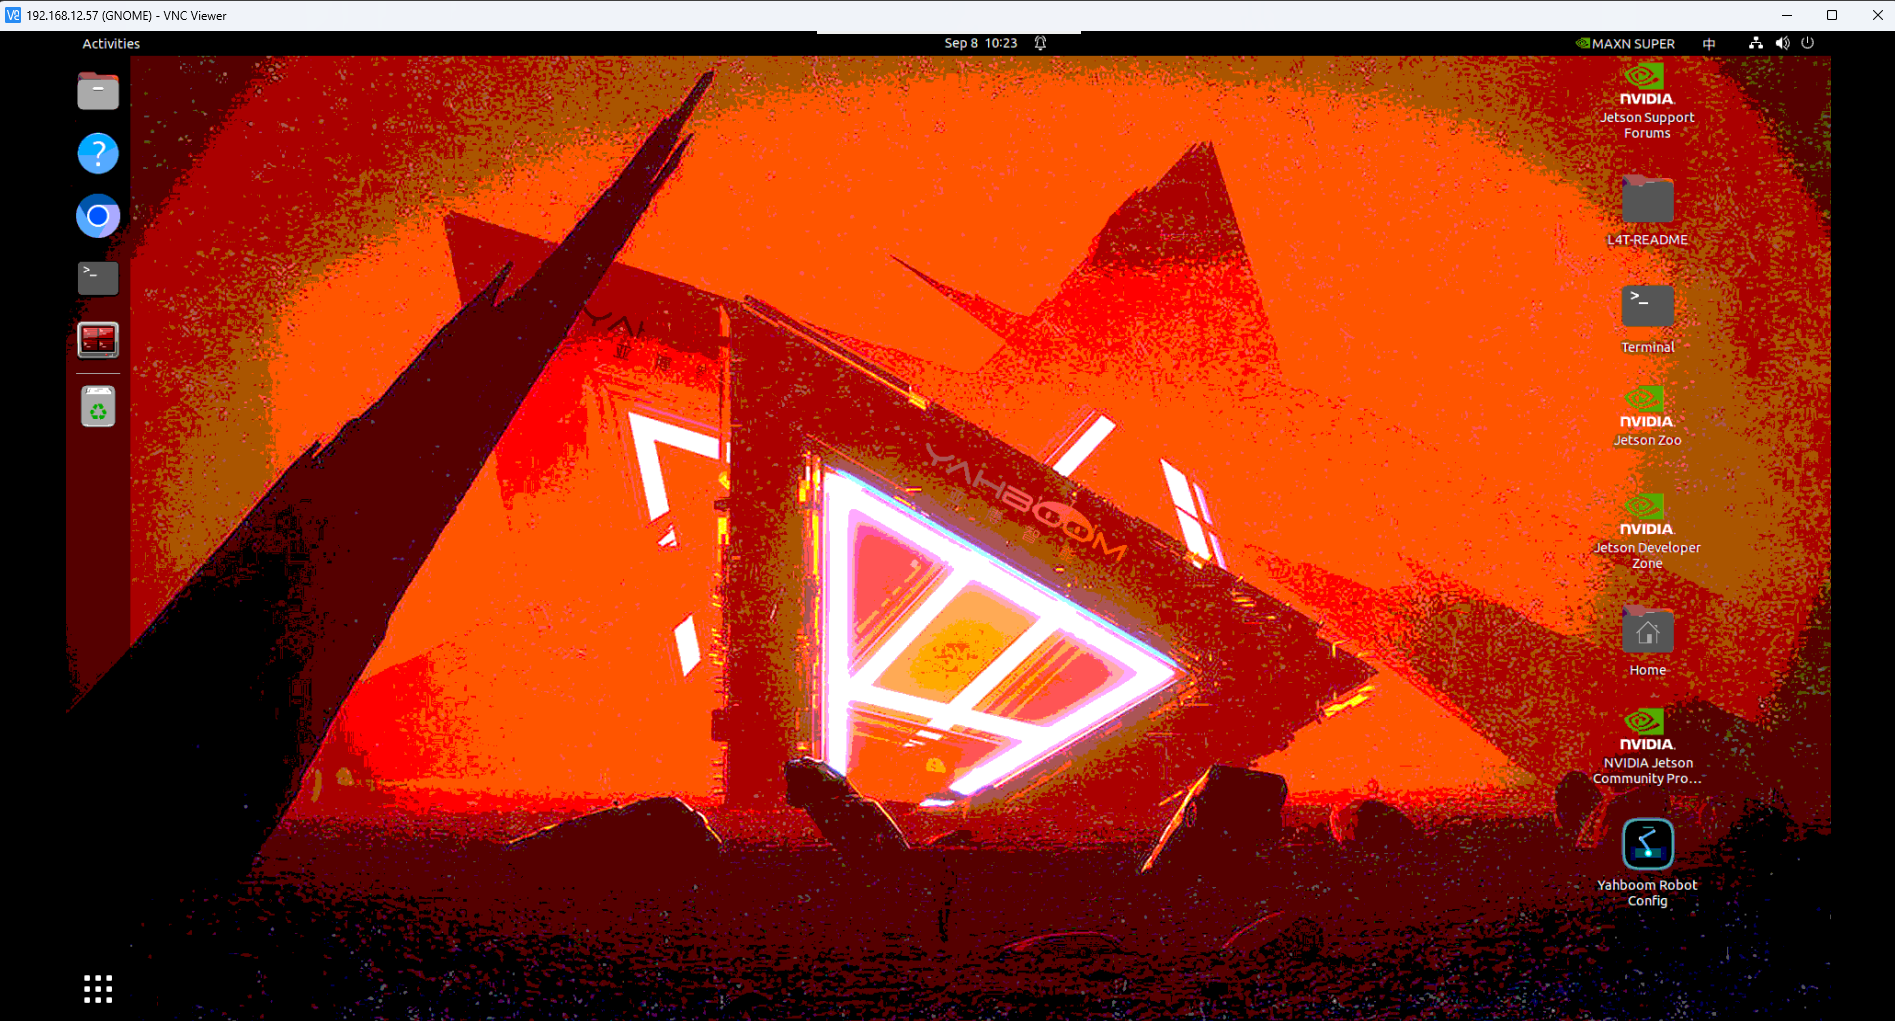
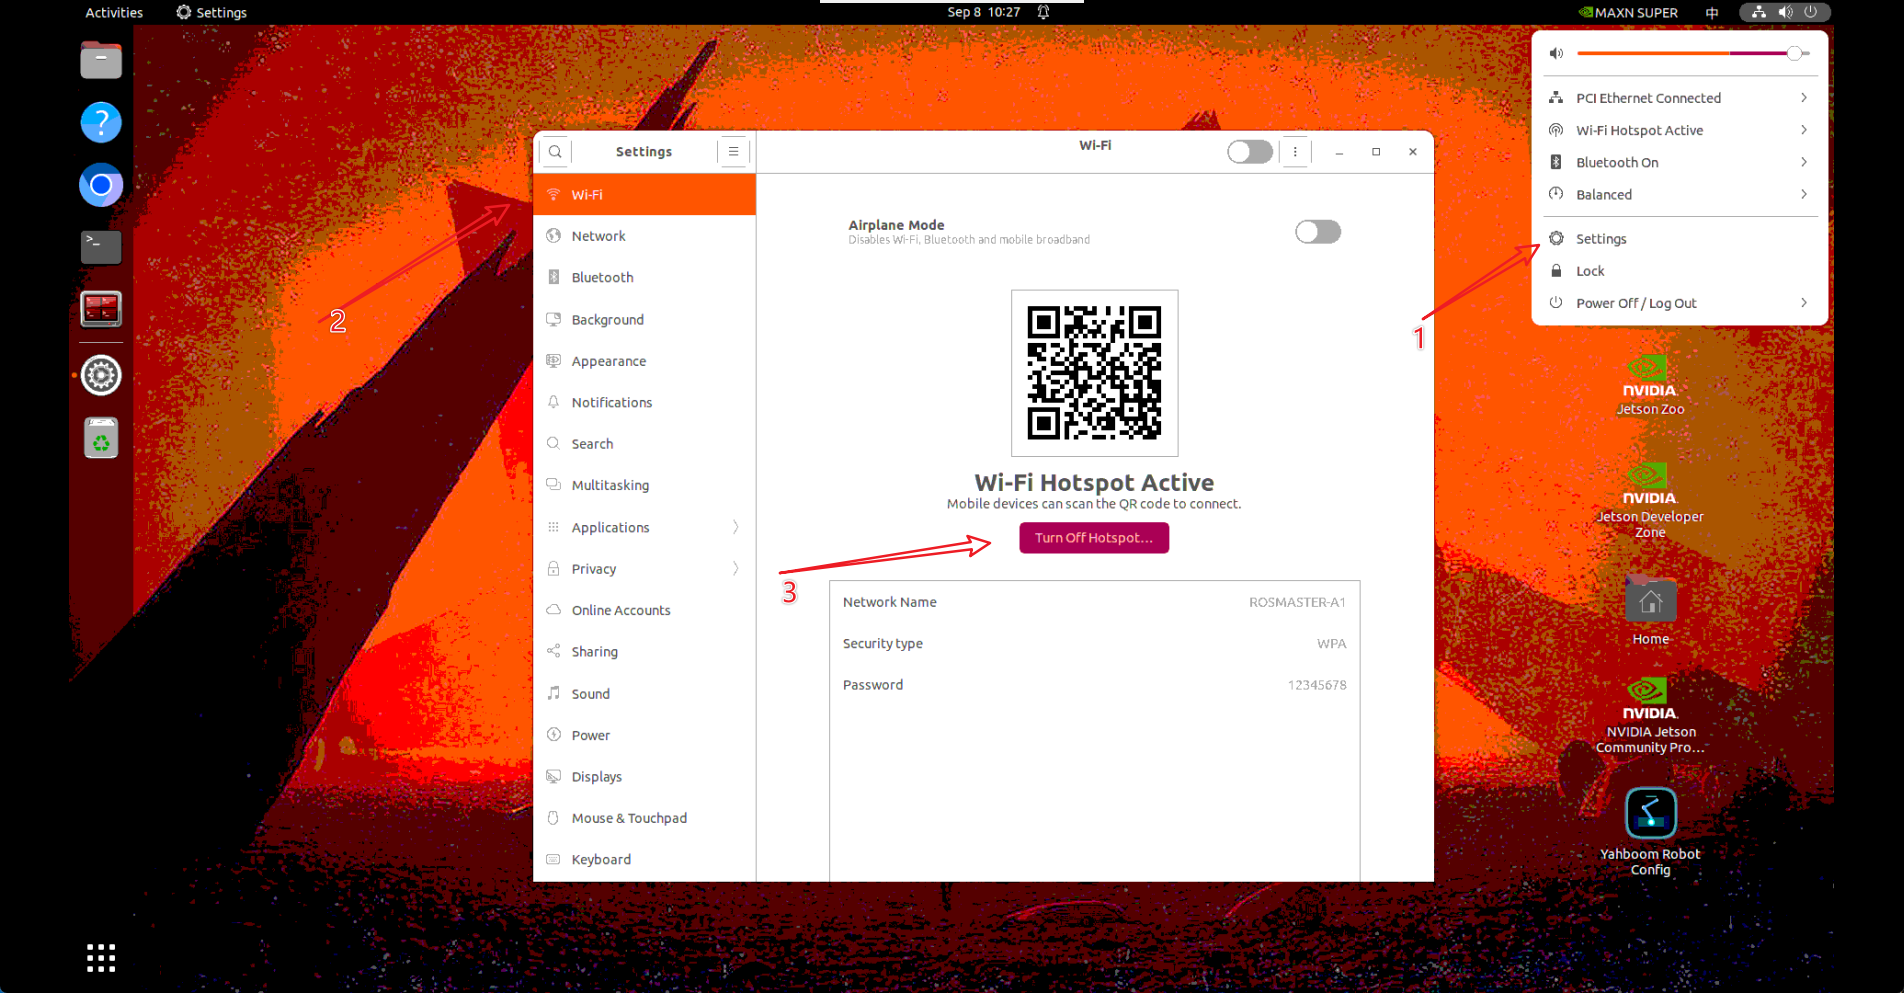
Open system settings (Settings), enter Wi-Fi settings interface, first turn off the car's built-in hotspot, so that the network card can normally scan external Wi-Fi:
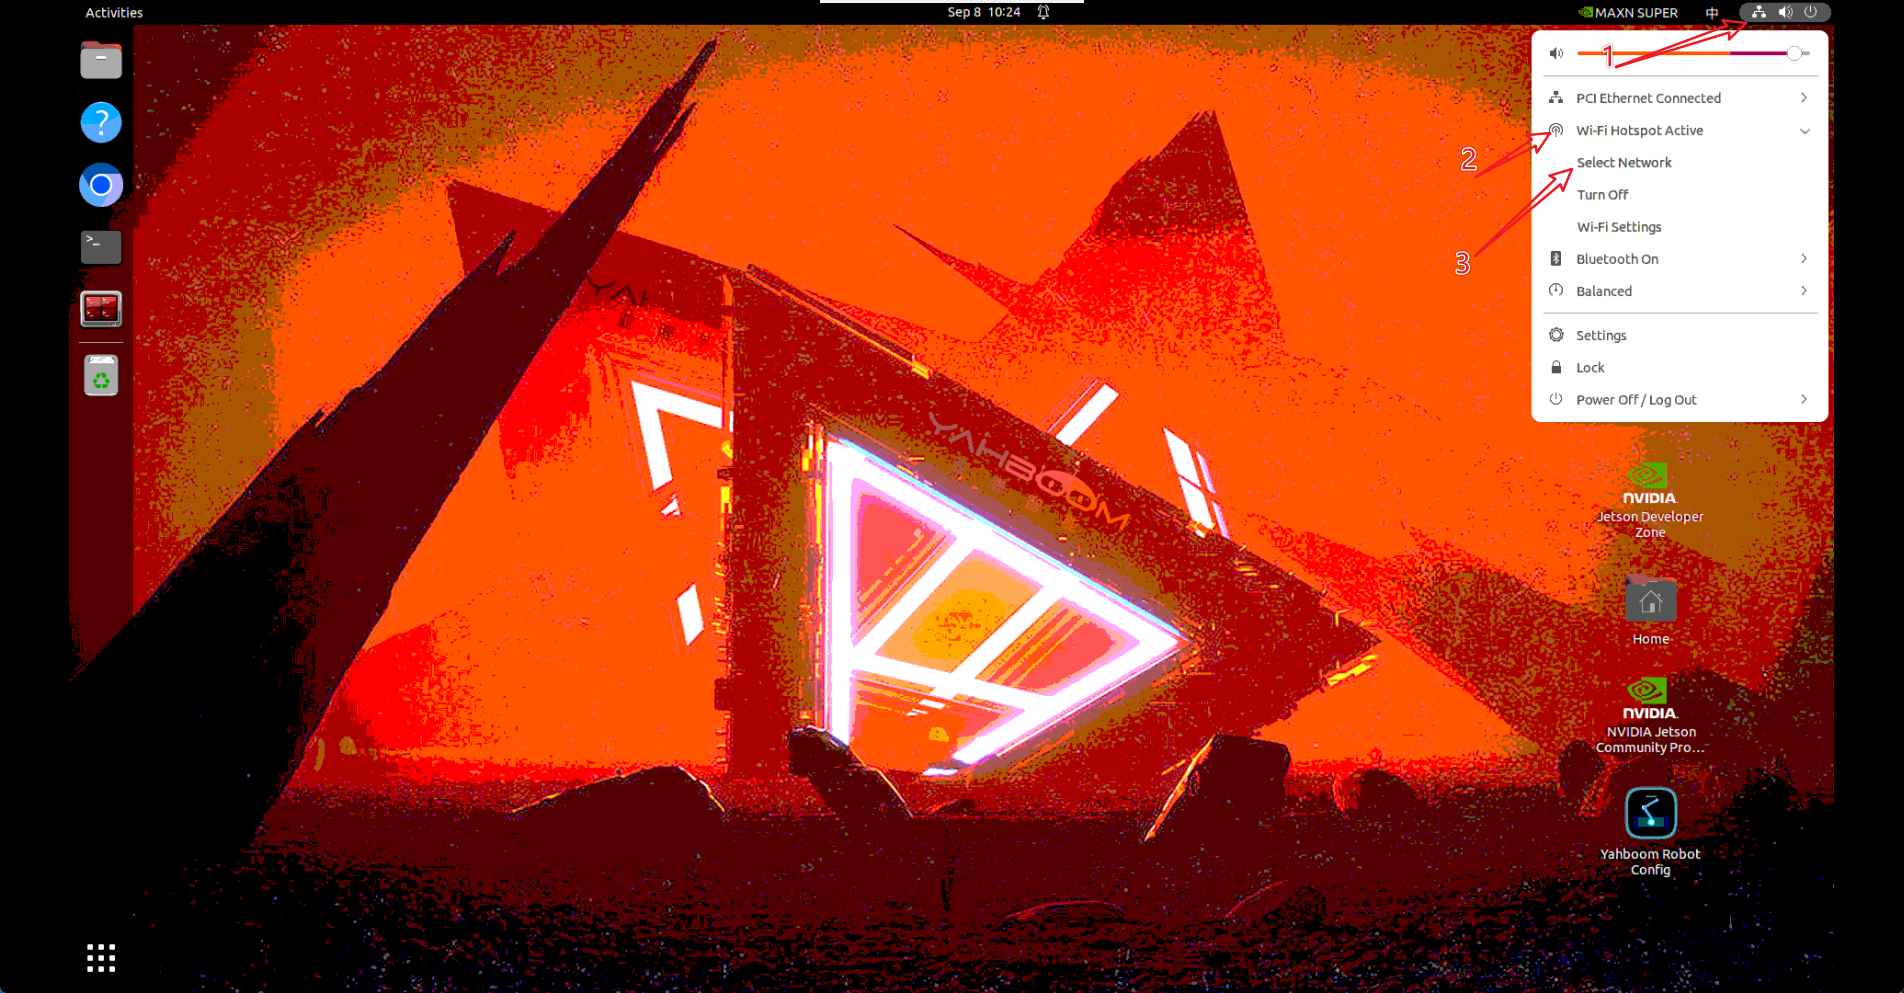
Click the network icon in the upper right corner of the desktop, and click Select Network in the dropdown menu:
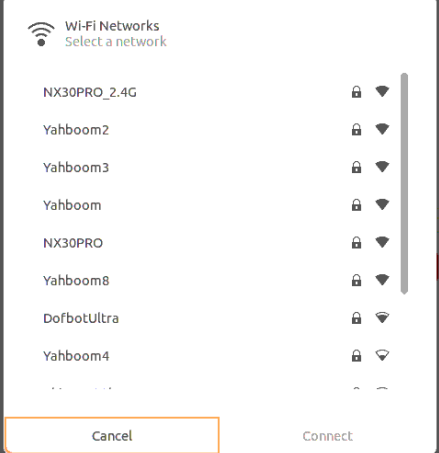
Select the external Wi-Fi name you want to connect to, enter the password and click connect:
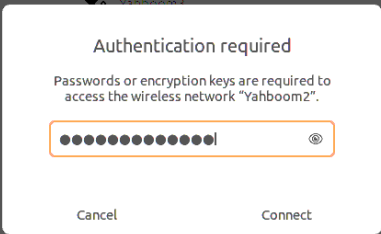
After successful connection, the network icon will show connected status, and the OLED screen will also synchronously update to the new IP address of your Wi-Fi. Subsequently, you can use this new IP for remote connection.
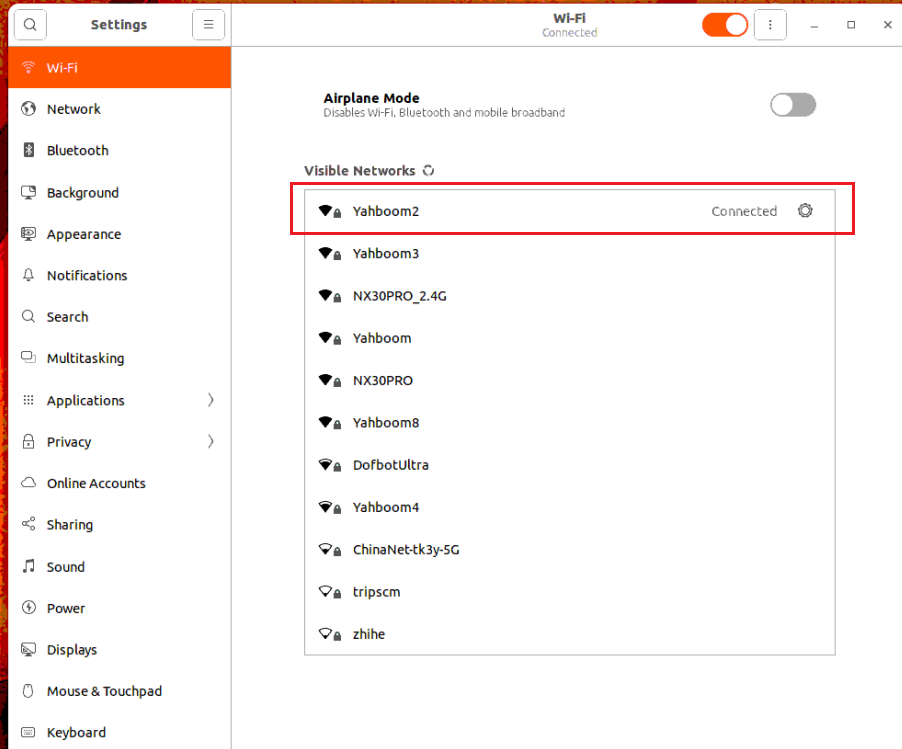
5.2 Method 2: When No Wired Cable, Configure Wi-Fi Priority Auto-Connection via Hotspot IP
If there is no router cable available, you can directly connect to the car's default Wi-Fi hotspot through your computer:
Connect the computer to the car's hotspot
ROSMASTER(password12345678), use VNC Viewer to connect to the hotspot default IP:192.168.1.11.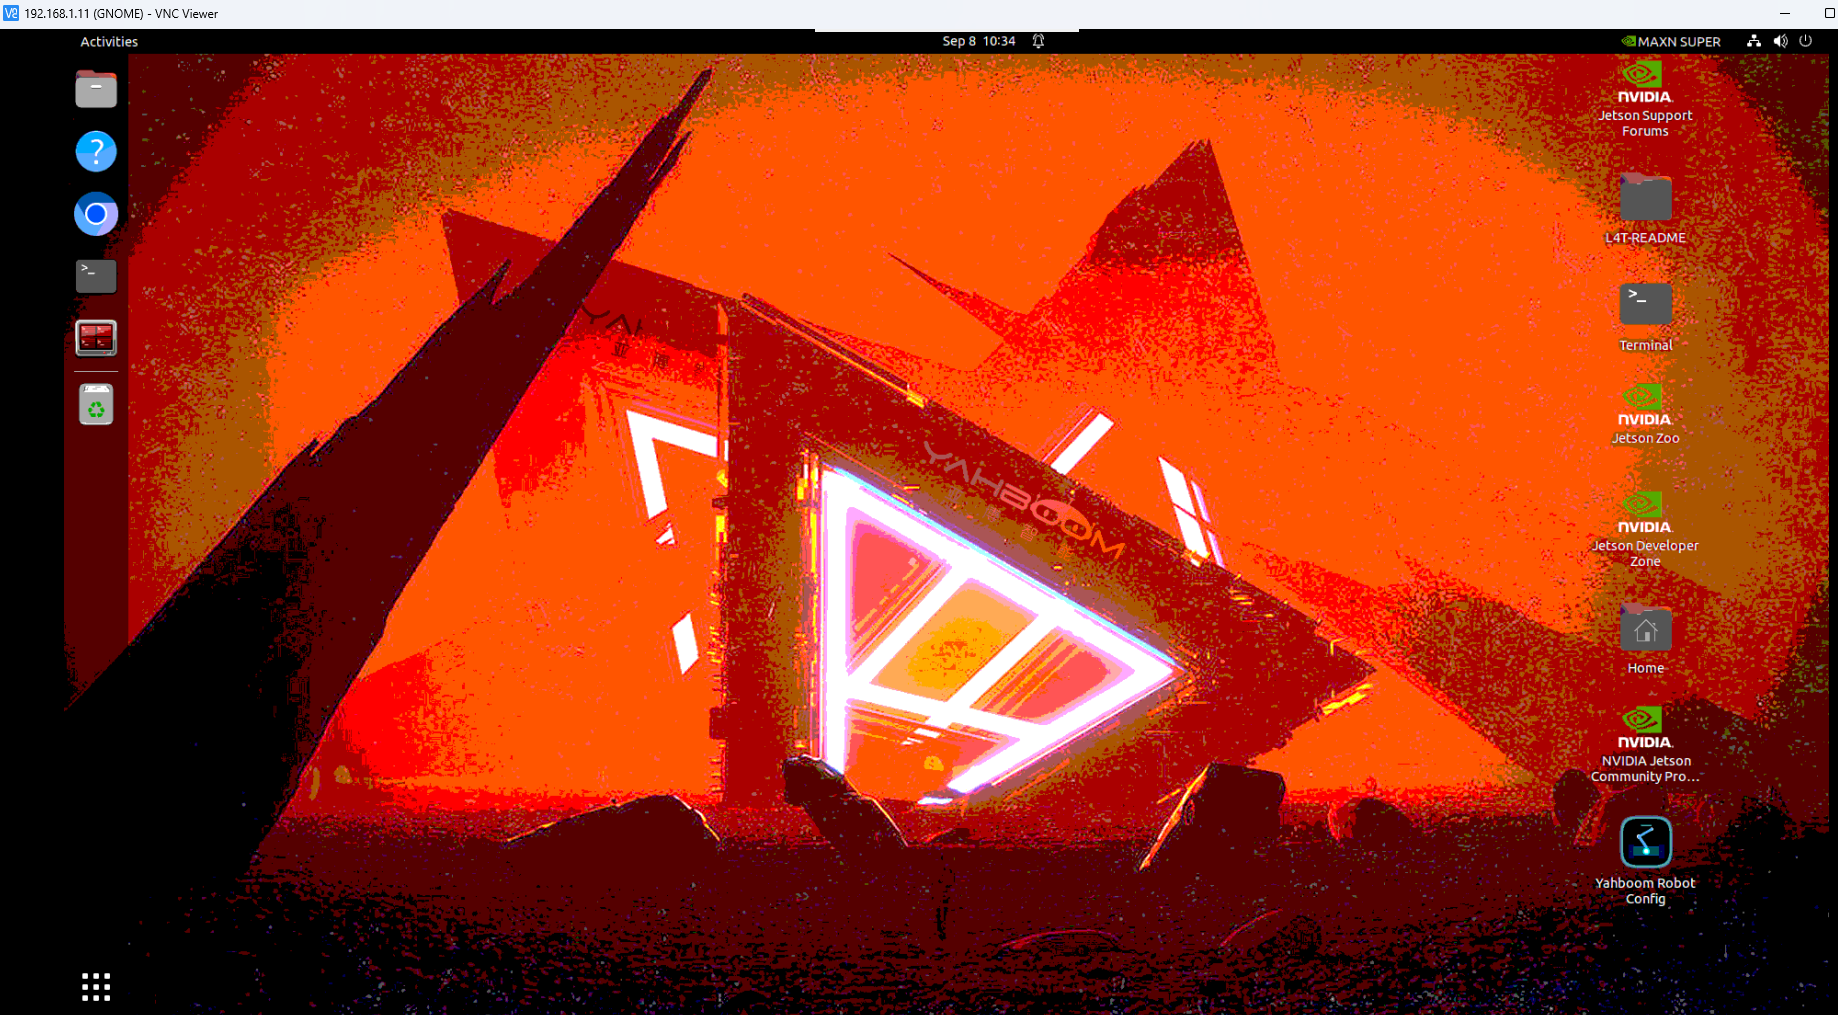
Open a terminal on the desktop and enter the network configuration tool command:
xxxxxxxxxxnm-connection-editor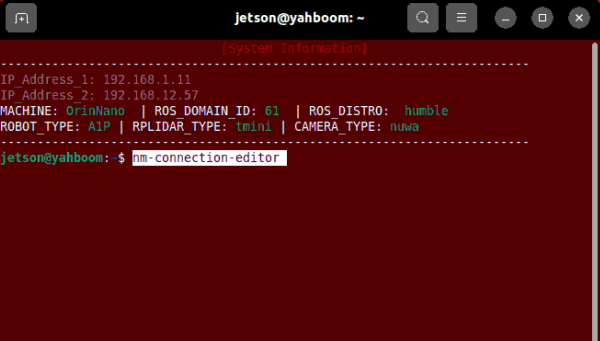
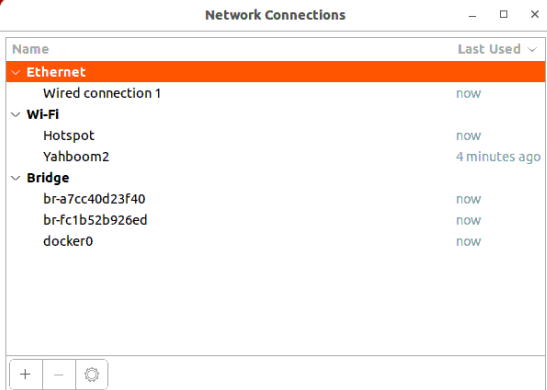
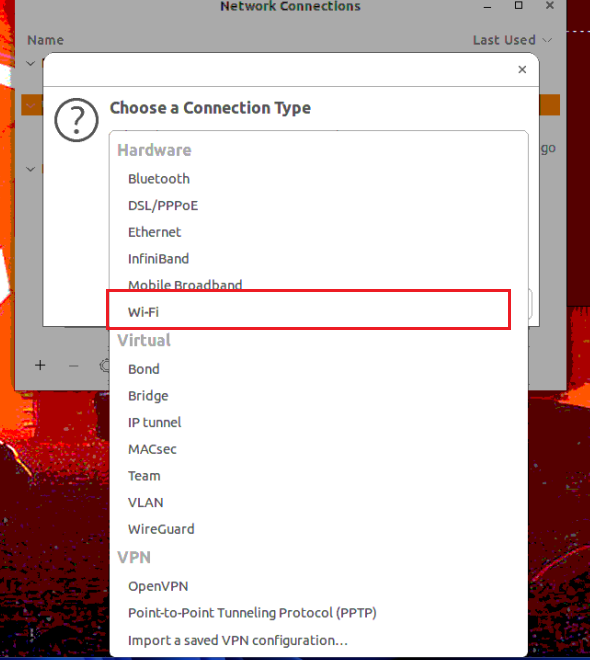
In the pop-up network connection window, click the 【+】 in the lower left corner to create a new connection, select Wi-Fi as the connection type, and click Create:
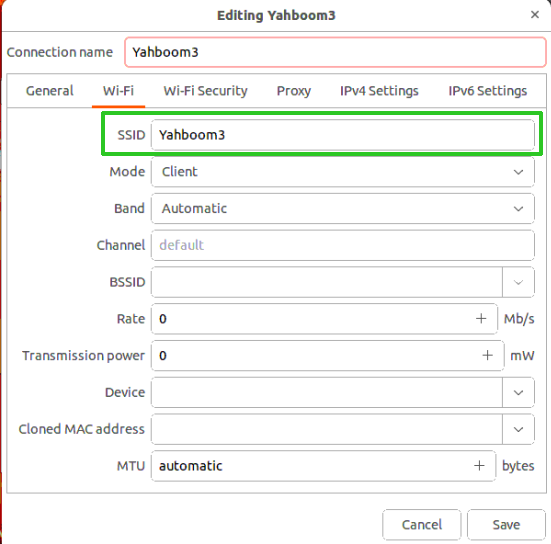
In the Wi-Fi tab, enter the router Wi-Fi name you want to connect to in the SSID field:
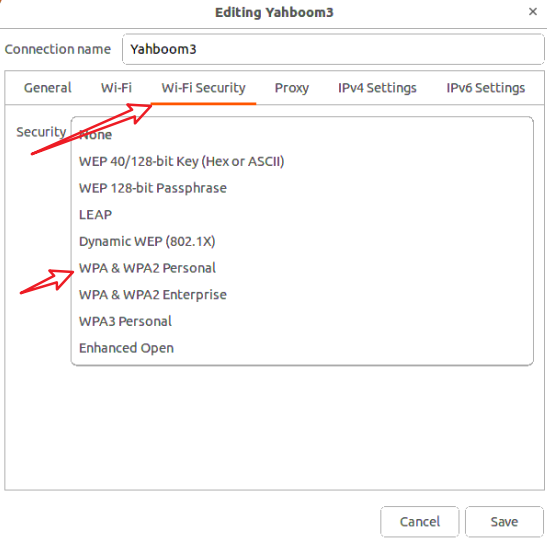
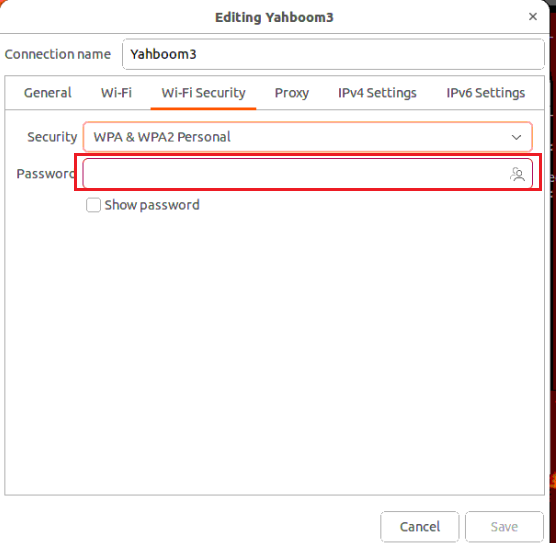
Switch to the Wi-Fi Security tab, select WPA & WPA2 Personal for security type, and enter the connection password for that Wi-Fi in the Password field:
Switch to the General tab, check "Connect automatically", and adjust the Priority (boot connection priority) value higher (for example set to
10, higher number means higher priority):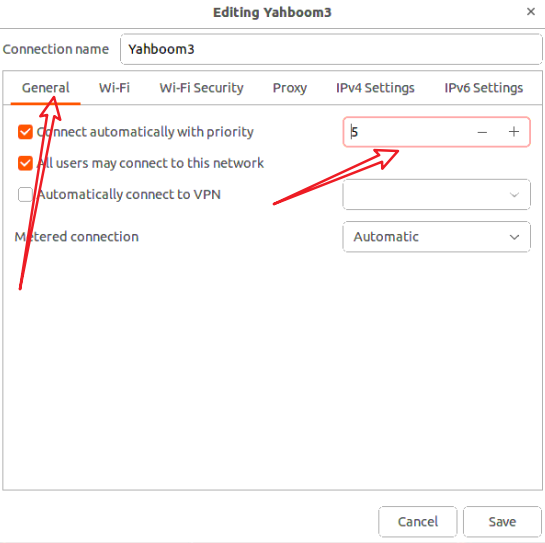
Click Save in the lower right corner. Similarly, in the list you can double-click the hotspot connection to view the hotspot's priority, as long as the external Wi-Fi priority is higher than the hotspot's priority:
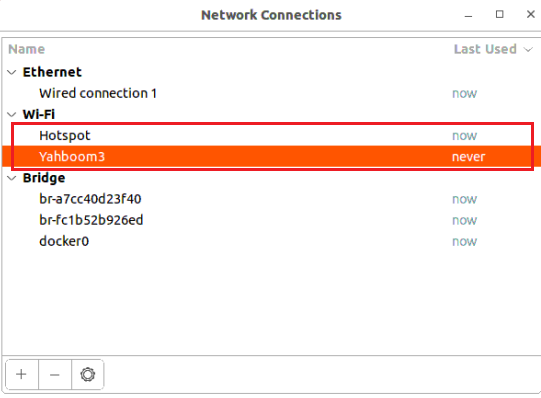
After configuration is complete, close the window and restart the mainboard. After the car boots up, it will automatically connect to the configured external Wi-Fi with higher priority.
6. Car Login Operation Guide
Choose the most suitable login method based on your development scenario:
SSH Terminal Login: Fast and lightweight, suitable for running commands, starting ROS2 nodes, and debugging command-line programs.
VNC Remote Desktop Login: With graphical interface, suitable for viewing camera images, RViz visualization, and operating desktop applications.
6.1 Method 1: SSH Remote Terminal Login
Simplest Method: Direct Connection via Computer System Command Line (Windows Terminal / PowerShell / macOS / Linux)
In the PowerShell, CMD, or terminal on your computer, directly enter one command:
x# Format: ssh username@carIP# Example for RDK X5 mainboard:ssh sunrise@192.168.12.57
# Example for Orin mainboard:ssh jetson@192.168.12.57Press Enter, then enter the password yahboom (Note: In Linux terminal, no asterisks or characters are displayed when entering password, just type blindly and press Enter).
Client Method: Using PuTTY / MobaXterm Tools
PuTTY download address: Download PuTTY
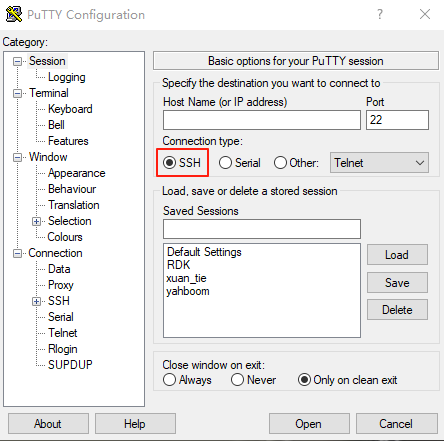
Open PuTTY software:
Select SSH for connection type;
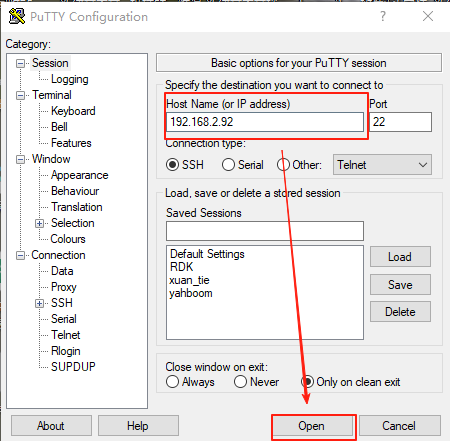
Enter the car's IP address in the Host Name (or IP address) field, keep port as
22;Click Open at the bottom.
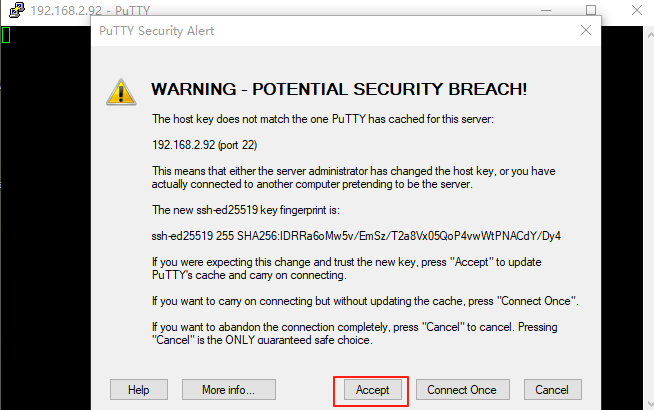
If the security prompt popup appears on the first connection, click Accept to accept it:
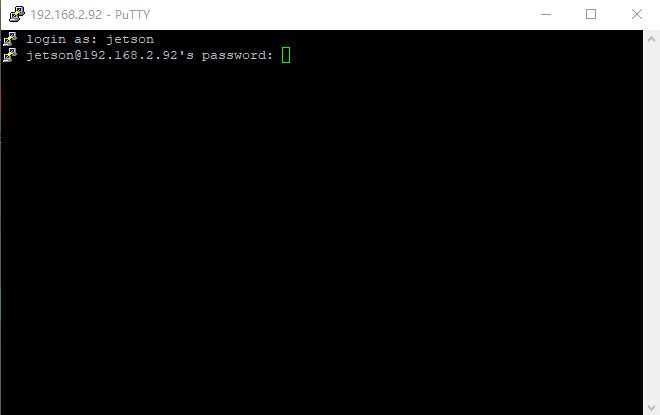
Enter the mainboard username (such as
sunriseorjetson) at the terminal promptlogin as:and press Enter;When prompted for password, enter
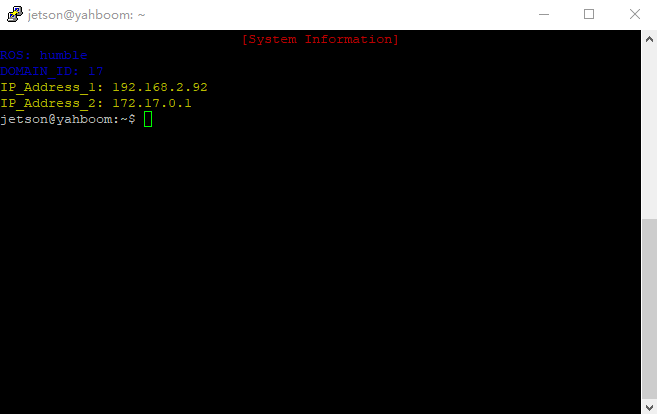
yahboom(no password echo), press Enter to complete login:
6.2 Method 2: VNC Remote Graphical Desktop Login
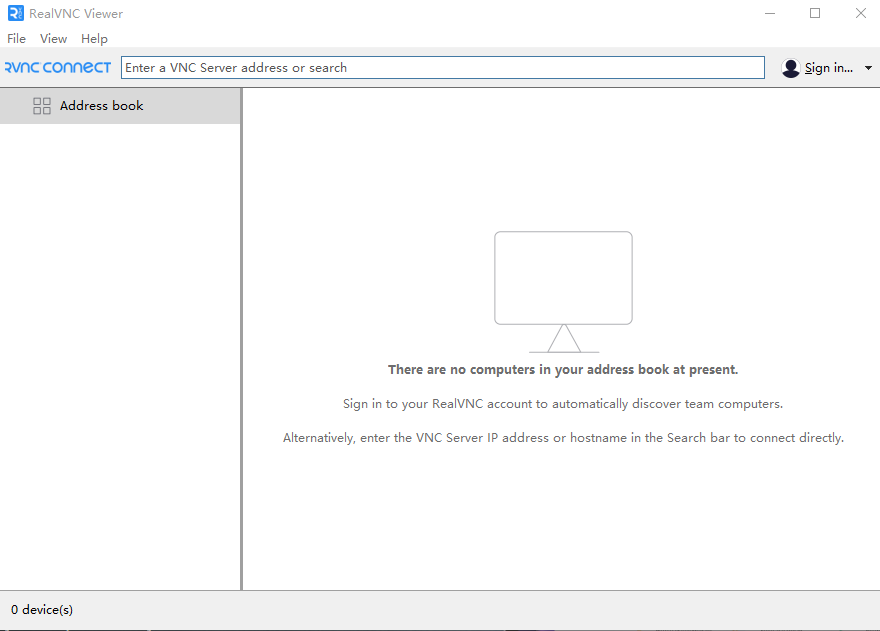
VNC Viewer official download address: Download VNC Viewer
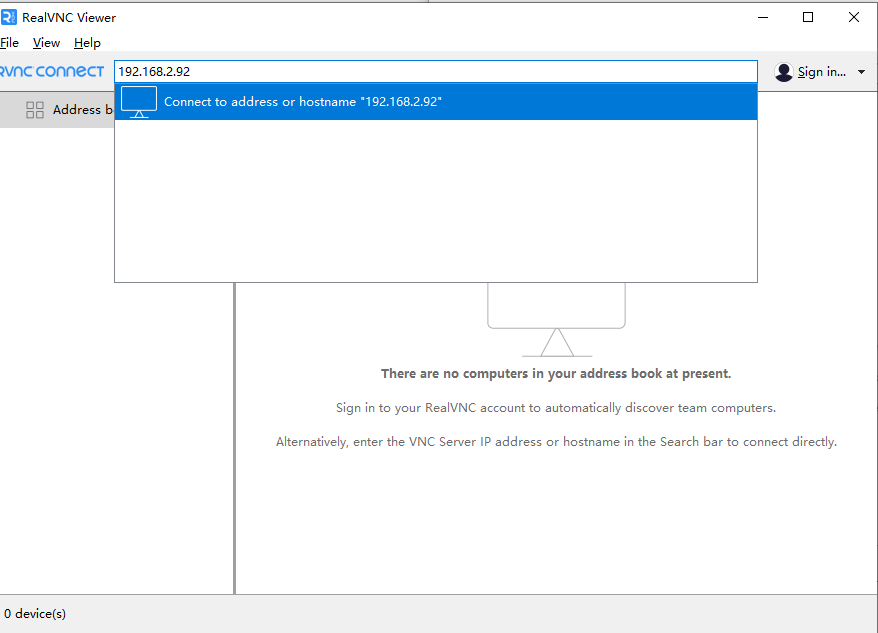
Open VNC Viewer, enter the car's IP address in the address bar at the top, and press Enter:
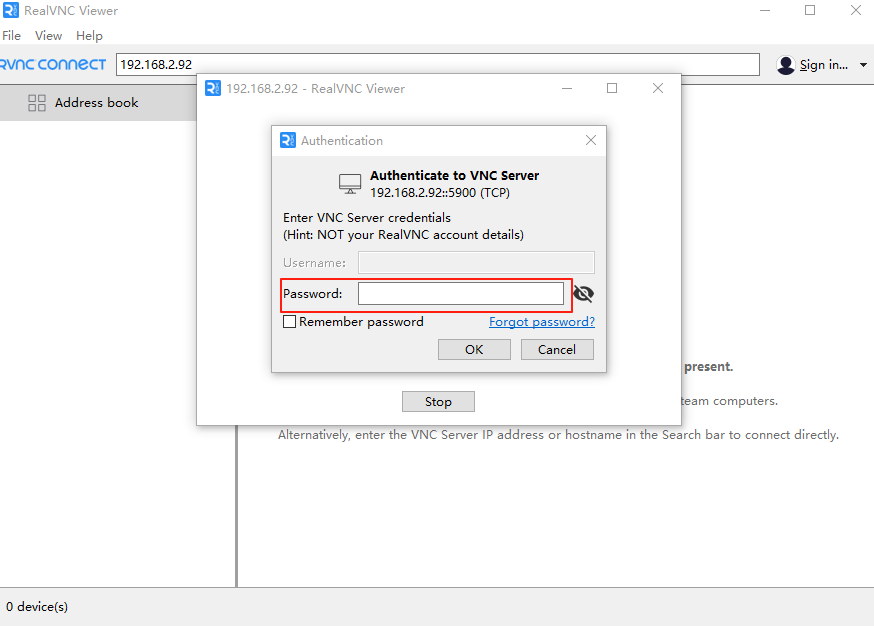
In the popup login box, enter the username and password for the corresponding mainboard (password is uniformly
yahboom), click OK:
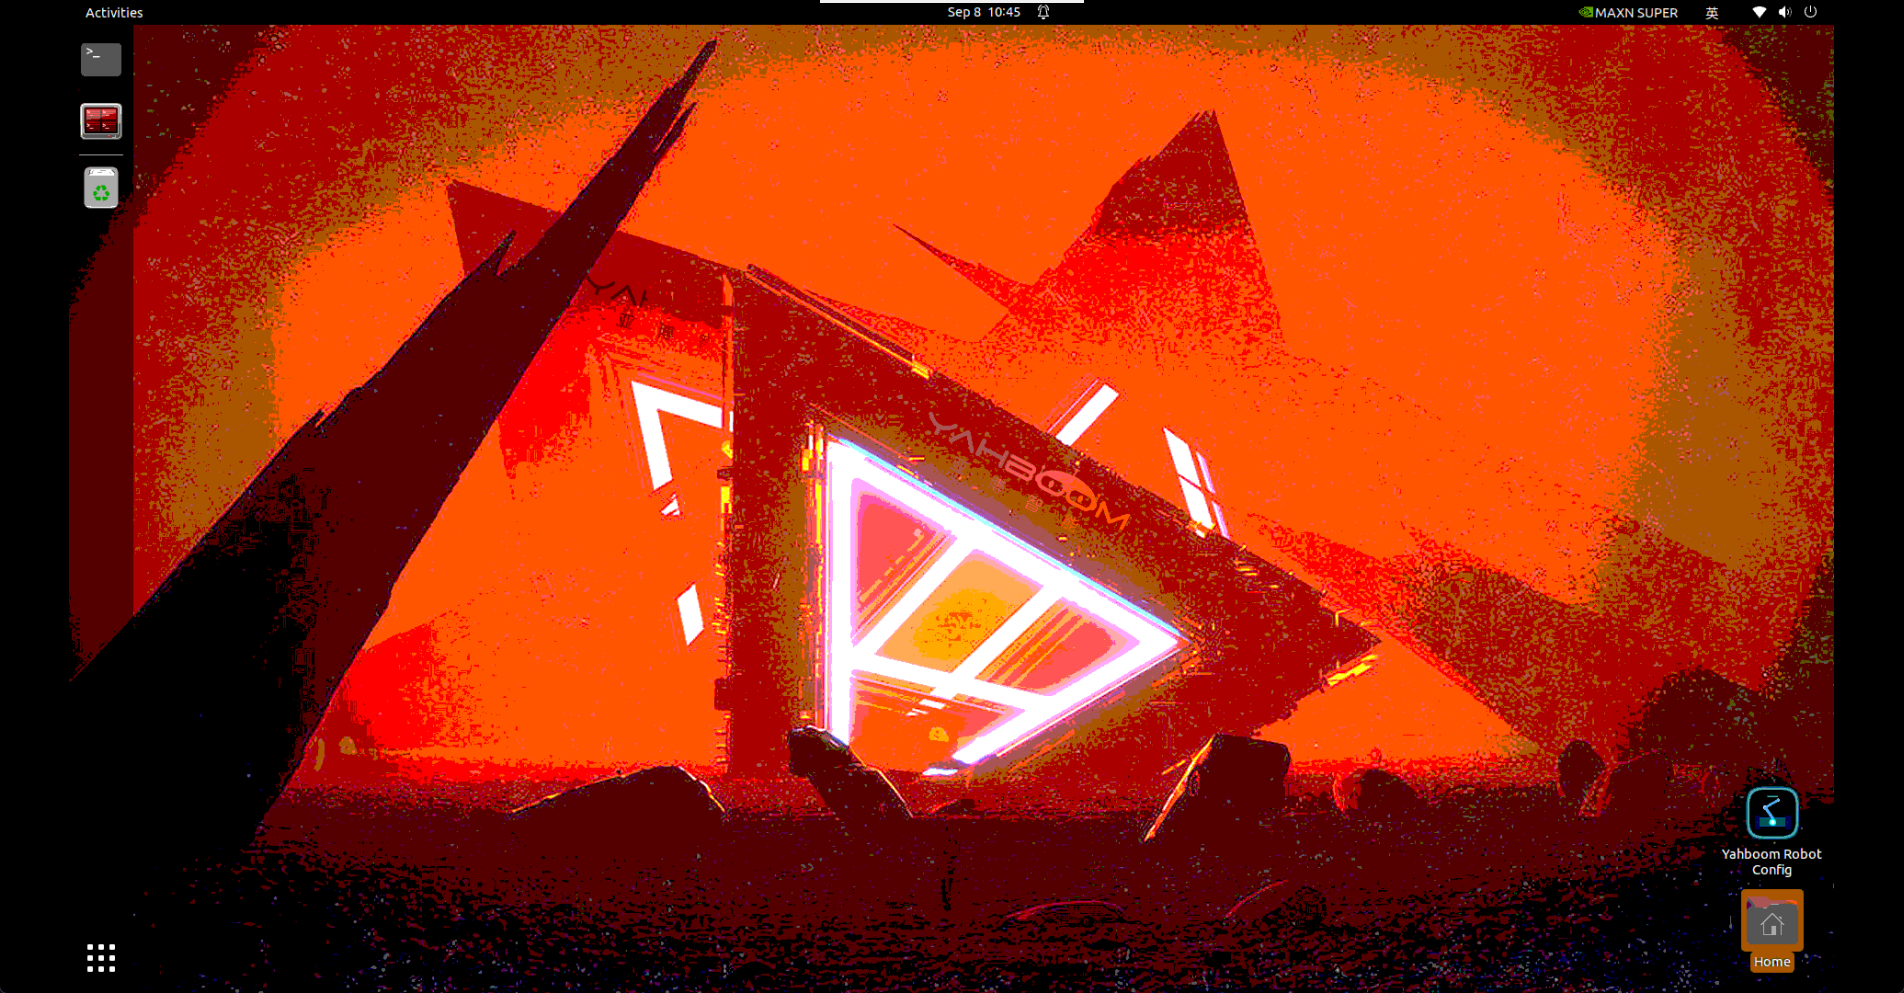
Successfully entered remote desktop environment:
7. Using VS Code Remote Development and Viewing Code (Strongly Recommended)
Visual Studio Code has powerful code highlighting, intelligent prompts, and terminal integration capabilities, making it the best tool for remotely viewing and editing car code on your computer.
Official website download address: Visual Studio Code
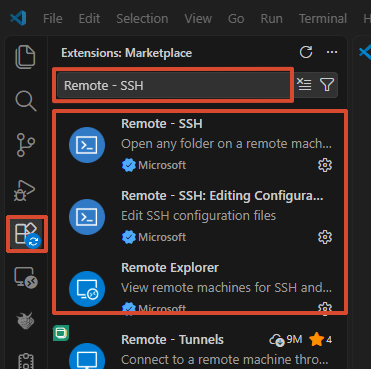
7.1 Step 1: Install Remote-SSH Plugin
Open VS Code, click the Extensions icon in the left activity bar, search and install the Remote - SSH plugin:
7.2 Step 2: Establish Remote Connection
Click the Remote Explorer icon in the left sidebar of VS Code;
Click the 【+】 New Remote Connection button on the right side of SSH:
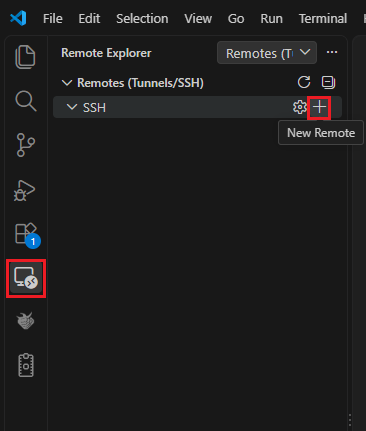
Enter the connection command in the popup input box at the top:
xxxxxxxxxxssh username@carIP# For example: ssh sunrise@192.168.12.57 or ssh jetson@192.168.12.57

Select the default save configuration file (usually saved in the current user's
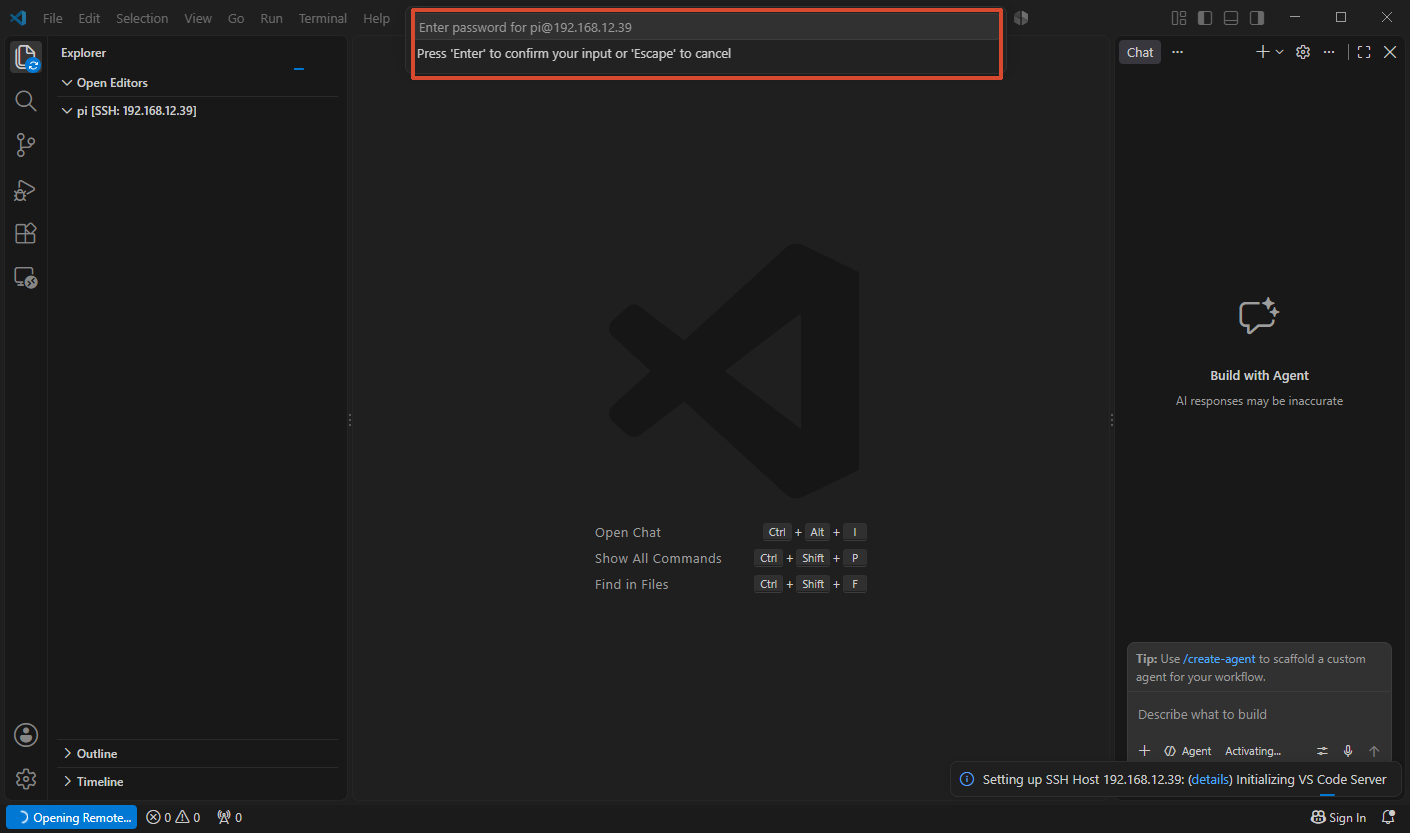
~/.ssh/config), and click Connect in the lower right corner to connect.When prompted to select platform, select Linux, then enter the login password
yahboomand press Enter.
7.3 Step 3: Open Car Code Engineering Directory
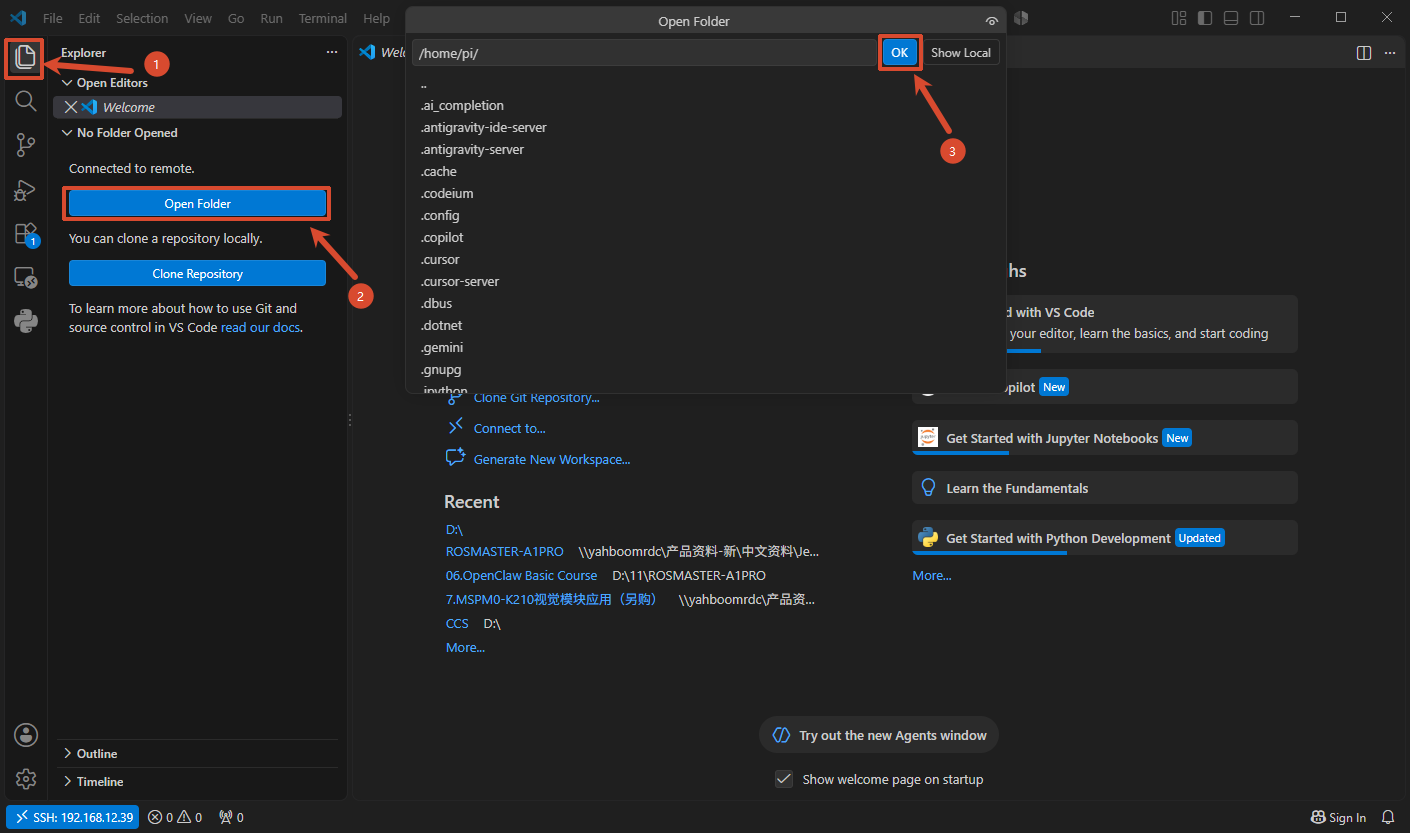
After successful connection (green SSH: IP displayed in the lower left corner):
Click menu bar File → Open Folder;
In the popup path, enter or select the car's core workspace path, for example:
xxxxxxxxxx/home/sunrise/(For Orin mainboard it is
/home/jetson/), click OK:
Then enter password to log in:
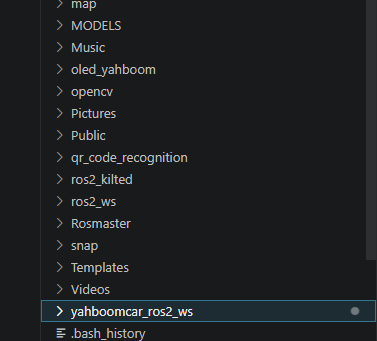
At this point, the left resource explorer will fully load the car's source code engineering, you can directly double-click on your computer to view and edit code, or run ROS2 commands using VS Code's built-in terminal:
7.4 Step 4: Compile Workspace
If you need to compile the corresponding workspace, you can cd to the corresponding directory and compile all packages:
xxxxxxxxxx#For examplecd ~/yahboomcar_ros2_ws/yahboomcar_wscolcon buildIf you modified a single package and want to compile it separately, you can enter the following command:
xxxxxxxxxx#For examplecd ~/yahboomcar_ros2_ws/yahboomcar_wscolcon build --packages-select yahboomcar_bringup8. Source Code Workspace Structure Description
The car's engineering main directory is located in ~/yahboomcar_ros2_ws under the user's home directory. The specific functional divisions of the main packages are as follows:
xxxxxxxxxx~/yahboomcar_ros2_ws/├── yahboomcar_ws/ # [Chassis and Sensor Core Functional Space]│ └── src/│ ├── yahboomcar_bringup/ # Robot underlying driver, various sensor startup launch files│ ├── yahboomcar_base_node/ # Ackerman chassis driver and motion control core node│ ├── yahboomcar_laser/ # LiDAR driver (C1 / T-mini Plus, etc.) and LiDAR obstacle avoidance/following│ ├── yahboomcar_depth/ # Depth camera driver (NUWA / Astra, etc.) and 3D point cloud processing│ ├── yahboomcar_vision/ # OpenCV visual processing, color recognition and line tracking│ ├── yahboomcar_mediapipe/ # AI visual human body pose, skeleton, face and gesture recognition│ ├── yahboomcar_nav/ # Nav2 autonomous navigation, Costmap and path planning algorithm│ ├── largemodel/ # Edge-side large model intelligent voice interaction and multimodal Agent│ ├── auto_interfaces/ # Custom ROS2 messages, topics and service interface definitions│ └── ...├── dofbot_pro_ws/ # [Six-Axis Robotic Arm Control and Kinematics Planning Space]│ └── src/│ ├── dofbot_pro_bringup/ # Robotic arm underlying driver and bus servo communication│ ├── dofbot_pro_driver/ # Six-axis servo hardware control and status feedback driver│ ├── dofbot_pro_moveit/ # MoveIt2 robotic arm inverse kinematics and trajectory planning│ ├── dofbot_pro_calibration/ # Robotic arm joint servo zero position calibration program│ ├── dofbot_pro_usb/ # Robotic arm visual gripping (color recognition, AprilTag grasping, etc.)│ ├── dofbot_pro_voice/ # Voice command to drive robotic arm action and gripping│ └── dofbot_pro_description/ # Robotic arm URDF 3D model and mesh description files└── software/ # [Underlying Dependency Library and Installation Environment] ├── library_ws/ # Chassis driver and hardware interaction support library ├── vioce_toolbox_lib/ # Voice interaction toolbox extension library └── py_install_V3.3.9/ # Python core dependencies and environment installation package9. Common Problem Troubleshooting and Maintenance Guide
9.1 If I replaced the LiDAR or camera, how to bring up the Web configuration interface again?
Reset Configuration Status
Execute the following command in the car terminal to reset the initialization flag to unconfigured:
xxxxxxxxxxsed -i 's/"FIRST_SETUP": "true"/"FIRST_SETUP": "false"/' ~/yahboomcar_ros2_ws/yahboomcar_ws/.system_cfg/robot_info.jsonThen restart the car, and after booting, you can enter the configuration wizard again via http://<Car IP>:8080.
9.2 Joystick Control Common Problem Troubleshooting
Joystick indicator light keeps flashing, cannot control the car?
Check if joystick battery is sufficient.
Check if the USB receiver on the car is properly inserted (the interface should show
/dev/input/js0green connected).Try pressing the
MODEkey in the center of the joystick to switch to analog red light mode.
How to close the joystick control program in VNC desktop?
After clicking to start joystick control, the VNC desktop will automatically pop up an independent terminal titled
A1Pro Joystick Control (Press Ctrl+C to close).Simply select that terminal window and press keyboard
Ctrl + C, which can gracefully terminate the joystick control node and close the window.
Chassis has no response after starting joystick control?
You must first press the
STARTkey on the joystick, and after hearing the car's buzzer make "beep-beep-beep" enable sound, the joystick control will officially take effect.
9.3 What if I cannot open the configuration webpage?
Check if computer and car are on the same network: Try
ping <Car IP>in the computer terminal to ensure network connectivity.Check service status: Run the following command in the car terminal to view boot service status:
xxxxxxxxxxsystemctl status first_setup.serviceCheck port 8080 occupancy:
xxxxxxxxxxnetstat -tunlp | grep 8080
9.4 VNC Remote Desktop Screen Flicker or Crash Troubleshooting
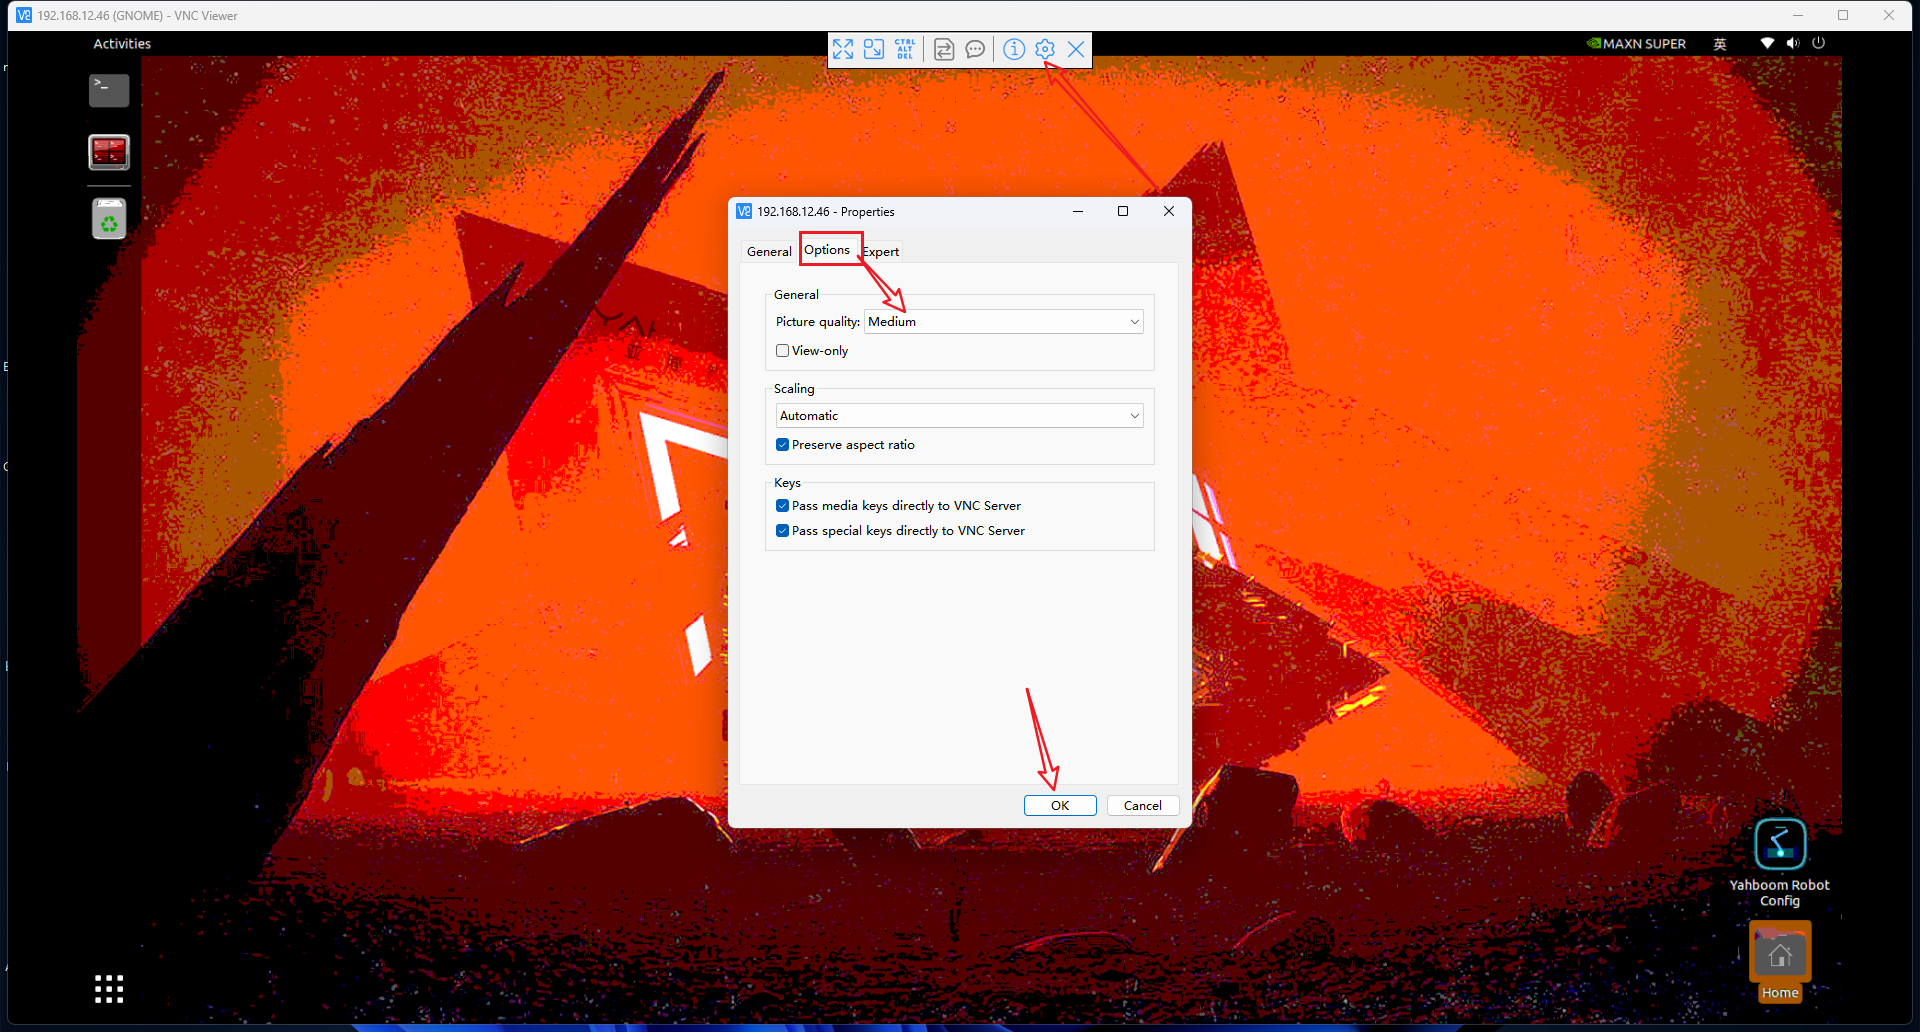
If the screen displays black or abnormal stripes after logging in with VNC Viewer (as shown in the figure below), and crashes after a few seconds:
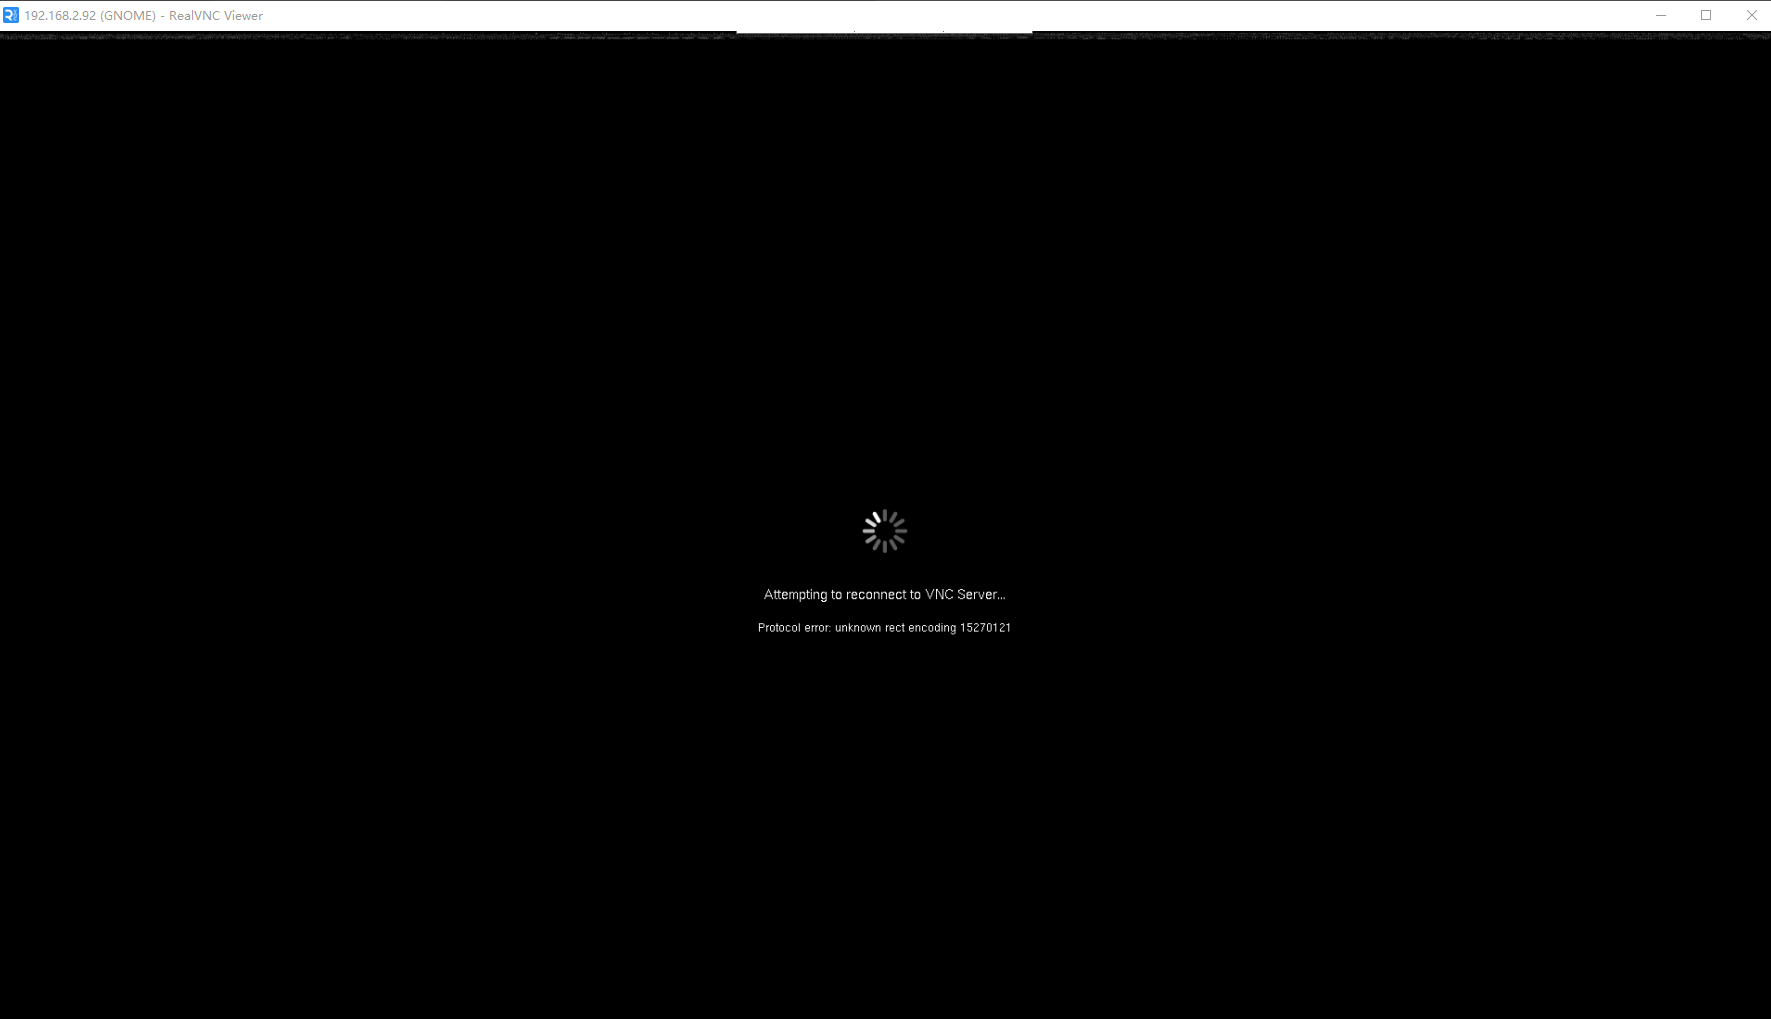
Solution: Right-click the car connection card in the VNC Viewer main interface, select Properties → switch to the Options tab → set Picture quality to High or Medium, click OK and reconnect to stabilize the display.