Welcome to ROSMASTER A1 PRO repository
1.OpenClaw Target Tracking
OpenClaw Target Tracking
OpenClaw Target Tracking1. Course ContentCourse OverviewLearning Objectives2. Preparation3. Target Tracking Case PracticeStep 1: Issue Tracking CommandStep 2: Hand-Eye Following ObservationStep 3: Target Loss Protection MechanismStep 4: Auto Recovery and Resume TrackingStep 5: Cancel/Exit Target Tracking4. Core Source Code Analysis4.1 TargetTrack() — Main Entry for Starting and Canceling Tracking4.2 _gaze_track_loop() — Background Closed-Loop Tracking Thread4.3 _get_bbox() — Thread-Safe Target Position Reading4.4 _gaze_control() — Joint Increment Control and Limit Protection5. Parameter DebuggingParameter Debugging Suggestion Table6. Common Problems and Troubleshooting Guide
1. Course Content
Course Overview
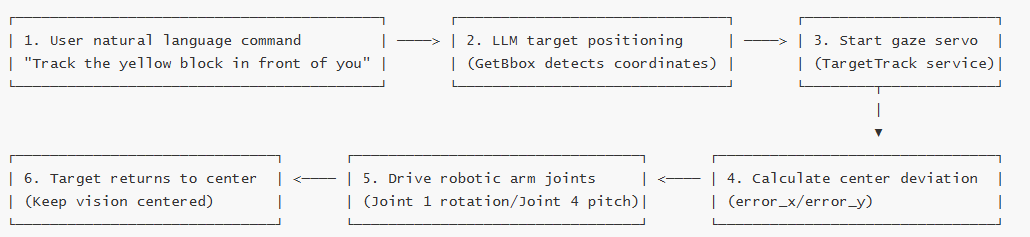
In embodied intelligent robots, Target Tracking (Visual Tracking) is like human "eye gaze and head turning tracking" - when you move an object in front of you, your eyes keep staring at it, if the object moves out of the center of your vision, your neck will turn to keep the object centered in your field of view.
OpenClaw Target Tracking utilizes this Eye-in-Hand Visual Servoing principle:
Eyes see (Visual Perception): The camera at the end of the robotic arm captures images in real-time, continuously locking onto the target object's position through visual algorithms.
Neck moves (Joint Control): The algorithm calculates the deviation pixels between the target object and the center of the frame in real-time, dynamically adjusting the base rotation joint and pitch joint of the robotic arm to move the camera, keeping the target firmly locked in the center of the frame.
Smart exception handling: When the target is occluded or moves out of the frame, the robotic arm automatically pauses movement and waits in place; once the target returns to the field of view, the robotic arm can recover tracking within seconds.
Learning Objectives
Master how to start and cancel target tracking through OpenClaw (natural language interaction/voice interaction/WebChat).
Understand the basic principles of visual servo feedback control (how image center deviation is converted to robotic arm joint angles).
Master the core source code logic of target tracking and debugging methods for key parameters (error threshold, adjustment step size).
2. Preparation
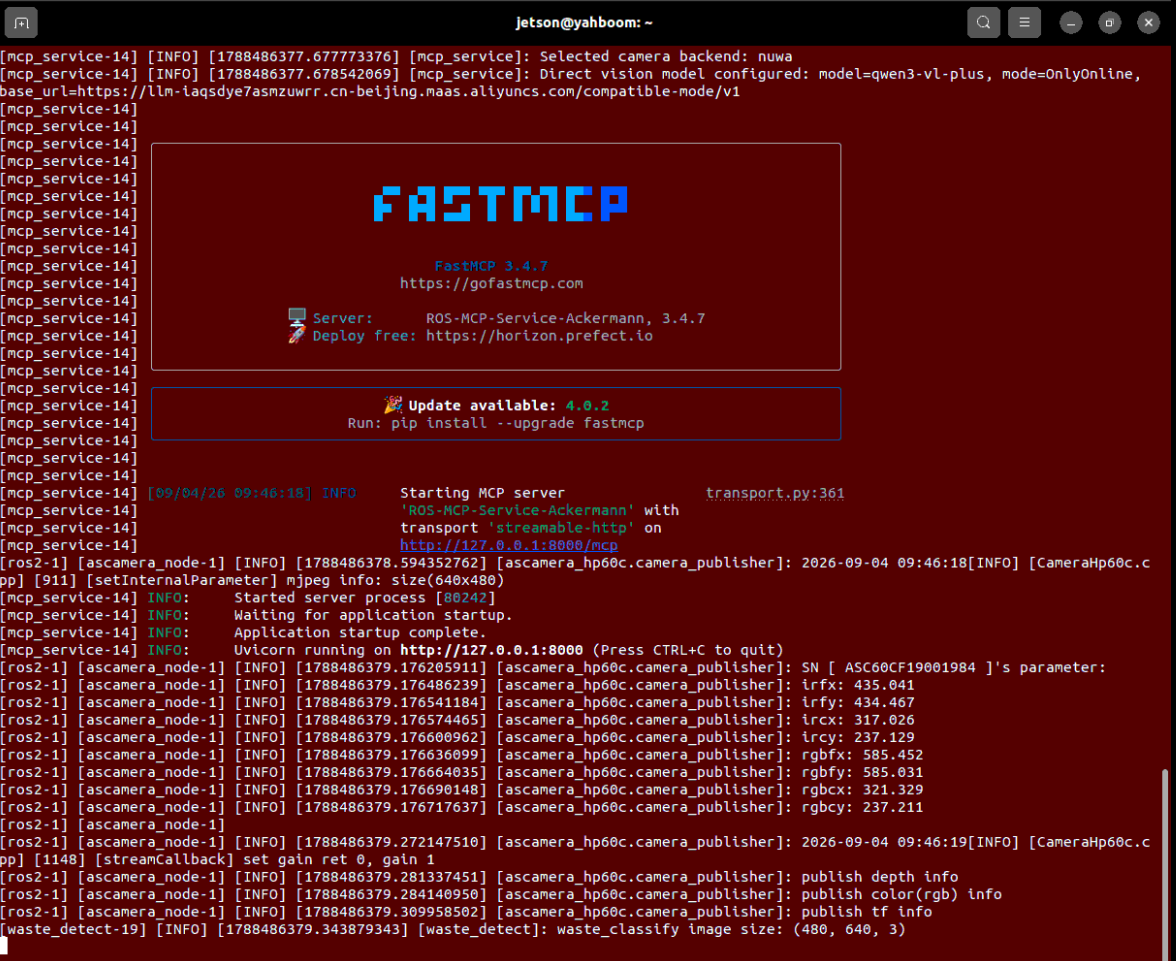
Start core nodes such as odometry, TF transformation, robotic arm assistance, camera node, and MCP service:
ros2 launch dofbot_pro_bringup mcp_service.launch.pyIf you need voice broadcast replies, you can use the command with
launch_openclaw_bridgeparameter to start the program; if you don't need voice replies, you can use the basic command above:
xxxxxxxxxxros2 launch dofbot_pro_bringup mcp_service.launch.py launch_openclaw_bridge:=true
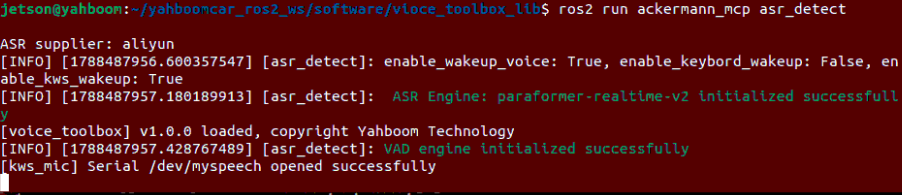
If you need voice dialogue interaction, you can run the following command (choose one between WebChat web interface and voice wake-up interaction):
xxxxxxxxxxros2 run ackermann_mcp asr_detect
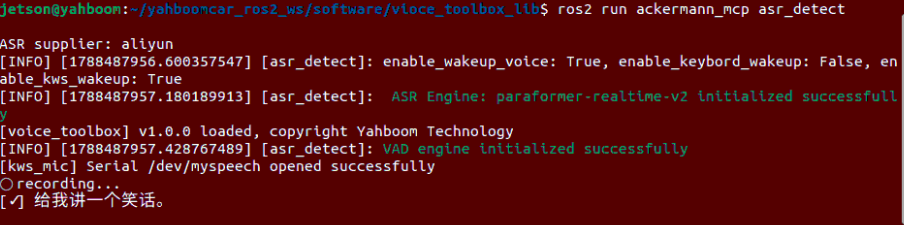
After shouting the wake-up word "Hi, yahboom", the indicator light turns on and you can speak the content you want to dialogue:
3. Target Tracking Case Practice
Tip
Dialogue commands can be expressed naturally according to your actual needs. The following cases are demonstrated using the web-based WebChat as an example.
Step 1: Issue Tracking Command
Enter the command in the WebChat interaction interface, for example:
"Track the yellow block in front of you"
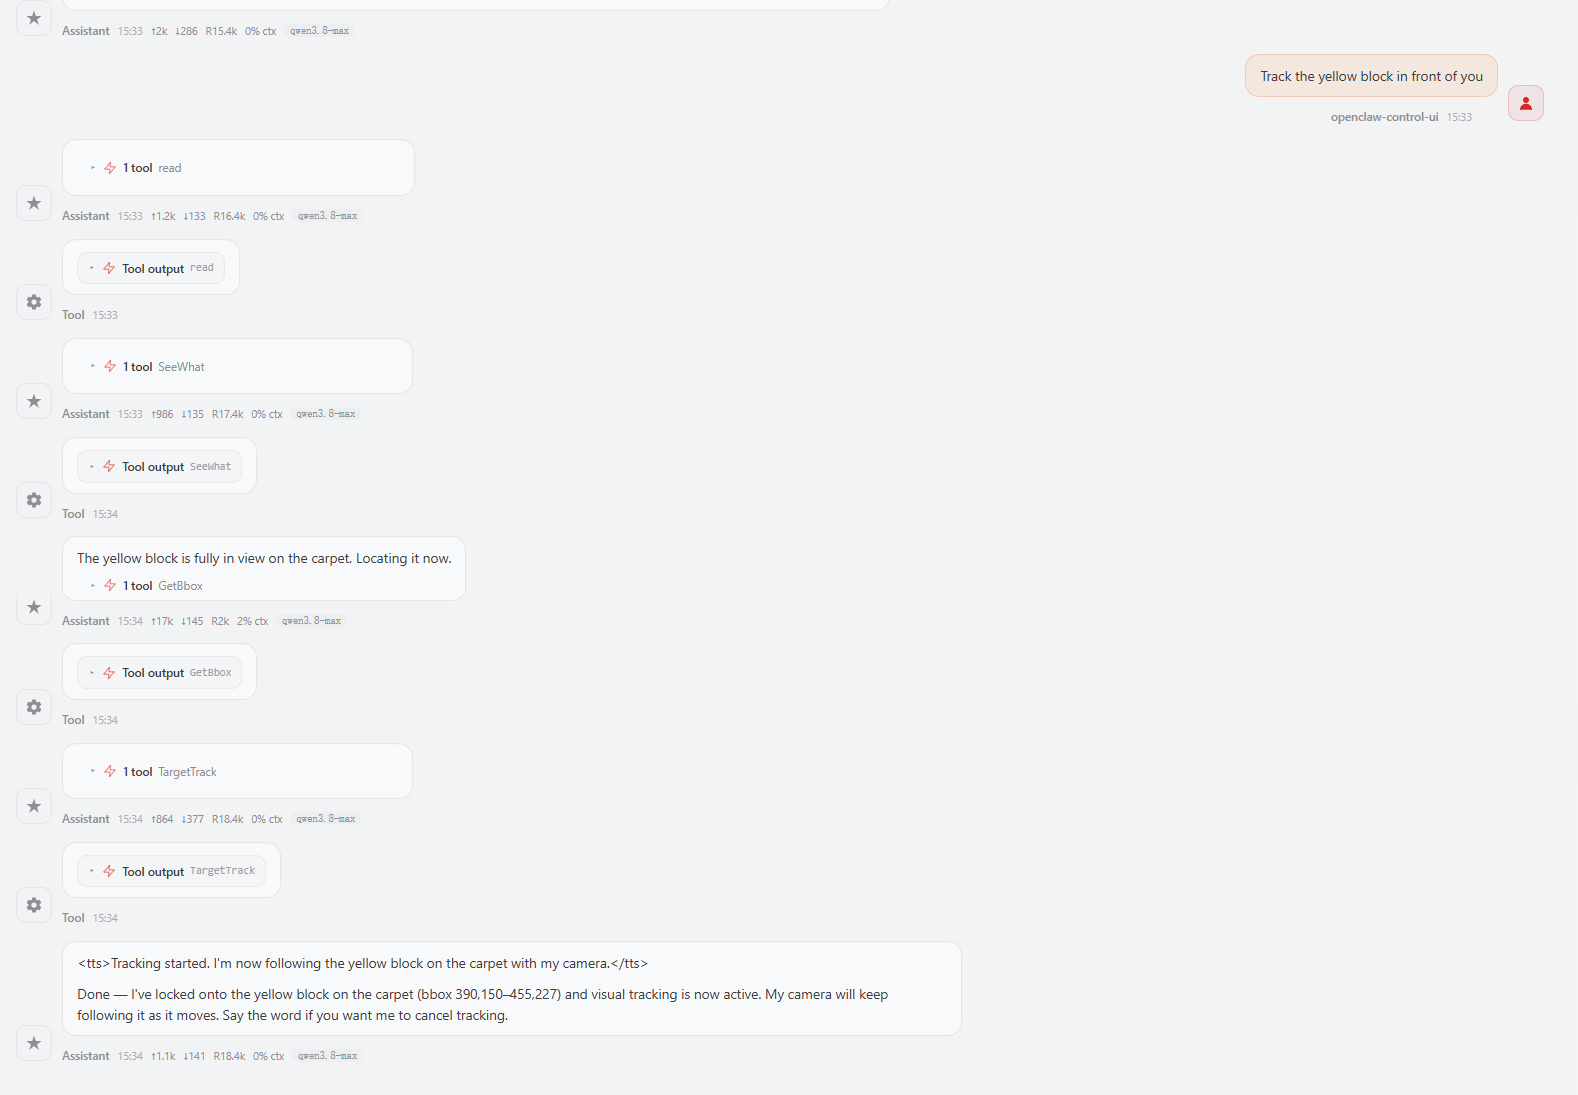
After OpenClaw receives the command, it first calls the LLM visual detection interface GetBbox to obtain the ROI bounding box coordinates of the yellow block in the current frame, then calls TargetTrack to start tracking.
Step 2: Hand-Eye Following Observation
Note: RDK and Raspberry Pi boards may experience very laggy VNC when running visualization due to performance issues. The tutorial does not enable the viewing angle by default. You can actually move the cube to track. To enable it, go to the launch file and manually change
display_windows_only_tracktoTrue, then compile.
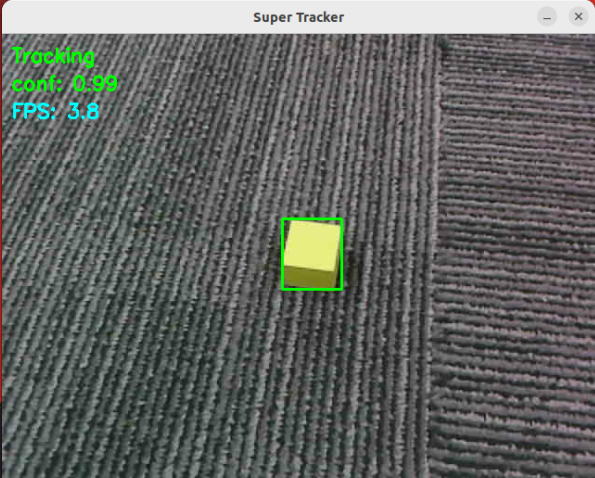
Slowly move the target object by hand, and the robotic arm will quickly react. By rotating the base rotation joint (left-right view) and pitch joint (up-down view) in real-time, the camera always aims at and gazes at the target object:
Step 3: Target Loss Protection Mechanism
If you cover the object with your hand or quickly move the object out of the frame, because the target's recognition confidence is too low (below threshold 0.08) or completely lost, the robotic arm will immediately stop moving and wait in the current posture:
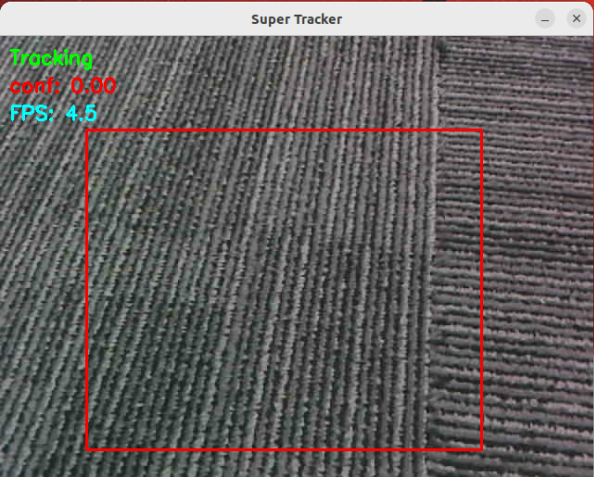
Popular principle: This is a anti-flying/anti-spinning protection mechanism. When the robot "can't see clearly", hovering in place is much safer than blindly searching, which can effectively prevent the robotic arm from colliding with surrounding objects.
Step 4: Auto Recovery and Resume Tracking
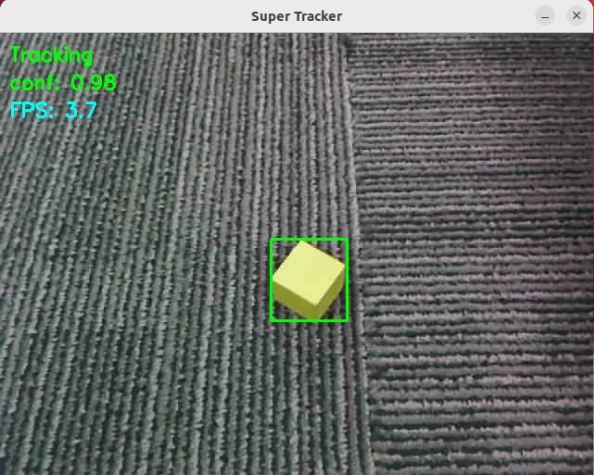
When the target cube is placed back into the camera's field of view, the visual tracking algorithm automatically captures and recognizes the cube. When the recognition confidence is greater than 0.1, the robotic arm instantly "re-locks the target" and continues into smooth tracking state:
Step 5: Cancel/Exit Target Tracking
When you don't need to continue tracking, just give OpenClaw a natural language command again, for example:
"Stop tracking" or "Cancel tracking target"
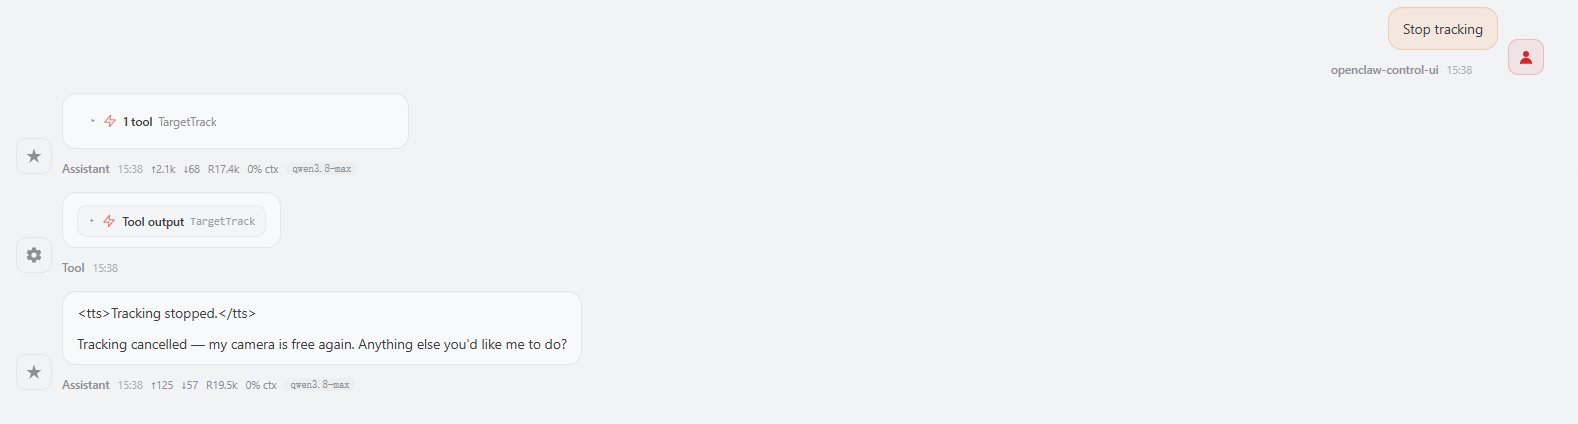
At this point, the background gaze thread will exit smoothly and safely, and the MCP server will print a log indicating that the target tracking state has been released. The robotic arm will automatically return to its initial posture:

Important
In the subsequent course 【02-OpenClaw Robotic Arm Tracking and Grasping】, OpenClaw will first call this target tracking function to aim at the object, then drive the car chassis and robotic arm to complete precise grasping.
4. Core Source Code Analysis
Source code file path:
xxxxxxxxxx~/yahboomcar_ros2_ws/dofbot_pro_ws/src/ackermann_mcp/ackermann_mcp/action_controller.py
In the ActionController class, the core control logic of target tracking is mainly composed of 4 key functions. Below is a popular analysis combined with the actual operation process.
4.1 TargetTrack() — Main Entry for Starting and Canceling Tracking
When the user says "Track the yellow block", OpenClaw passes the object coordinates to call this function to start tracking; when the user says "Stop tracking", it passes the string "cancel" to cancel tracking.
xdef TargetTrack(self, x1_or_cmd, y1:int=None, x2:int=None, y2:int=None): # Branch 1: Cancel tracking logic if isinstance(x1_or_cmd, str): if x1_or_cmd != "cancel": return [False, "Invalid command for TargetTrack. Use 'cancel' to stop tracking."] # 1. Safely terminate background gaze thread if hasattr(self, '_gaze_stop_event'): self._gaze_stop_event.set() if hasattr(self, '_gaze_thread') and self._gaze_thread is not None and self._gaze_thread.is_alive(): self._gaze_thread.join(timeout=2.0) self._gaze_thread = None # 2. Call ROS 2 service to unregister visual tracking algorithm if not self.cancel_track_client.wait_for_service(timeout_sec=5.0): return [False, "CancelTrack service not available"] self.cancel_track_client.call(CancelTrack.Request()) # 3. Reset robotic arm to initial default posture self._reset_joints() self.InitArmPose() return [True, "Tracking cancelled and arm reset"]
# Branch 2: Start tracking logic x1: int = x1_or_cmd if not self.start_track_client.wait_for_service(timeout_sec=5.0): return [False, "Tracking service not available"] # 1. Send initial bounding box coordinates to upstream visual tracking service (x1, y1, x2, y2) result = self.start_track_client.call(StartTrack.Request(x1=x1, y1=y1, x2=x2, y2=y2)) if not result.success: return [False, "Tracking failed"] # 2. Start independent background gaze thread _gaze_track_loop self._gaze_stop_event = threading.Event() self._gaze_thread = threading.Thread(target=self._gaze_track_loop, daemon=True) self._gaze_thread.start() return [True, "Tracking started"]Key point popular explanation:
Multi-threading concurrency mechanism: After starting tracking, the program hands the specific head-turning gaze action to an independent background thread
_gaze_track_loop, and the main thread immediately returns success. This not only allows the car to continuously track the target but also can respond to your next command at any time without freezing the system.Graceful exit and reset: When canceling tracking, the termination signal is sent through
threading.Event(), and after waiting for the thread to safely end,InitArmPose()is called to gracefully reset the robotic arm, preventing the servo from being suspended mid-air causing continuous stress and heating.
4.2 _gaze_track_loop() — Background Closed-Loop Tracking Thread
This is the heartbeat loop that actually makes the robotic arm "eye follows heart", continuously observing target position and calculating error at approximately 4Hz.
xxxxxxxxxxdef _gaze_track_loop(self): '''Background thread: Continuously adjusts robotic arm gaze based on target pixel position''' self._get_joints() # Read current angles of robotic arm joints 1, 2, 4 while not self._gaze_stop_event.is_set() and rclpy.ok(): box = self._get_bbox() # Get current target's [centerX, centerY, confidence] if box[2] < 0.08: # Confidence too low (target occluded or lost), wait 0.1s and continue to next frame, don't move blindly time.sleep(0.1) continue # Camera resolution is 640x480, so the center coordinates are (320, 240) error_x = box[0] - 320 # Horizontal deviation (positive means object is to the right, negative to the left) error_y = box[1] - 240 # Vertical deviation (positive means object is below, negative above) self._gaze_control(error_x, error_y) # Execute joint micro-adjustment time.sleep(0.25)Key point popular explanation:
Why is the base center (320, 240)? Because the RGB camera's image resolution is 640 pixels wide × 480 pixels high, so the exact center of the frame is
(640/2, 480/2) = (320, 240).Target deviation direction: If the center of the detection box is
(400, 200), thenerror_x = 400 - 320 = +80(to the right),error_y = 200 - 240 = -40(above). The controller can clearly know which direction to turn the head.
4.3 _get_bbox() — Thread-Safe Target Position Reading
xxxxxxxxxxdef _get_bbox(self)-> list: with self._track_lock: # Calculate geometric center point of detection box center_x = (self.track_box.bbox[0] + self.track_box.bbox[2]) / 2 center_y = (self.track_box.bbox[1] + self.track_box.bbox[3]) / 2 # Check freshness of visual message (timeliness judgment) msg_stamp_sec = self.track_box.timestamp.sec + self.track_box.timestamp.nanosec * 1e-9 now_sec = self.get_clock().now().nanoseconds * 1e-9 # If visual message hasn't been updated for more than 0.5 seconds, visual algorithm stalling or frame loss, force confidence to 0 confidence = self.track_box.confidence if (now_sec - msg_stamp_sec) < 0.5 else 0.0 return [center_x, center_y, confidence]Key point popular explanation:
Avoid using outdated information (timeliness guarantee): If the camera suddenly disconnects or the visual node drops frames, using the residual historical coordinates from the previous second to adjust the robotic arm can easily lead to misoperation. The code guarantees adjustment only based on "fresh first-hand footage" by comparing timestamps (over 0.5 seconds is considered invalid).
4.4 _gaze_control() — Joint Increment Control and Limit Protection
This function converts pixel error into joint angle increment commands for each joint of the robotic arm.
xxxxxxxxxxdef _gaze_control(self, error_x, error_y):    '''Gaze tracking core algorithm: Adjust corresponding joints based on pixel deviation'''    if self.joint_1 is None or self.joint_2 is None or self.joint_4 is None:        return
    # 1. Horizontal direction control: Managed by base rotation joint 1    if abs(error_x) > self.gaze_threshold:        if error_x > self.gaze_threshold:            self.joint_1 += self.step  # Target is to the right, joint 1 clockwise micro-adjustment        elif error_x < -self.gaze_threshold:            self.joint_1 -= self.step  # Target is to the left, joint 1 counter-clockwise micro-adjustment        self.SingleJoint_pub.publish(ArmJoint(id=1, joint=self.joint_1, time=100))
    # 2. Vertical direction control: Mainly managed by wrist pitch joint 4, joint 2 as auxiliary buffer    if abs(error_y) > self.gaze_threshold:        if error_y > self.gaze_threshold:            self.joint_4 -= self.step  # Target is below, joint 4 looks down        elif error_y < -self.gaze_threshold:            self.joint_4 += self.step  # Target is above, joint 4 looks up                    # Intelligent protection mechanism: Check if joint 4 has reached its physical lower limit        if self.joint_4 > -5:            self.SingleJoint_pub.publish(ArmJoint(id=4, joint=self.joint_4, time=100))        else:            # When joint 4 has already lowered to the limit (-5°), further lowering would scratch the car body! At this point, automatically link joint 2 to continue lowering            self.joint_2 -= self.step            self.SingleJoint_pub.publish(ArmJoint(id=2, joint=self.joint_2, time=100))
5. Parameter Debugging
Core parameter configuration file path:
xxxxxxxxxx~/yahboomcar_ros2_ws/dofbot_pro_ws/src/dofbot_pro_bringup/config/common.yaml
Configuration parameters related to target tracking:
xxxxxxxxxx...# gaze controlgaze_threshold55.0 # Gaze control dead zone error threshold, unit: pixelsgaze_step2 # Gaze control adjustment step size per adjustment, unit: joint angle (degrees)...Parameter Debugging Suggestion Table
| Parameter Name | Default Value | Effect of Increasing | Effect of Decreasing | Recommended Debugging Scenario |
|---|---|---|---|---|
gaze_threshold | 55.0 | Robotic arm is less sensitive to slight shaking, movement is more stable, but alignment accuracy is slightly worse | More strict alignment, more precise center; but if set too small (e.g., < 20), the robotic arm may tremble micro-correcting near the target | Appropriately increase when ambient light is poor or target edge is shaking; appropriately decrease when high precision is required |
gaze_step | 2 | Each response rotation is larger, head turning speed is faster, can keep up with fast movement | Each micro-adjustment is smoother and finer; but if the target moves fast, may experience tracking lag | Can set to 3 or 4 when tracking high-speed moving objects; keep default 2 for slow precise observation |
6. Common Problems and Troubleshooting Guide
Problem phenomenon: Robotic arm reacts slowly or loses target when target moves?
Troubleshooting 1 (Initial bounding box accuracy): Check if the first frame ROI box is accurately circled when GetBbox selects the target object. The system automatically saves the first frame verification image to this path:
xxxxxxxxxx~/MODELS/multi_brains_file/verify_image.pngOpen this image to confirm whether the initial box is misaligned due to ambient reflections or occlusion:
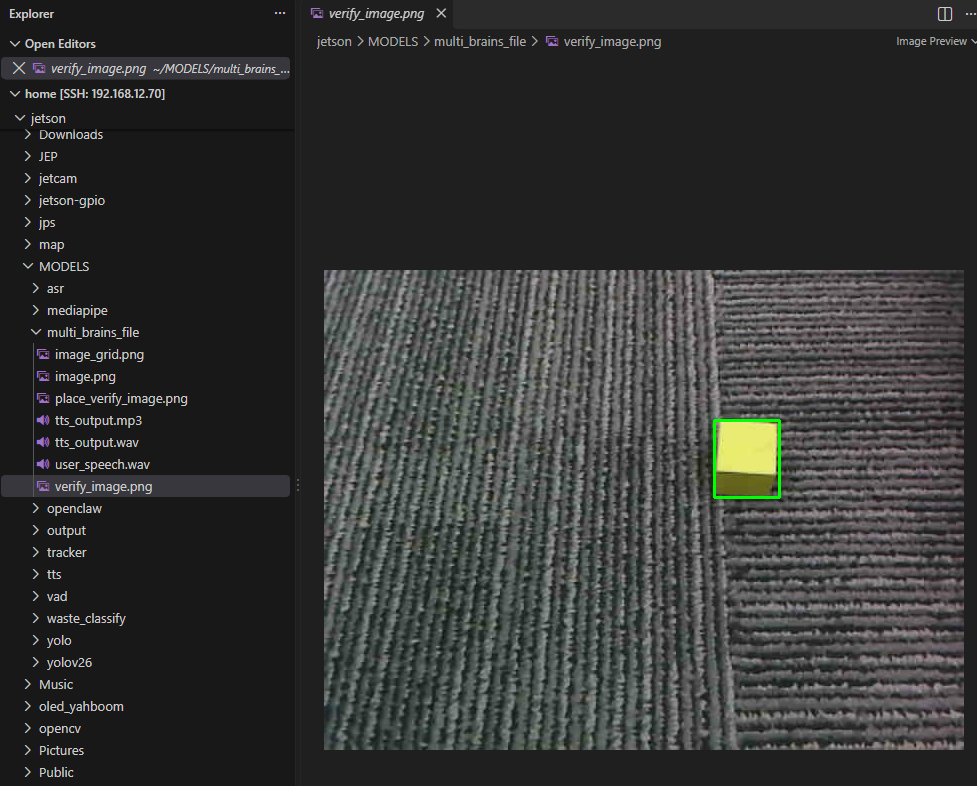
Troubleshooting 2 (Movement speed): Keep the object moving at a constant speed when moving, don't quickly pull it away instantaneously, to avoid it leaving the camera's field of view refresh rate.
Troubleshooting 3 (Lighting environment): Ensure uniform lighting on the object surface, avoid strong backlight or severe shadow interference with feature matching.