Welcome to ROSMASTER A1 PRO repository
5.OpenClaw SLAM Mapping And Navigation
OpenClaw SLAM Mapping And Navigation
OpenClaw SLAM Mapping And Navigation1. Course ContentCourse OverviewLearning Objectives2. Preparation3. Recording and Viewing Map Mapping FilesStep 1: Drive Car to Target Point and Record CoordinatesStep 2: View Map Mapping Configuration File4. OpenClaw Intelligent Navigation Case Practice5. Core Source Code Analysis5.1 Navigation() — Dual-Mode Navigation Decision and Scheduling Engine5.2 PreciseAdjustPosition() — Vehicle Body Local Coordinate System PID Closed-Loop Fine-tuning6. Parameter DebuggingNavigation and Fine-tuning Parameters OverviewParameter Debugging Quick Reference Guide
1. Course Content
Course Overview
In embodied intelligence systems, mobile navigation capability is the foundation for robots to break through operational space limitations and achieve large-scale autonomous services. If a robot can only operate the robotic arm in place, its operational radius is only a few dozen centimeters; once given "legs (mobile chassis)" and a "navigation brain", it can travel between various functional areas of factories, warehouses, or homes.
In complex real-world scenarios, robot navigation faces three levels of challenges, and OpenClaw solves them one by one through sophisticated combined strategies:
Semantic location mapping (giving coordinates names): Humans usually say "go to the shipping area", "go to the charging station", while underlying algorithms only recognize spatial coordinates (X, Y, Z, Yaw). The system uses the
RecordMapLocationtool to one-click name and persistently save the current car body pose, like posting "house numbers" on each booth in a mall.Dual-mode navigation switching (highway vs indoor slow travel):
Road Network Navigation: Like "city main roads and elevated dedicated lanes". In open long-distance areas, the robot strictly travels along the pre-calibrated skeleton road network at high speed, with clear paths, never lost, extremely strong anti-dynamic interference;
Ordinary autonomous navigation (Nav2): Like "entering station and short-range free roaming". Near short-distance target points, autonomously avoid obstacles through local costmap to approach.
The system uses
0.8 metersas the critical threshold, long-distance takes the elevated road network, short-distance takes local alignment, seamlessly and smoothly connected!
Precise position fine-tuning (PreciseAdjustPosition reverse parking): After traveling dozens of meters at long distance, due to tiny wheel slipping, the chassis inevitably generates a few centimeters of drift error. To allow the robotic arm to accurately grasp blocks on the table, after the car arrives at the destination, it automatically enables ArUco visual re-localization, and combines with three-channel PID controller, like an old driver reverse parking, for millimeter and degree-level precise alignment!
Learning Objectives
Learn to use the
RecordMapLocationtool to record map mapping files, establishing correspondence between semantic location names and coordinates.Deeply understand the dynamic switching logic between road network navigation (Road Network) and Nav2 autonomous navigation.
Master the coordinate system conversion and PID control principle of centimeter-level fine-tuning
PreciseAdjustPosition.Master navigation key threshold and PID parameter tuning methods.
2. Preparation
Important
OpenClaw navigation function requires first building an environmental grid map, pose map and completing road network file annotation. For detailed operations, refer to the previous tutorial 【05.Road network planning and navigation — 2.Road Network Annotation】.
If you need to use visual re-localization function, you also need to annotate the ArUco code's global coordinates in the map. For detailed operations, refer to 【02.LiDAR Course — Pose Constraint Combined Visual Re-localization Navigation】.
Start core nodes:
ros2 launch dofbot_pro_bringup mcp_service.launch.py relocation:=false display_windows_only_track:=trueIf you need voice broadcast replies:
xxxxxxxxxxros2 launch dofbot_pro_bringup mcp_service.launch.py relocation:=false display_windows_only_track:=true launch_openclaw_bridge:=true
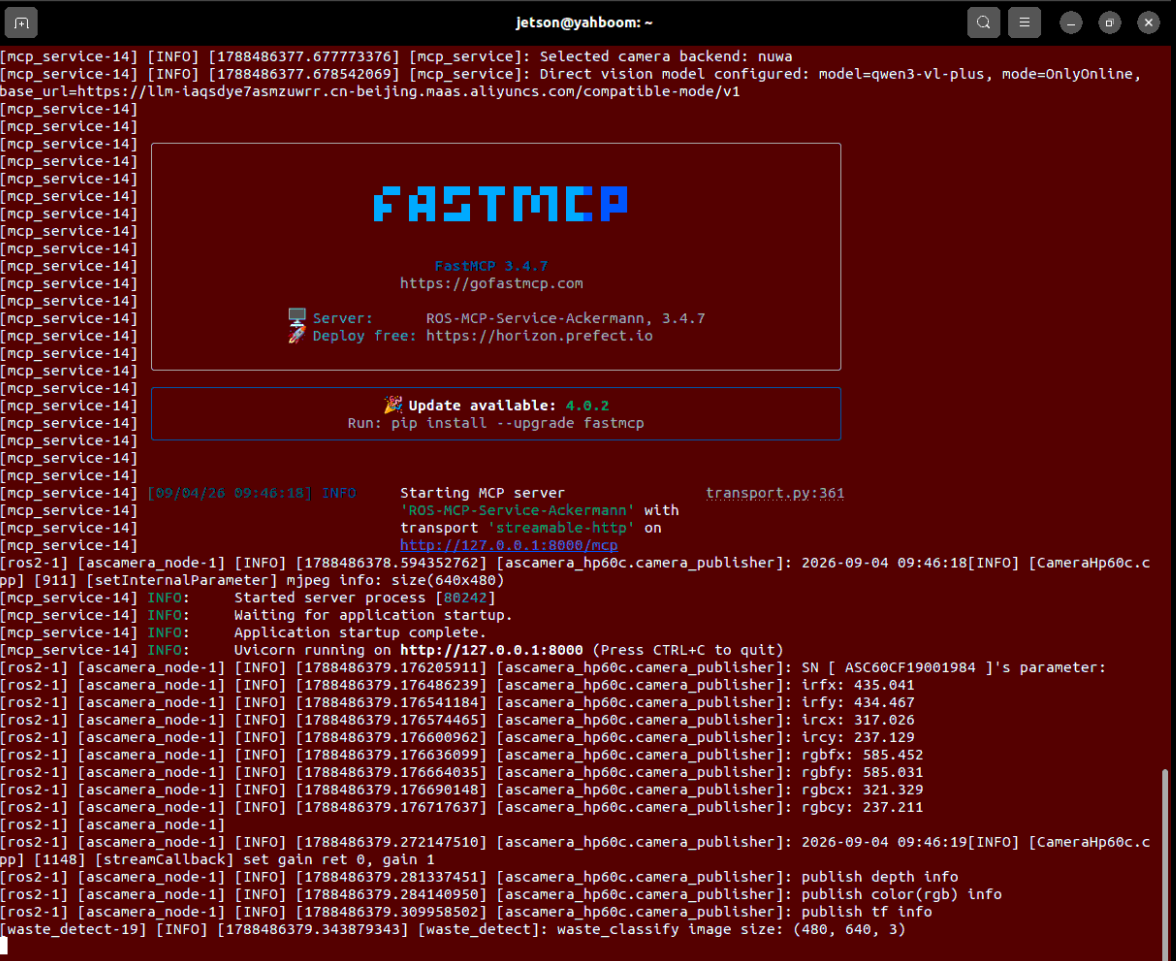
Enter the road network Docker container environment to start the visualization tool RViz:
x# Quick startup commandbringup_ros2kilted# Enter container terminalexec_ros2kilted
ros2 launch road_net_route rviz_only.launch.py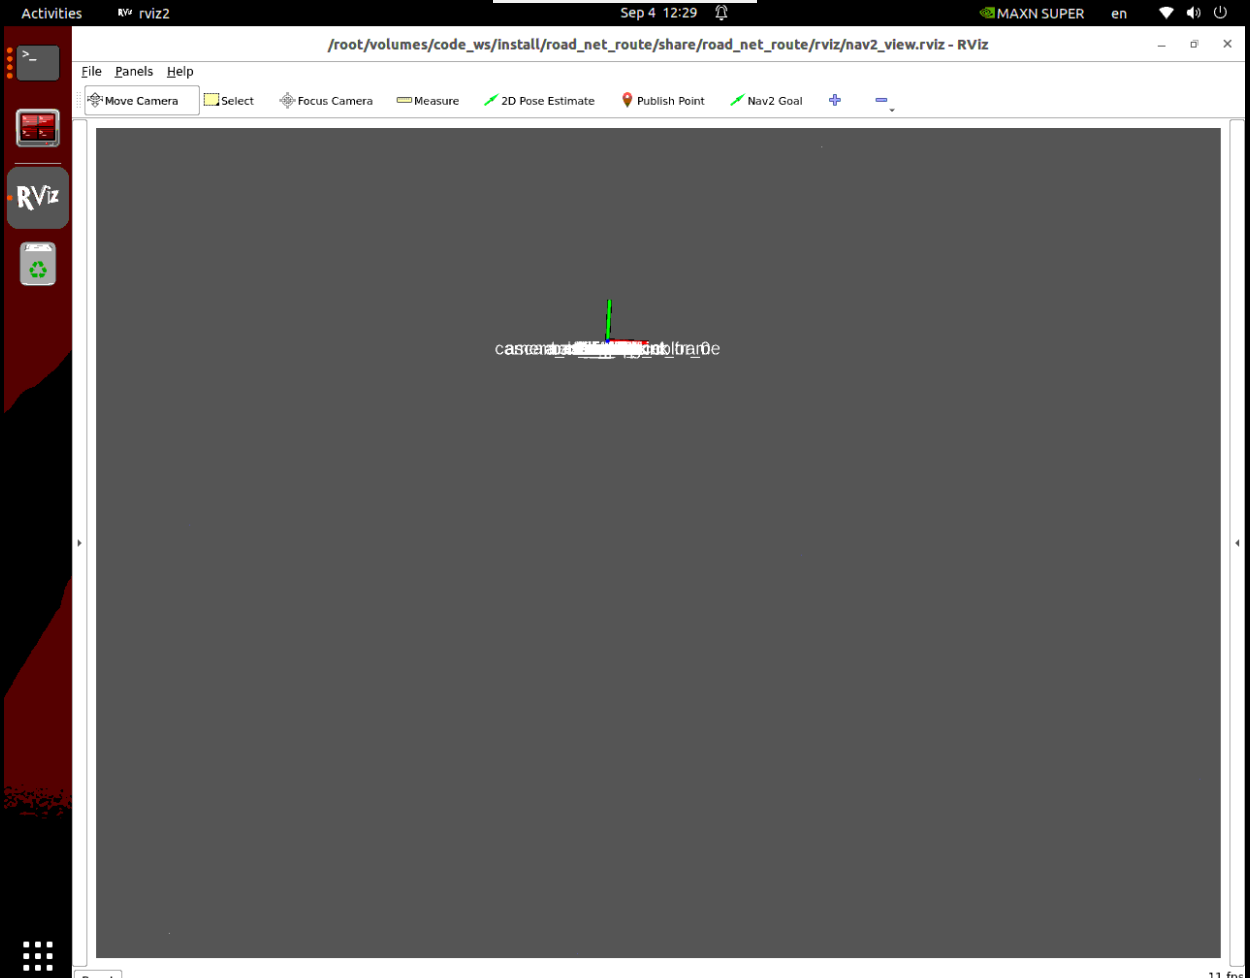
Start positioning service (load pre-saved mapping map package):
xxxxxxxxxxros2 launch yahboomcar_nav localization_imu_odom.launch.py use_rviz:=false load_state_filename:=/home/jetson/map/map.pbstream # For Raspberry Pi:ros2 launch yahboomcar_nav localization_imu_odom.launch.py use_rviz:=false load_state_filename:=/root/map/map.pbstream# For RDK:ros2 launch yahboomcar_nav localization_imu_odom.launch.py use_rviz:=false load_state_filename:=/home/sunrise/map/map.pbstream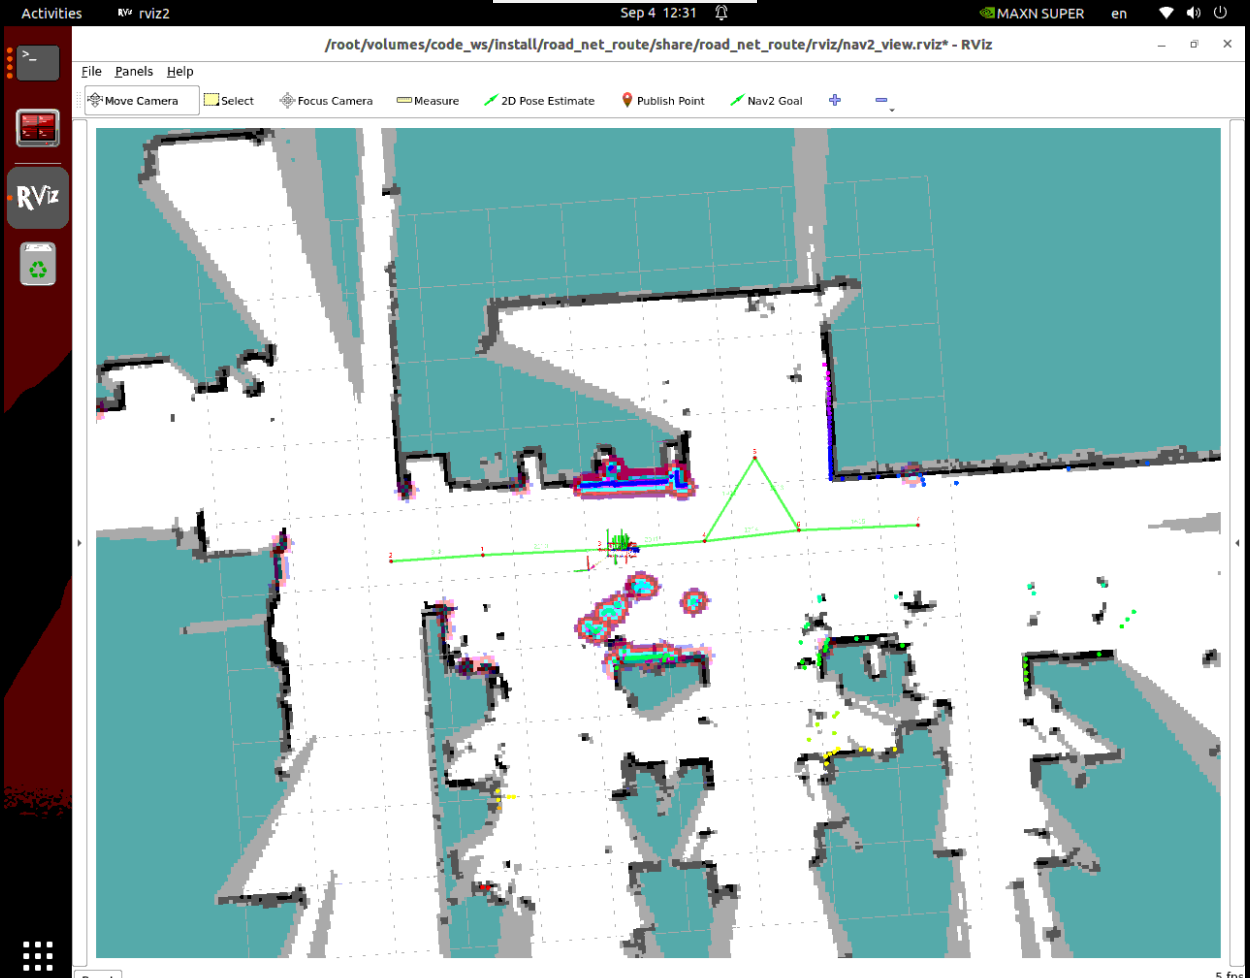
Enter the road network Docker container environment to start the navigation main service:
xxxxxxxxxx# Note: Entering docker container requires running the following command in the terminal under vnc link to use visualizationbringup_ros2kiltedexec_ros2kilted
ros2 launch road_net_route roadnet_nav2.launch.py
PS: If the road network sometimes doesn't display when reopened, the common problem is that the ros node from the last opening wasn't properly released. It is recommended to run in docker
xxxxxxxxxxpkill -f ros
For voice dialogue interaction:
xxxxxxxxxxros2 run ackermann_mcp asr_detect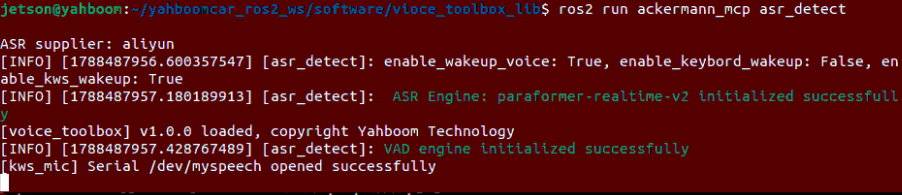
3. Recording and Viewing Map Mapping Files
Tip
You can record points through the terminal robot_control CLI command tool, or directly ask OpenClaw to record the current position in dialogue. Below demonstrates using the most clear and intuitive CLI tool.
| Core Tool | CLI Parameters | Popular Function Description |
|---|---|---|
RecordMapLocation | --name (Chinese location name), --symbol (short identifier) | Write the car body's current spatial coordinates to the configuration file, posting a house number for the location |
Step 1: Drive Car to Target Point and Record Coordinates
Drive the car to the "ShippingArea" workstation front, execute the following command in the terminal to record the car body base_link coordinates and heading in the global map map:
xxxxxxxxxxrobot_control call-tool RecordMapLocation --name ShippingArea --symbol B--name: Specify the full name of the workstation (e.g., "ShippingArea", "ProcessingCenter", "ChargingPile").--symbol: Specify the English letter ID of the workstation (e.g., A, B, C), convenient for quick search and deduplication.

After successful recording, the terminal will output a prompt for successful saving. If a same-named symbol already exists in the configuration file, the system will automatically overwrite and update to the latest coordinates:
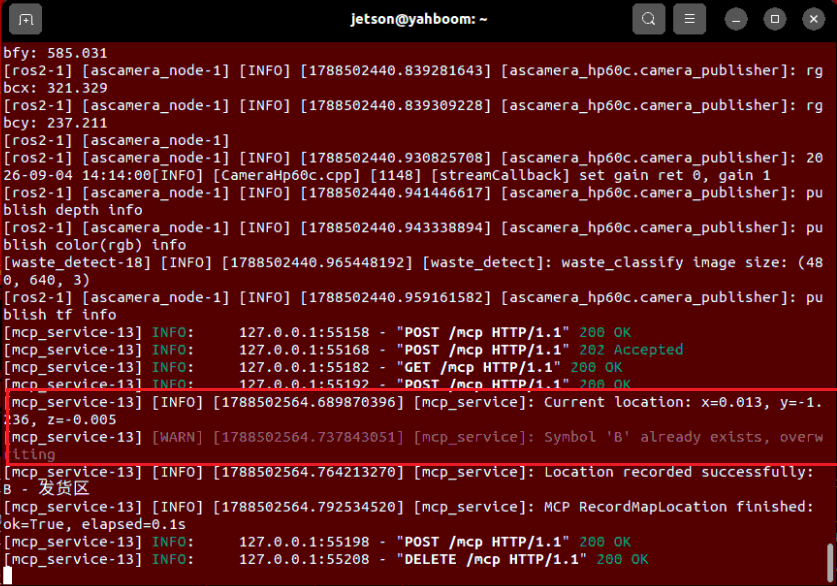
Step 2: View Map Mapping Configuration File
Point data is persistently saved in the map_mapping.yaml file. Run the following command to view:
xxxxxxxxxxcat ~/yahboomcar_ros2_ws/dofbot_pro_ws/install/dofbot_pro_bringup/share/dofbot_pro_bringup/config/map_mapping.yamlIn the printed content, you can clearly see the just-recorded "ShippingArea" and the corresponding Position spatial 3D coordinates and Orientation quaternion heading:
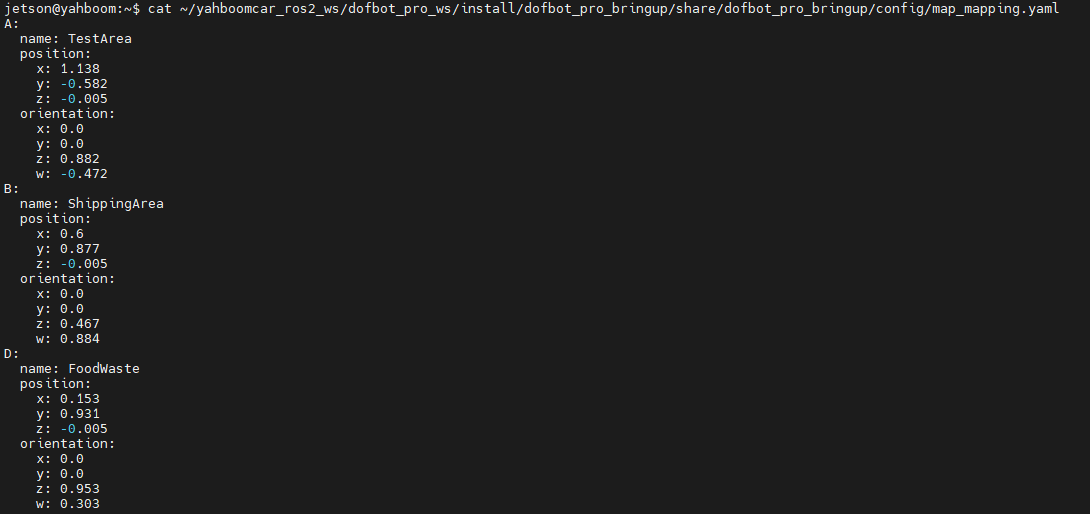
4. OpenClaw Intelligent Navigation Case Practice
Tip
Instructions can be expressed naturally according to your actual needs. Here we use WebChat as an example.
OpenClaw navigation related core tools:
| Tool Name | Input Parameters | Core Function |
|---|---|---|
GetMapMapping | None | Query all location names and symbol lists recorded in the current map |
Navigation | --location (target location name or symbol) | Start autonomous decision navigation to target workstation and complete precise fine-tuning |
Enter the command in WebChat:
"Navigate to the shipping area" or "Go to location B"

After the car receives the command:
Quickly look up the table to read "ShippingArea" target coordinates;
Autonomously decide to take the elevated road network for high-speed cruise to near the shipping area;
After arriving at the frontier, smoothly switch to local navigation, and finally through PID fine-tuning, smoothly stop in front of the shipping workstation, with posture exactly the same as when recorded!
5. Core Source Code Analysis
Source code file path:
xxxxxxxxxx~/yahboomcar_ros2_ws/dofbot_pro_ws/src/ackermann_mcp/ackermann_mcp/action_controller.py
5.1 Navigation() — Dual-Mode Navigation Decision and Scheduling Engine
xxxxxxxxxxdef Navigation(self, location: str) -> list[bool, str]:    '''Intelligent navigation scheduling main entry: Auto-decide road network and local navigation by distance'''    location = location.strip("'\"")    # 1. Read and parse map_mapping.yaml configuration file    try:        with open(self.map_mapping_file, 'r', encoding='utf-8') as file:            map_data = yaml.safe_load(file) or {}
        target_data = None        for symbol, data in map_data.items():            if symbol == location or (isinstance(data, dict) and data.get('name') == location):                target_data = data                break        if target_data is None:            return [False, f"Coordinates record for '{location}' not found in map mapping file"]    except Exception as e:        return [False, str(e)]
    # 2. Construct target PoseStamped message    goal_msg = PoseStamped()    goal_msg.header.frame_id = "map"    goal_msg.header.stamp = self.get_clock().now().to_msg()    pos = target_data.get('position', {})    ori = target_data.get('orientation', {})    goal_msg.pose.position.x = float(pos.get('x', 0.0))    goal_msg.pose.position.y = float(pos.get('y', 0.0))    goal_msg.pose.position.z = float(pos.get('z', 0.0))    goal_msg.pose.orientation.x = float(ori.get('x', 0.0))    goal_msg.pose.orientation.y = float(ori.get('y', 0.0))    goal_msg.pose.orientation.z = float(ori.get('z', 0.0))    goal_msg.pose.orientation.w = float(ori.get('w', 1.0))
    # 3. Calculate geometric straight-line distance from car current position to target point    current_pose = self._get_current_map_pose()    if current_pose is None:        return [False, "Failed to get current car body global pose"]    distance = math.sqrt(        (current_pose.transform.translation.x - goal_msg.pose.position.x) ** 2 +        (current_pose.transform.translation.y - goal_msg.pose.position.y) ** 2    )
    # 4. Decision branch: Choose navigation backend based on distance threshold    if distance < self.nav_mode_threshold:        # Branch A: Short distance (< 0.8 meters), directly call Nav2 ActionClient for short-range parking        self.get_logger().info("Distance is close, enabling Nav2 local autonomous alignment")        # ... Send Nav2 goal and wait for arrival ...    else:          # Branch B: Long distance (>= 0.8 meters), publish to road network navigation topic, cruise at high speed along trunk skeleton        self.get_logger().info("Distance is far, enabling road network planned high-speed navigation")        self.road_net_nav_future = Future()        self.road_net_nav_pub.publish(goal_msg)        # Wait for road network navigation to return success status ...
    # 5. After arrival, precise alignment: Start ArUco visual re-localization and enter PID fine-tuning    time.sleep(3.0)  # Wait for chassis sway to completely stop    self._control_aritag_detect(sign='enable')  # Enable visual re-localization    time.sleep(3.0)    self.PreciseAdjustPosition(goal_msg)        # Closed-loop millimeter-level fine-tuning    self._control_aritag_detect(sign='disable') # Fine-tuning complete, disable visual to save CPU    return [True, "Navigation succeeded"]
Key point popular explanation:
CPU energy-saving small detail: ArUco machine code detection is only started through
_control_aritag_detect('enable')in the brief few seconds of fine-tuning at the destination, and immediately closed after fine-tuning, avoiding occupying valuable chip computing power during full-speed running.
5.2 PreciseAdjustPosition() — Vehicle Body Local Coordinate System PID Closed-Loop Fine-tuning
The navigation algorithm drives the car to the approximate position, but the robotic arm grasping requires error within 1 centimeter. This function is responsible for the final "crucial last step".
xxxxxxxxxxdef PreciseAdjustPosition(self, precise_pose: PoseStamped):    '''Use local coordinate system dual closed-loop PID for centimeter-level precise position fine-tuning'''    target_x = precise_pose.pose.position.x    target_y = precise_pose.pose.position.y    target_yaw = get_yaw_from_quaternion(precise_pose.pose.orientation)
    # Initialize PID parameters for position and yaw angle    xy_kp, xy_ki, xy_kd = self.precise_adjust_xy_pid    theta_kp, theta_ki, theta_kd = self.precise_adjust_theta_pid    xy_integral, theta_integral = 0.0, 0.0    xy_prev_error, theta_prev_error = 0.0, 0.0    consecutive_success = 0    required_success = 5  # Must have 5 consecutive frames meeting standard to be considered truly stably in place
    for attempt in range(self.precise_adjust_max_iteration):        transform = self._get_current_map_pose()        if transform is None: return False
        current_x = transform.transform.translation.x        current_y = transform.transform.translation.y        current_yaw = get_yaw_from_quaternion(transform.transform.rotation)
        # 1. Calculate error in global map coordinate system        dx = target_x - current_x        dy = target_y - current_y                # 2. Core mathematical transformation: Rotate and project global map error to vehicle local coordinate system!        error_x = dx * math.cos(current_yaw) + dy * math.sin(current_yaw)   # Vehicle front-rear direction error        error_y = -dx * math.sin(current_yaw) + dy * math.cos(current_yaw)  # Vehicle left-right direction error        error_theta = normalize_angle(target_yaw - current_yaw)            # Vehicle yaw angle error        pos_error = math.sqrt(dx * dx + dy * dy)
        # 3. Steady-state arrival determination (position error < 1cm, angle error < 0.05rad = 2.8°)        pos_reached = pos_error < self.precise_adjust_pos_tolerance        angle_reached = abs(error_theta) < self.precise_adjust_angle_tolerance
        if pos_reached and angle_reached:            consecutive_success += 1            if consecutive_success >= required_success:                self.cmd_pub.publish(Twist())  # Immediately brake                self.get_logger().info("Precision alignment complete!")                return True        else:            consecutive_success = 0  # Reset count once shaking exceeds standard
        # 4. PID calculation and speed limit output        dt = 0.1        vx = max(-self.precise_adjust_max_linear_vel,                  min(self.precise_adjust_max_linear_vel, xy_kp * error_x))        omega = max(-self.precise_adjust_max_angular_vel,                    min(self.precise_adjust_max_angular_vel, theta_kp * error_theta))
        twist = Twist()        twist.linear.x = vx        twist.angular.z = omega        self.cmd_pub.publish(twist)        time.sleep(0.1)
    self.cmd_pub.publish(Twist())
6. Parameter Debugging
Core parameter configuration file path:
xxxxxxxxxx~/yahboomcar_ros2_ws/dofbot_pro_ws/src/dofbot_pro_bringup/config/common.yaml
Navigation and Fine-tuning Parameters Overview
xxxxxxxxxxmcp_service ros__parameters # Navigation mode switching distance nav_mode_threshold0.8 # Mode switching threshold (meters), Nav2 below this value, road network above # PreciseAdjustPosition fine-tuning PID parameters precise_adjust_xy_pid0.5 0.0 0.1 # X/Y position PID [proportional Kp, integral Ki, derivative Kd] precise_adjust_theta_pid1.0 0.0 0.2 # Angle PID [proportional Kp, integral Ki, derivative Kd] precise_adjust_max_linear_vel0.1 # Fine-tuning max linear velocity (0.1 m/s, smooth slow parking) precise_adjust_max_angular_vel0.5 # Fine-tuning max angular velocity (rad/s) precise_adjust_pos_tolerance0.01 # Arrival position tolerance (0.01 meters, i.e., 1 cm) precise_adjust_angle_tolerance0.05 # Arrival angle tolerance (0.05 radians, approximately 2.8°) precise_adjust_max_iteration500 # Max attempts (timeout protection)Parameter Debugging Quick Reference Guide
| Phenomenon | Possible Cause | Solution |
|---|---|---|
| Car "draws dragon" and sways back and forth at destination | Position Kp is set too large, or differential Kd is too small | Appropriately reduce the first item in precise_adjust_xy_pid (e.g., from 0.5 to 0.3) |
| Fine-tuning process is too slow like a snail | Speed limit or Kp is too small | Appropriately increase precise_adjust_max_linear_vel or increase Kp |
| Always 2~3 cm off and prompts timeout failure | Tolerance is set too strict (e.g., carpet resistance is large and can't park within 1cm) | Appropriately relax precise_adjust_pos_tolerance to 0.02 (2 cm) |