Welcome to ROSMASTER A1 PRO repository
3.Robot Keyboard Control
⌨️ Robot Keyboard Control
1. Course Introduction
This course will introduce how to control the chassis movement of the A1 Pro robot and the individual joint servos of the 6-DOF robotic arm via keyboard. Through this lesson, you will gain an in-depth understanding of the ROS 2 keyboard control node's working mechanism, topic communication flow, Ackermann chassis kinematics constraints, and the coordinated control logic of the underlying hardware drivers.
🎯 Course Objectives
Master the startup and parameter configuration of the keyboard control node: Learn how to launch via command line and modify control step size and speed limit parameters as needed.
Proficiently master key mappings and operations: Master omnidirectional/directional movement of the chassis, dynamic speed adjustment, robotic arm joint 1~6 selection and angle fine-tuning, and one-key reset operations.
Understand system communication topology and message definitions: Master the data flow and roles of
/cmd_vel(geometry_msgs/msg/Twist) andarm_joint(dofbot_pro_interface/msg/ArmJoint).In-depth mastery of source code implementation and safety mechanisms: Understand terminal non-blocking key capture, Ackermann non-omnidirectional chassis constraints, command timeout protection, and servo software/hardware limit protection mechanisms.
2. System Architecture and Communication Topology
The keyboard control node yahboom_keyboard.py serves as the upper-layer control interaction node, collecting user keyboard input and simultaneously publishing chassis velocity commands and robotic arm servo commands. The underlying driver node Ackman_driver_A1P.py (node name driver_node) receives commands and communicates with the STM32/Rosmaster expansion board via serial port, driving motors and bus servos to execute actions while feeding back the robot's actual status.
3. Preparation
3.1 Start Chassis Hardware Driver
Open a terminal and run the following launch file to start the chassis and robotic arm driver nodes for the A1 Pro robot:
xxxxxxxxxxros2 launch yahboomcar_bringup yahboomcar_bringup_A1_launch.py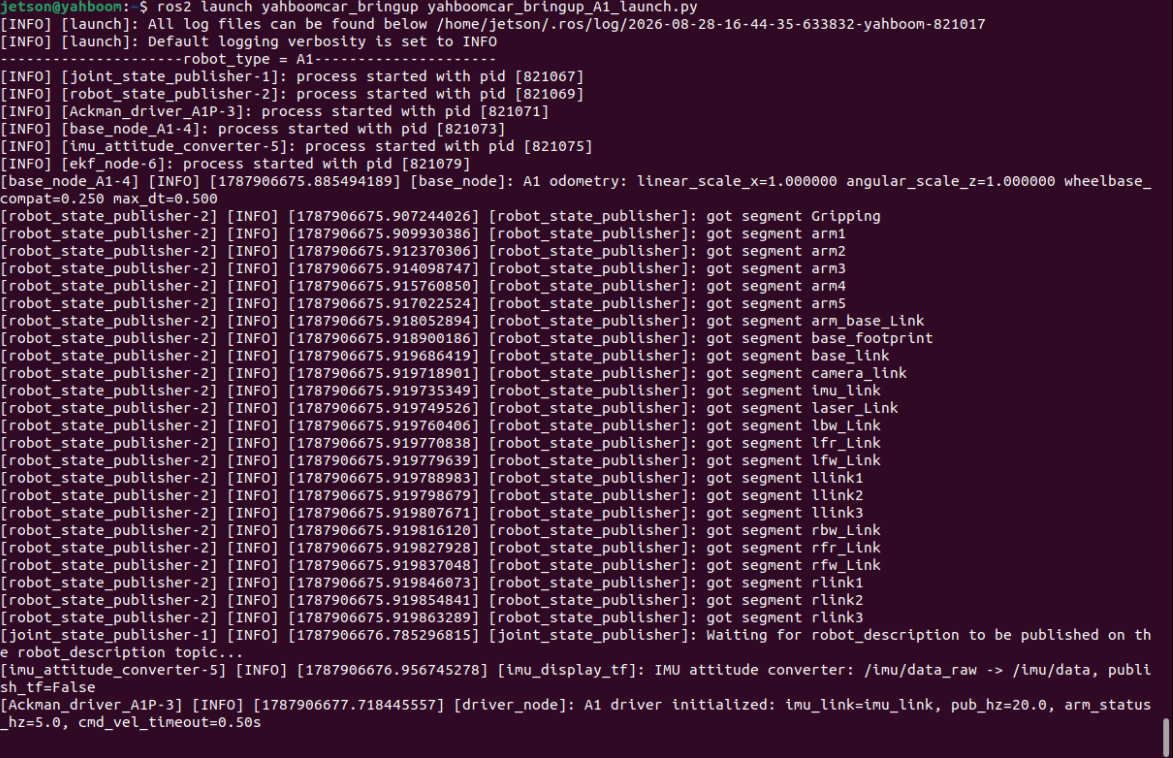
Note
After successful driver startup, the robotic arm will automatically execute a power-on reset motion (moving to initial pose [90, 120, 0, 0, 90, 0]), and the terminal will output A1 driver initialized related information.
3.2 Start Keyboard Control Node
Run the keyboard control node in a new terminal:
xxxxxxxxxxros2 run yahboomcar_ctrl yahboom_keyboard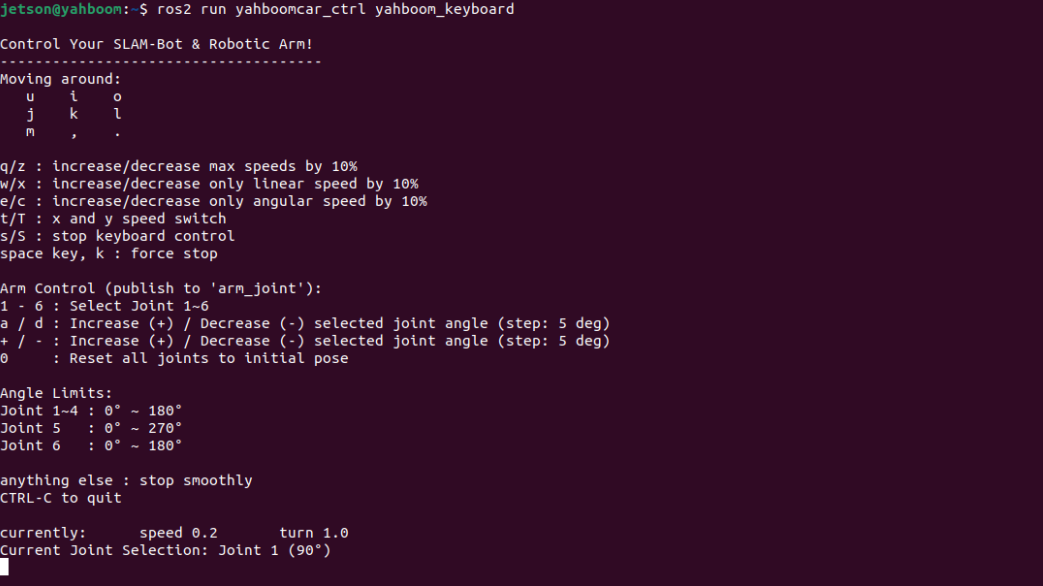
Important
Window Focus: The keyboard control node captures key presses through terminal standard input. Ensure the terminal window running keyboard control is active/selected.
Input Method State: Must switch the input method to English half-width mode. Chinese input method will intercept key presses and cause no response.
Safe Operation: Ensure there is sufficient open space around the vehicle before movement to avoid collisions.
4. Key Operation Guide
4.1 Chassis Motion Control
| Key | Function Description | Kinematics Command (geometry_msgs/msg/Twist) |
|---|---|---|
i / I | Forward | linear.x = +speed, angular.z = 0 |
, | Backward | linear.x = -speed, angular.z = 0 |
u / U | Move left-forward (forward + left turn) | linear.x = +speed, angular.z = +turn |
o / O | Move right-forward (forward + right turn) | linear.x = +speed, angular.z = -turn |
m / M | Move left-backward (backward + left turn) | linear.x = -speed, angular.z = -turn |
. | Move right-backward (backward + right turn) | linear.x = -speed, angular.z = +turn |
k / Space | Emergency forced stop | Immediately clear velocity and publish all-zero command |
Other unbound keys | Smooth deceleration stop | Automatically brake after 5 consecutive cycles without valid movement input |
Warning
Ackermann Chassis Steering Special Note:
The A1 Pro chassis uses front-wheel Ackermann steering + rear-wheel dual motor drive structure, and physically does not support in-place rotation (zero-radius turn).
In the underlying driver Ackman_driver_A1P.py, when linear velocity $v_x = 0$, angular velocity $\omega_z$ is forcibly set to zero to protect the front-wheel steering servo.
Therefore, pressing j or l alone will not cause the vehicle to move. Movement keys (such as u, o, m, .) must be used in combination to generate steering motion.
4.2 Speed Adjustment and Speed Limit Protection
The node default initial linear velocity is 0.2 m/s, and initial angular velocity is 1.0 rad/s.
| Key | Function Description | Adjustment Ratio |
|---|---|---|
q / Q | Increase both linear and angular velocity by 10% | $\times 1.1$ |
z / Z | Decrease both linear and angular velocity by 10% | $\times 0.9$ |
w / W | Increase linear velocity only by 10% | Linear velocity $\times 1.1$ |
x / X | Decrease linear velocity only by 10% | Linear velocity $\times 0.9$ |
e / E | Increase angular velocity only by 10% | Angular velocity $\times 1.1$ |
c / C | Decrease angular velocity only by 10% | Angular velocity $\times 0.9$ |
Tip
The node has built-in maximum speed protection mechanisms:
Maximum linear velocity limit: Limited by
linear_speed_limitparameter (default 1.0 m/s)Maximum angular velocity limit: Limited by
angular_speed_limitparameter (default 5.0 rad/s, the underlying driver further limits to within 3.0 rad/s)
When speed reaches the set limit, the terminal will print Linear speed limit reached! or Angular speed limit reached! prompts.
4.3 Robotic Arm 6-DOF Control
The A1 Pro is equipped with 6-DOF serial bus servos. The keyboard control node supports single-joint selection adjustment and one-key pose reset.
| Key | Function Description | Corresponding Action and Output |
|---|---|---|
1 ~ 6 | Select currently controlled joint (Joint 1 ~ 6) | Terminal displays selected joint number, current angle, and allowed range of motion |
a / A / + / = | Increase current selected joint angle (default +5°) | Publish ArmJoint message, auto-clamp at upper limit |
d / D / - / _ | Decrease current selected joint angle (default -5°) | Publish ArmJoint message, auto-clamp at lower limit |
0 | One-key reset all 6 joints to initial pose | Restore to [90, 120, 0, 0, 90, 0], execution time 1500ms |
Servo Parameters and Angle Limits Reference Table
| Servo Number | Joint Name (URDF Joint) | Allowed Angle Range (arm_bounds) | Default Initial Angle (init_pose) | Mechanism Motion Function Description |
|---|---|---|---|---|
| Servo 1 | arm1_Joint | 0° ~ 180° | 90° | Robotic arm base left-right horizontal rotation (90° is straight ahead) |
| Servo 2 | arm2_Joint | -60°~ 180° | 120° | Upper arm front-back pitch (controls robotic arm extension range) |
| Servo 3 | arm3_Joint | -20° ~ 180° | 0° | Forearm up-down pitch (controls end effector working height) |
| Servo 4 | arm4_Joint | -20° ~ 180° | 0° | Wrist up-down pitch (adjusts end effector gripper pose pitch angle) |
| Servo 5 | arm5_Joint | 0° ~ 270° | 90° | Wrist rotation servo (adjusts gripper horizontal/vertical rotation angle) |
| Servo 6 | rlink1_Joint | 0° ~ 180° | 0° | End effector gripper open-close (0° is fully open, closing angle adapts to held object size) |
4.4 Auxiliary and Status Toggle Keys
| Key | Function Description | Notes |
|---|---|---|
s / S | Pause / Resume keyboard control | Toggle stop flag. When paused, continuously publish all-zero velocity, blocking movement commands |
Ctrl + C | Safe exit | Automatically restore terminal original settings and send stop command to chassis |
5. Source Code Analysis and Core Mechanism Implementation
Source code file location:
xxxxxxxxxx~/yahboomcar_ros2_ws/yahboomcar_ws/src/yahboomcar_ctrl/yahboomcar_ctrl/yahboom_keyboard.py
5.1 ROS 2 Node Initialization and Parameter Declaration
In the Yahboom_Keybord class constructor, the node completes publisher creation, parameter declaration, and terminal environment preservation:
xclass Yahboom_Keybord(Node): def __init__(self, name): super().__init__(name) # Create chassis velocity publisher and robotic arm servo publisher self.pub = self.create_publisher(Twist, 'cmd_vel', 1) self.pub_arm = self.create_publisher(ArmJoint, 'arm_joint', 10)
# Declare configurable ROS 2 parameters self.declare_parameter("linear_speed_limit", 1.0) self.declare_parameter("angular_speed_limit", 5.0) self.declare_parameter("arm_joint_step", 5) self.declare_parameter("arm_joint_time", 200) self.declare_parameter("init_pose", [90, 120, 0, 0, 90, 0]) self.declare_parameter( "arm_bounds", [0.0, 180.0, 0.0, 180.0, 0.0, 180.0, 0.0, 180.0, 0.0, 270.0, 0.0, 180.0] )
# Load parameters and initial pose self.linenar_speed_limit = float(self.get_parameter("linear_speed_limit").value) self.angular_speed_limit = float(self.get_parameter("angular_speed_limit").value) self.arm_joint_step = int(self.get_parameter("arm_joint_step").value) self.arm_joint_time = int(self.get_parameter("arm_joint_time").value) # Save terminal attributes for restoration on exit self.settings = termios.tcgetattr(sys.stdin)5.2 Terminal Non-blocking Key Capture
Standard input is set to Raw mode via the Linux standard termios module, combined with select.select with 0.1 second timeout to achieve single-character immediate reading without pressing Enter:
xxxxxxxxxxdef getKey(self): tty.setraw(sys.stdin.fileno()) rlist, _, _ = select.select([sys.stdin], [], [], 0.1) if rlist: key = sys.stdin.read(1) else: key = '' termios.tcsetattr(sys.stdin, termios.TCSADRAIN, self.settings) return key5.3 Robotic Arm Servo Adjustment and One-key Reset
When receiving angle adjustment keys, the node calculates target angle, performs range limiting, and packs/publishes ArmJoint messages:
xxxxxxxxxxdef adjust_joint(self, joint_id, delta):    if joint_id < 1 or joint_id > 6:        return    idx = joint_id - 1    lower, upper = self.arm_bounds[idx]    # Software safety limit clipping    new_angle = max(lower, min(upper, self.arm_joints[idx] + delta))    self.arm_joints[idx] = new_angle    # Publish single servo control command, single step time 200ms    self.pub_arm_joint(joint_id, new_angle, self.arm_joint_time)    print(f"\r[Arm] Joint {joint_id}: {new_angle}° (Limits: {lower}~{upper}°)")
def reset_arm(self):    init_pose_param = list(self.get_parameter("init_pose").value)    self.arm_joints = [int(angle) for angle in init_pose_param]    # Iterate and publish all 6 joints, execution time set to 1500ms for smooth return    for joint_id, angle in enumerate(self.arm_joints, start=1):        self.pub_arm_joint(joint_id, angle, 1500)    print(f"\r[Arm] Reset all joints to: {self.arm_joints}")
5.4 Underlying Driver Response and Safety Protection Mechanisms
The underlying driver Ackman_driver_A1P.py provides multiple safety and kinematics guarantees:
Ackermann Non-omnidirectional Kinematics Filtering:
xxxxxxxxxx# When linear velocity is 0, force angular velocity to 0 to prevent in-place steering from damaging the steering mechanismif abs(vx) < 1e-4:vx = 0.0angular = 0.0Communication Timeout Protection (Watchdog): The driver maintains
cmd_vel_timeout(default 0.5s). If the keyboard node crashes or exits abnormally, and no new velocity command is received for more than 0.5 seconds, the driver thread will automatically trigger shutdown protection.Robotic Arm Status Feedback Loop: After executing servo motions, the driver publishes
sensor_msgs/msg/JointStatestatus on the/arm_status/arm_jointtopic at 5Hz frequency, enabling the robot 3D model in RViz2 to maintain real-time pose synchronization with the physical robotic arm.
6. Operation Verification and Debugging Tips
6.1 Verify Chassis Velocity Command Publishing
Execute the following command in another terminal to observe the data flow of the /cmd_vel topic when pressing keys:
xxxxxxxxxxros2 topic echo /cmd_velWhen pressing i for forward movement, you will see output similar to:
xxxxxxxxxxlinear x0.20000000298023224 y0.0 z0.0angular x0.0 y0.0 z0.0---6.2 Verify Robotic Arm Control Commands and Feedback
xxxxxxxxxx# Listen to single servo control commands published by the keyboard noderos2 topic echo /arm_joint
# Listen to actual robotic arm joint status feedback from the driver noderos2 topic echo /arm_status/arm_joint
After pressing 1 to switch to joint 1 and then pressing a to increase the angle, the /arm_joint topic will capture:
id1joint95time200---