Welcome to ROSMASTER A1 PRO repository
5.AprilTag Tracking and Grasping
🎯 Visual Servo Tracking and Grasping AprilTags
1. Course Overview
The function implemented in this lesson can be simply understood as: robotic arm "eyes" fixate on the tag, automatically follow movement, and approach to grasp when stable.
The camera is mounted at the robotic arm end-effector. The program uses Visual Servoing algorithm to closed-loop control joint 1 base servo (left/right rotation) and joints 2/3/4 (pitching motion), keeping the AprilTag always in the center target box of the camera image. When the wooden block is stably centered and alignment frame count is reached, the chassis automatically drives forward to the optimal grasping distance (approximately 230~240mm), and the robotic arm automatically calculates the gripper alignment angle and executes IK descent grasping.
Note
The tutorial recommends using the accompanying 4*4cm AprilTag cube wooden blocks (easier to lock for tracking).
2. Preparation and Running
This case requires opening 3 terminals to start the system sequentially:
2.1 Start Camera Driver and Kinematics Solver Environment
Run in Terminal 1:
ros2 launch dofbot_pro_driver A1pro_camera_arm.launch.py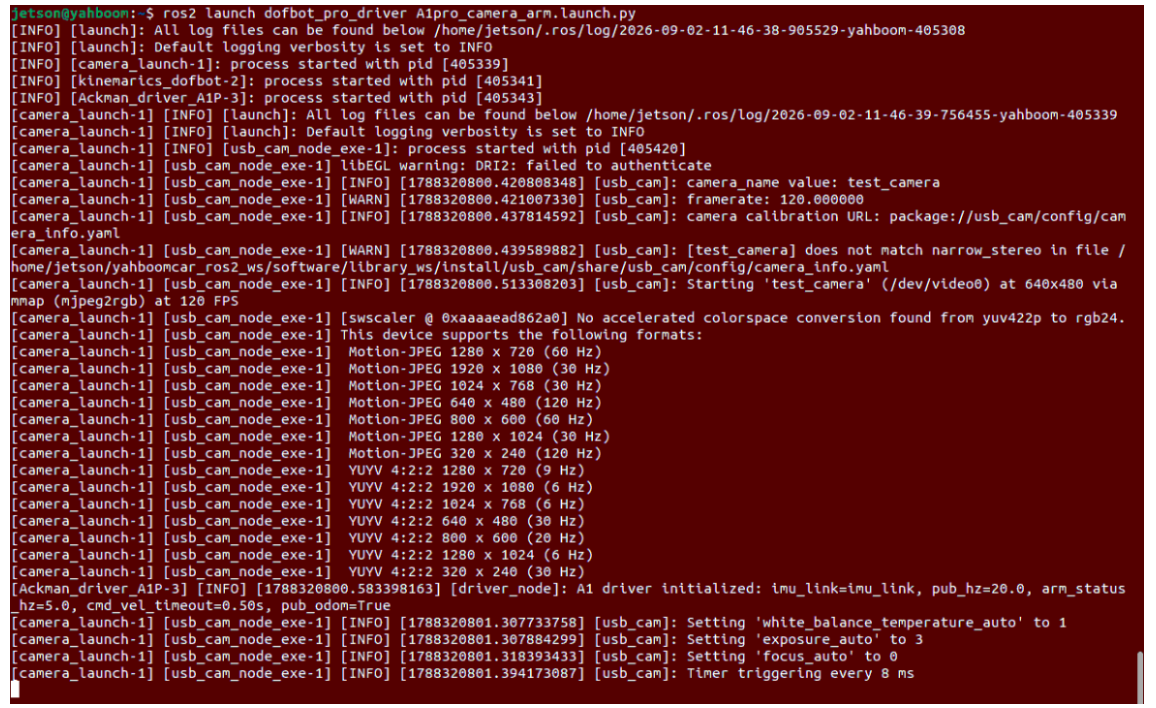
2.2 Start Robotic Arm Desktop Grasping Action Execution Node
Run in Terminal 2:
x# Depth camera version (Nuwa)ros2 run dofbot_pro_driver grasp_desktop
# Or USB camera versionros2 run dofbot_pro_usb grasp_usb
2.3 Start AprilTag Visual Tracking Node
Run in Terminal 3:
xxxxxxxxxx# Depth camera version (Nuwa)ros2 run dofbot_pro_driver apriltag_follow_2D
# Or USB camera versionros2 run dofbot_pro_usb apriltag_follow_usb
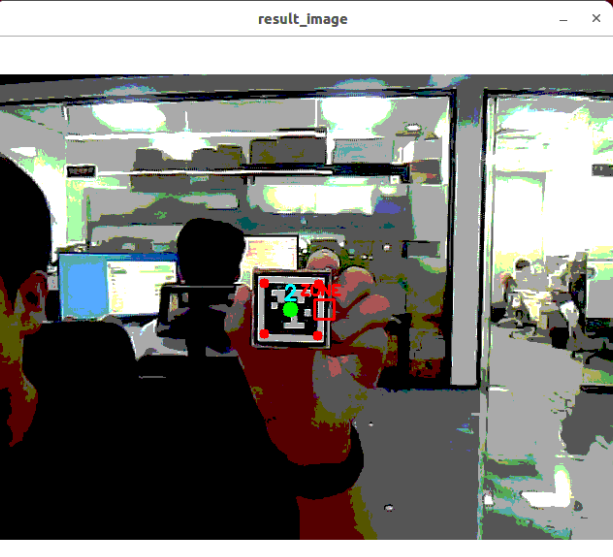
3. Operation Demo and Interaction Flow
Handheld material guidance: Hold the AprilTag wooden block and slowly move it horizontally or up/down in front of the robotic arm camera field of view;
Gimbal dynamic servo tracking: The robotic arm uses PID algorithm to dynamically adapt base rotation and pitch joint rotation, always pulling the AprilTag back to the center alignment box in the camera image;
Observe status indicator box:
When AprilTag is not aligned, the box and crosshair are 🔴 blue;
When AprilTag is aligned, the box turns 🟢 green, and the display shows alignment stability progress count (e.g.,
LOCKING: 5/10);
Automatic grasping trigger:
After continuous alignment frame count reaches threshold, the buzzer sounds once, and the gimbal automatically locks current pose;
Chassis automatically and smoothly approaches the target wooden block;
After reaching grasping distance, chassis stops, robotic arm adaptively aligns to the block's deflection angle and descends to grasp;
Reset and ready: After grasping, the robotic arm lifts the material, automatically resets to initial patrol pose and resets tracking counter, ready for the next round of tracking.
Tip
When moving the wooden block, please move slowly and smoothly. Fast waving can cause motion blur in the image or exceed PID response limits, causing robotic arm shaking.
4. Core Source Code Analysis
The tracking and grasping system is completed by "visual servo tracking" and "IK grasping execution" two nodes working in coordination:
| Camera Type | Visual Servo Tracking Decision Node | Grasping Action Execution Node |
|---|---|---|
| USB Monocular Camera | dofbot_pro_usb/apriltag_follow_usb.py | dofbot_pro_usb/grasp_usb.py |
| 3D Depth Camera | dofbot_pro_driver/apriltag_follow_2D.py | dofbot_pro_driver/grasp_desktop.py |
Regardless of which camera is mounted, the program runs based on a rigorous four-stage state machine:
xxxxxxxxxxPhase A: Gimbal PID Tracking -> Phase B: Continuous Center Locking -> Phase C: Chassis Active Approach -> Phase D: Gripper Adaptive Grasping
The main technical implementation comparison between the two:
| Comparison Dimension | USB Monocular Camera Solution | 3D Depth Camera Solution (Nuwa-HP60C) |
|---|---|---|
| Tracking Center Reference | Image optical center TARGET_X = 341, TARGET_Y = 242 | Image standard center TARGET_X = 320, TARGET_Y = 240 |
| Lock Confirmation Threshold | Continuous 5 frames stable centering to lock | Continuous 10 frames stable centering to lock (more resistant to shake false detection) |
| Distance Measurement | Pinhole geometry model calculates distance, approach to approximately 230mm | Depth map matrix directly extracts millimeter-level physical depth, approach to approximately 240mm |
| Spatial Compensation Dimension | Superimpose X, Y 2D spatial deviation compensation | Synchronously superimpose X, Y, Z 3D omnidirectional spatial compensation |
4.1 USB Monocular Camera Core Source Code Analysis (apriltag_follow_usb.py)
1. Gimbal PID Dynamic Following and Slope Limiting
Calculate pixel deviation between tag center and target optical center, output each joint target angle through PID. To prevent sudden robotic arm jitter, a slope limiter is added (max_step_change = 0.03):
xxxxxxxxxx# apriltag_follow_usb.py —— XY_track gimbal trackingdiff_center_x = center_x - float(TARGET_X)diff_center_y = center_y - float(TARGET_Y)
raw_angular_x = self.angular_x_PID.compute(adjusted_center_x, TARGET_X)raw_angular_y = self.angular_y_PID.compute(adjusted_center_y, TARGET_Y)
# Slope limiter: limit maximum change per frame, keep motion smoothdiff_x = raw_angular_x - self.last_angular_xangular_x = self.last_angular_x + max(-self.max_step_change, min(self.max_step_change, diff_x))
# Drive base joint1 rotation and joint2/3/4 pitch coordinationtarget_j1 = 90  + (10 * angular_x * -90.0)target_j2 = 150 + (angular_y * -150.0)target_j3 = 12  + (angular_y * -60.0)target_j4 = 20  + (angular_y * -100.0)
2. Alignment Anti-Jitter Counting and Chassis Active Approach
Require tag center to enter tolerance box (±10 pixels) and continuously maintain for 5 frames, then lock gimbal and chassis uses PID control to approach:
xxxxxxxxxx# apriltag_follow_usb.py —— Continuous alignment and approachif is_aligned and self.Done_flag and not self.adjust_dist and not self.start_grasp: self.aligned_count += 1 if self.aligned_count >= self.ALIGNED_THRESHOLD: # Reach 5 frames self.adjust_dist = True # Switch to approach phase self.XY_Track_flag = False # Lock gimbal joints self.Beep_Loop() # Buzzer response4.2 3D Depth Camera Core Source Code Analysis (apriltag_follow_2D.py)
1. Dual-Mode Image Soft Synchronization and Physical Depth Direct Reading
The depth camera uses ApproximateTimeSynchronizer to receive RGB color images and 32-bit floating-point depth maps, directly indexing true spatial physical depth at the aligned tag center:
xxxxxxxxxx# apriltag_follow_2D.py —— Hardware-level depth reading and distance calculationcx_int = int(np.clip(center_x, 0, 639))cy_int = int(np.clip(center_y, 0, 479))
# Convert mm to meterscur_depth = depth_image[cy_int, cx_int] / 1000.0# Combine hand-eye matrix to calculate vehicle to bottom horizontal physical distancepose_t = self.compute_heigh(center_x, center_y, cur_depth)self.cur_distance = math.sqrt(pose_t[1]**2 + pose_t[0]**2) * 1000.0  # millimeters
2. 10-Frame High-Robustness Locking and Chassis PID Approach
The depth camera version uses a stricter 10-frame continuous center alignment mechanism (ALIGNED_THRESHOLD = 10), effectively filtering transient alignment caused by handheld shaking; after confirming lock, chassis smoothly advances to 240mm:
xxxxxxxxxx# apriltag_follow_2D.py —— State machine transition controlif is_aligned and self.Done_flag and not self.adjust_dist and not self.start_grasp:    self.aligned_count += 1    if self.aligned_count >= self.ALIGNED_THRESHOLD:  # Reach 10 frames        self.Beep_Loop()        self.adjust_dist = True        self.XY_Track_flag = False
if self.adjust_dist:    # Calculate chassis forward linear velocity based on current true millimeter distance    if self.cur_distance > GRASP_DIST + 0.2:        self.move_dist(self.cur_distance)    else:        if self.cur_distance > 200:            self.adjust_dist = False            self.start_grasp = True            self.pubVel(0, 0, 0)
3. Gripper Rotation Angle Adaptive Computation and 3D IK Trigger
After chassis stops, the algorithm calculates the block's placement inclination angle based on AprilTag adjacent corner point vector difference, automatically converts to joint 5 target value, enabling the mechanical gripper to precisely align parallel to the block for closing:
xxxxxxxxxx# apriltag_follow_2D.py —— Gripper adaptive angle and grasping command publishingvx = int(tag.corners[0][0]) - int(tag.corners[1][0])vy = int(tag.corners[0][1]) - int(tag.corners[1][1])target_joint5 = compute_joint5(vx, vy)self.joint5.data = int(target_joint5)
# Publish rotation angle and target 3D coordinates, trigger grasp_desktop to execute IKself.TargetJoint5_pub.publish(self.joint5)self.pos_info_pub.publish(tag_msg)
Through this dual-version layered architecture, whether using monocular lens or 3D depth camera, both share a stable and smooth servo tracking and automatic grasping control closed-loop.
4.3 Grasping Offset Tuning (Both Camera Models)
If position deviation occurs during actual grasping (such as missing, knocking over objects, offset left/right, or hitting the table), you can directly modify the spatial offset configuration file for the corresponding camera:
1. Where to Modify
Configuration files are located in the ~/yahboomcar_ros2_ws/dofbot_pro_ws/src/dofbot_pro_driver/config/ directory. Select based on camera type:
3D Depth Camera (Nuwa-HP60C):
offset_value.yamlUSB Camera:
usb_offset_value.yaml
2. How to Modify
The file contains offset parameters in X, Y, Z directions (unit: meters, recommended adjustment per tweak is 0.005~0.01, i.e., 5~10mm):
x_offset(forward/backward direction, positive toward vehicle front):Gripper extends too far and knocks over object decrease value (adjust smaller or set negative)
Gripper doesn't extend far enough and misses increase value (adjust larger)
y_offset(left/right direction, positive toward vehicle left):Gripper deviates right increase value (correct left)
Gripper deviates left decrease value (correct right)
z_offset(up/down height, positive toward ceiling):Gripper too high in air and can't grasp decrease value (probe deeper)
Gripper hits or scrapes table increase value (raise higher)