Welcome to ROSMASTER A1 PRO repository
1.Multi-vehicle Control
Multi-Vehicle Chassis Control
Preface: Multi-vehicle cooperative control is built on the distributed network architecture of ROS 2. Within the same local area network and under the same ROS_DOMAIN_ID, the primary vehicle, follower vehicles, and the control terminal (virtual machine/PC) can achieve shared control or grouped control through topic remapping or independent namespaces. This section uses two vehicles (robot1 and robot2) as an example to introduce two modes: shared keyboard control and independent gamepad distribution control.
1. Program Description
This feature enables simultaneous control of multiple vehicle chassis and robotic arms via keyboard or gamepad.
1.1 Functional Requirements
Using two vehicles as an example, each vehicle must satisfy the following requirements simultaneously:
Same Local Area Network: The two vehicles and the control terminal (virtual machine/PC) must be connected to the same 2.4G/5G Wi-Fi router, ensuring their IP addresses are on the same subnet and can ping each other;
Same ROS Domain ID: The
ROS_DOMAIN_IDof both vehicles must be configured identically (the system default is usually 61):- Raspberry Pi 5: Enter the Docker container and modify the
ROS_DOMAIN_IDin/root/.bashrc, then runsource ~/.bashrcto refresh the changes; - Orin / RDK X5: Modify the
ROS_DOMAIN_IDin~/.bashrcdirectly in the terminal, then runsource ~/.bashrcto refresh the changes;
- Raspberry Pi 5: Enter the Docker container and modify the
2. Control Modes and Startup Steps
The system provides two control modes:
- Shared Keyboard Mode: At the underlying layer, both vehicles remap their respective velocity topics to the global topic
/cmd_vel, so that publishing velocity from a single keyboard makes all vehicles move synchronously; - Gamepad Distribution Mode: Both vehicles retain their own independent namespaces (
/robot1/cmd_vel,/robot2/cmd_vel), while the gamepad control node distributes commands to the topics of both vehicles simultaneously.
2.1 Mode 1: Shared Keyboard Control Mode
Step 1: Launch the Shared Control Chassis Driver on Both Vehicles
Run the following command in the terminal of Vehicle 1 (robot1):
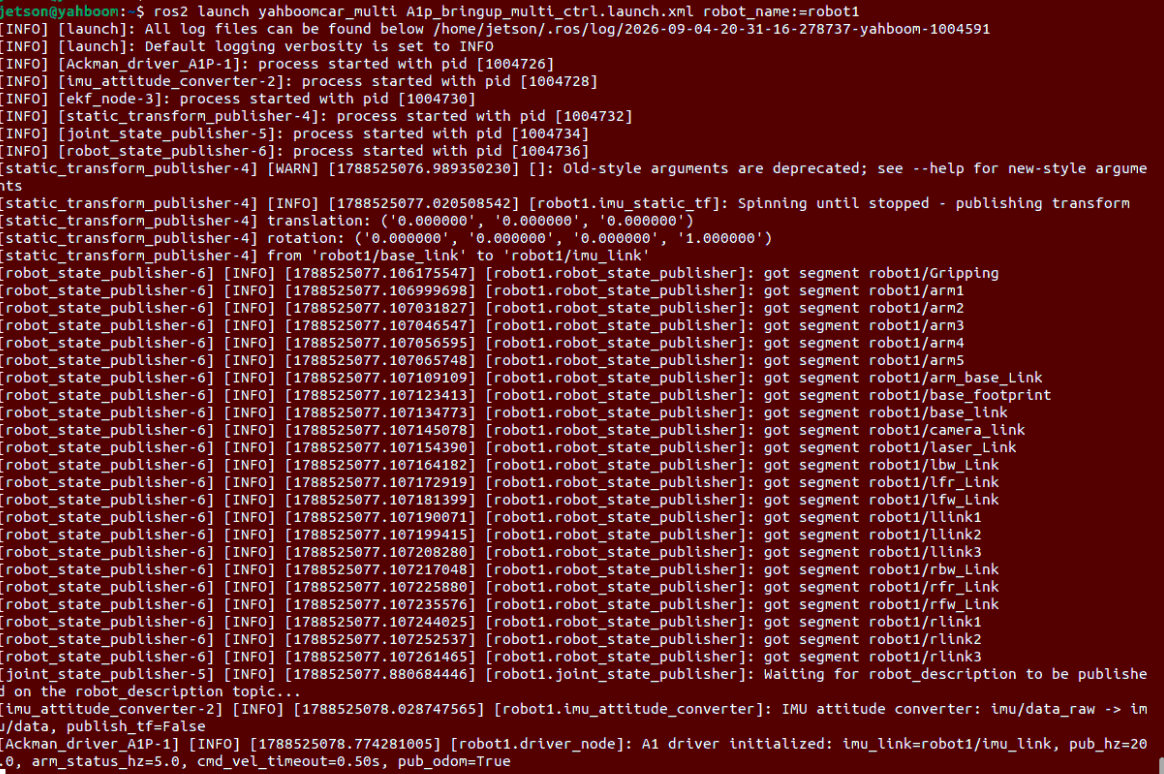
ros2 launch yahboomcar_multi A1p_bringup_multi_ctrl.launch.xml robot_name:=robot1The successful startup screen is shown below:
Run the following command in the terminal of robot2:
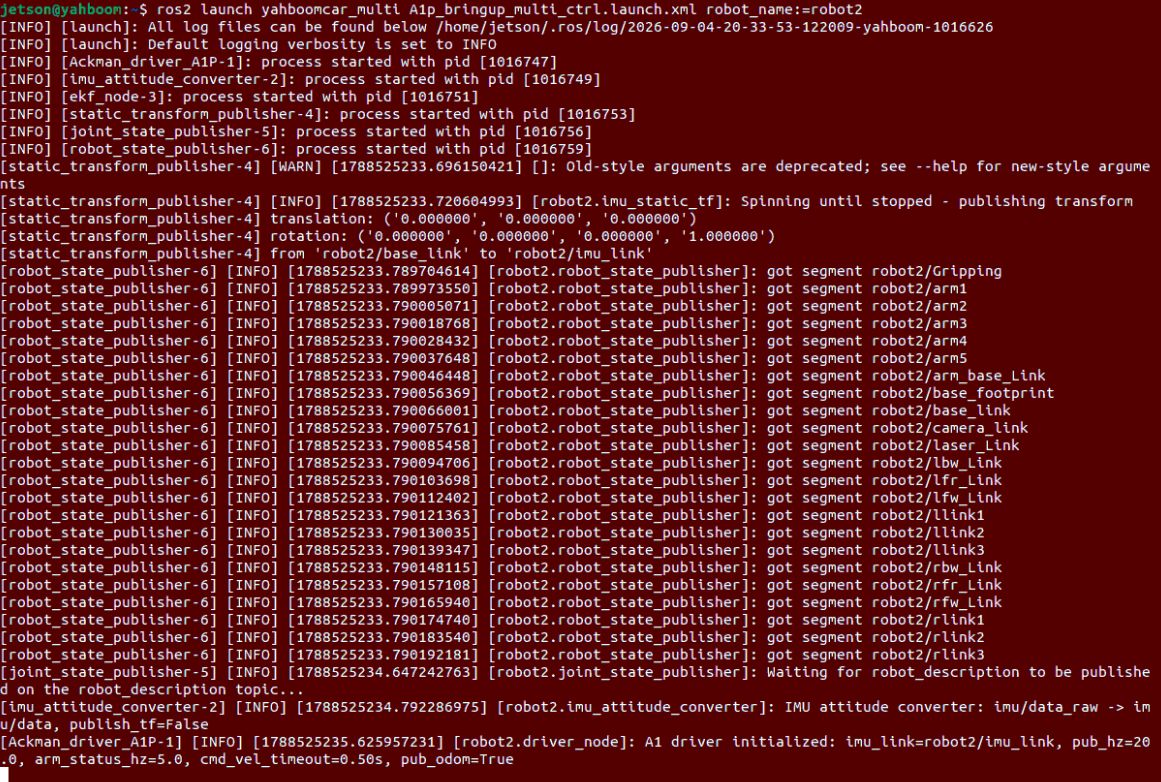
xxxxxxxxxxros2 launch yahboomcar_multi A1p_bringup_multi_ctrl.launch.xml robot_name:=robot2The successful startup screen is shown below:
[!NOTE] The
robot_nameparameter represents the unique namespace identifier of the current vehicle and defaults torobot1; the second vehicle is designated asrobot2.
Step 2: Launch the Keyboard Control Node
Enter the following command in the terminal of any vehicle, or in the terminal of a control node on the same local area network:
xxxxxxxxxxros2 run yahboomcar_ctrl yahboom_keyboardKeyboard control instructions:
i/,: Move forward / Move backwardj/l: Turn left / Turn rightu/o: Forward-left turn / Forward-right turnm/.: Backward-left turn / Backward-right turnkor Space: Emergency stop braking
In this mode, both vehicles jointly subscribe to the global /cmd_vel and /arm_joint, so pressing a key causes both vehicles to execute chassis movement and robotic arm actions synchronously.
2.2 Mode 2: Gamepad Distribution Control Mode
If you need to use a gamepad for wireless joystick control, the two vehicles' chassis do not need to remap topics to global topics, but instead maintain the independence of their respective namespaces.
[!IMPORTANT] If Mode 1 was launched previously, first press
Ctrl + Cin each terminal to exit.
Step 1: Launch the Independent Namespace Chassis Driver on Both Vehicles
Run the following command in the terminal of robot1:
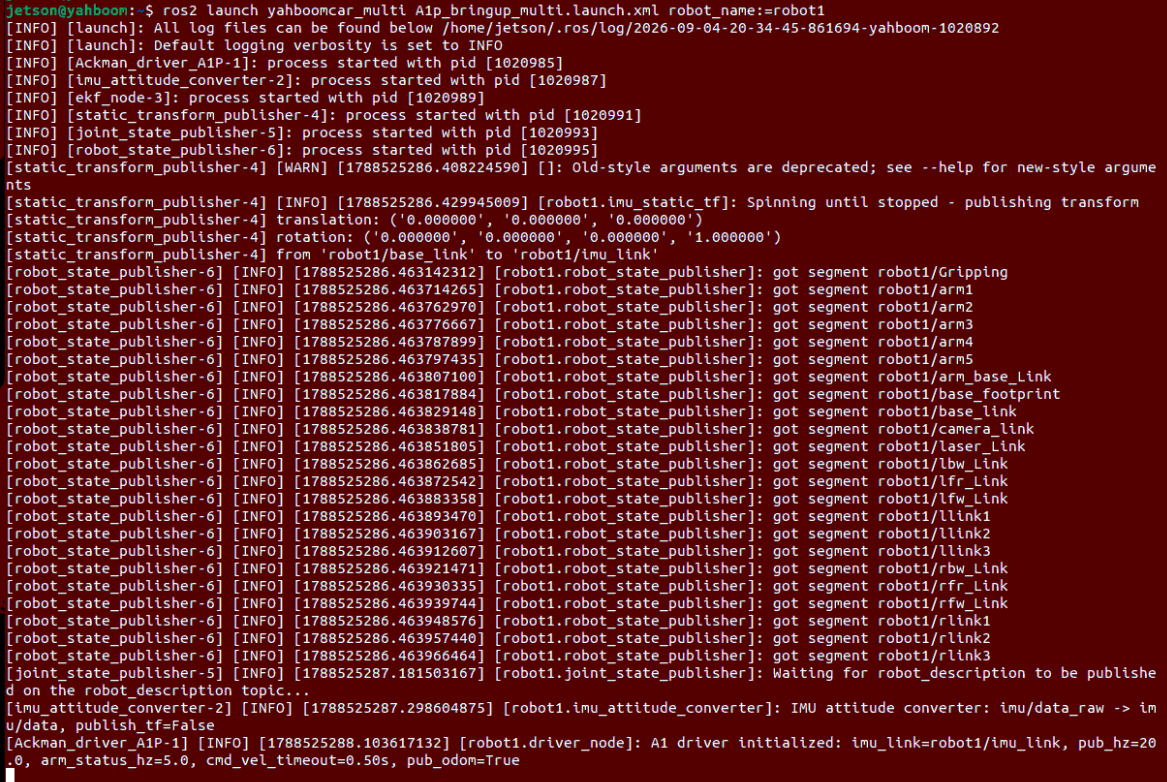
xxxxxxxxxxros2 launch yahboomcar_multi A1p_bringup_multi.launch.xml robot_name:=robot1Run the following command in the terminal of robot2:
xxxxxxxxxxros2 launch yahboomcar_multi A1p_bringup_multi.launch.xml robot_name:=robot2After successful startup, the terminal prints the readiness status of each sensor and the chassis driver:
Step 2: Launch the Gamepad Control Node
Insert the USB gamepad wireless receiver into one of the vehicles or the control computer, then enter the following command in the terminal:
xxxxxxxxxxros2 launch yahboomcar_multi A1p_joy_ctrl.launch.pyThe terminal prints the gamepad node startup information:
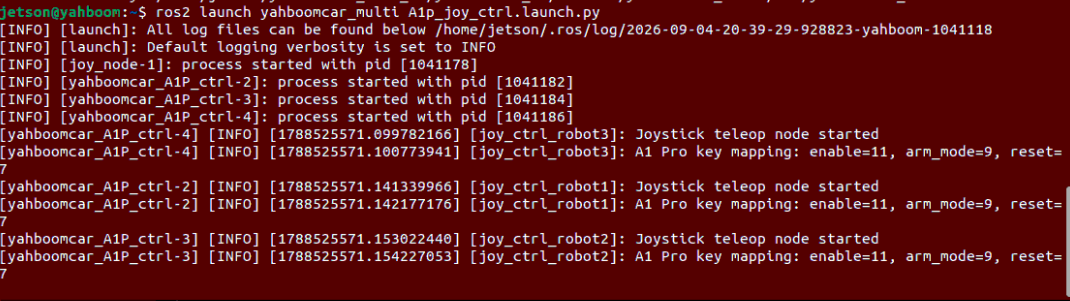
In gamepad mode, A1p_joy_ctrl.launch.py internally generates control mapping nodes for robot1, robot2 (and optionally robot3). The gamepad's joystick and buttons simultaneously broadcast control commands to /robot1/cmd_vel, /robot2/cmd_vel, as well as the buzzer, light, and robotic arm topics.
3. Multi-Device Communication and Node Topology Verification
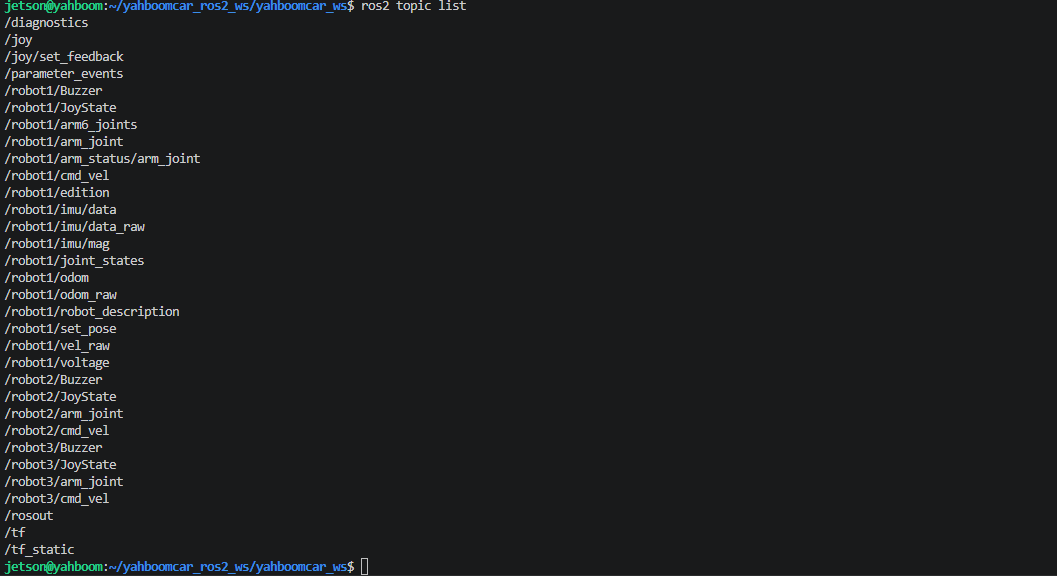
3.1 View the Topic List
Run the following command in the terminal to view the currently active topics of the system:
xxxxxxxxxxros2 topic listYou can see topics containing the dedicated namespaces of both vehicles (as well as global shared topics in keyboard mode):
3.2 View the Multi-Device Computation Graph Topology
Run the rqt computation graph analysis tool in the terminal:
xxxxxxxxxxros2 run rqt_graph rqt_graphThe computation graph visually shows the communication paths between each control node and the vehicle driver nodes:
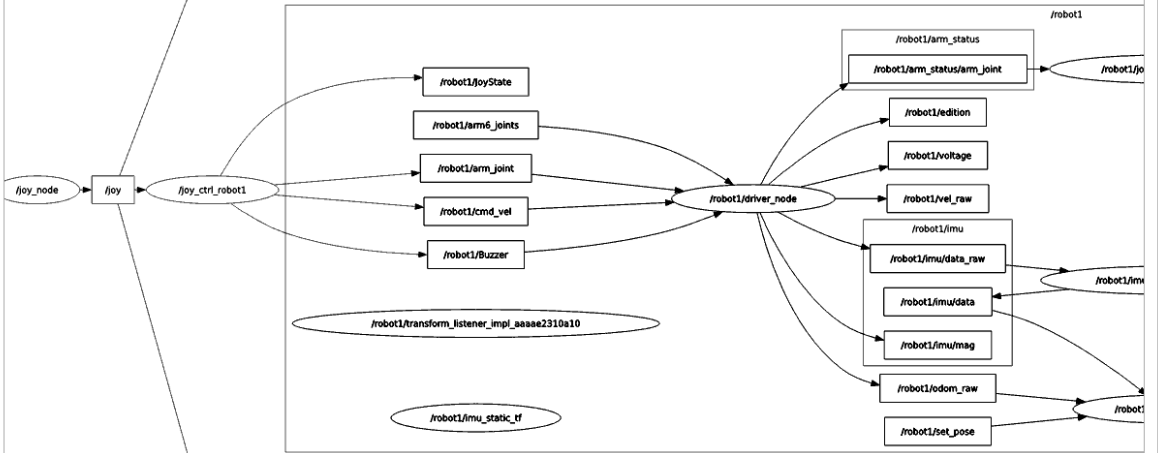
- Shared Keyboard Mode: The control node publishes messages to the global topic
/cmd_vel, while/robot1/driver_nodeand/robot2/driver_nodelisten to this topic simultaneously; - Gamepad Distribution Mode: The gamepad node listens to
/joyand publishes consistent velocity control commands to/robot1/cmd_veland/robot2/cmd_velin parallel.
4. Core Source Code Analysis
4.1 Shared Keyboard Chassis Launch File (A1p_bringup_multi_ctrl.launch.xml)
Source code path:
~/yahboomcar_ros2_ws/yahboomcar_ws/src/yahboomcar_multi/launch/A1p_bringup_multi_ctrl.launch.xml
x<launch> <arg name="robot_name" default="robot1"/> <group> <push-ros-namespace namespace="$(var robot_name)"/> <!-- 1. Low-level driver node: Ackermann steering chassis driver --> <node name="driver_node" pkg="yahboomcar_bringup" exec="Ackman_driver_A1P" output="screen"> <param from="$(find-pkg-share yahboomcar_bringup)/param/a1_driver.yaml"/> <param name="imu_link" value="$(var robot_name)/imu_link"/> <param name="odom_frame" value="$(var robot_name)/odom"/> <param name="base_footprint_frame" value="$(var robot_name)/base_footprint"/> <param name="pub_odom" value="true"/> <param name="pub_odom_tf" value="false"/> <!-- Key remapping: remap velocity and robotic arm topics to global topics without namespaces for unified single-node control --> <remap from="cmd_vel" to="/cmd_vel"/> <remap from="arm_joint" to="/arm_joint"/> <remap from="/arm_status/arm_joint" to="/$(var robot_name)/arm_status/arm_joint"/> <remap from="/arm_driver/get_actual_arm_position" to="/$(var robot_name)/arm_driver/get_actual_arm_position"/> </node> <!-- 2. IMU attitude conversion node --> <node name="imu_attitude_converter" pkg="yahboomcar_bringup" exec="imu_attitude_converter" output="screen"> <param name="imu_input_topic" value="imu/data_raw"/> <param name="imu_output_topic" value="imu/data"/> <param name="publish_tf" value="false"/> <param name="use_odom_position" value="false"/> </node> <!-- 3. EKF Extended Kalman Filter data fusion node --> <node name="ekf_filter_node" pkg="robot_localization" exec="ekf_node" output="screen"> <param name="odom_frame" value="$(var robot_name)/odom"/> <param name="base_link_frame" value="$(var robot_name)/base_footprint"/> <param name="world_frame" value="$(var robot_name)/odom"/> <param from="$(find-pkg-share yahboomcar_multi)/param/A1p_ekf_$(var robot_name).yaml"/> <remap from="odometry/filtered" to="odom"/> </node> <!-- 4. IMU static TF broadcasting --> <node name="imu_static_tf" pkg="tf2_ros" exec="static_transform_publisher" args="0 0 0 0 0 0 $(var robot_name)/base_link $(var robot_name)/imu_link"/> </group> <!-- 5. Load the robotic arm and vehicle body URDF description file --> <include file="$(find-pkg-share yahboomcar_multi)/launch/A1p_description_multi.launch.py"> <arg name="robot_name" value="$(var robot_name)"/> </include></launch>Key Mechanism Analysis:
Namespace Isolation: Using
<push-ros-namespace namespace="$(var robot_name)"/>adds therobot1/orrobot2/prefix to all nodes in the group, resolving node name conflicts in multi-device networking;Global Topic Remapping:
<remap from="cmd_vel" to="/cmd_vel"/>redirects the vehicle's privaterobotX/cmd_velto the global/cmd_vel;- The keyboard control node only needs to publish to the global
/cmd_velto broadcast to both vehicles;
Coordinate Frame Isolation: The odometry frame
odomand the base framebase_footprintare parameterized as$(var robot_name)/odomand$(var robot_name)/base_footprintrespectively, ensuring that the TF tree trunks do not interfere with each other.
4.2 Gamepad Multi-Vehicle Distribution Launch File (A1p_joy_ctrl.launch.py)
Source code path:
~/yahboomcar_ros2_ws/yahboomcar_ws/src/yahboomcar_multi/launch/A1p_joy_ctrl.launch.py
xxxxxxxxxxfrom launch import LaunchDescriptionfrom launch.actions import DeclareLaunchArgumentfrom launch.substitutions import LaunchConfigurationfrom launch_ros.actions import Nodedef generate_launch_description(): first_robot_arg = DeclareLaunchArgument('first_robot1', default_value='robot1') second_robot_arg = DeclareLaunchArgument('second_robot2', default_value='robot2') third_robot_arg = DeclareLaunchArgument('third_robot3', default_value='robot3') first_robot = LaunchConfiguration('first_robot1') second_robot = LaunchConfiguration('second_robot2') third_robot = LaunchConfiguration('third_robot3') # 1. Hardware gamepad driver node, listens to /joy joy_node = Node( package='joy', executable='joy_node', ) # 2. Control node that distributes gamepad commands to robot1 robot1_joy_ctrl_node = Node( package='yahboomcar_multi', executable='yahboomcar_A1_ctrl', name='joy_ctrl_robot1', output='screen', remappings=[ ('cmd_vel', [first_robot, '/cmd_vel']), ('Buzzer', [first_robot, '/Buzzer']), ('RGBLight', [first_robot, '/RGBLight']), ('JoyState', [first_robot, '/JoyState']), ('arm_joint', [first_robot, '/arm_joint']), ], ) # 3. Control node that distributes gamepad commands to robot2 robot2_joy_ctrl_node = Node( package='yahboomcar_multi', executable='yahboomcar_A1_ctrl', name='joy_ctrl_robot2', output='screen', remappings=[ ('cmd_vel', [second_robot, '/cmd_vel']), ('Buzzer', [second_robot, '/Buzzer']), ('RGBLight', [second_robot, '/RGBLight']), ('JoyState', [second_robot, '/JoyState']), ('arm_joint', [second_robot, '/arm_joint']), ], ) return LaunchDescription([ joy_node, first_robot_arg, second_robot_arg, third_robot_arg, robot1_joy_ctrl_node, robot2_joy_ctrl_node, ])Key Mechanism Analysis:
- This launch file starts two
yahboomcar_A1_ctrlinstances simultaneously; - Both instances listen to the low-level
/joygamepad button messages, but map their control outputs torobot1/cmd_velandrobot2/cmd_velrespectively throughremappings; - This achieves precise, independent, and synchronized control of any number of vehicles on the local area network with a single gamepad, without remapping global topics.