Welcome to ROSMASTER A1 PRO repository
3.Multimodal Visual Understand + Robotic Arm Gripping
3. Multimodal Visual Understanding + Robotic Arm Gripping (Text Version)
1. Course Content
Learn how the multimodal large model integrates 2D visual perception, spatial geometric reasoning, and 3D inverse-kinematics control of the robotic arm;
Through terminal text interaction, experience the large model autonomously identifying target objects, computing relative spatial positions, and controlling a 6-DOF robotic arm to perform precise spatial grasping (
pick);Learn the large model's cross-target relative pose reasoning to complete relative placement (
place) Note: because the USB camera has no depth data, the placement location is an adjustable fixed position;Learn AprilTag-based 3D elevation perception filtering and automated sorting and removal (
apriltag_remove_higher);Deeply analyze the underlying spatial coordinate solving logic of the embodied large model's decision layer and the action server
action_service_nuwa.py.This case uses the matching 3 × 3 × 3 blocks and 3 × 3 × 3 machine-code wooden blocks
2. Preparation
2.1 Content Description
This lesson applies to controllers such as Raspberry Pi 5, Jetson Orin NANO, and D-Robotics RDK X5:
Raspberry Pi 5: You must first enter the Docker container before running ROS 2 related commands. Refer to [3.Enter Docker (For Raspberry Pi)] in the [Robot Configuration and Operation Guide];
Orin / RDK X5: Run commands directly in the onboard terminal; there is no need to enter Docker.
2.2 Start the Local Dify Large-Model Environment
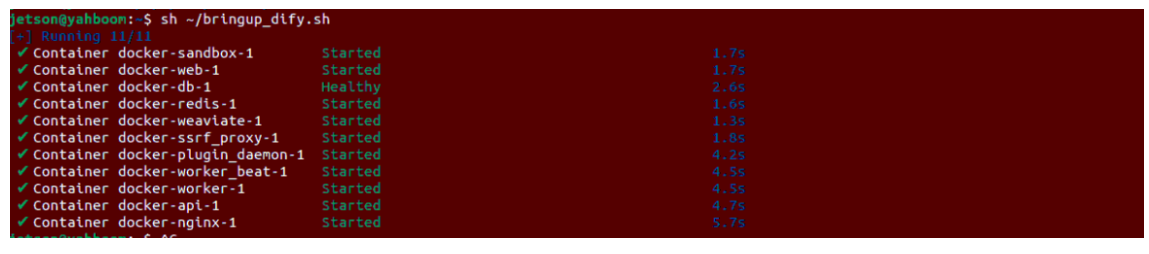
Enter the following command in the host terminal to start the Dify service:
sh ~/bringup_dify.shThe terminal prints the following message, indicating that the Dify service is connected successfully:
3. Running Examples
3.1 Start the Embodied Intelligence Master Control Service (Text Interaction Mode)
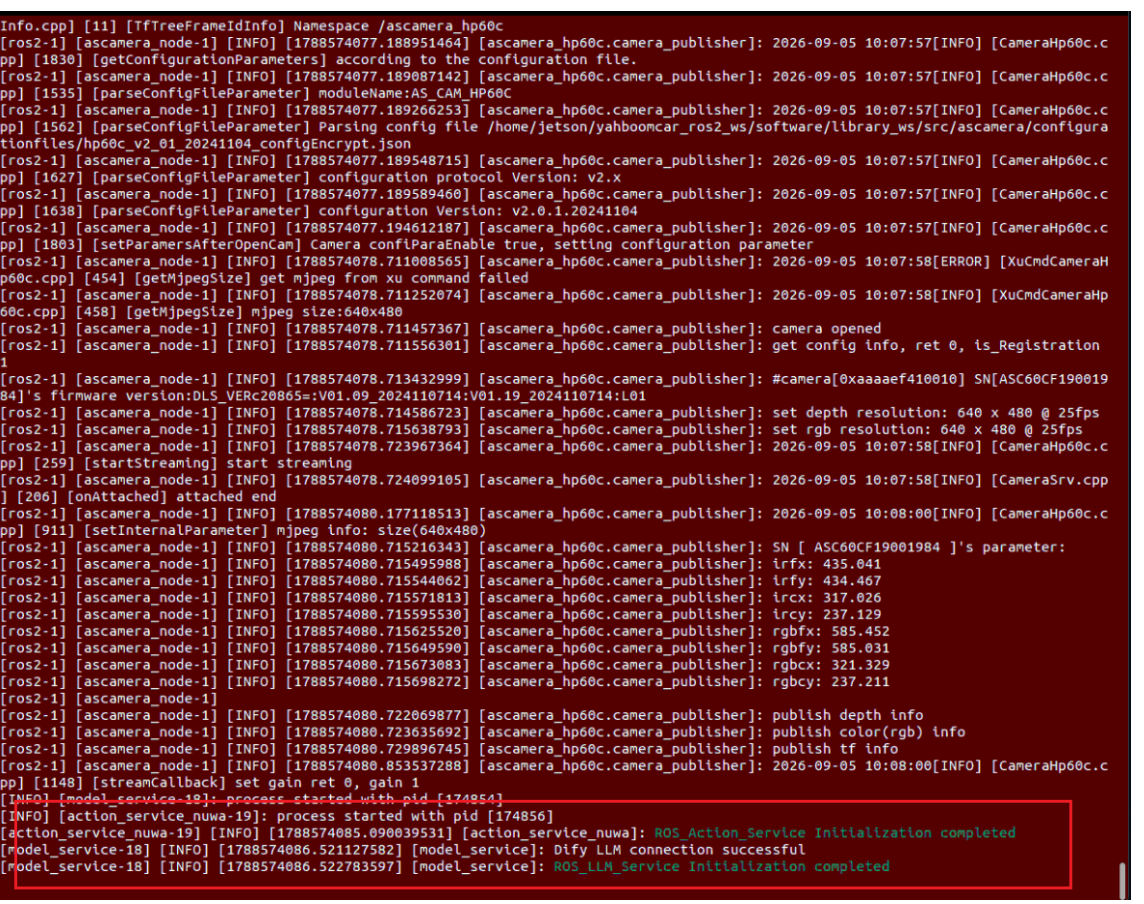
Open a terminal on the onboard computer and enter the following command to start the large-model embodied control hub (specifying text_chat_mode:=True):
xxxxxxxxxxros2 launch multi_brains llm_agent_control.launch.py text_chat_mode:=TrueAfter the system finishes initializing, the action service and multimodal perception nodes become ready.
3.2 Start the Text Interaction Control Terminal
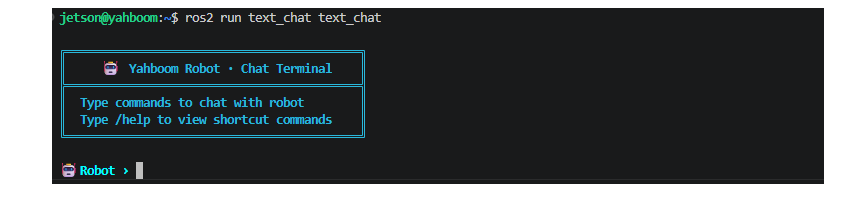
Using remote SSH, open another terminal and start the text interaction program:
xxxxxxxxxxros2 run text_chat text_chatAfter startup, the terminal enters the real-time text interaction interface, waiting for the user to enter commands.
Tip
Chinese Input Tip:
It is recommended to connect from a computer using an SSH remote tool (such as MobaXterm or VSCode Terminal), so that Chinese can be typed seamlessly for interaction.
3.3 Classic Test Cases
Note: RDK and Raspberry Pi boards may experience very laggy VNC when running visualization due to performance issues. The tutorial does not enable the viewing angle by default. You can actually move the cube to track. To enable it, go to the launch file and manually change
display_windows_only_tracktoTrue, then compile.
Props recommended for testing:
Basic block test: 30 × 30 × 30 mm building blocks (solid-color blocks such as red, green, and blue);
Elevation and tag test: 30 × 30 × 30 mm building blocks with AprilTag codes attached (they can be stacked in multiple layers to form different heights).
Case 1: Target Object Recognition and Precise Grasping ("Find the red cube in front of you and grasp it.")
Enter the test statement in the text interaction terminal:
xxxxxxxxxxFind the red cube in front of you and grasp it.The terminal prints the steps planned by the large model and the bounding box parameters:
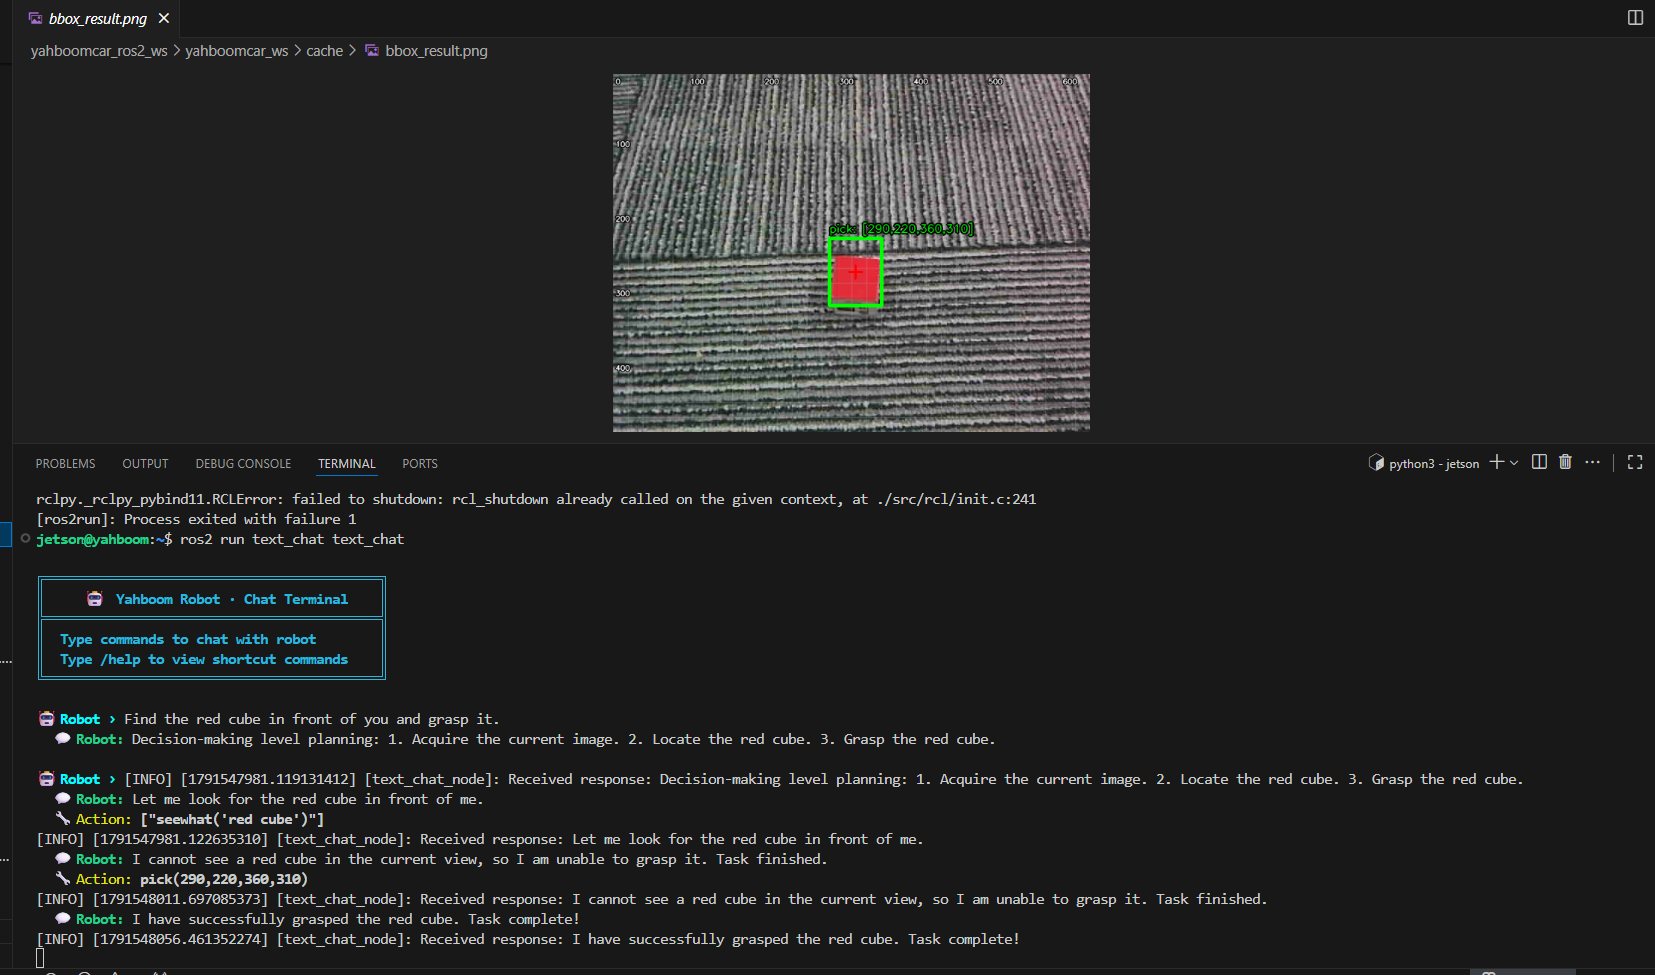
The path of the boxed photo is,
~/yahboomcar_ros2_ws/yahboomcar_ws/cache/bbox_result.png
Execution Process and Behavior:
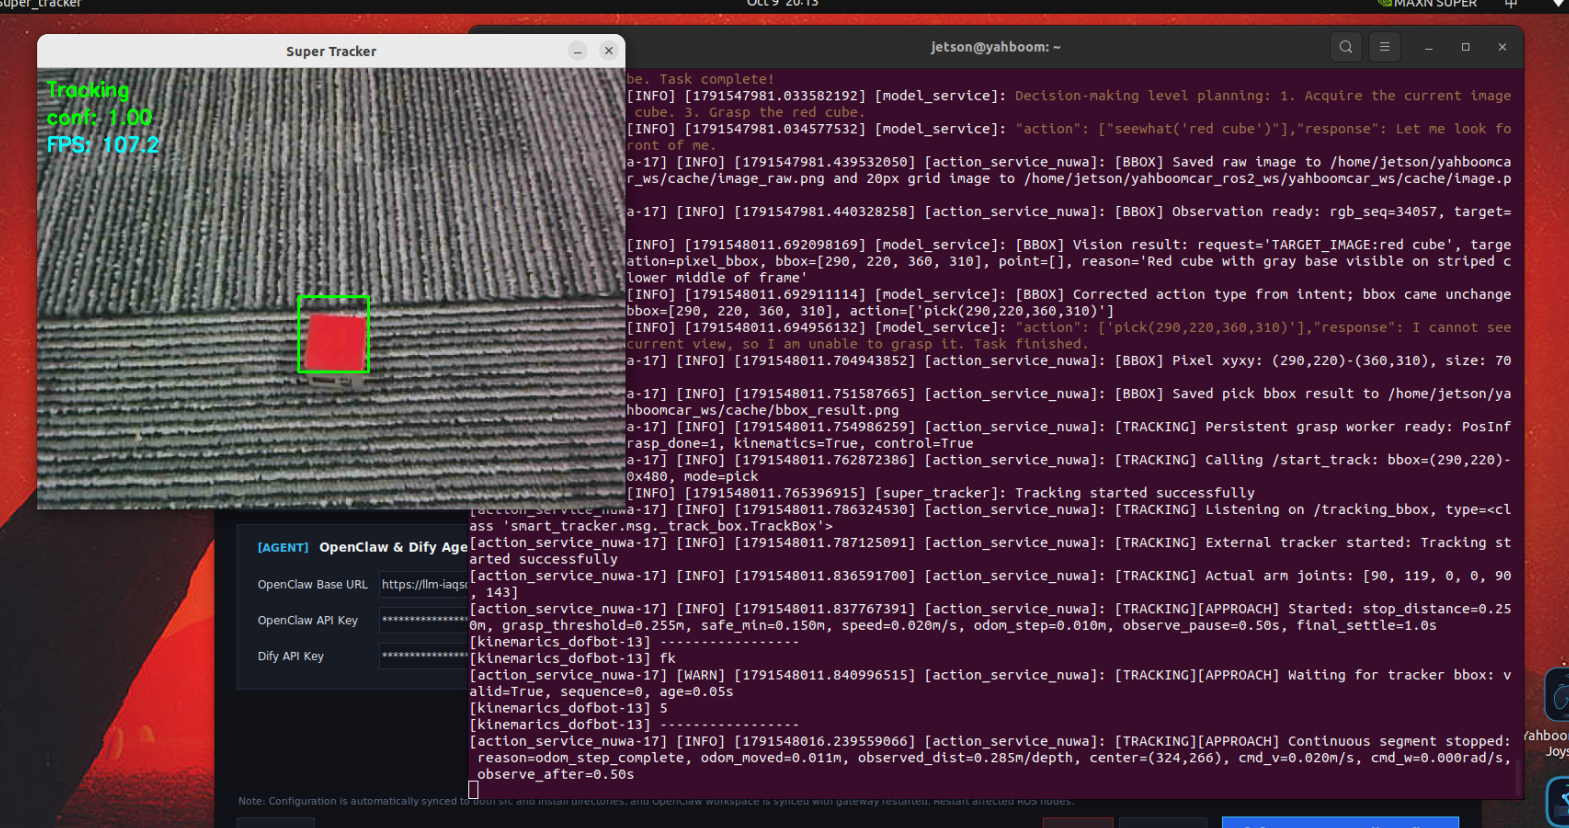
After receiving the command, the large model first issues the
seewhatcommand to obtain the current color image from the camera;The multimodal model precisely locates the pixel bounding box coordinates
[x1, y1, x2, y2]of the yellow block and assembles thepickaction;The robot performs the underlying spatial inverse solution, automatically adjusts the robotic arm angle, opens the gripper, and dives down to grasp the target block;
After a successful grasp, the robotic arm lifts up and maintains the current holding posture:
Note
How to Reset the Robotic Arm:
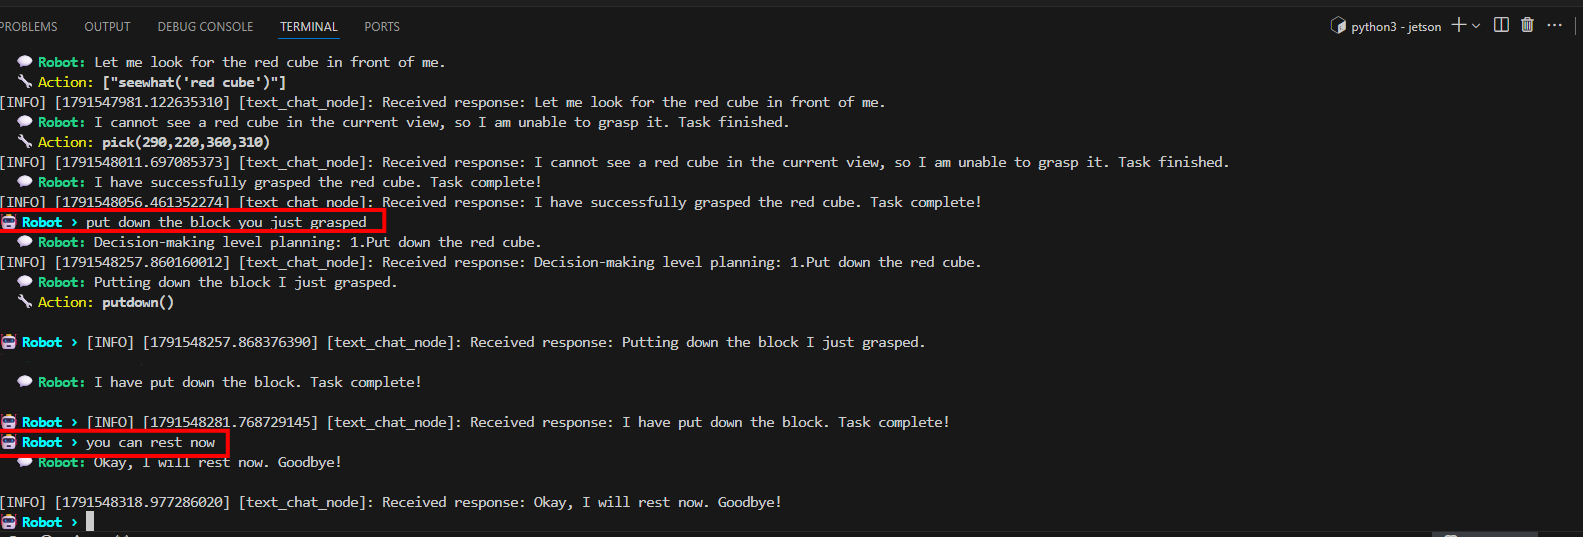
Method 1: Enter
put down the block you just graspedin the interaction terminal, and the robotic arm will safely place the block down in place;Method 2: Enter
you can rest nowin the interaction terminal to end the current task cycle and reset the conversation.
Example of entering "you can rest now":
Case 2: Cross-Target Relative Spatial Relationship Placement ("Put the red block in front of you to the right of the yellow block")
Place a red block and a yellow block on the tabletop, and enter the test statement in the terminal:
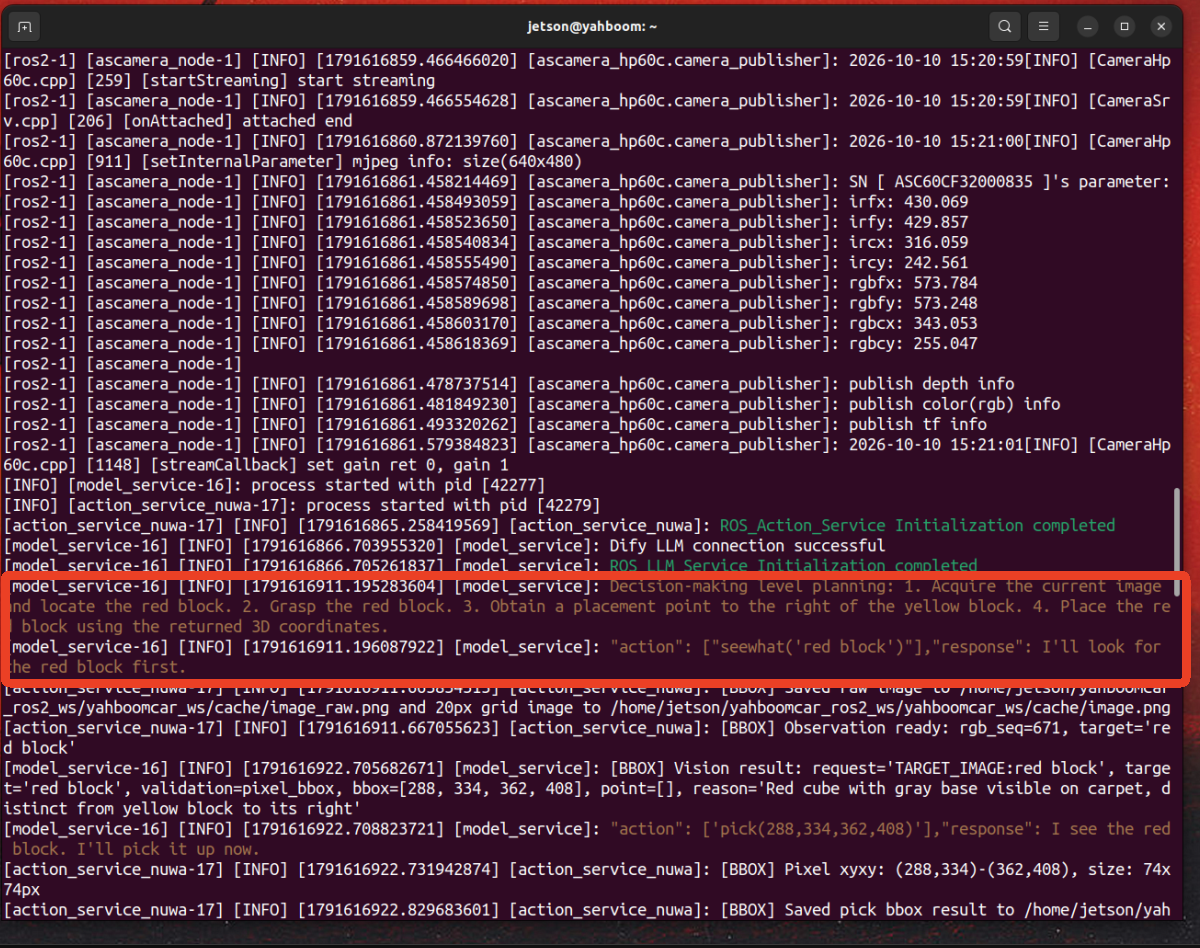
xxxxxxxxxxPut the red block in front of you to the right of the yellow block.The terminal prints the 4-stage task plan parsed by the large model:
Execution Process and Behavior:
The multimodal large model simultaneously detects the pixel coordinates of the "red block" and the "yellow block" in the current field of view;
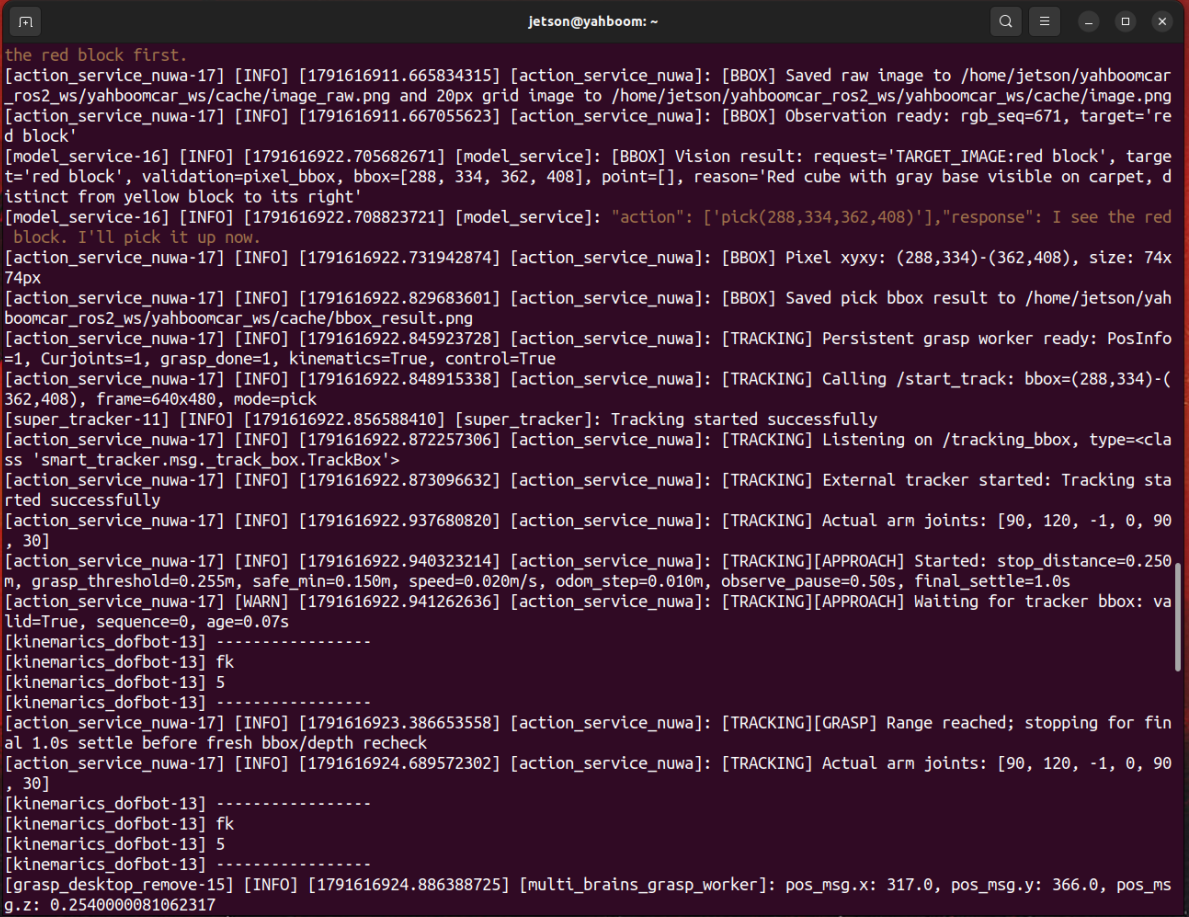
The robot first calls
pickto grasp the red block in front:
xxxxxxxxxx~/yahboomcar_ros2_ws/yahboomcar_ws/cache/bbox_result.png
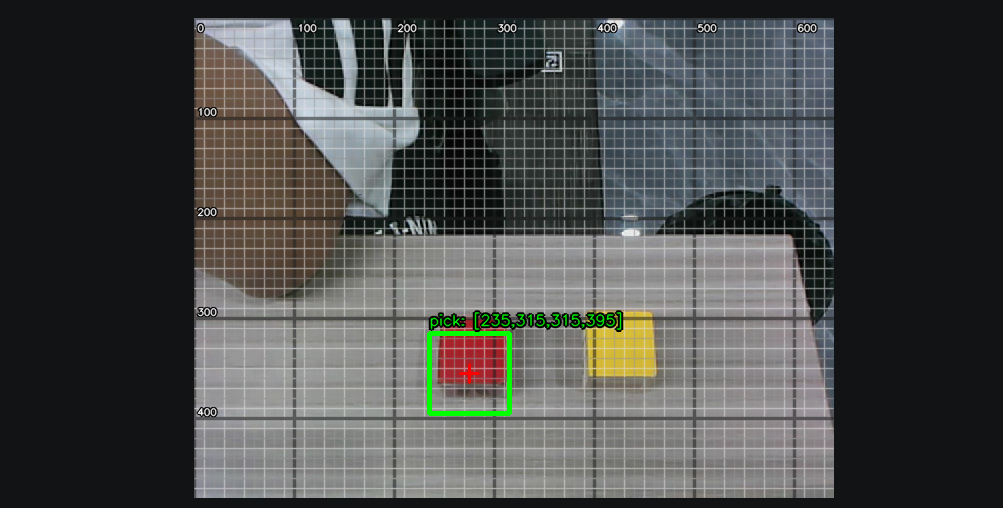
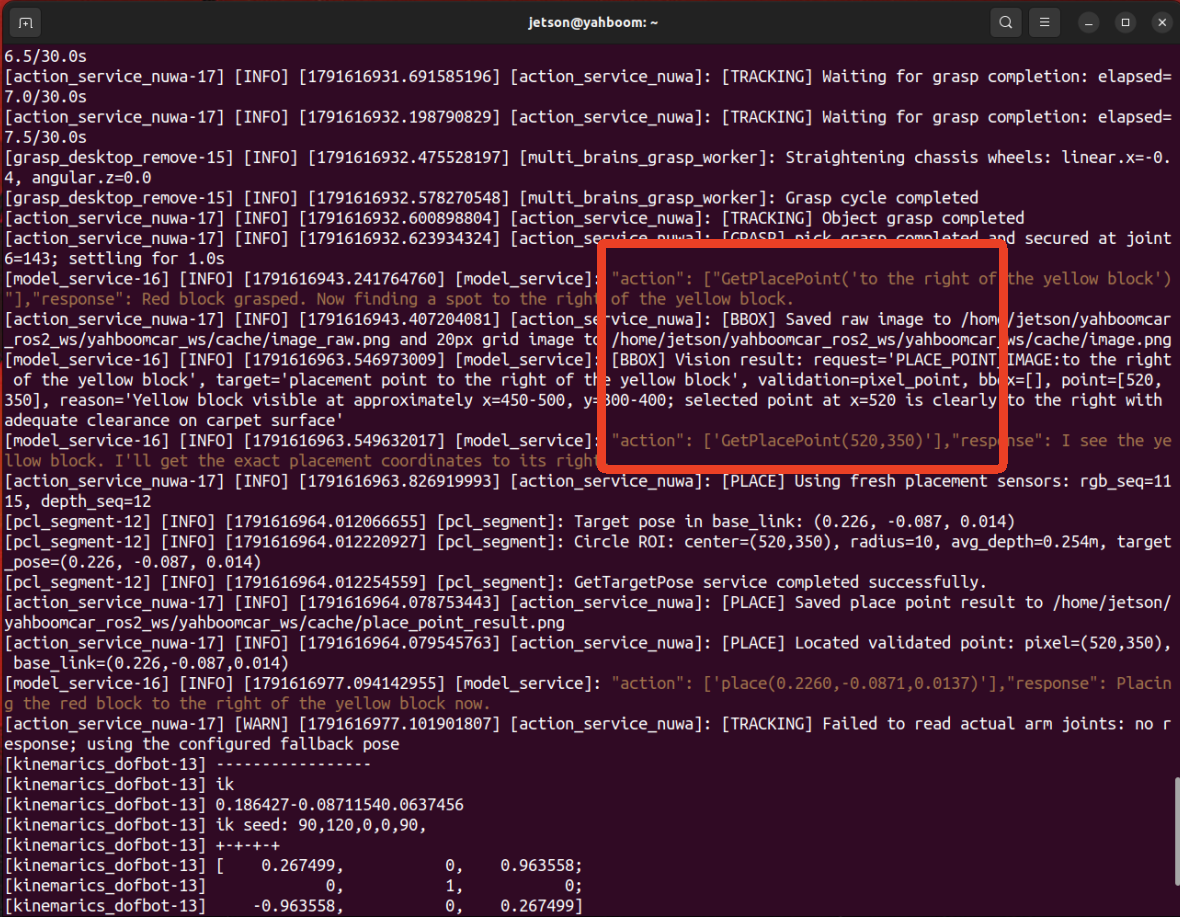
Then, based on the coordinates of the blue block and the geometric topological relationship of "to the right," the large model calls the
placecommand; the robotic arm rotates to the right side of the base and safely releases the gripper, completing a precise placement and indicating that the task is complete:
xxxxxxxxxx~/yahboomcar_ros2_ws/yahboomcar_ws/cache/place_point_result.png~
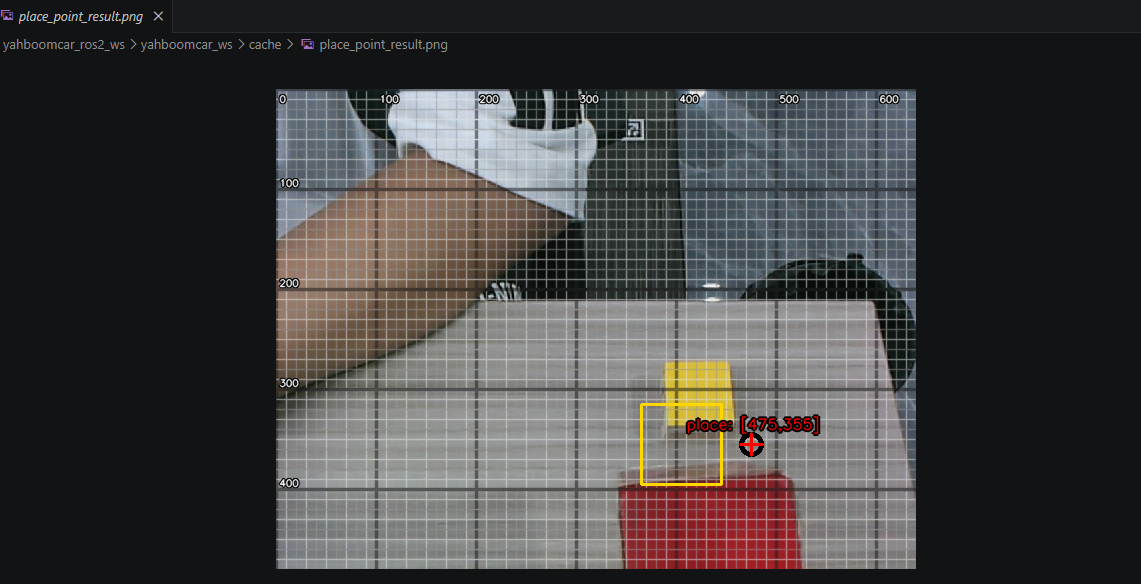
Enter "you can rest now" to reset the robotic arm and start a new round of interaction:

Case 3: 3D Elevation Perception and Automated Sorting/Removal ("Please help me remove the machine codes in front of you that are higher than 5 cm")
Place several wooden blocks with AprilTag tags in the field of view, and raise one of them to a height of more than 5 cm. Enter in the interaction terminal:
xxxxxxxxxxPlease help me remove the machine codes in front of you that are higher than 5 cm.The terminal prints the apriltag_remove_higher action parsed by the large model:
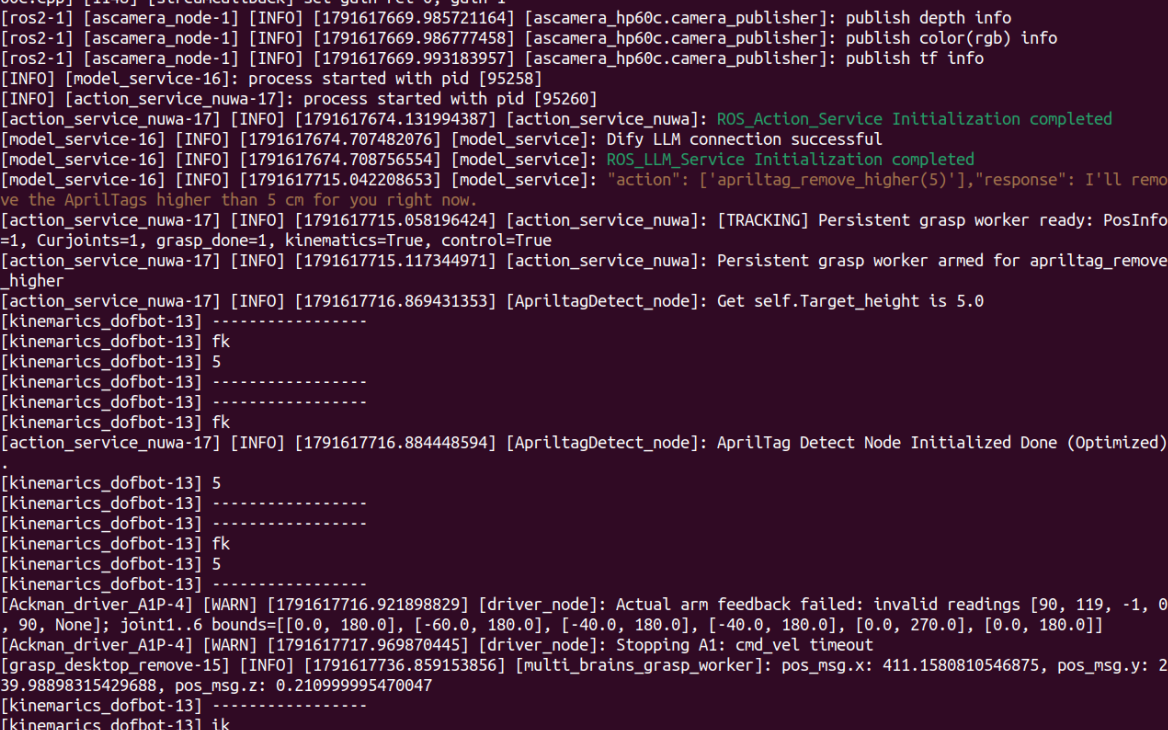
Execution Process and Behavior:
The robot uses the camera to perceive the pose and spatial height of AprilTag tags, and the window annotates the 3D relative height of each tag in real time;
When a tag with a height exceeding 5 cm (0.05 m) is detected, the robotic arm automatically locates its spatial center and reaches down to grasp it:
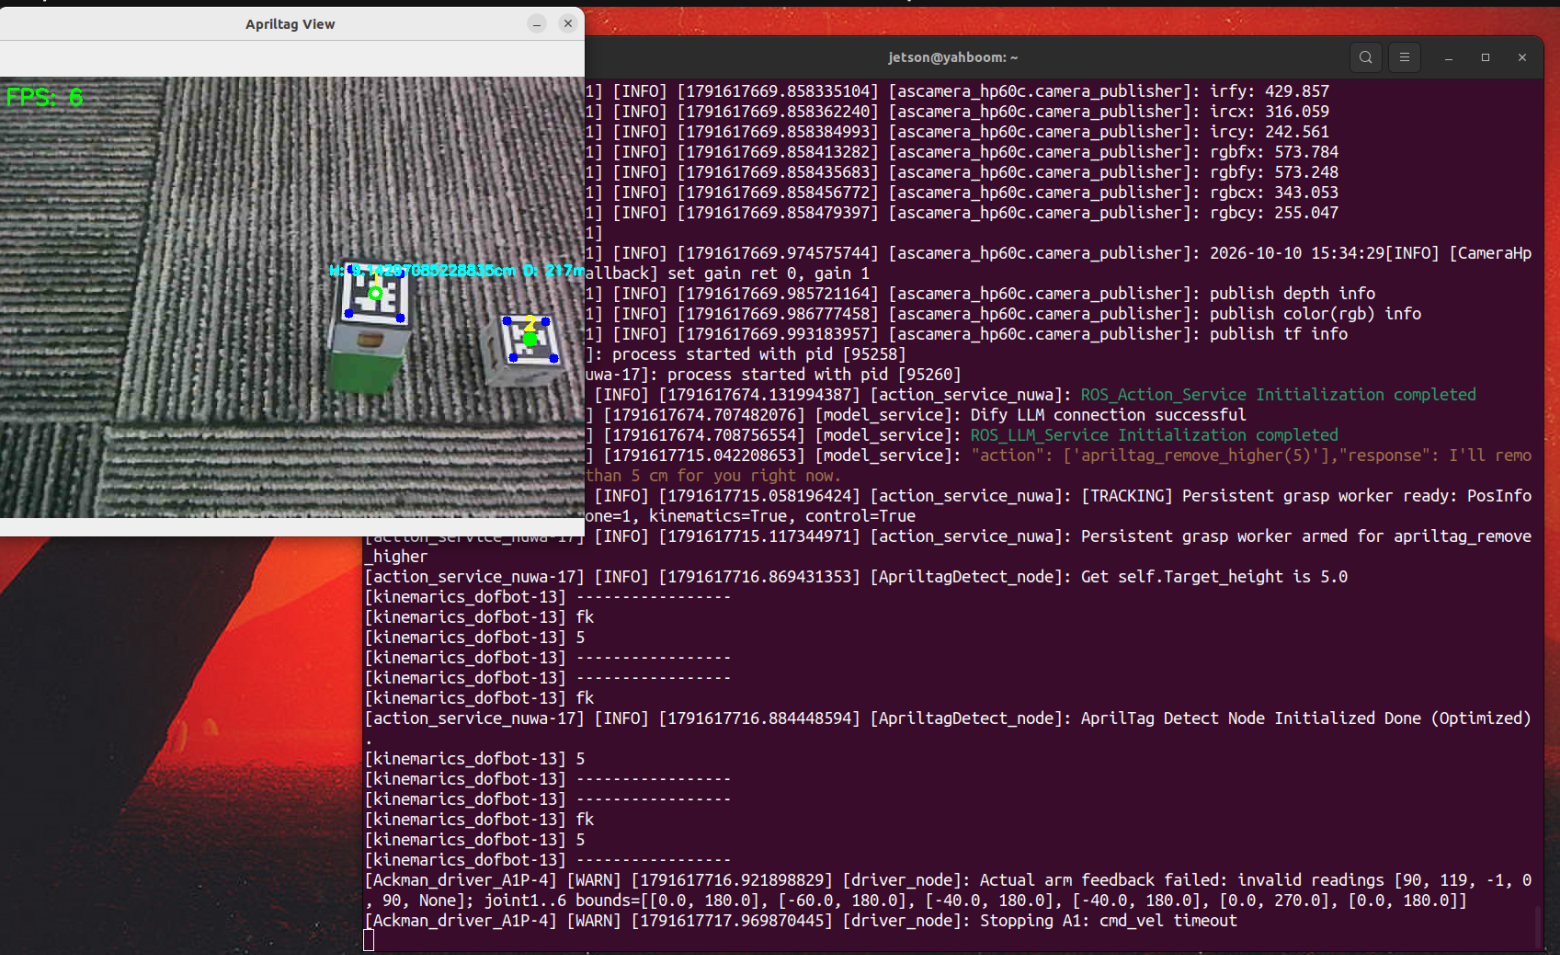
To put it down, you can say "put down the machine code in your hand"

4. Core Source Code Analysis
Source package path:
~/yahboomcar_ros2_ws/yahboomcar_ws/src/multi_brains
For different hardware configurations, the system provides two independent action execution servers and adaptively switches between them via the environment variable CAMERA_TYPE (nuwa or usb):
3D depth camera scheme (default): provided by
action_service_nuwa.py, which uses point clouds and depth maps to achieve back-projection inverse-solution grasping in physical space;USB monocular camera scheme: provided by
action_service_usb.py, which combines Visual Servoing with KCF tracking for closed-loop approach grasping.
4.1 Scheme 1: 3D Depth Camera Spatial Inverse-Solution Grasping (action_service_nuwa.py)
In the depth camera scheme, a pixel grid is overlaid on the image captured by the camera, and the multimodal large model outputs a 2D bounding box [x1, y1, x2, y2]:
In the ActionController.pick() method, the process of solving from 2D pixels to the real physical coordinates of the robotic arm is completed:
xxxxxxxxxxdef pick(self, x1, y1, x2, y2): # 1. Normalize the pixel bounding box to prevent coordinates from going out of bounds x1, y1, x2, y2 = self.normalize_bbox(x1, y1, x2, y2, 640, 480) # 2. Extract the valid foreground distance Z of the target bounding box in the depth map depth = self.get_dist(int((x1 + x2) / 2.0), int((y1 + y2) / 2.0)) # 3. Combined with the camera intrinsics, back-project to a 3D point in the camera coordinate system (cam_x, cam_y, cam_z) point_cam = self.pixel_to_3d_ray(u_c, v_c, depth) # 4. Use the TF transform to convert the camera point to the robotic arm base coordinate system (arm_base_link) point_arm = self.tf_buffer.transform(point_cam, "arm_base_link") # 5. Call the 6-DOF robotic arm inverse kinematics (IK) to solve the target servo angle of each joint target_angles = self.solve_ik(point_arm.point.x, point_arm.point.y, point_arm.point.z) # 6. Safely drive the servo to reach down and close the gripper self.pubSix_Arm(target_angles, runtime=2000) self.pubSingle_Arm(joint_id=6, joint_angle=30, runtime=1000) # Close the gripperSpatial Relative Placement (place)
When the large model understands "place it to the right/left of an object," the decision hub first generates the target placement point (place_x, place_y, place_z) based on the reference target's BBox and the relative direction, and ActionController.place() executes it:
The robotic arm lifts the grasped object to a safe transfer height;
The base rotates to the lateral unloading point of the target direction;
It slowly descends and opens the gripper to release the object;
The robotic arm withdraws to the standby pose, ensuring it does not scrape or bump the placed item.
4.2 Scheme 2: USB Monocular Camera Visual-Servoing Grasping (action_service_usb.py)
A monocular USB camera cannot directly read the 3D physical depth of a pixel. Therefore, action_service_usb.py adopts a closed-loop guided grasping scheme based on Visual Servoing:
xdef grasp_obj(self, x1, y1, x2, y2) -> bool | None: """ Start tracking and grasp the target according to the 640x480 BBox given by the large model """ normalized = self.normalize_bbox(x1, y1, x2, y2) if normalized is None: self.get_logger().error("[BBOX] Failed to normalize the bounding box") return False x1, y1, x2, y2 = normalized self.save_bbox_result(normalized, "grasp_obj")
# Start the visual detection and servo tracking sub-node self.grasp_obj_future = Future() command = [ "ros2", "run", "dofbot_pro_usb_voice", "KCF_detect", "--ros-args", "-p", f"x1:={x1}", "-p", f"y1:={y1}", "-p", f"y2:={y2}", ] return self._run_usb_grasp_action( "grasp_obj", self.grasp_obj_future, command, cancel_after=False, )Closed-loop servoing flow:
After the system receives the object pixel box returned by the large model, it starts the
KCF_detectvisual tracking node to lock onto the target;Under closed-loop visual feedback control, the robotic arm and the robot chassis dynamically fine-tune their pose and distance, keeping the target object centered while approaching the optimal grasping working range of the robotic arm;
Once ranging and alignment converge, the grasping action sequence is triggered to reach down and close the gripper, achieving highly robust grasping with a monocular camera.
Spatial Relative Placement (place)
A monocular USB camera cannot directly read the 3D physical depth of a pixel, so the placement location is an adjustable fixed position:
xxxxxxxxxx~/yahboomcar_ros2_ws/yahboomcar_ws/src/multi_brains/multi_brains/action_service_usb.py
The following are the adjustable left/right placement positions:
xxxxxxxxxxself.right_putsown_joints = [130,20,55,50,90,135] # Robot arm put down right poseself.left_putsown_joints = [30,20,55,50,90,135]
After modifying, you need to compile and then restart the program
xxxxxxxxxxcd ~/yahboomcar_ros2_ws/yahboomcar_wscolcon build --packages-select multi_brains
4.3 Tag Elevation Perception and Sorting (apriltag_remove_higher)
Both schemes support the tag recognition and sorting action apriltag_remove_higher(target_high):
Traverse all detected AprilTag machine-code tags in the field of view;
Extract the vertical height of each tag relative to the reference plane;
When a tag whose height exceeds the set threshold (such as
0.05m) is detected, automatically trigger spatially aligned grasping and move it to the side, realizing intelligent visual elevation sorting.