yahboom
HomeTutorialsProduct
Solution
Blog
Online Store
About Us
EN/中文
Store
ROSMASTER A1 PRO📖
00.Configuration and Operation Guide
  • 0. Unboxing and Review
  • 1.Assembly Videos
  • 2.User Manual
  • 3.Enter Docker (For Raspberry Pi)
  • 4.A1Pro Front Wheel Servo Calibration
  • 5.USB Camera Calibration
  • 6.Depth Camera Calibration
  • 7.FAQ
  • 8.Desktop Configuration Center and Remote Control Guide
01.Chassis Control Course
  • 1.Robot Information Publishing
  • 2.Robot Handle Control
  • 3.Robot Keyboard Control
  • 4.Linear Velocity Calibration
  • 5.Angular Velocity Calibration
  • 6.Robot URDF Model
  • 7.Robot EKF State Estimation
02.Lidar Course
  • 1.Lidar Introduction and Use
  • 2.Lidar Obstacle Avoidance
  • 3.Lidar Following
  • 4.Lidar Patrol
  • 5.GMapping-SLAM Mapping
  • 6.Cartographer-SLAM Mapping
  • 7.Slam-Toolbox Mapping
  • 8.Lifelong Mode Mapping
  • 9.Navigation2 Single Point Navigation
  • 10.Navigation2 Multi Point Navigation
  • 11.Cartographer Relocalization Navigation
  • 12.Slam-Toolbox Localization Navigation
  • 13.Synchronous Mapping And Navigation
  • 14.Aruco Visual Relocalization Navigation
  • 15.Mobile App Mapping And Navigation
  • 16.AprilTag Transport
  • 17.Color Block Transport
03.USB Camera-Depth Camera Course
  • 1.USB Camera Introduction
  • 2.USB Camera Intrinsic Calibration
  • 3.Nuwa-HP60C Camera Introduction (Depth Camera Only)
  • 4.Depth Camera Distance Measurement (Depth Camera Only)
  • 5.Depth Pseudo Color Image (Depth Camera Only)
  • 6.Block Volume Calculation (Depth Camera Only)
  • 7.Edge Detection (Depth Camera Only)
  • 8.RTAB-Map SLAM Mapping (Depth Camera Only)
  • 9.RTAB-Map Navigation (Depth Camera Only)
04.Robotic Arm and 3D Space Gripping Course
  • 0.Robotic Arm Basic Usage
  • 1.Robotic Arm Kinematics
  • 2.Robotic Arm Chassis Coordination Control
  • 3.AprilTag ID Sorting
  • 4.AprilTag Height Anomaly Sorting
  • 5.AprilTag Tracking and Grasping
  • 6.Color Block Sorting
  • 7.Color Block Height Anomaly Sorting
  • 8.Color Block Tracking and Grasping
  • 9.Wood Block Shape Sorting
  • 10.KCF Tracking and Grasping Objects
  • 11.Mediapipe Gesture ID Sorting AprilTag
  • 12.Mediapipe Gesture Height Sorting AprilTag
  • 13.Desktop Tracking and Grasping AprilTag
  • 14.3D Spatial Tracking AprilTag
  • 15.Line Following Obstacle Clearing
  • 16.Transformer Model Tracking Algorithm
05.Road Network Planning and Navigation
  • 1.Introduction To Road Network Planning
  • 2.Road Network Annotation
  • 3.Planning And Navigation Between Waypoints
  • 4.Road Network Navigation In Any Pose
  • 5.Path Re-planning
06.OpenClaw Basic Course
  • 1.Introduction to OpenClaw
  • 2.OpenClaw Core Concepts
  • 3.OpenClaw API-KEY Configuration
  • 4.OpenClaw Switch Models
  • 5.OpenClaw System Prompt Words
  • 6.OpenClaw Common CLI Commands
07.OpenClaw Interaction Method
  • 1.OpenClaw Webchat Interaction
  • 2.OpenClaw Tui Interaction
  • 3.OpenClaw Voice Dialogue Interaction
  • 4.OpenClaw WhatsApp Interaction
08.OpenClaw Development
  • 1.OpenClaw Connecting to Robot MCP Service
  • 2.Robot CLI Command Tool
  • 3.robot-control plugin tool
  • 4.reply-bridge plugin tool
  • 5.OpenClaw Multimodal Vision
  • 6.OpenClaw Chassis Control
  • 7.OpenClaw Robotic Arm Control
  • 8.OpenClaw Skills Development
  • 9.OpenClaw Scheduled Tasks
  • 10.OpenClaw Multi-Agent Intelligent Agent
  • 11.OpenClaw Active Interaction
  • 12.OpenClaw Vector Memory
09.OpenClaw Embodied Intelligent Application
  • 1.OpenClaw Target Tracking
  • 2.OpenClaw Arm Tracking And Grasping
  • 3.OpenClaw Arm Fixed-point Placement
  • 4.OpenClaw Waste Sorting
  • 5.OpenClaw SLAM Mapping And Navigation
  • 6.OpenClaw Navigation Transport
  • 7.OpenClaw AprilTag Grasping
  • 8.OpenClaw Color Line Patrol
  • 9.OpenClaw Visual Distance Measurement
10.OpenClaw Scenario Sandbox
  • 1.Map Description and Prop Placement
  • 2.Build Sand Table Map
  • 3.Visual Relocation Markers
  • 4.Map Mapping Markers
  • 5.OpenClaw Scenario Sandbox Comprehensive Case
11.AI Model Basics
  • 1.AI Large Model Types and Principles
  • 2.RAG Retrieval Enhancement and Model Training Samples
  • 3.Embodied Intelligent Robot System Architecture
  • 4.Embodied Intelligent Functions Core Source Code
12.AI Model Development
  • 1.Register a Model Service Provider Aaccount
  • 2.Configuring API-KEY
  • 3.Introduction to Dify
  • 4.Basic Dify Features
  • 5.AI Large Model Development - chatbot
  • 6.Deploy the RAG Knowledge Base
  • 7.RAG Knowledge Base + chatbot
  • 8.AI Agent Workflow
  • 9.Custom Wake-up Response
13.AI Model - Text Version
  • 1.Semantic Understand and Command Follow
  • 2.Multimodal Visual Understand
  • 3.Multimodal Visual Understand + Robotic Arm Gripping
  • 4.Multimodal Visual Understand+SLAM Navigation
  • 5.Robotic Arm Gripping+Multimodal Visual Understand+SLAM Navigation
  • 6.Intention Estimation
14.AI Model - Voice Version
  • 1.Semantic Understand and Command Follow
  • 2.Multimodal Visual Understand
  • 3. Multimodal Large Model+Robotic Arm Gripping
  • 4.Multimodal Visual Understand+SLAM Navigation
  • 5.Robotic Arm Gripping+Multimodal Visual Understand+SLAM Navigation
  • 6.Intention Estimation
15.Mediapipe Visual Course
  • 1.Hand Detection
  • 2.Posture Detection
  • 3.Overall Detection
  • 4.Facial Landmark Detection
  • 5.Face Detection
  • 6.Face Special Effects
  • 7.3D Object Recognition
  • 8.Brush
  • 9.Finger Control
  • 10.Palm Target Positioning
  • 11.Fingertip Trajectory Recognition
  • 12.Fingertip Gesture Control Cobotic Arm
  • 13.Gesture Grabbing and Releasing Objects
  • 14.Finger Control Robotic Arm
  • 15.Medipipe Gesture Control Robotic arm Cction Group
16.MoveIt2 Simulation Course
  • 1.MovelT2 Configuration
  • 2.MovelT2 Simulation-Reality Linkage
  • 3.Random Movement
  • 4.Forward Kinematics Design
  • 5.Inverse Kinematics Design
  • 6.Cartesian Path
  • 7.Scene Design
  • 8.Trajectory Planning
  • 9.Collision Detection
  • 10.3D Perception Obstacle‑Avoidance
17.Multi-vehicle Course
  • 1.Multi-vehicle Control
  • 2.Multi-vehicle Navigation
  • 3.Multi-vehicle Formation
18.YOLO26 Development
  • 1.CLI Use
  • 2.Object Detection
  • 3.Instance Segmentation
  • 4.Pose Estimation
  • 5.Image Classification
  • 6.Oriented Object Detection
  • 7.YOLOv26 + DeepSORT Tracking
  • 8.Monocular Depth Estimation
19.Control Board STM32 Driver Course
  • 0.Notes (Must Read)
  • 1.About Expansion Board
  • 2.STM32 Development Environment
  • 3.Button Control
  • 4.FreeRTOS Application
  • 5.Serial Communication
  • 6.SBUS Model Aircraft Remote Control
  • 7.CAN Bus Communication
  • 8.RGB Colorful Light Bar
  • 9.Timer Interrupt to Control PWM Servo
  • 10.Control Serial Port Servos
  • 11.Nine-axis Attitude Sensor to Obtain Data
  • 12.Control Motor
  • 13.Timer Captures the Encoder Data
  • 14.1 Kinematic Analysis of Mecanum Wheel
  • 14.2 Kinematic Analysis of Ackerman
  • 14.3 Kinematic Analysis of 4WD
  • 15.PID Control Robot Movement
20.Docker Course
  • 1.Docker Introduction and Installation
  • 2.Docker Basic Commands
  • 3.Docker Submission and Multi-Terminal Access
  • 4. Docker Startup Script
  • 5.Docker-Vscode Environment Construction
21.Image Processing Basics Course
  • 1. Introduction to Open Source CV
  • 2. Image reading and display
  • 3. Image writing
  • 4. Image quality
  • 5. Pixel Operation
  • 6. Image zoom
  • 7. Image cutting
  • 8. Image translation
  • 9. Image Mirroring
  • 10. Affine Transformation
  • 11. Image Rotation
  • 12. Perspective Transformation
  • 13. Grayscale processing
  • 14. Image Binarization
  • 15. Edge Detection
  • 16. Line drawing
  • 17. Rectangle and circle drawing
  • 18. Drawing text and pictures
22.Linux System Course
  • 1.Introduction to Linux system
  • 2.Ubuntu file system
  • 3.Ubuntu common commands
  • 4.Ubuntu common editors
  • 5.Ubuntu software operation commands
  • 6.Virtual machine installation
  • 7.SSH remote control
  • 8.VNC remote control
  • 9.Transfer files remotely
  • 10.Driver library and communication
  • 11.Static IP and hotspot mode
  • 12.Bind device ID
  • 13.Capacity expansion and resource allocation
  • 14.Update system software sources
  • 15.Set root user password
  • 16.sudo free password
  • 17.Connect to WiFi network
  • 18.View system version
  • 19.Customized service management
  • 20.Back up system image
23.ROS2 Basic Course
  • 1.Introduction to ROS2
  • 2.ROS2 install Humble
  • 3.ROS2 development environment
  • 4.ROS2 workspace
  • 5.ROS2 function package
  • 6.ROS2 node
  • 7.ROS2 topic communication
  • 8.ROS2 service communication
  • 9.ROS2 action communication
  • 10.ROS2 custom interface message
  • 11.ROS2 parameter service case
  • 12.ROS2 meta-function package
  • 13.ROS2 distributed communication
  • 14.ROS2 DDS
  • 15.ROS2 time related API
  • 16.ROS2 common command tools
  • 17.ROS2 rviz2 use
  • 18.ROS2 rqt toolbox
  • 19.ROS2 Launch startup file configuration
  • 20.ROS2 recording and playback tool
  • 21.ROS2 URDF model
  • 22.ROS2 Gazebo simulation platform
  • 23.ROS2 TF2 coordinate transformation
24.Main Control Course
Jetson Orin Nano_NX
  • 1.Jetson Orin board introduction
  • 2.Restore the factory image system
  • 3.Backup SSD system
  • 4.SSD expansion
  • 5.Network configuration
  • 6.SSH remote login
  • 7.VNC remote control
  • 8.Remote file transfer
  • 9.Jtop tool
  • 10.Exchange space expansion
Raspberry Pi
  • 1. Introduction to Raspberry PI 5
  • 2. Raspberry PI system installation and backup
  • 3. Powering the Raspberry PI 5
  • 4. Startup of Raspberry PI 5
  • 5. Update and upgrade operating system
  • 6. Introduction to raspi-config tool
  • 7. config.txt file description
  • 8. Network Configuration
  • 9. remote access
  • 10. Transfer files remotely
  • 11. Set display resolution and rotation
  • 12. Set screen to sleep
  • 13. Play audio and video
  • 14. Using USB camera
  • 15. Using MIPI camera
  • 16. Get real-time temperature of Raspberry Pi
RDKX5
  • 1.Introduction to RDK X5 board
  • 2.Write system file
  • 3.Hardware interface description
  • 4.Install case and other accessories
  • 5.Network configuration
  • 6.Remote login
  • 7.Update system
  • 8.srpi-config user guide
  • 9.config. txt configuration file
  • 10.Self-startup setting
  • 11.RDK exclusive command usage
  • 12.Linux command usage
  • 13.GPIO readwrite operation
  • 14.Image classification algorithm
  • 15.Use USB camera
  • 16.Use MIPI camera
  • 17.Binocular camera depth algorithm
  • 18. Controlling RGB Cooling Fans
Download
  • SystemFile
  • Code
  • 3D_Model_File
  • Software_Tools
  • Hardware_Info
  • Introduction_Manual
  • Script_File
  • Dify AI Agent
Download ZIP

Welcome to ROSMASTER A1 PRO repository

3.Visual Relocation Markers

Visual Relocation Markers

1. Course Content

Course Overview

In robot autonomous navigation, LiDAR (Light Detection and Ranging) localization is extremely precise, but in the following typical industrial scenarios, it is prone to "localization degradation and drift":

  1. Long straight corridors and symmetric shelf passages: Both sides are completely featureless columns with identical characteristics - LiDAR "looks the same everywhere". When the chassis wheels experience slight slipping, the cart has difficulty determining whether it moved forward 1 meter or 1.2 meters;

  2. Human traffic and dynamic obstacle occlusion: When LiDAR's field of view is largely blocked by surrounding obstacles, scan matching scores drop sharply;

  3. Long-term operation cumulative error: After running for tens of minutes, tiny wheel speed integral errors may accumulate to 5-10 cm, causing the robotic arm to miss objects during grasping operations.

The cart introduces an industrial-grade multi-sensor fusion architecture of "LiDAR localization as primary + visual tag codes (AprilTag/ArUco) global repositioning redundant calibration".

Learning Objectives

  1. Deeply understand the geometric calculation principle of AprilTag / ArUco tags in robot visual repositioning.

  2. Master the process of graphically checking in and recording tag code global coordinates using apriltag_global_recorder.launch.py tool.

  3. Master the data structure of aritag_relocation.yaml configuration file and on-site tag size parameter tuning.


2. Preparation

2.1 Map and Route Network Preparation

Please ensure you have completed the sandbox environment grid map and pose graph construction according to the previous lesson [Build Sand Table Map], and planned the basic driving route network.

2.2 AprilTag Tag Size Confirmation and Parameter Configuration

  • The standard sandbox map tag codes included in the kit (usually 36h11 tag family), have a factory-calibrated actual physical black frame outer edge length of 0.048 meters (4.8 cm):

  • Core parameter configuration file path:

~/yahboomcar_ros2_ws/dofbot_pro_ws/src/dofbot_pro_bringup/config/common.yaml
  • Confirm the actual physical size tag_size of the tag in the parameter file:

xxxxxxxxxx
...
apriltag:                 # Tag detection node configuration
  ros__parameters:
    image_transport: raw  # Image format
    family: 36h11         # Tag family (default is tag36h11)
    size: 0.048           # Tag black outer frame actual physical edge length, unit: meters
...

Important
If you print your own tag paper, please measure the black frame outer edge length with a ruler and accurately fill in the real meter value (for example, 5cm fill 0.050) into size, otherwise spatial ranging inverse solution will have proportional scaling deviation.


3. Deploy ArUco Tag Codes in Sandbox Map

  • Deployment Principle: Tag codes should be pasted at positions where the onboard camera can clearly see the front or at a large angle when the robot navigates into a workstation (for example, shelf front columns, operation table side panels, or wall edges, recommended height 15-25 cm from ground).

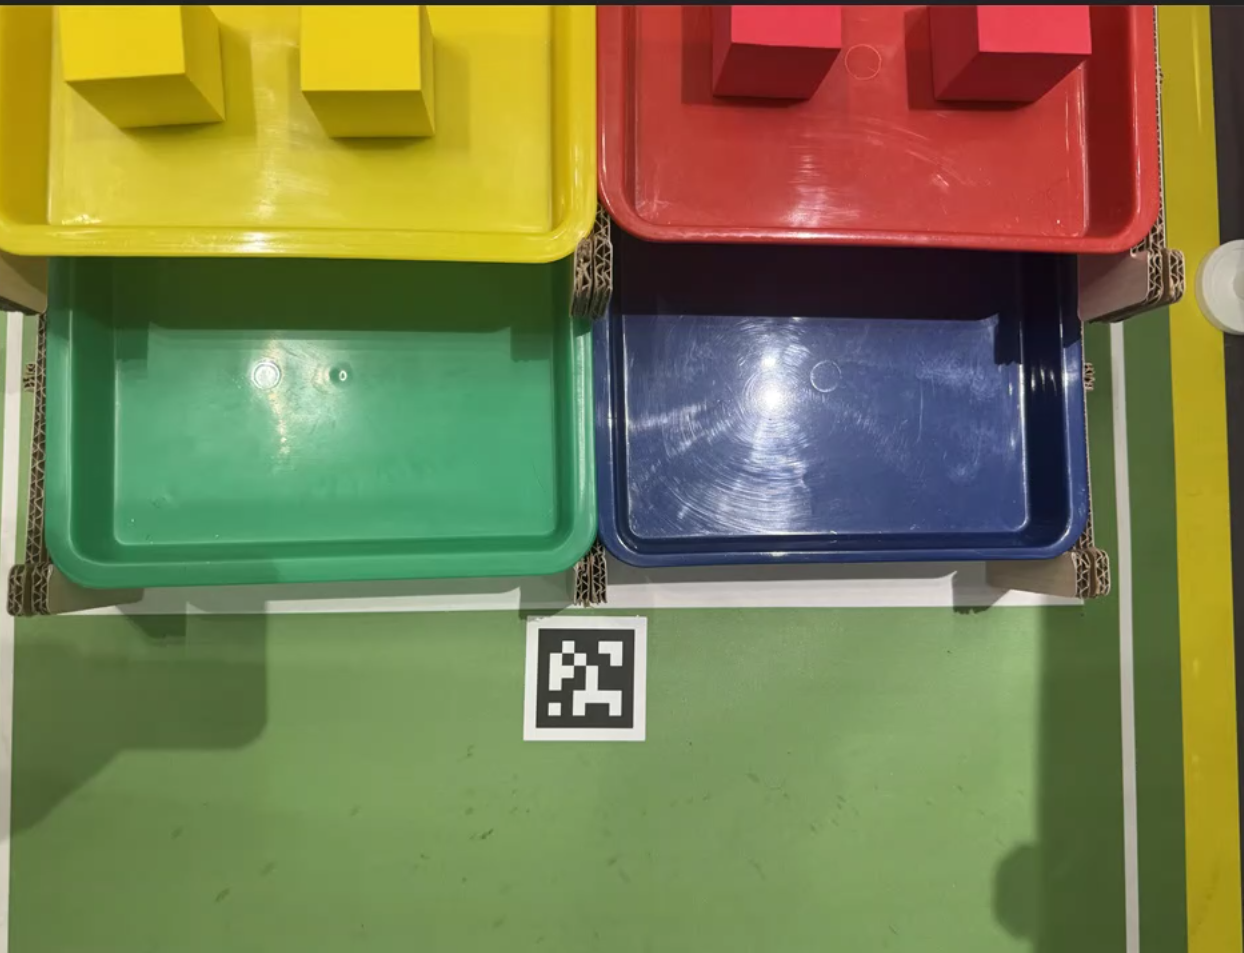
  • Recommended sandbox tag deployment reference positions are as follows:
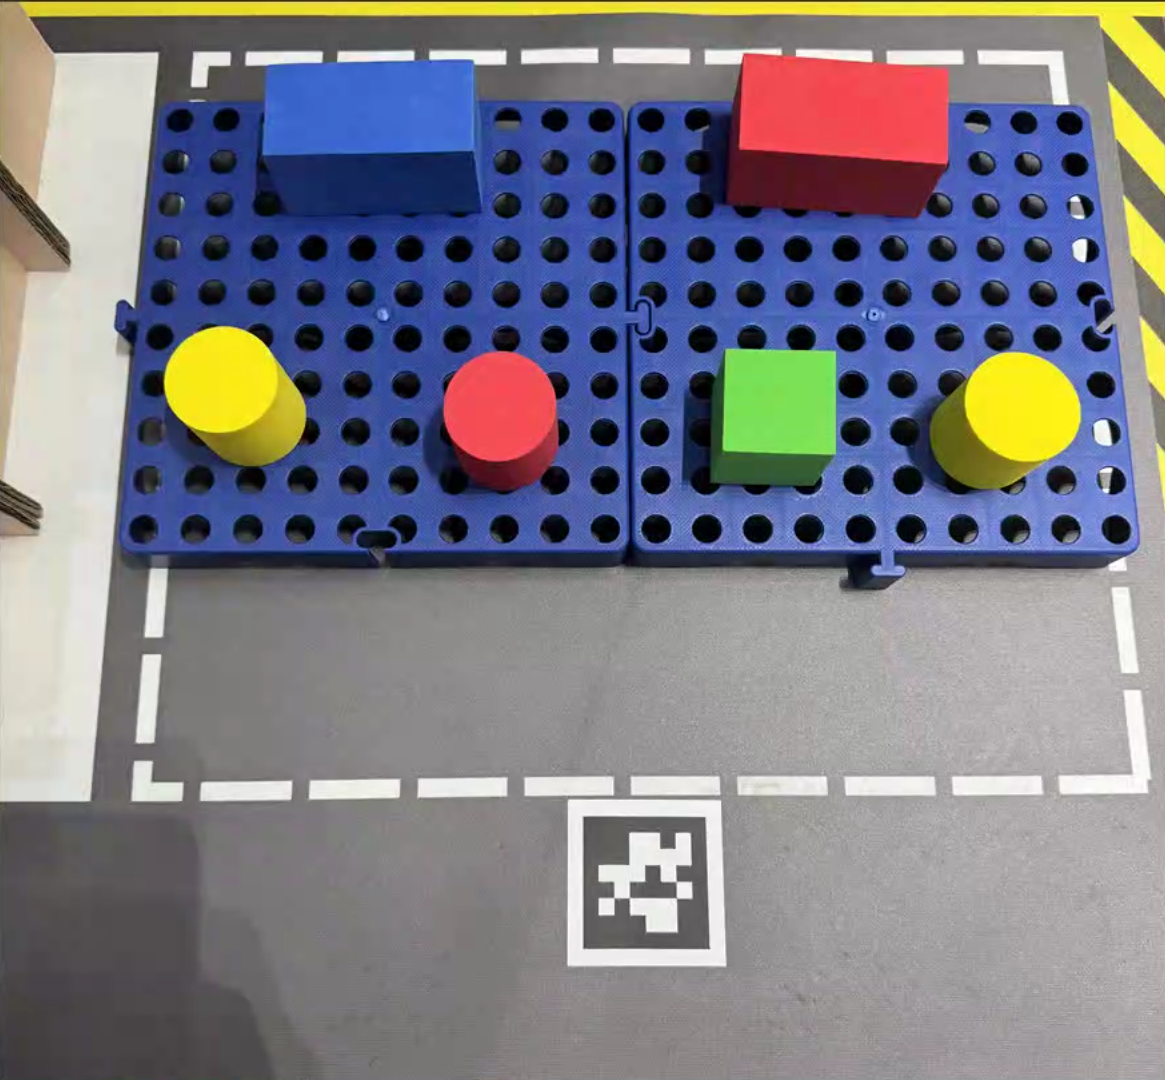
image-20260907113724977

image-20260907113706384

Important

  • The visual repositioning mechanism is automatically triggered when the cart approaches the target workstation. If the tag code is seen in the camera's field of view upon arrival, the system immediately starts global repositioning to accurately position the cart; if the tag code is not seen due to angle issues, the system automatically falls back to using laser odometry for PreciseAdjustPosition fine-tuning, the two are mutually redundant.


3. Preparation and Execution (Phase 1: Record Tag Code Global Positions)

Before formally using visual repositioning, you need to record and save the global coordinates of the tag codes arranged on the wall or ground in a high-precision LiDAR localization environment.

This phase requires starting the following nodes in sequence:

3.1 Start Chassis and Sensors

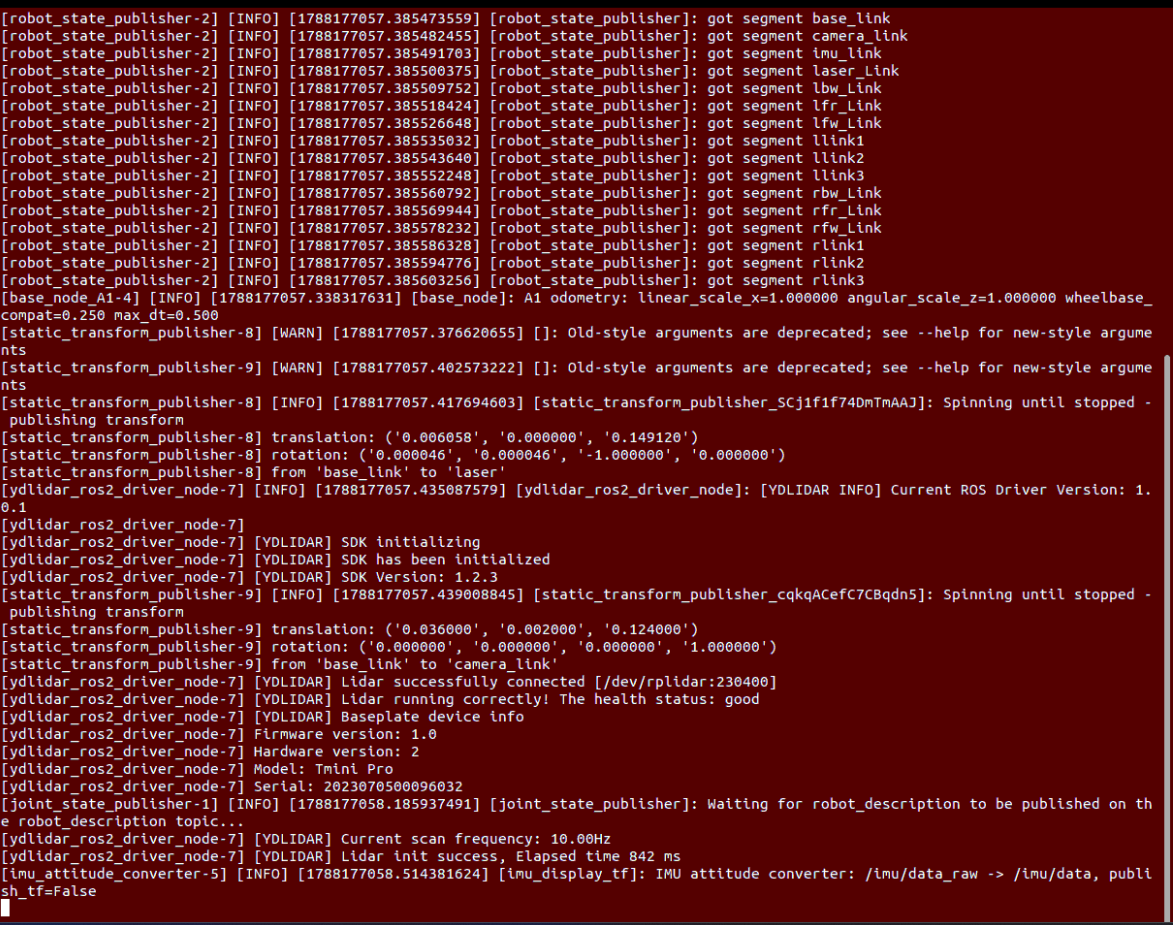
Run in Terminal 1 (start chassis drive, LiDAR, and RGB depth camera):

xxxxxxxxxx
ros2 launch yahboomcar_nav laser_bringup_launch.py
3.2 Start RViz Navigation Visualization

Run in Terminal 2 (recommended to open RViz on the virtual machine side when virtual machine and cart are on the same LAN):

xxxxxxxxxx
ros2 launch yahboomcar_nav display_nav_launch.py
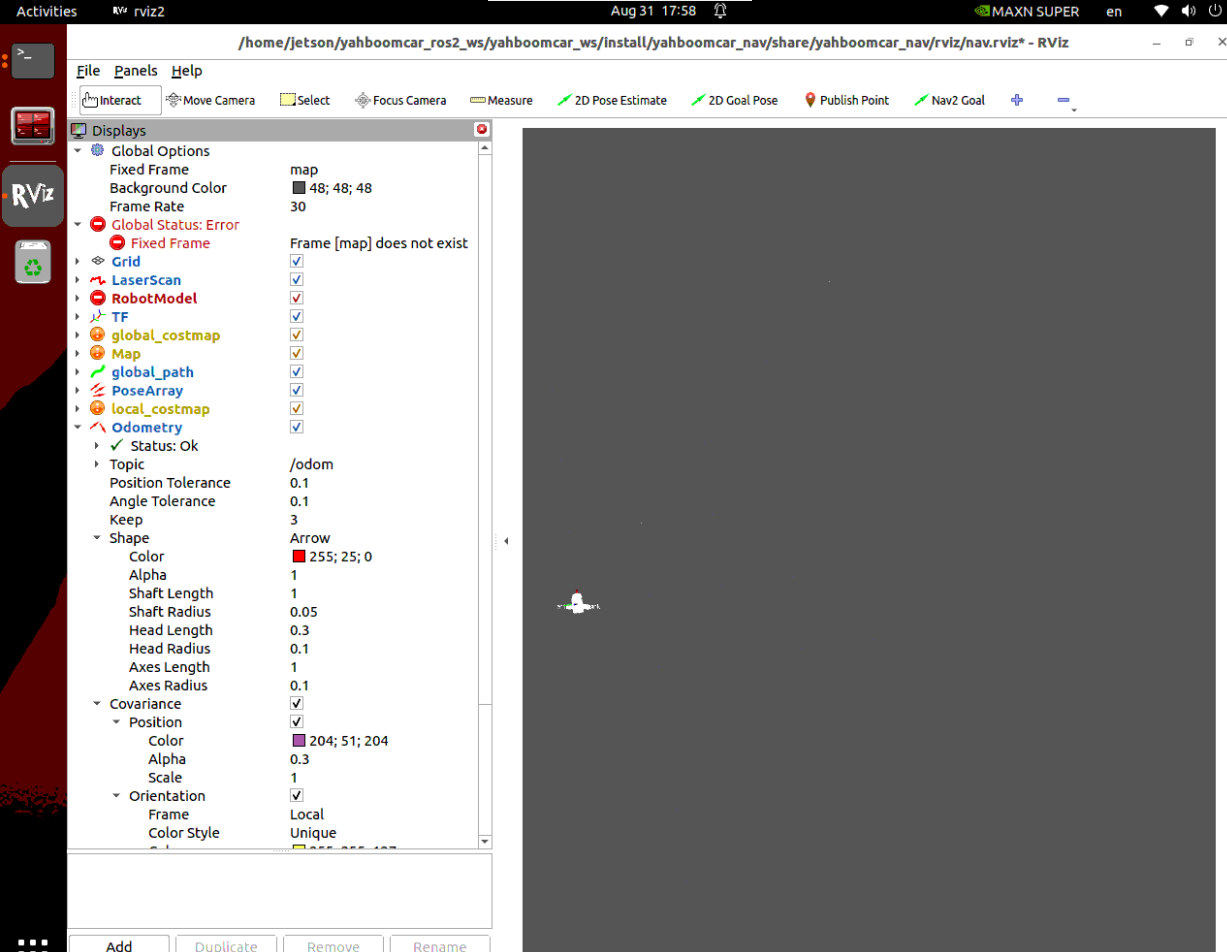
image-20260831175851580

3.3 Start Cartographer Pure Localization Node

Load .pbstream pose graph in Terminal 3 to start pure localization core:

xxxxxxxxxx
ros2 launch yahboomcar_nav localization_imu_odom.launch.py use_rviz:=false load_state_filename:=$HOME/map/map.pbstream

3.4 Start Nav2 Navigation Controller

Start navigation controller in Terminal 4 (load corresponding static grid map):

xxxxxxxxxx
ros2 launch yahboomcar_nav navigation_cartodwb_launch.py maps:=$HOME/map/map.yaml

Tip
After pure localization starts, if in a low-feature area, you can use the 2D Pose Estimate tool in the RViz top toolbar to assist in aligning the initial pose: image-20260907114045648
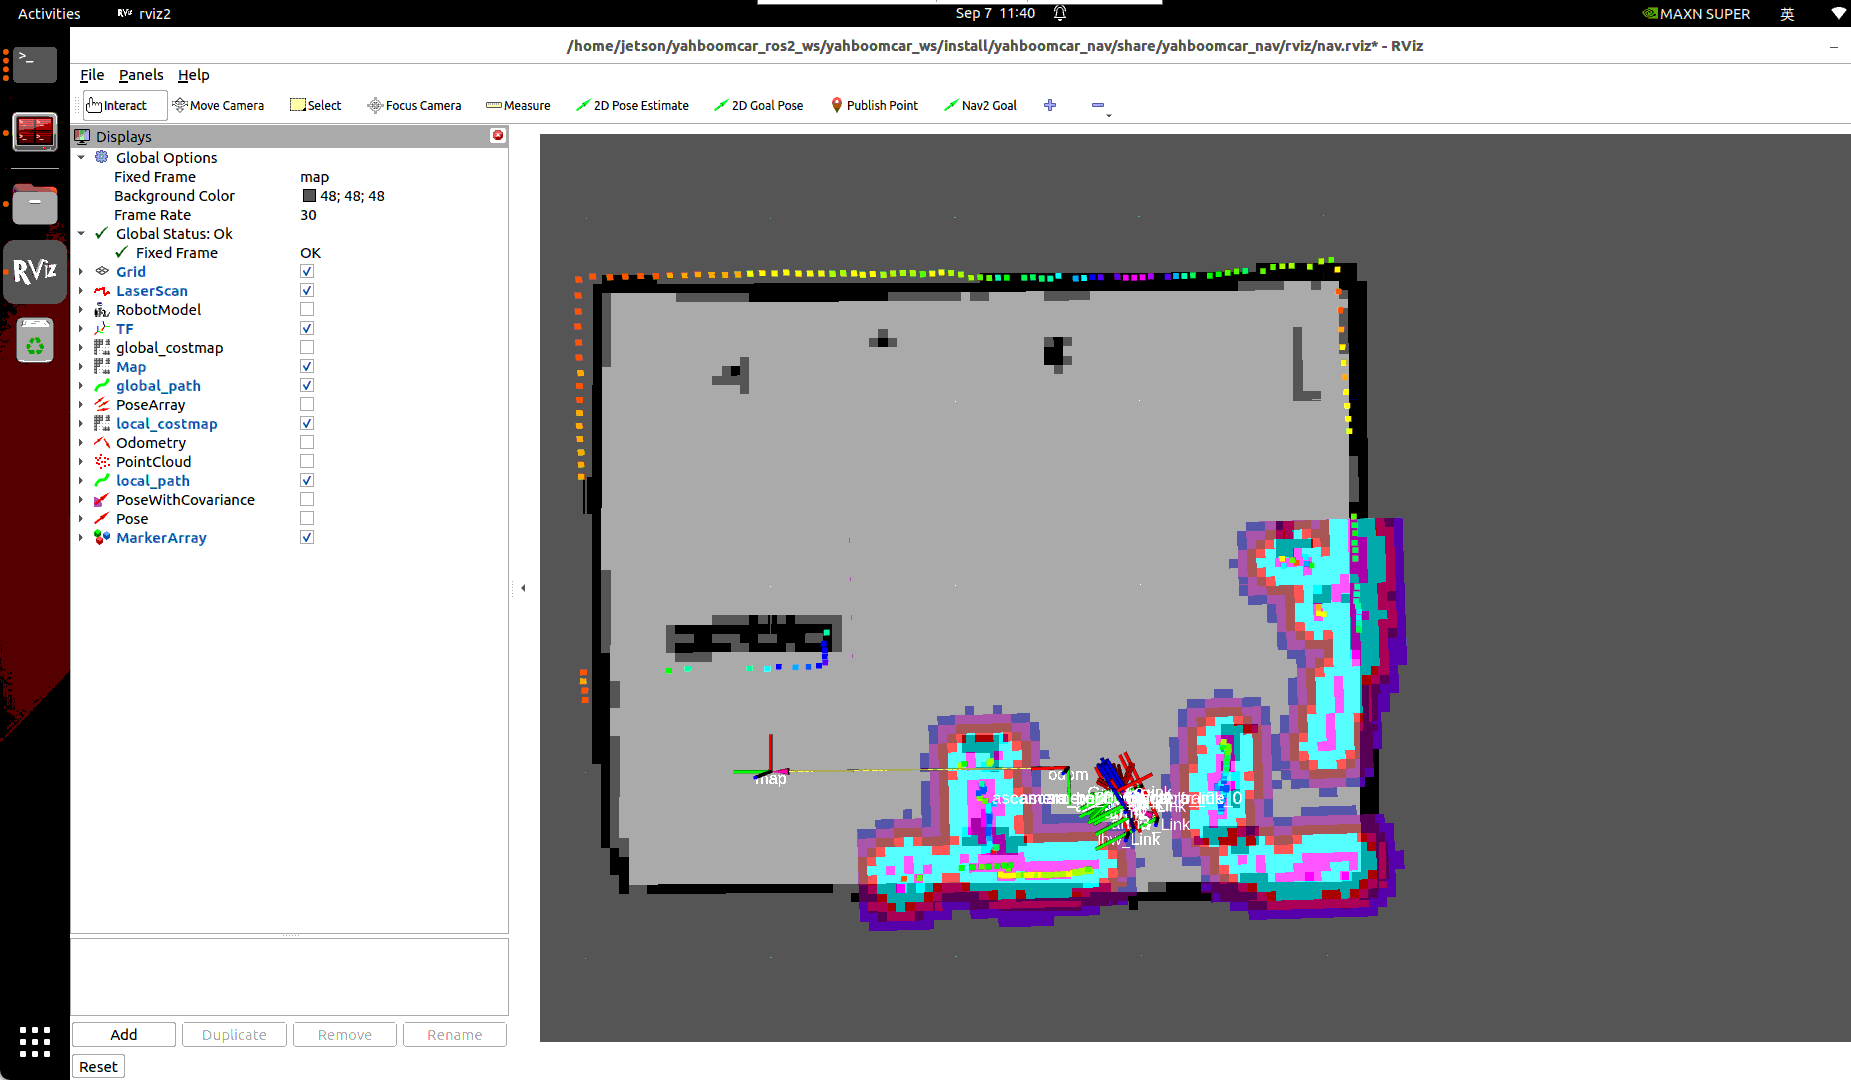
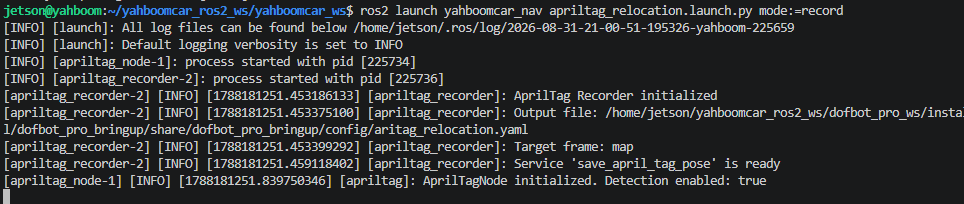
3.5 Start AprilTag Recording Mode

Run in Terminal 5 (start detection node and pose recorder):

xxxxxxxxxx
ros2 launch yahboomcar_nav apriltag_relocation.launch.py mode:=record
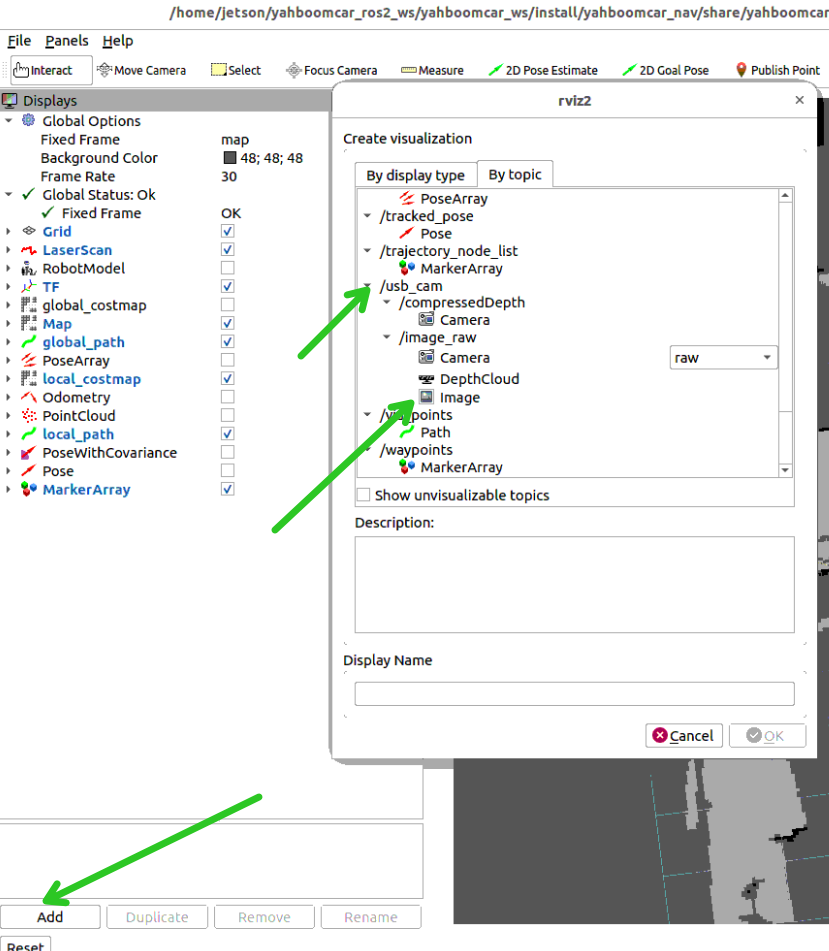
  1. Click Add in the bottom-left corner of RViz2 interface, select By topic $\rightarrow$ /apriltag/image_rect to add Image plugin for real-time camera detection view:
  2. Remotely control the cart to drive to the front of the tag code, ensure the camera image clearly shows the tag code with 3D coordinate axes and green detection box:
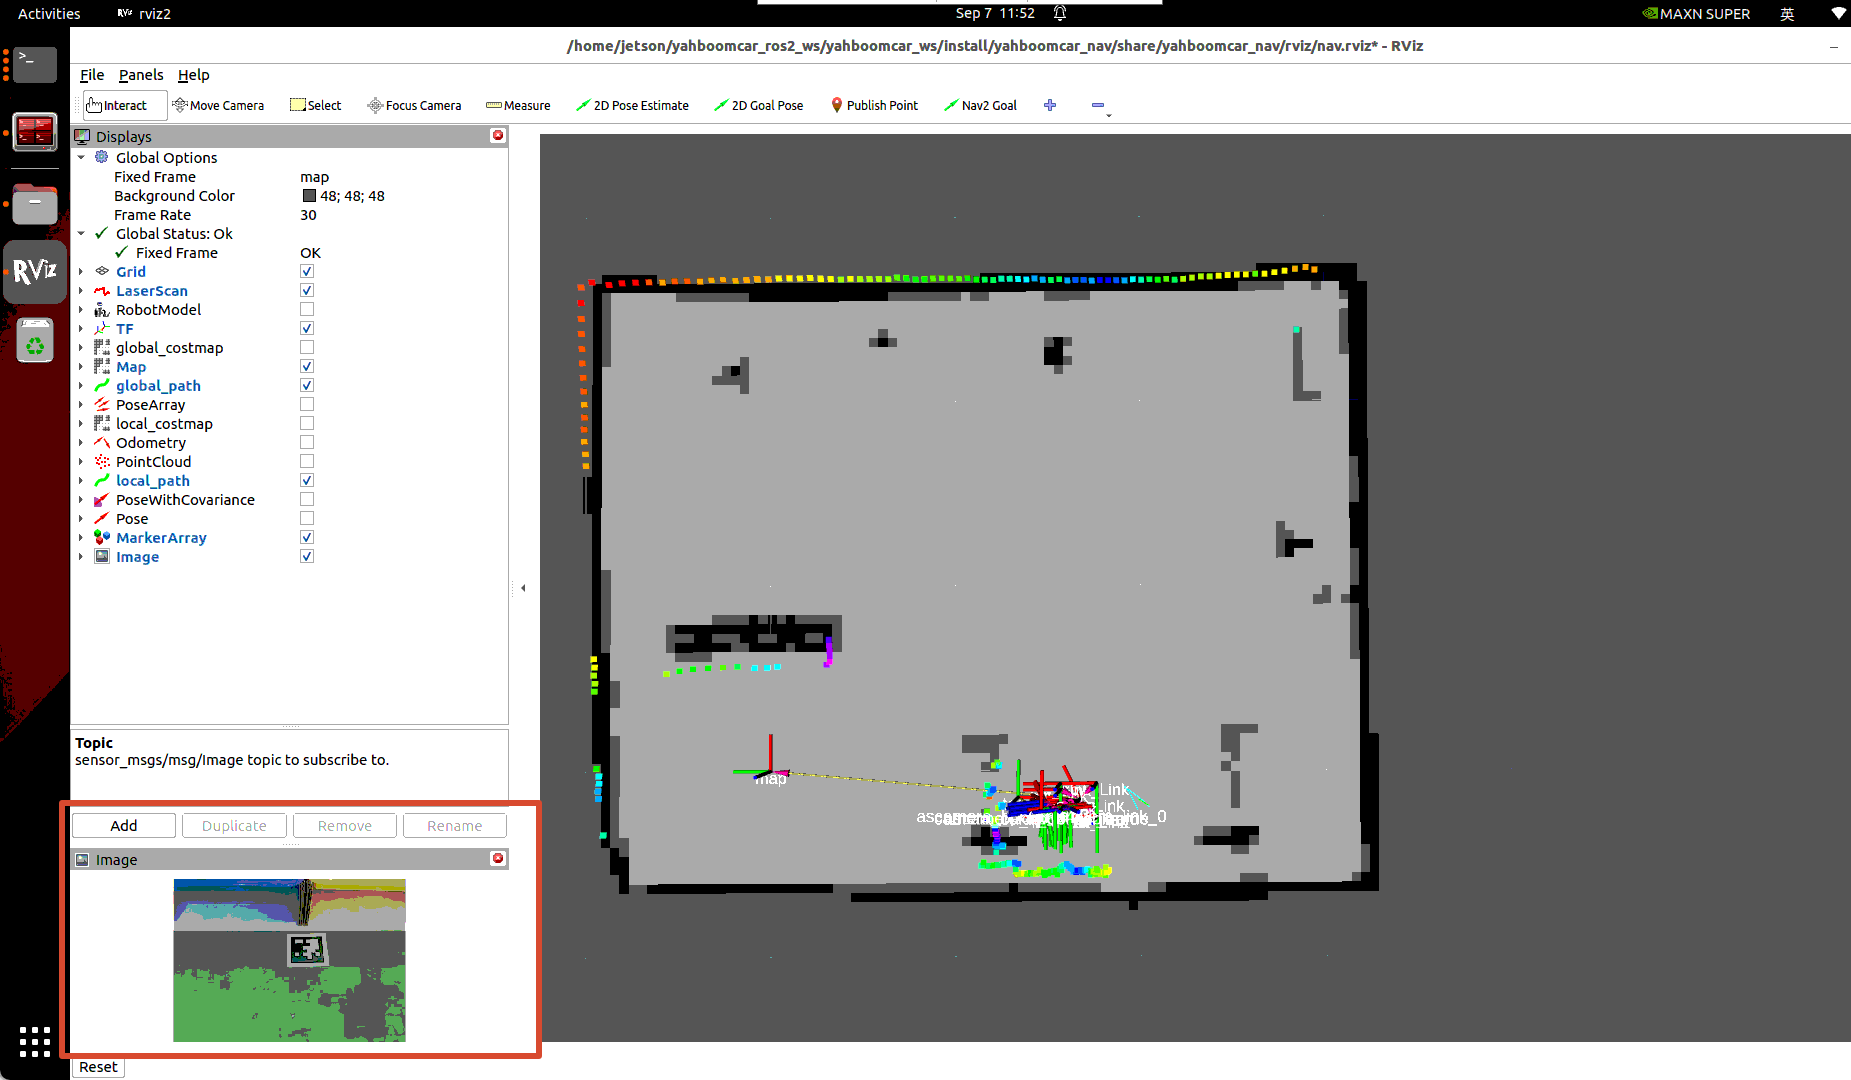
    image-20260907115215307

3.6 View Tag ID and Record Pose

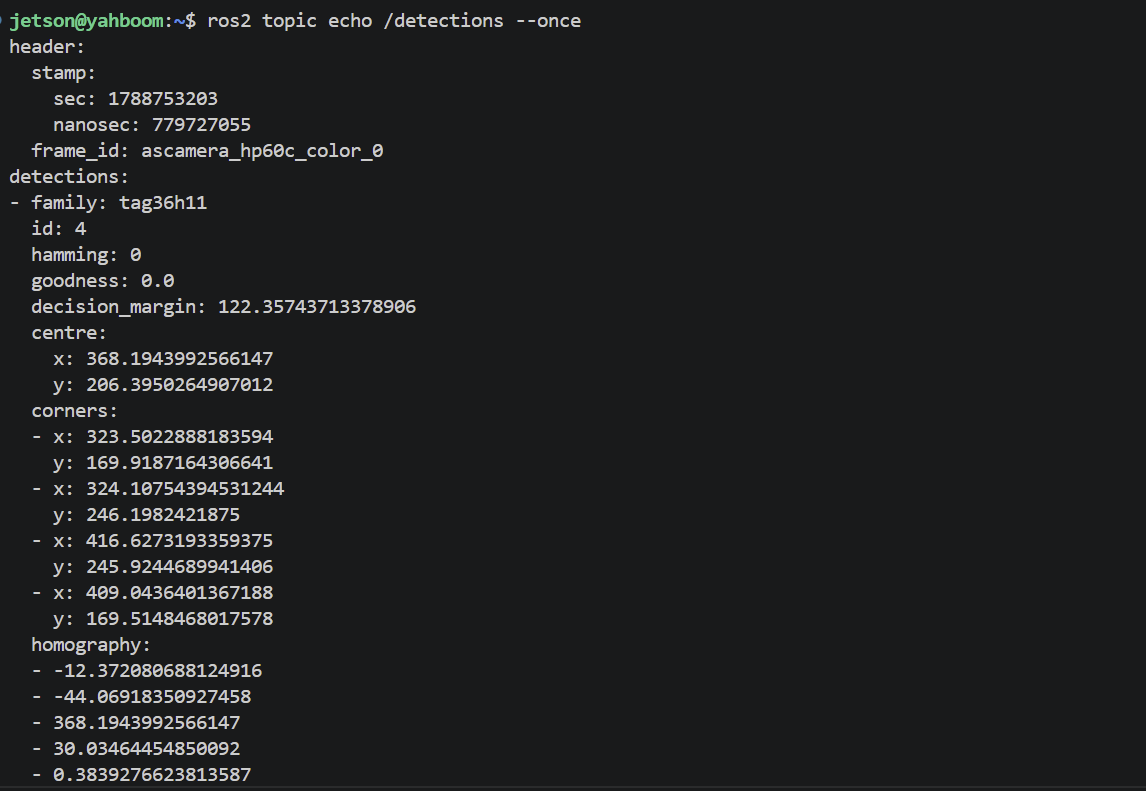
View currently detected tag ID in Terminal 6:

xxxxxxxxxx
ros2 topic echo /detections --once

image-20260907115336475

After confirming the detected ID (for example, ID is 4), call the service to persistently write the tag's global coordinates in the map to the configuration file:

xxxxxxxxxx
ros2 service call /save_april_tag_pose apriltag_localization/srv/SaveAprilTagPose "{tag_id: 4}"

image-20260907115358338

Note
After successful recording, the system writes the tag's precise pose in the map coordinate system to aritag_relocation.yaml. If there are multiple tag codes, remotely control the cart to each tag in sequence and call the above service.

Build Sand Table Map
Map Mapping Markers

COMPANY

  • About us
  • Team Style
  • Blog

LEARNING & EXPLORATION

  • Tutorials
  • Edge AI hardware
  • Educational robots
  • Embedded intelligent hardware

WHERE TO BUY

  • Yahboom Online Store
  • Amazon
  • Alibaba
  • AliExpress
  • Mercado

TECHNOLOGY SUPPORT

  • Email: support@yahboom.com

BE A DISTRIBUTOR

  • Email: sales@yahboom.com
QR Code

Copyright © 2017-2026 Yahboom. All Rights Reserved.

EN/中文