Welcome to ROSMASTER A1 PRO repository
2.Multi-vehicle Navigation
Multi-Vehicle Navigation
Preface: In multi-robot autonomous cooperative operation scenarios, multiple vehicles need to independently perform self-localization, costmap maintenance, and local dynamic obstacle avoidance planning under a shared global map. This course uses two vehicles (robot1 and robot2) as an example. Through namespaces, the sensor topics, TF tree, and Nav2 navigation stack are isolated independently, demonstrating the complete workflow in which the two vehicles share one global map and navigate independently to designated goal points.
1. Program Description
This feature assigns different navigation goal points to the two vehicles in RViz2. Based on the unified global map and their respective AMCL Monte Carlo localization, the two vehicles autonomously plan globally optimal paths. During driving, they use LiDAR to detect unknown obstacles and the other vehicle in real time, avoid them, and finally reach their designated goals safely.
1.1 Functional and Network Requirements
- Same Local Area Network Configuration: Both vehicles and the control terminal (virtual machine/PC) running RViz must be on the same Wi-Fi LAN;
- Same ROS_DOMAIN_ID: The
ROS_DOMAIN_IDof the primary vehicle, follower vehicles, and the control computer must be consistent (the default is usually 61);
1.2 Map File Preparation
Multi-vehicle navigation relies on a pre-built 2D grid map (including the .yaml description file and the .pgm image file). The map files must be placed in the following default path on the control terminal or the vehicles:
~/yahboomcar_ros2_ws/yahboomcar_ws/src/yahboomcar_nav/maps/map.yaml~/yahboomcar_ros2_ws/yahboomcar_ws/src/yahboomcar_nav/maps/map.pgm
[!IMPORTANT] Map Service Note: The global map service (
map_server) only needs to be started once on the virtual machine or control computer. Broadcasting the global/maptopic makes it available to all vehicles on the LAN; the two vehicles themselves do not need to start a map node again.
2. Program Startup Steps
It is recommended to place the two vehicles in the approximate starting area corresponding to the map. To ensure smooth navigation computation, the map service, visualization, and multi-vehicle AMCL/Nav2 nodes are recommended to run on the control computer (or virtual machine) configured with multi-device communication.
2.1 Step 1: Start the Chassis and LiDAR on Both Vehicles
Run the following command in the terminal of robot1:
xxxxxxxxxxros2 launch yahboomcar_multi A1p_laser_bringup_multi_launch.xml robot_name:=robot1After successful startup, the terminal prints the LiDAR and chassis EKF filtering status:
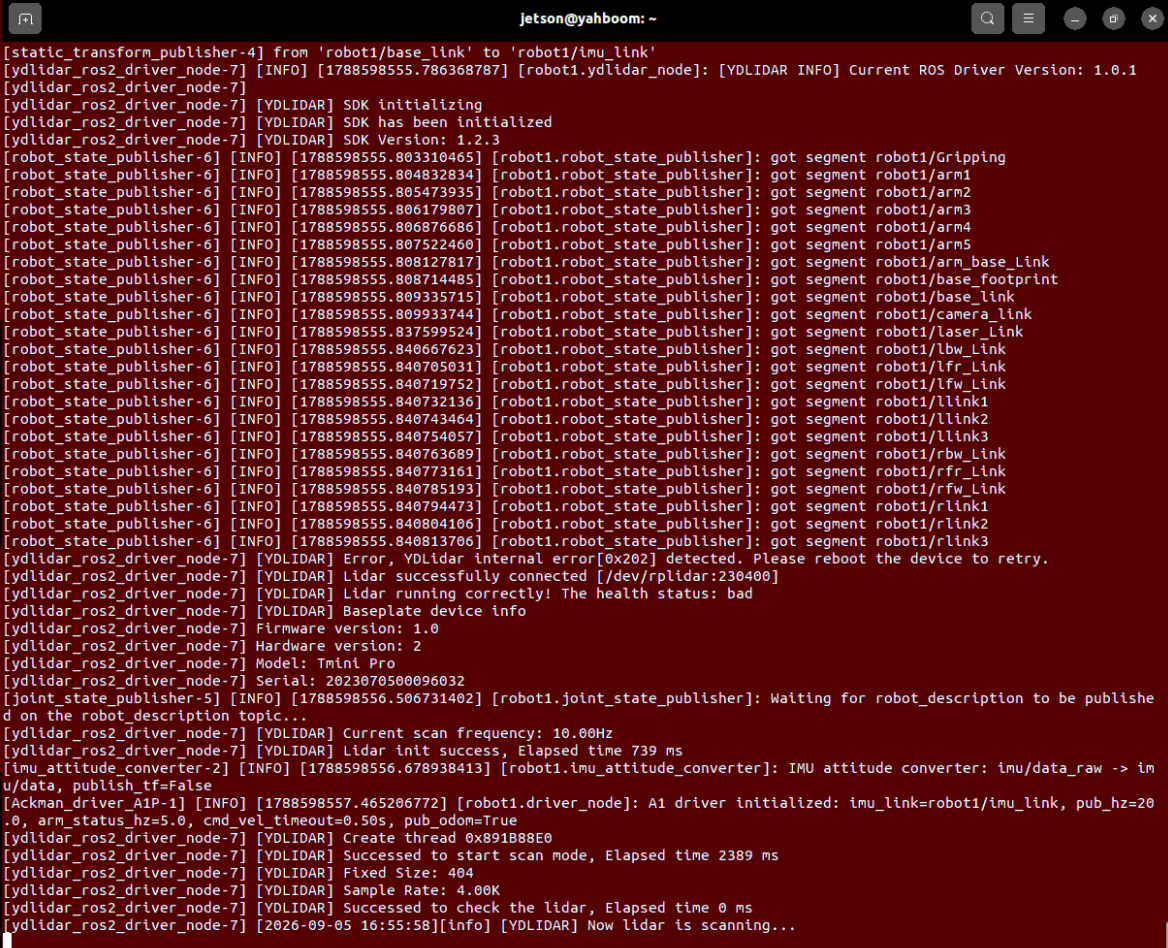
Run the following command in the terminal of robot2:
xxxxxxxxxxros2 launch yahboomcar_multi A1p_laser_bringup_multi_launch.xml robot_name:=robot2Startup success status:
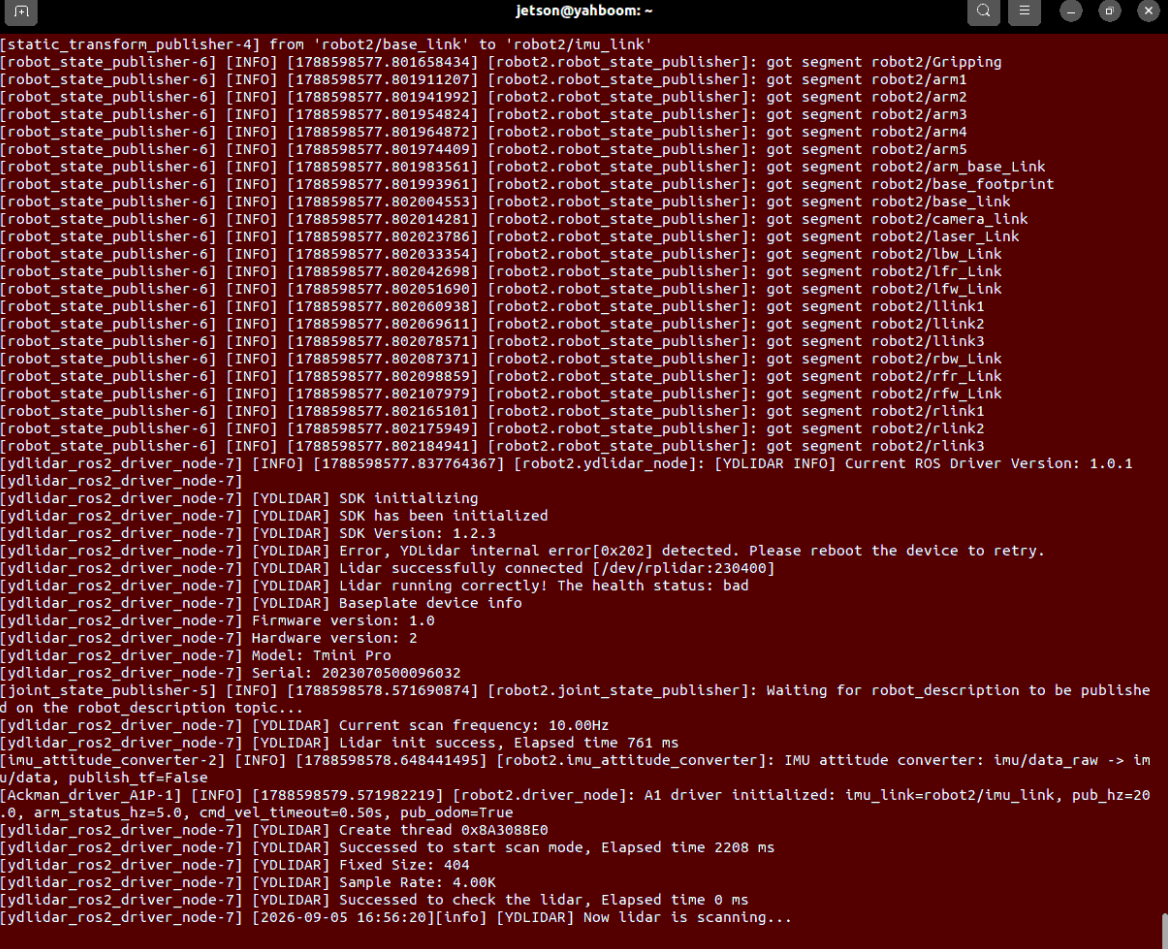
[!TIP]
A1p_laser_bringup_multi_launch.xmlautomatically detects the environment variableRPLIDAR_TYPE(supporting thetminiorc1LiDAR) internally, and completes the chassis driver, IMU attitude conversion, EKF filtering, and namespace coordinate frame transformation.
2.2 Step 2: Start RViz2 Visualization and the Global Map Service
Enter the following command in the terminal of the virtual machine / main board to start the pre-configured multi-vehicle navigation RViz interface:
xxxxxxxxxxros2 launch yahboomcar_multi display_multi_nav_launch.pyThe interface after startup is shown below:
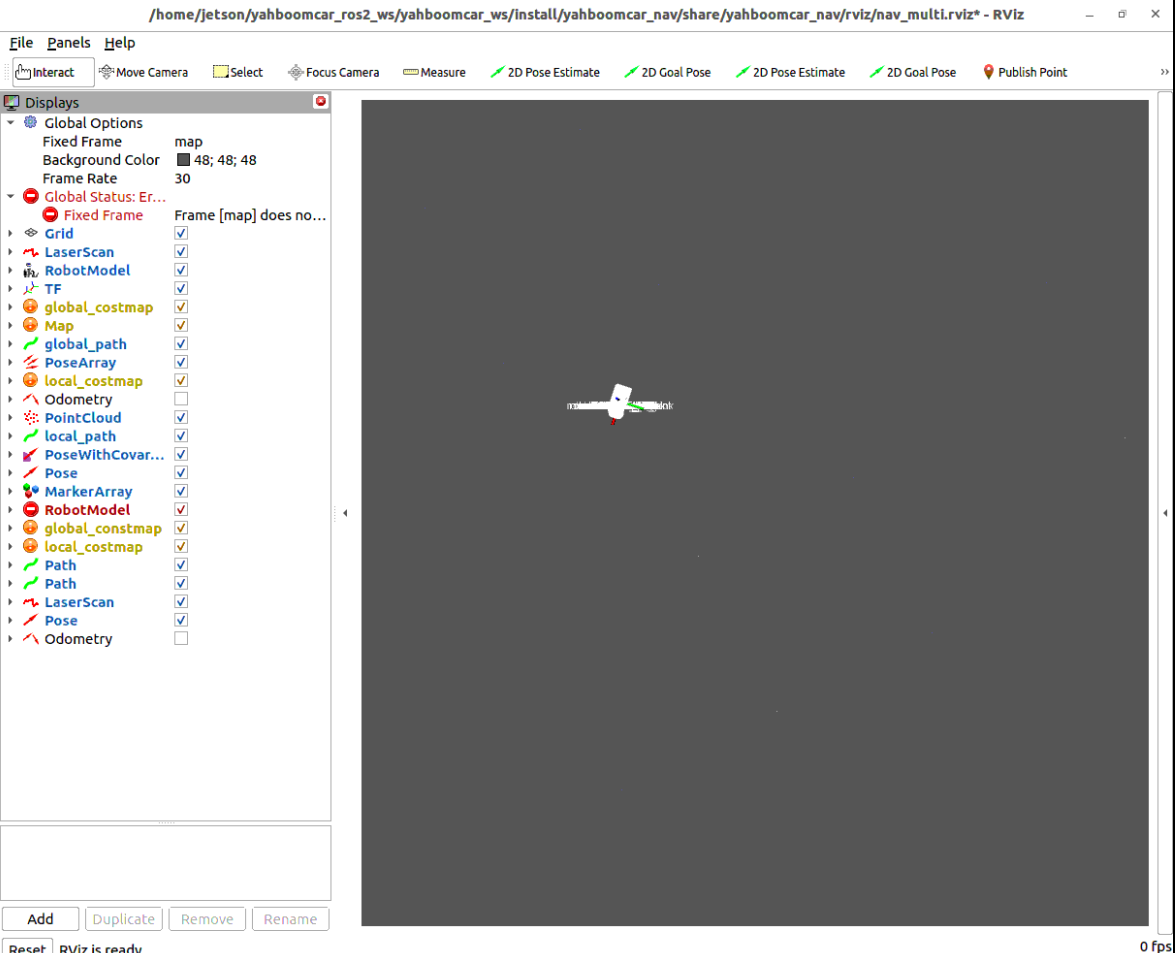
Open another terminal on the virtual machine / control computer and start the global map loading service:
xxxxxxxxxxros2 launch yahboomcar_multi map_server_launch.pyThe terminal prints the lifecycle activation status:
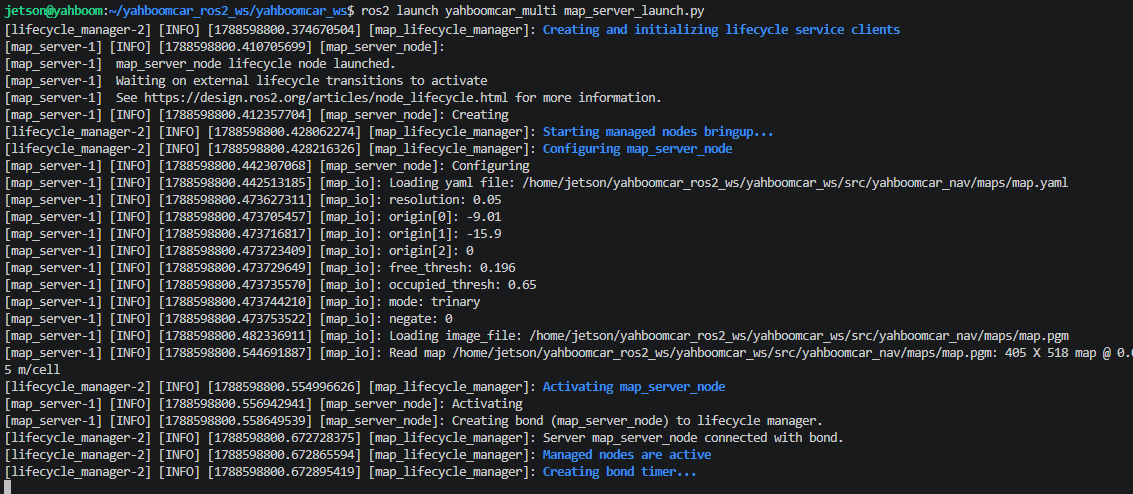
The loaded 2D grid map will then be displayed normally in the RViz interface:
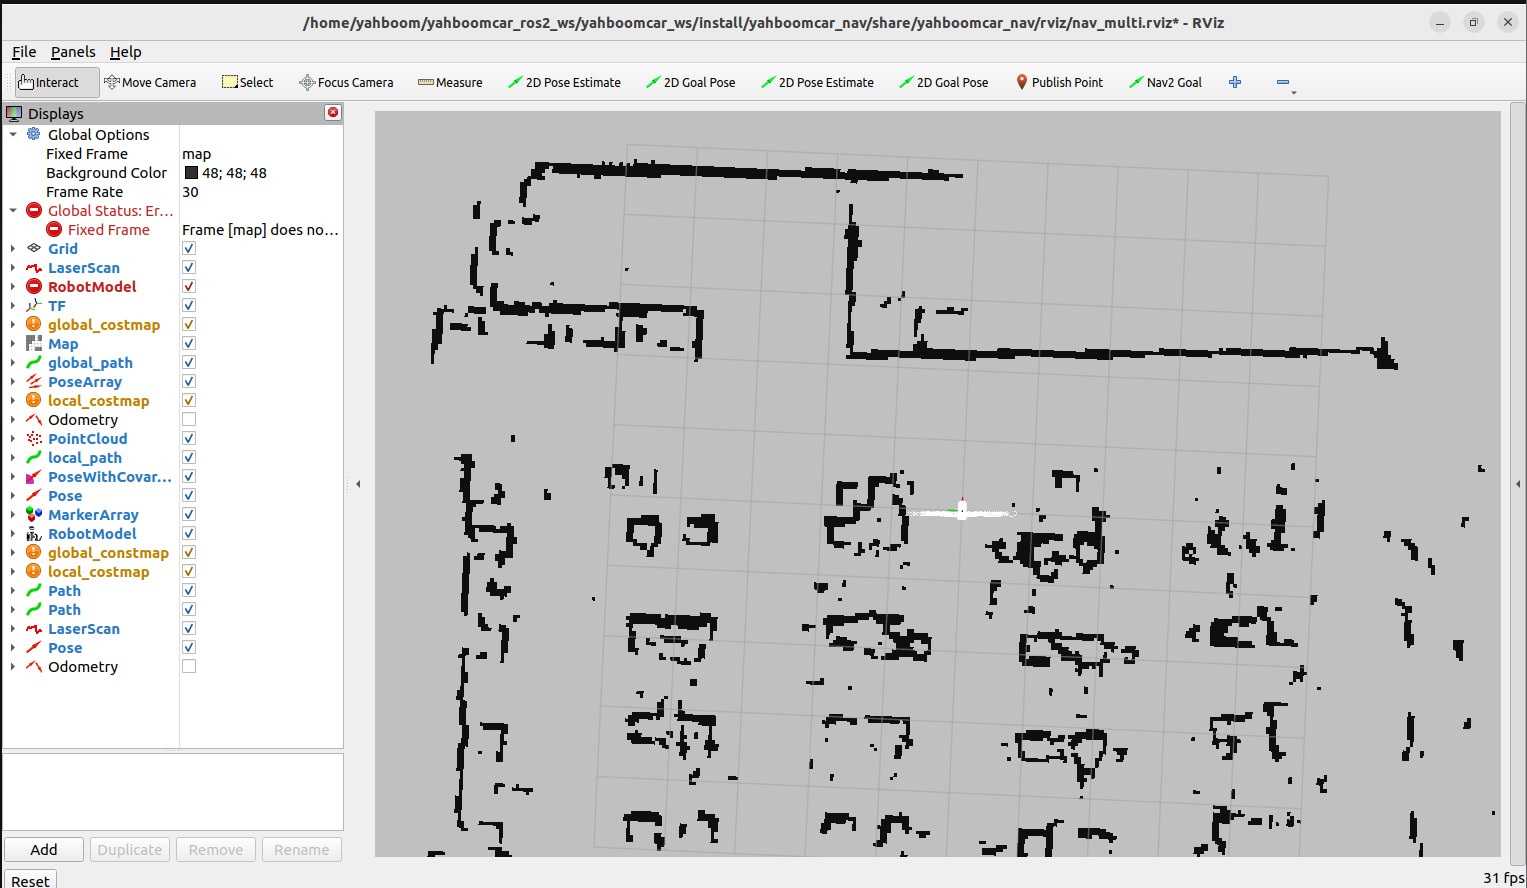
[!NOTE] If the map does not appear in RViz due to transient packet loss on the LAN, you can press
Ctrl + Cin the map service terminal and re-runros2 launch yahboomcar_multi map_server_launch.py.
2.3 Step 3: Start AMCL Monte Carlo Localization for Both Vehicles
Open another terminal on the control computer and start the localization node of robot1:
xxxxxxxxxxros2 launch yahboomcar_multi A1p_amcl_robot1_launch.pyThe terminal prints the node activation status:
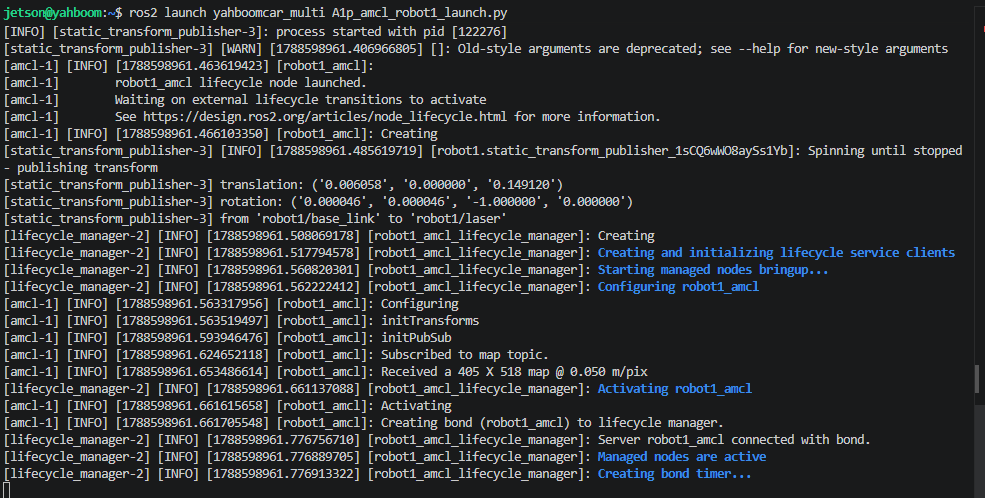
Open another terminal and start the localization node of robot2:
xxxxxxxxxxros2 launch yahboomcar_multi A1p_amcl_robot2_launch.pyThe terminal prints the node activation status:
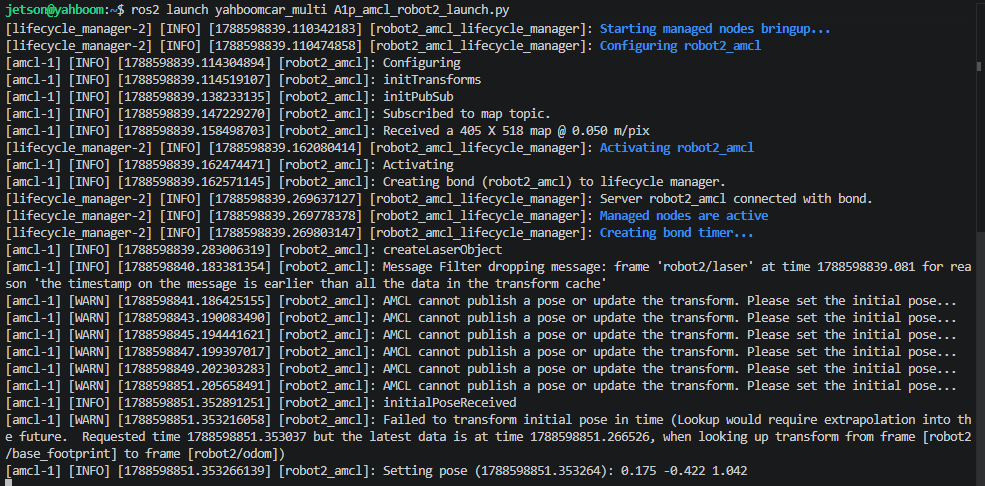
After startup, the terminal prompts you to wait for the initial pose: AMCL cannot publish a pose or update the transform. Please set the initial pose...:

Set Initial Poses for Both Vehicles:
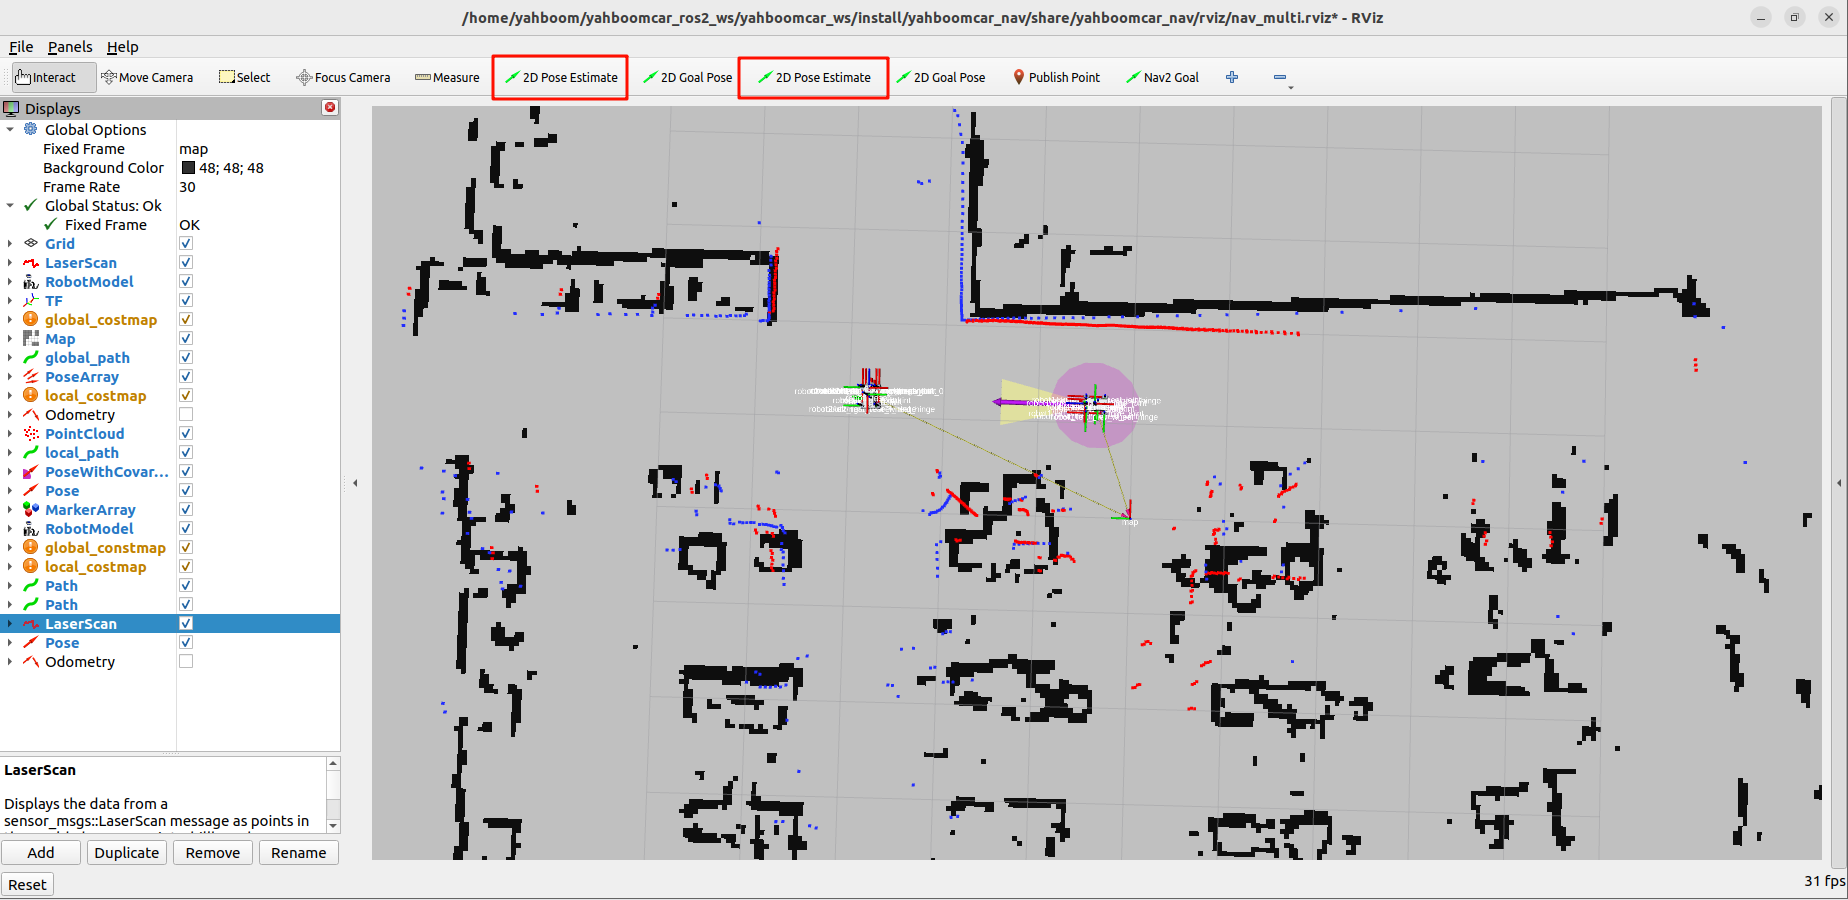
Observe the top toolbar of RViz, where two dedicated 【2D Pose Estimate】tools are configured:
- The first tool is remapped to
/robot1/initialpose; - The second tool is remapped to
/robot2/initialpose.
- The first tool is remapped to
First click the first pose tool and drag the green orientation arrow on the map according to the actual position of Vehicle 1;
Then click the second pose tool and calibrate the orientation on the map according to the actual position of Vehicle 2;
After calibration, the LiDAR scan point clouds will perfectly coincide with the black obstacles on the map (red point cloud is robot1's LiDAR data, blue point cloud is robot2's LiDAR data), as shown below:
2.4 Step 4: Start the Nav2 Navigation System for Both Vehicles
Open another terminal on the control computer and start the Nav2 navigation stack of robot1:
xxxxxxxxxxros2 launch yahboomcar_multi A1p_nav_robot1_launch.pyOpen another terminal and start the Nav2 navigation stack of robot2:
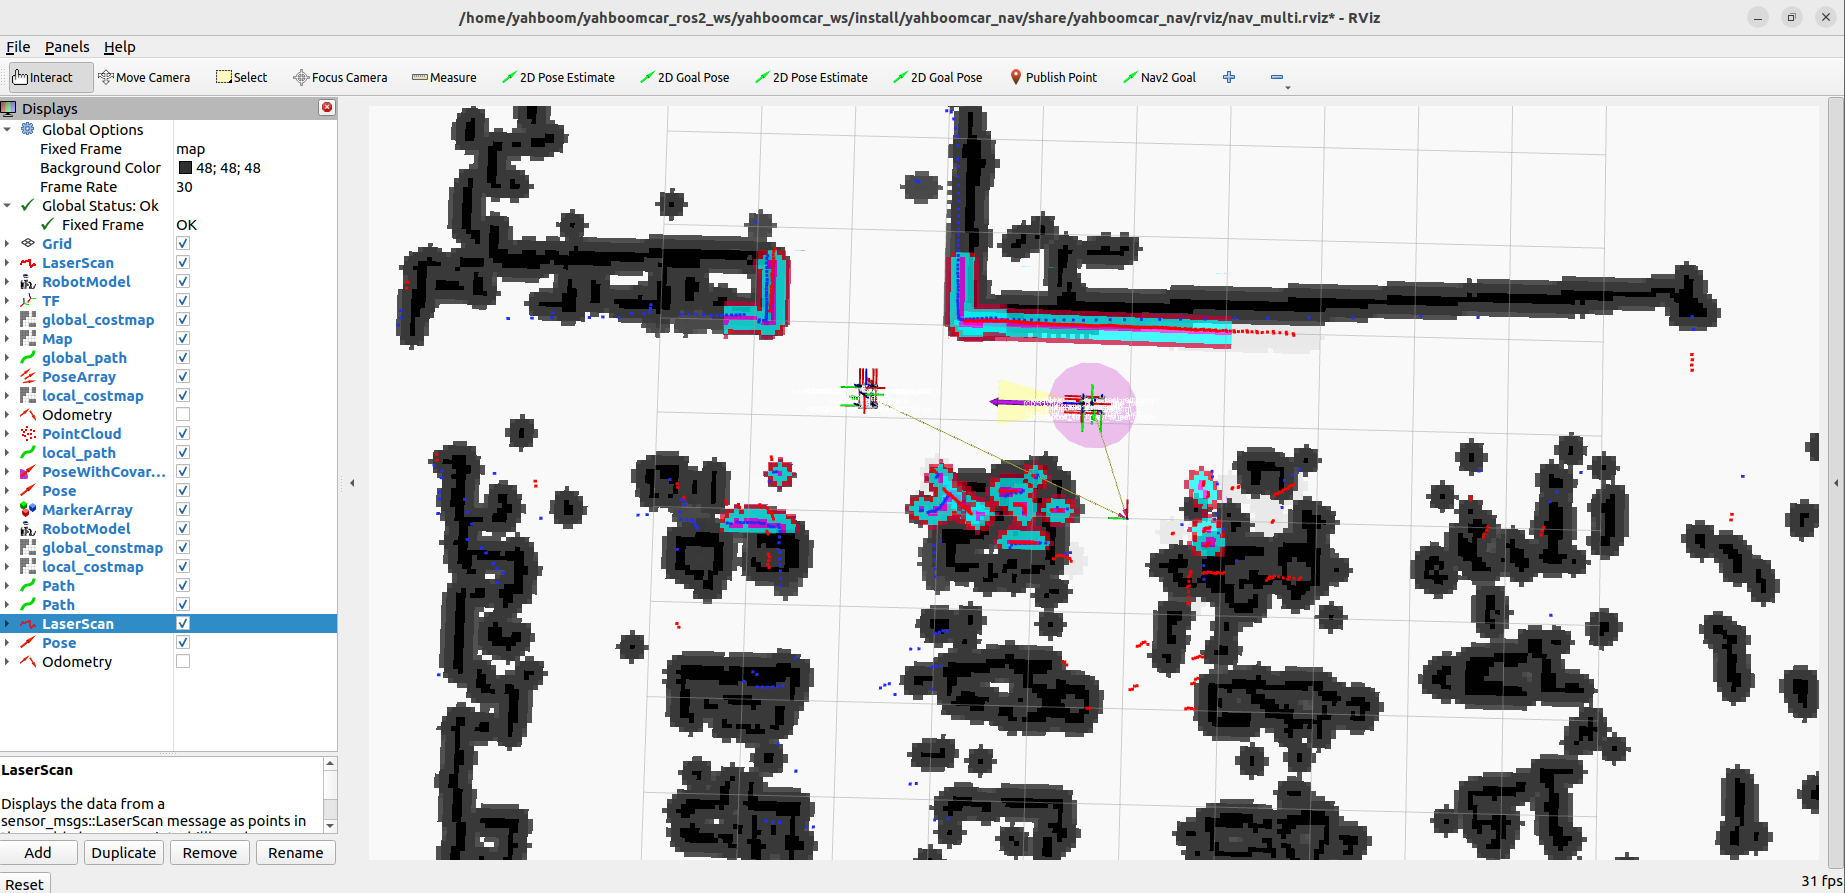
xxxxxxxxxxros2 launch yahboomcar_multi A1p_nav_robot2_launch.pyAfter startup, the costmap inflation layers of both vehicles are rendered and displayed in RViz:
2.5 Step 5: Publish Goal Points for Independent Multi-Vehicle Navigation
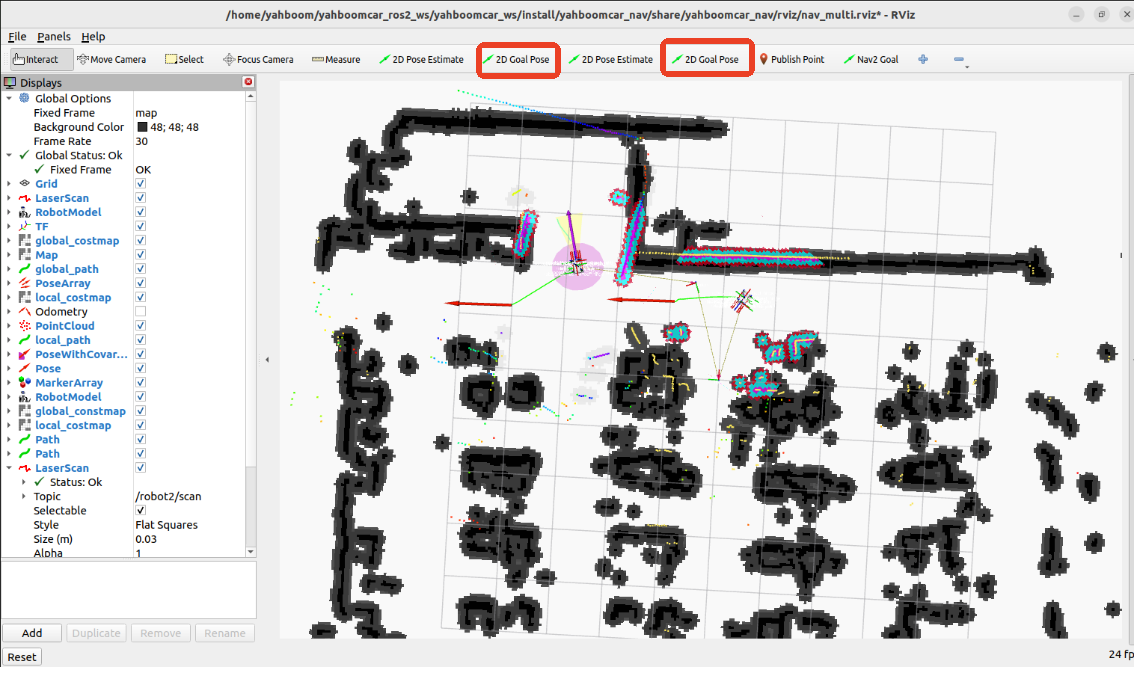
Two dedicated goal tools are provided on the RViz top toolbar:
- The first 【2D Goal Pose】tool: Sends goal points to
/robot1/goal_pose; - The second 【2D Goal Pose】tool: Sends goal points to
/robot2/goal_pose.
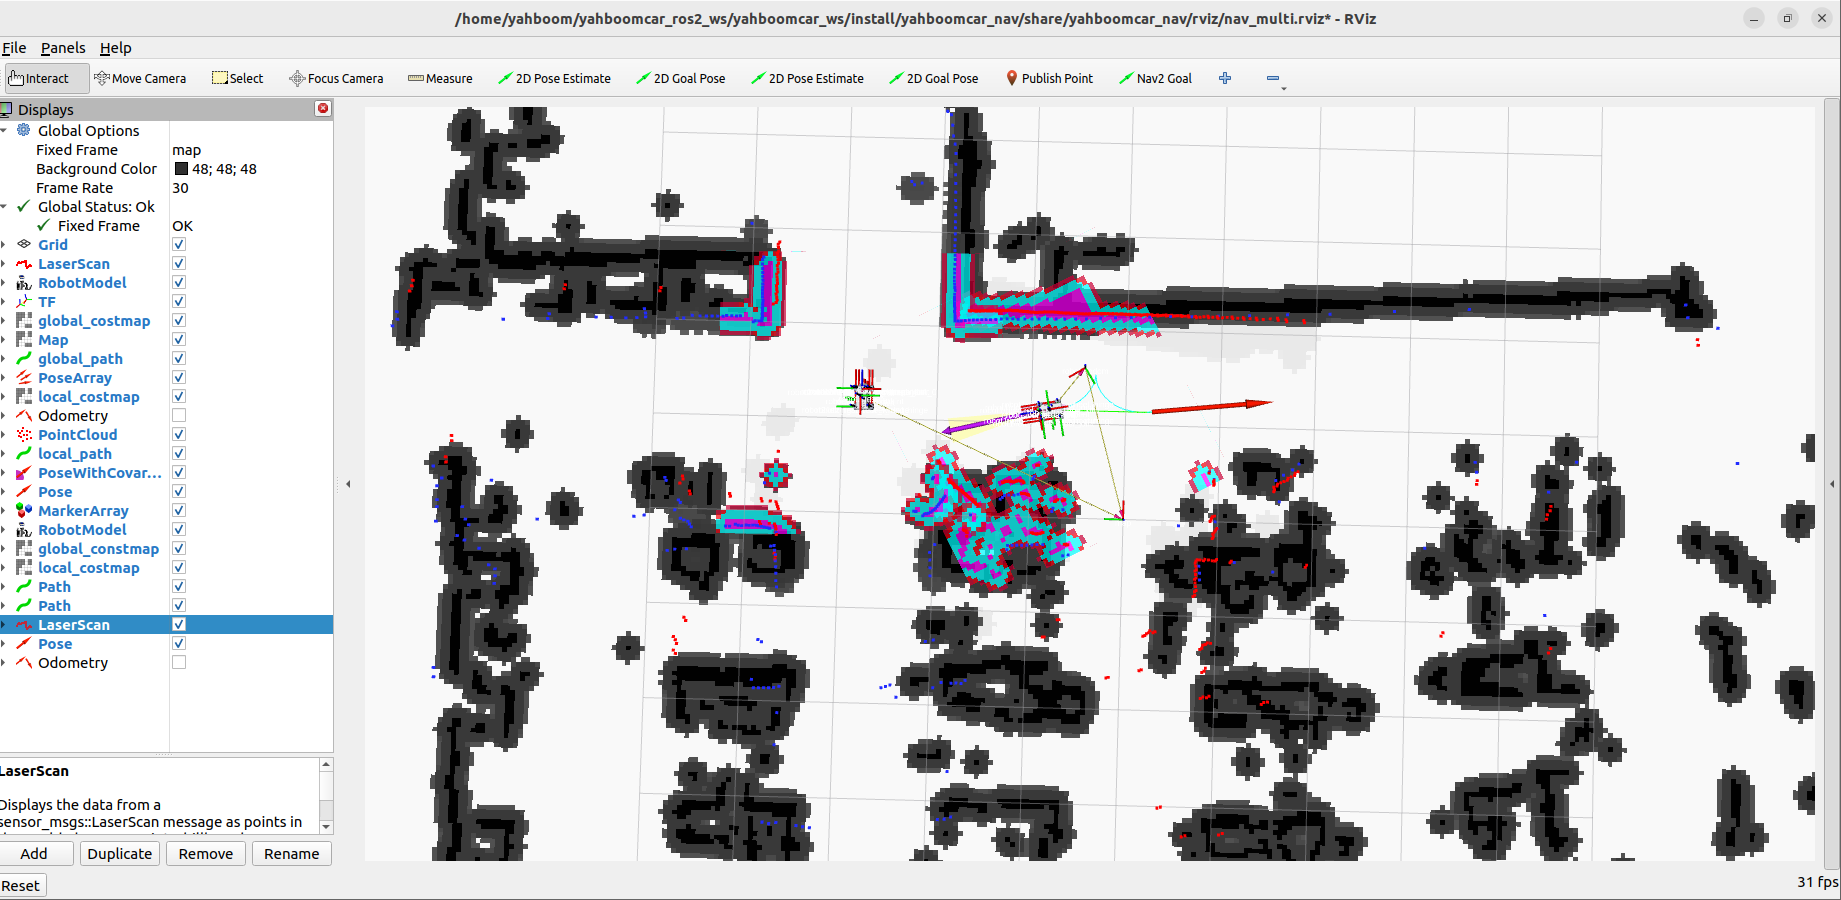
Use the corresponding tool for each vehicle to mark goal points on the map. The two vehicles will compute globally optimal paths in parallel and drive along their respective planned routes while avoiding obstacles, safely reaching their own destinations:
3. Core Configuration and Code Analysis
3.1 Chassis and LiDAR Fusion Launch File (A1p_laser_bringup_multi_launch.xml)
Source code path:
~/yahboomcar_ros2_ws/yahboomcar_ws/src/yahboomcar_multi/launch/A1p_laser_bringup_multi_launch.xml
x<launch> <arg name="robot_name" default="robot1"/> <!-- Automatically obtain the LiDAR model environment variable, default is tmini --> <let name="lidar_type" value="$(env RPLIDAR_TYPE tmini)"/> <!-- Include the chassis driver dedicated to the current vehicle --> <include file="$(find-pkg-share yahboomcar_multi)/launch/A1p_bringup_multi.launch.xml"> <arg name="robot_name" value="$(var robot_name)"/> </include> <!-- Include the namespaced LiDAR driver according to the model --> <group if="$(eval '\'$(var lidar_type)\' == \'tmini\'')"> <include file="$(find-pkg-share yahboomcar_multi)/launch/tmini_multi.launch.xml"> <arg name="robot_name" value="$(var robot_name)"/> </include> </group> <group if="$(eval '\'$(var lidar_type)\' == \'c1\'')"> <include file="$(find-pkg-share yahboomcar_multi)/launch/c1_multi.launch.xml"> <arg name="robot_name" value="$(var robot_name)"/> </include> </group></launch>- This file encapsulates the underlying hardware driver startup logic. When calling externally, only
robot_nameneeds to be passed to automatically bind the LiDAR data and chassis coordinate frames to the namespace tree of the vehicle (e.g.,robot1/scan,robot1/odom).
3.2 Global Map Service Management (map_server_launch.py)
Source code path:
~/yahboomcar_ros2_ws/yahboomcar_ws/src/yahboomcar_multi/launch/map_server_launch.py
xxxxxxxxxxdef generate_launch_description(): map_file = LaunchConfiguration( 'map', default='/home/sunrise/yahboomcar_ros2_ws/yahboomcar_ws/src/yahboomcar_nav/maps/yahboomcar.yaml' ) # 1. Map server node map_node = Node( name="map_server_node", package='nav2_map_server', executable='map_server', parameters=[{'use_sim_time': False}, {'yaml_filename': map_file}], output="screen" ) # 2. Lifecycle manager: automatically configure and switch map_server to the Active state life_node = Node( name="map_lifecycle_manager", package='nav2_lifecycle_manager', executable='lifecycle_manager', output='screen', parameters=[{'use_sim_time': False}, {'autostart': True}, {'node_names': ['map_server_node']}] ) return LaunchDescription([map_node, life_node])- The map service runs independently of the robot bodies in the root scope without a namespace, publishing the global
/maptopic, so all robots are aligned to a unified global coordinate origin.
3.3 Independent AMCL Launch and Pose Remapping (A1p_amcl_robot1_launch.py)
Source code path:
~/yahboomcar_ros2_ws/yahboomcar_ws/src/yahboomcar_multi/launch/A1p_amcl_robot1_launch.py
xxxxxxxxxxdef generate_launch_description(): param_file = os.path.join(get_package_share_directory('yahboomcar_multi'), 'param', 'A1p_amcl_robot1.yaml') amcl_node = Node( name="robot1_amcl", package='nav2_amcl', executable='amcl', parameters=[param_file], # Remap the default /initialpose to the dedicated initial pose topic of the current vehicle remappings=[('/initialpose', '/robot1/initialpose')], output="screen" ) life_node = Node( name="robot1_amcl_lifecycle_manager", package='nav2_lifecycle_manager', executable='lifecycle_manager', output='screen', parameters=[{'use_sim_time': False}, {'autostart': True}, {'node_names': ['robot1_amcl']}] ) # Publish the static transform of the vehicle LiDAR base tf_base_link_to_laser = Node( package='tf2_ros', executable='static_transform_publisher', namespace="robot1", arguments=['0.0060585', '0', '0.14912', '0', '3.1415', '3.1415', 'robot1/base_link', 'robot1/laser'] ) return LaunchDescription([amcl_node, life_node, tf_base_link_to_laser])- Through the remapping
('/initialpose', '/robot1/initialpose'), the interactive tools in RViz can precisely distinguish the two vehicles and initialize the particle filter convergence for each of them separately.
3.4 Dedicated Nav2 Navigation Pipeline Integration (A1p_nav_robot1_launch.py)
Source code path:
~/yahboomcar_ros2_ws/yahboomcar_ws/src/yahboomcar_multi/launch/A1p_nav_robot1_launch.py
- It introduces
bringup_launch.pyand setsnamespacetorobot1; - It loads
yahboomcar_multi/param/A1p_nav_robot1.yaml, which strictly configuresrobot_base_frame: robot1/base_footprint,global_frame: map, and the subscribed topic paths for both the local and global costmaps; - The planner and controller servers of the two vehicles operate independently of each other, completely eliminating control command cross-talk.